2008 SUBARU OUTBACK lock
[x] Cancel search: lockPage 226 of 444

6-6Interior equipment
CAUTION
If you hold the divider plate at the
top while turning it counterclock-
wise, it may break.
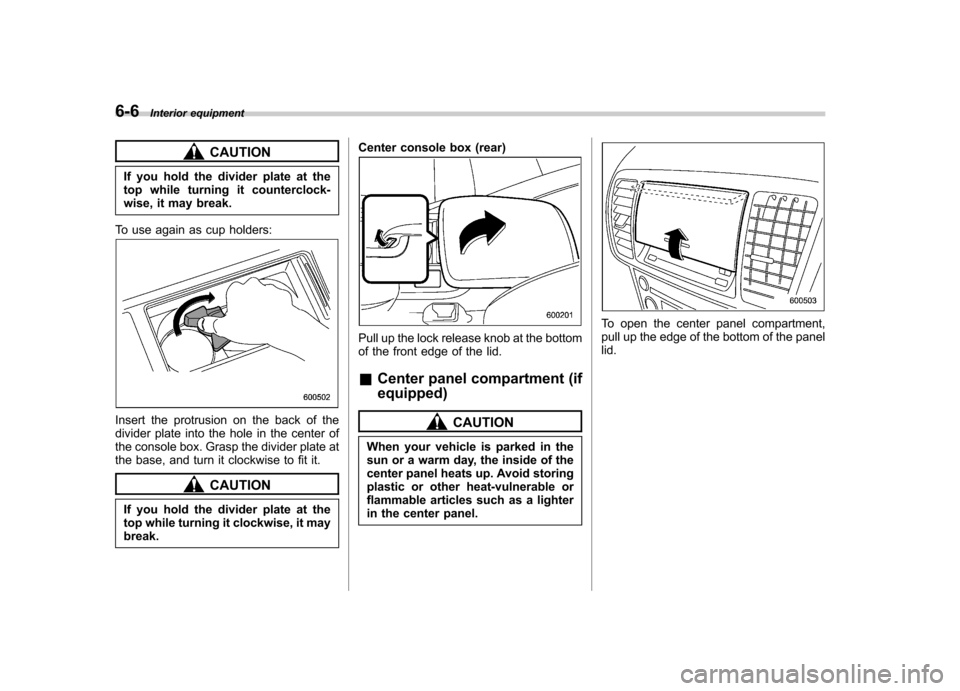
To use again as cup holders:
Insert the protrusion on the back of the
divider plate into the hole in the center of
the console box. Grasp the divider plate at
the base, and turn it clockwise to fit it.
CAUTION
If you hold the divider plate at the
top while turning it clockwise, it maybreak. Center console box (rear)
Pull up the lock release knob at the bottom
of the front edge of the lid. &
Center panel compartment (if equipped)
CAUTION
When your vehicle is parked in the
sun or a warm day, the inside of the
center panel heats up. Avoid storing
plastic or other heat-vulnerable or
flammable articles such as a lighter
in the center panel.
To open the center panel compartment,
pull up the edge of the bottom of the panellid.
Page 237 of 444

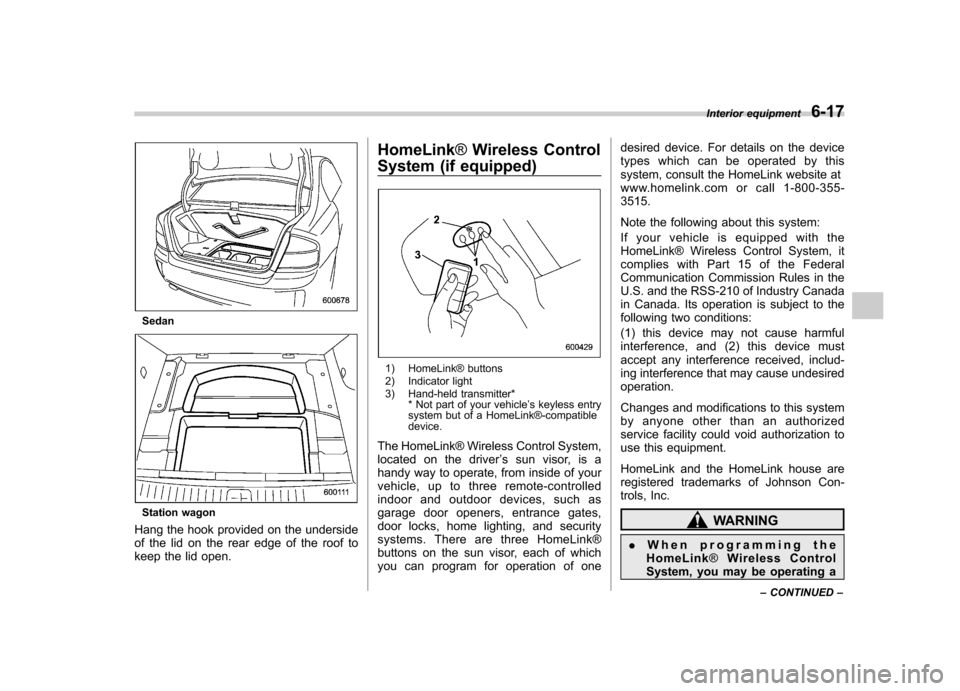
Sedan
Station wagon
Hang the hook provided on the underside
of the lid on the rear edge of the roof to
keep the lid open. HomeLink
®Wireless Control
System (if equipped)
1) HomeLink® buttons
2) Indicator light
3) Hand-held transmitter* * Not part of your vehicle ’s keyless entry
system but of a HomeLink®-compatible device.
The HomeLink® Wireless Control System,
located on the driver ’s sun visor, is a
handy way to operate, from inside of your
vehicle, up to three remote-controlled
indoor and outdoor devices, such as
garage door openers, entrance gates,
door locks, home lighting, and security
systems. There are three HomeLink®
buttons on the sun visor, each of which
you can program for operation of one desired device. For details on the device
types which can be operated by this
system, consult the HomeLink website at
www.homelink.com or call 1-800-355-3515.
Note the following about this system:
If your vehicle is equipped with the
HomeLink® Wireless Control System, it
complies with Part 15 of the Federal
Communication Commission Rules in the
U.S. and the RSS-210 of Industry Canada
in Canada. Its operation is subject to the
following two conditions:
(1) this device may not cause harmful
interference, and (2) this device must
accept any interference received, includ-
ing interference that may cause undesiredoperation.
Changes and modifications to this system
by anyone other than an authorized
service facility could void authorization to
use this equipment.
HomeLink and the HomeLink house are
registered trademarks of Johnson Con-
trols, Inc.
WARNING
. When programming the
HomeLink ®Wireless Control
System, you may be operating a Interior equipment
6-17
– CONTINUED –
Page 241 of 444

opener by pressing the programmed
HomeLink® button. &Programming other devices
To program other devices such as door
locks, home lighting and security systems,
contact HomeLink at www.homelink.com
or call 1-800-355-3515. & Operating the HomeLink ®
Wireless Control System
Once programmed, the HomeLink® Wire-
less Control System can be used to
remote-control the devices to which its
buttons are programmed. To activate a
device, simply press the appropriate but-
ton. The indicator light illuminates, indicat-
ing that the signal is being transmitted. & Reprogramming a single HomeLink ®button
1. Press and hold the HomeLink® button
you wish to reprogram. DO NOT release
the button until step 4 has been com-pleted.
2. When the HomeLink® indicator light
begins to flash slowly (after 20 seconds),
position the hand-held transmitter of the
device for which you wish to program the
button at 1 to 3 inches (25 to 76 mm) away
from the HomeLink® button surface. 3. Press and hold the hand-held trans-
mitter button. The HomeLink® indicator
light will flash, first slowly and then rapidly.
4. When the indicator light begins to flash
rapidly, release both buttons.
The programming for the previous device
is now erased and the new device can be
operated by pushing the HomeLink®button.
& Erasing HomeLink ®button
memory
NOTE . Performing this procedure erases
the memory of all the preprogrammed
buttons simultaneously. The memory
of individual buttons cannot be erased.. It is recommended that upon the
sale of the vehicle, the memory of all
programmed HomeLink ®buttons be
erased for security purposes.
1. Press and hold the two outside buttons
until the indicator light begins to flash
(after 20 seconds).
2. Release both buttons. & In case a problem occurs
If you cannot activate a device using the
corresponding HomeLink® button after
programming, contact HomeLink at www.homelink.com or call 1-800-355-
3515 for assistance.
Interior equipment
6-21
Page 242 of 444

Fuel...................................................................... 7-3
Fuel requirements ............................................... 7-3
Fuel filler lid and cap ........................................... 7-5
State emission testing (U.S. only) ...................... 7-7
Preparing to drive ............................................... 7-8
Starting the engine .............................................. 7-9
Manual transmission vehicle ................................ 7-9
Automatic transmission vehicle ........................... 7-9
Stopping the engine ........................................... 7-10
Remote engine start system (dealer option) ................................................. 7-11
Starting your vehicle .......................................... 7-11
Remote start safety features ............................... 7-11
Entering the vehicle while it is running via remote start ................................................................. 7-12
Entering the vehicle following remote engine start shutdown ......................................................... 7-12
Pre-heating or pre-cooling the interior of the vehicle ............................................................. 7-12
Service mode ..................................................... 7-12
Remote transmitter programming and programmable feature option ............................ 7-12
System maintenance .......................................... 7-13
Manual transmission –5 speeds ...................... 7-14
Shifting speeds .................................................. 7-15
Driving tips ........................................................ 7-15
Manual transmission –6 speeds (2.5GT
spec.B) ............................................................. 7-16
Selecting reverse gear ........................................ 7-16
Shifting speeds .................................................. 7-17
Driving tips ........................................................ 7-17 Automatic transmission
–4-speed ................... 7-18
Selector lever .................................................... 7-18
Selector lever reverse inhibiting function ............ 7-20
Selection of manual mode .................................. 7-21
Maximum speeds ............................................... 7-22
Driving tips ........................................................ 7-22
SPORT mode ..................................................... 7-23
Shift lock release ............................................... 7-23
Automatic transmission –5-speed ................... 7-24
Selector lever .................................................... 7-25
Selector lever reverse inhibiting function ............ 7-26
Selection of manual mode .................................. 7-27
Maximum speeds ............................................... 7-29
Driving tips ........................................................ 7-29
Shift lock release ............................................... 7-29
SI-DRIVE (Except 2.5-liter non-Turbo models) ............................................................ 7-30
Intelligent (I) mode ............................................. 7-31
Sport (S) mode .................................................. 7-31
Sport Sharp (S#) mode. ...................................... 7-32
SI-DRIVE selector .............................................. 7-32
SI-DRIVE Sport Sharp (S#) switch ...................... 7-32
Rear viscous limited slip differential (LSD) (if equipped) .................................................... 7-33
Power steering ................................................... 7-33
Braking ............................................................... 7-34
Braking tips ....................................................... 7-34
Brake system .................................................... 7-34
Disc brake pad wear warning indicators ............. 7-34
ABS (Anti-lock Brake System) .......................... 7-35
Starting and operating
7
Page 247 of 444

7-6Starting and operating
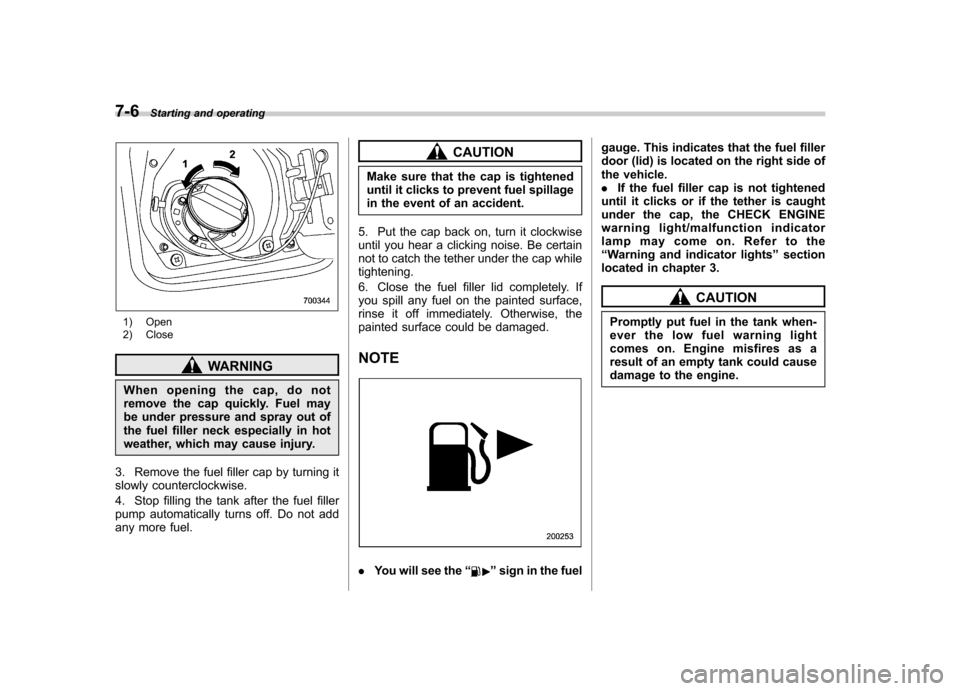
1) Open
2) Close
WARNING
When opening the cap, do not
remove the cap quickly. Fuel may
be under pressure and spray out of
the fuel filler neck especially in hot
weather, which may cause injury.
3. Remove the fuel filler cap by turning it
slowly counterclockwise.
4. Stop filling the tank after the fuel filler
pump automatically turns off. Do not add
any more fuel.
CAUTION
Make sure that the cap is tightened
until it clicks to prevent fuel spillage
in the event of an accident.
5. Put the cap back on, turn it clockwise
until you hear a clicking noise. Be certain
not to catch the tether under the cap whiletightening.
6. Close the fuel filler lid completely. If
you spill any fuel on the painted surface,
rinse it off immediately. Otherwise, the
painted surface could be damaged. NOTE
. You will see the “”sign in the fuel gauge. This indicates that the fuel filler
door (lid) is located on the right side of
the vehicle..
If the fuel filler cap is not tightened
until it clicks or if the tether is caught
under the cap, the CHECK ENGINE
warning light/malfunction indicator
lamp may come on. Refer to the“ Warning and indicator lights ”section
located in chapter 3.
CAUTION
Promptly put fuel in the tank when-
ever the low fuel warning light
comes on. Engine misfires as a
result of an empty tank could cause
damage to the engine.
Page 250 of 444

Starting the engine
CAUTION
Do not operate the starter motor
continuously for more than 10 sec-
onds. If the engine fails to start after
operating the starter for 5 to 10
seconds, wait for 10 seconds or
more before trying again.
& Manual transmission vehicle
1. Apply the parking brake.
2. Turn off unnecessary lights and ac- cessories.
3. Press the clutch pedal to the floor and
shift the shift lever into neutral.
Hold the clutch pedal to the floor while
starting the engine. The starter motor will
only operate when the clutch pedal is
pressed fully to the floor.
4. Turn the ignition switch to the “ON ”
position and check the operation of the
warning and indicator lights. Refer to the“ Warning and indicator lights ”section
(chapter 3).
5. Turn the ignition switch to the “START ”
position without depressing the accelera-
tor pedal. Release the key immediately
after the engine has started. If the engine does not start, try thefollowing.
(1) Turn the ignition switch to the“LOCK ”position and wait for at least
10 seconds. After checking that the
parking brake is firmly set, turn the
ignition switch to the “START ”position
while depressing the accelerator pedal
slightly (approximately a quarter of the
full stroke). Release the accelerator
pedal as soon as the engine starts.
(2) If this fails to start the engine, turn
the ignition switch back to the “LOCK ”
position and wait for at least 10
seconds. Then fully depress the accel-
erator pedal and turn the ignition
switch to the “START ”position. If the
engine starts, quickly release the
accelerator pedal.
(3) If this fails to start the engine, turn
the ignition switch again to the “LOCK ”
position. After waiting for 10 seconds
or longer, turn the ignition switch to the“ START ”position without depressing
the accelerator pedal.
(4) If the engine still refuses to start,
contact your nearest SUBARU dealer
for assistance. 6. Confirm that all warning and indicator
lights have gone off after the engine has
started. The fuel injection system auto-
matically lowers the idle speed as the
engine warms up.
& Automatic transmission ve- hicle
CAUTION
If you restart the engine while the
vehicle is moving, shift the selector
lever into the “N ” position. Do not
attempt to place the selector lever of
a moving vehicle into the “P ” posi-
tion.
1. Apply the parking brake.
2. Turn off unnecessary lights and ac- cessories.
3. Shift the selector lever to the “P ”or “N ”
position (preferably “P ” position). The
starter will only operate when the select
lever is at the “P ”or “N ”position.
4. Turn the ignition switch to the “ON ”
position and check the operation of the
warning and indicator lights. Refer to the“ Warning and indicator lights ”section
(chapter 3).
5. Turn the ignition switch to the “START ”
position without depressing the accelera-
Starting and operating
7-9
– CONTINUED –
Page 251 of 444

7-10Starting and operating
tor pedal. Release the key immediately
after the engine has started.
If the engine does not start, try the following.
(1) Turn the ignition switch to the“LOCK ”position and wait for at least
10 seconds. After checking that the
parking brake is firmly set, turn the
ignition switch to the “START ”position
while depressing the accelerator pedal
slightly (approximately a quarter of the
full stroke). Release the accelerator
pedal as soon as the engine starts.
(2) If this fails to start the engine, turn
the ignition switch back to the “LOCK ”
position and wait for at least 10
seconds. Then fully depress the accel-
erator pedal and turn the ignition
switch to the “START ”position. If the
engine starts, quickly release the
accelerator pedal.
(3) If this fails to start the engine, turn
the ignition switch again to the “LOCK ”
position. After waiting for 10 seconds
or longer, turn the ignition switch to the“ START ”position without depressing
the accelerator pedal.
(4) If the engine still refuses to start,
contact your nearest SUBARU dealer
for assistance.
6. Confirm that all warning and indicator
lights have gone out after the engine has started. The fuel injection system auto-
matically lowers the idle speed as the
engine warms up.
While the engine is warming up, make
sure that the selector lever is at the
“P ”or
“ N ”position and that the parking brake is
applied. Stopping the engine
WARNING
Do not stop the engine when the
vehicle is moving. This will cause
loss of power to the power steering
and the brake booster, making steer-
ing and braking more difficult. It
could also result in accidental acti-
vation of the “LOCK ”position on the
ignition switch, causing the steering
wheel to lock.
The ignition switch should be turned off
only when the vehicle is stopped and the
engine is idling.
Page 253 of 444

7-12Starting and operating
& Entering the vehicle while it
is running via remote start
1. Unlock the vehicle doors using the
keyless entry system. If the vehicle ’s
doors are unlocked manually using the
key, the vehicle ’s alarm system will trigger
and the remote engine start system will
turn off. Inserting the key into the ignition
switch and turning it to the “ON ”position or
pressing the unlock button “
”on the
remote keyless entry transmitter will dis-
arm the alarm system. Refer to the “Alarm
system ”section in chapter 2.
2. Enter the vehicle. Do not press the
brake pedal.
3. Insert the key into the ignition switch
and turn to the “ON ”position. If the ignition
switch is accidentally turned to the“ START ”position, the system ’s “starter
anti-grind ”feature will prevent the starter
from re-cranking.
4. Press the brake pedal. The remote
starter disengages, the vehicle ’s power
window features are re-enabled and the
vehicle will operate normally.
& Entering the vehicle follow-
ing remote engine start shut-down
An alarm trigger may occur if the vehicle is
opened by the remote keyless entry transmitter within a few seconds immedi-
ately following remote engine start shut-down.
& Pre-heating or pre-cooling
the interior of the vehicle
Before exiting the vehicle, set the tem-
perature controls to the desired setting
and operation. After the system starts the
vehicle, the heater or air-conditioning will
activate and heat or cool the interior to
your setting. & Service mode
In service mode, the remote start function
is temporarily disabled to prevent the
system from unexpectedly starting the
engine while being serviced. ! To engage the service mode
Turn the ignition switch to the “ON ”
position, depress and hold the brake pedal
then, press and release the “
”button on
the remote control transmitter three times.
The system will pause for 1 second and
then flash the parking lights and honk the
horn three times indicating that the system
is in service mode. When attempting to
activate the remote start system while in
service mode, the parking lights will flash
and the horn will honk two times and will
not start. !
To disengage the service mode
Turntheignitionswitchtothe “ON ”
position, depress and hold the brake
pedal, then press and release the “
”
button on the remote control transmitter
three times. The system will pause for 1
second and flash the parking lights 1 time
indicating that the system has exited
service mode.
NOTE
When taking your vehicle in for service,
it is recommended that you inform the
service personnel that your vehicle is
equipped with a remote control startsystem. & Remote transmitter program-
ming and programmable fea-
ture option
New transmitters can be programmed to
the engine starter system in the event that
remote transmitters are lost, stolen or
damaged. The remote engine start system
also has one programmable feature that
can be adjusted for user preference.
The remote engine starter system can be
programmed to either make an audible
horn chirp upon remote start activation or
not. Remote transmitter programming and
feature programming can be adjusted
using the following procedure.