2008 SKODA OCTAVIA display
[x] Cancel search: displayPage 50 of 75
Selector key NAV (Navigation)
48
– If no home address has been defined, open the menu Enter home
address .
– Press the function key to open the menu Address
input .
Storing the current position as a home address
– Press the function key in the menu New destination.
– If no home address has been selected, open the menu Enter home
address .
– If you press the function key , the current vehicle posi-
tion will be stored as a home address.
Editing a stored home address
– Press the selector key to change or delete an already stored
home address in the menu Navigation set-ups.
– When in the main menu Set-ups, press the function key
and the function key in the menu Navigation
set-ups .
– When in the menu Edit home address, you can , the
currently stored home address or overwrite with the function key .
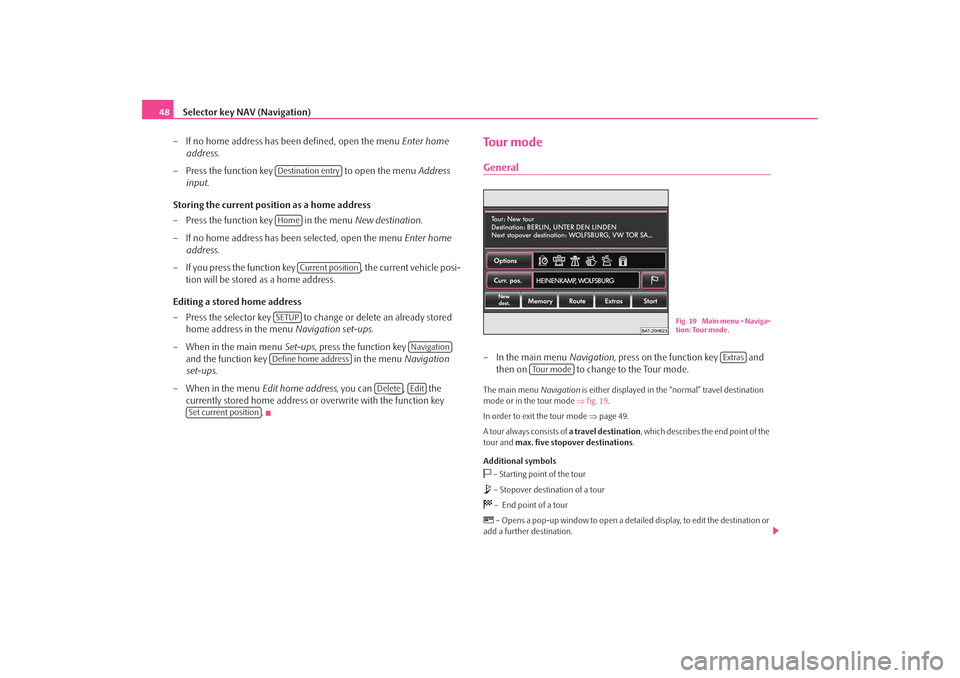
To u r m o d eGeneral– In the main menu Navigation, press on the function key and
then on to change to the Tour mode.The main menu Navigation is either displayed in the “normal” travel destination
mode or in the tour mode ⇒fig. 19 .
In order to exit the tour mode ⇒page 49.
A tour always consists of a travel destination, which describes the end point of the
tour and max. five stopover destinations .
Additional symbols – Starting point of the tour – Stopover destination of a tour – End point of a tour – Opens a pop-up window to open a detail ed display, to edit the destination or
add a further destination.
Destination entryHome
Current position
SETUP
Navigation
Define home address
Delete
Edit
Set current position
Fig. 19 Main menu - Naviga-
tion: Tour mode.
Extras
To u r m o d e
s2u4.6.book Page 48 Wednesday, August 13, 2008 7:57 AM
Page 51 of 75
Selector key NAV (Navigation)49
Note
During destination guidance, the travel and arrival time information always relates
to the arrival at the final travel destination. The estimated travel or arrival time at a
stopover destination is not displayed.Enter a stopover destinationIf, in addition to the displayed travel destination, travel to the destination
or several destinations still has to be undertaken, proceed as follows. You
can insert the additional destination behind the displayed travel destina-
tion as a new end point of the tour.
– After selecting a travel destination, press on the function key in the main menu Navigation. A pop-up window will open.
– If you press , the menu New destination
will open for selecting a stopover de stination. The background of the
unit changes automatically to the tour mode.
– Select a stopover destination as described ⇒page 42.
– If you have confir med the new destination, you will be asked to select
an entry behind which the new destination should be placed. You
therefore determine the order of the destinations. Press to close
the message.
– The main menu Navigation will now be opened in the tour mode
⇒ page 48, fig. 19 .
– Press the function key to start the route guidance to the first stopover destination of the displayed tour.
– Press the function key and then to add further desti- nations to your tour ⇒page 49, “Arranging a new tour in tour
mode”.
Exiting the tour modeEnsure that all stopover destinations are deleted before you finish with
the tour mode. You can store the disp layed tour with all the stopover
destinations before endi ng it by pressing ⇒page 50.
– Press on the function key in the main menu Navigation and on
in the pop-up window, to end the tour mode.
– Confirm the message “ Would you like to exit the tour mode? ” by
pressing the function key .
– Only the travel destination previo usly determined as end point is
displayed in the main menu Navigation.Arranging a new tour in tour mode– In the main menu Navigation, press on the function key and
then on to change to the Tour mode.
– Press on the function key and then on to arrange a new tour.
– Press on the function key in the menu Tou r plan: New Tour behind
the display of the starting point or of an indicated destination.
– Press on in the pop-up window.
– Select a destination as described ⇒page 42.
– If you have confirmed the first destination, the menu will again Tou r
plan: New tour will be opened / has been opened. Press the function
key next to the destination behind which a further destination
should be inserted.
– Press on in the pop-up window and choose another
destination.
Extras
Enter intermediate destination
OK
StartExtras
Edit tour
Memory
Extras
Leave tour mode
Leave
Extras
To u r m o d e
Extras
New tour
Destination entry
Destination entry
s2u4.6.book Page 49 Wednesday, August 13, 2008 7:57 AM
Page 52 of 75
Selector key NAV (Navigation)
50
– Press if you wish to end the tour input. The travel destination of your tour and the next stopover de stination is displayed in the main
menu Navigation .
– Press the function key to start route guidance to the first stop- over destination of your tour.
– Press the function key to permanently store the displayed tour under its own name in the destination memory ⇒page 50,
“Storing a tour”.In the menu Tour plan: New tour “New Tour” acts as a replacement for a name
which you can allocate for this tour when the tour is stored.Storing a tourA tour can only be displayed in the tour mode and therefore stored only
in the tour mode.
– Press function key ⇒page 48, fig. 19 to store a tour
displayed in the main menu Navigation.
– Press on in the pop-up window. An entry window for free text entry will open.
– Allocate a name for your tour.
– Confirm the displayed name by pressing .
–The message “ Tour stored” will appear. Press to confirm the
message.You can store max. 10 tours in the destination memory.
Calling up a stored tour– Press on the function key in the main menu Navigation and
then on .
– Press on the function key and on in the pop-up window.
– Press the function key next to a tour name in the menu Lo ad tou r
to display information relating to the corresponding tour in the menu
Tour details .
– Press the function key when in the menu Tou r details or press
directly on the name of a tour when in the menu Load tour so that the
selected tour is displayed in the main menu Navigation
– Press the function key to start the route guidance.Editing a stored tourA tour can only be displayed in the tour mode and therefore only stored
in the tour mode. Call up the tour to be edited.
– If you press at the top of the select ed tour message the tour plan for
this tour will open.
– Alternatively, open the tour plan by pressing the function key . Press on in the pop-up window.
– Press on the function key next to the destination in the tour plan you wish to process. The pop-up wi ndow with the possible options for
processing this input will open.
StartMemory
Memory
Save tour
OK
OK
Extras
To u r m o d e
Memory
Load tour
SelectStrat
Extras
Edit tour
s2u4.6.book Page 50 Wednesday, August 13, 2008 7:57 AM
Page 53 of 75
Selector key NAV (Navigation)51
– If you press the function key next to the starting point of the tour “
”, you will only have the possibility to determine, via the , the first stopover destin ation after the starting
point. The starting point has already been determined automatically
via the GPS position definition of the unit and can therefore not be
processed.
– If you press the function key next to one of the other destinations, you will be offered further modification options.
Options for determining a tour destination
– opens the menu Destination data for a detailed display of the selected
destination. Press the function key to be shown the destination on
the map. Pressing the function key will switch you back to the detailed display.
– Renewed pressing on will only start the route guidance to this tour
destination, possible stopover destinations will be ignored. Press to change
back to the display of the tour plan without starting the route guidance.
– erases after further confirming the displayed tour destination.
– Press to select an entry behind which the selected tour destina-
tion should be moved.
– for input of a further tour destination.
Waypoint mode (Offroad Navigation)Overview of the functionsOpening the waypoint mode
– Press on the function key in the main menu Navigation.
– Press on the function key in the pop-up window.
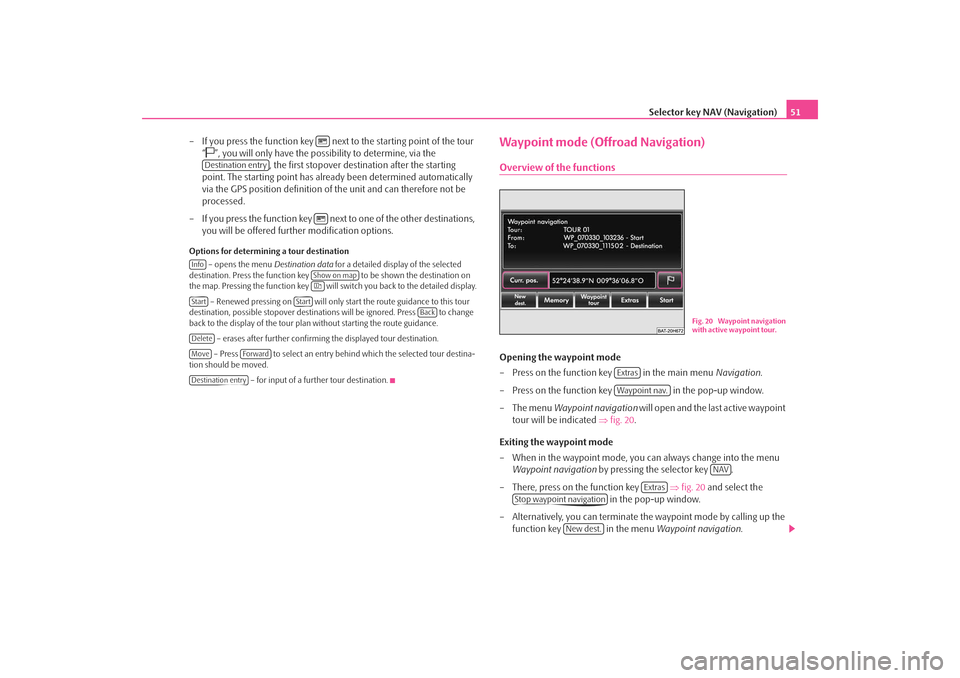
– The menu Waypoint navigation will open and the last active waypoint
tour will be indicated ⇒fig. 20 .
Exiting the waypoint mode
– When in the waypoint mode, you can always change into the menu Waypoint navigation by pressing the selector key .
– There, press on the function key ⇒ fig. 20 and select the
in the pop-up window.
– Alternatively, you can terminate the waypoint mode by calling up the
function key in the menu Waypoint navigation.
Destination entry
Info
Show on map
Start
Start
Back
DeleteMove
Forward
Destination entry
Fig. 20 Waypoint navigation
with active waypoint tour.
ExtrasWaypoint nav.
NAV
Extras
Stop waypoint navigation
New dest.
s2u4.6.book Page 51 Wednesday, August 13, 2008 7:57 AM
Page 54 of 75
Selector key NAV (Navigation)
52
– Once you have reached the destin ation of a waypoint tour, the
waypoint mode will close automati cally and the “normal” main menu
Navigation will open again.When in the menu Waypoint navigation , the last active waypoint tour and its
current geo-position will be displayed. If no waypoint tour has been recorded or all
of them have been deleted, a correspond ing message will be inserted. In this case
the function keys for starting, loading or processing a waypoint tour are not active.
If a waypoint tour is disp layed, the waypoint tour ⇒page 53, “Driving a stored
waypoint tour” will be started by pressing the function key .
The following menus and sub-menus are operated analog to the already described
menus of the navigation system and will no longer be described here in detail:•
Pressing on a displayed entry or the function key will always open the
detailed display.
•
Pressing the function key opens a pop- up window for analog processing of
the accompanying input.
The function key
Pressing the function key will open a safety interrogation:
– switches back into the waypoint mode. – terminates the waypoint mode and opens the menu New
destination for selection of an “Onroad destinat ion” from the available navigation
data.
The function key
Pressing the function key will open a pop-up window:
– opens a list of the stored wayp oint tours. Press the corresponding
waypoint tour for selection.
– opens the waypoint tour memory. Stored waypoint
tours can be displayed, renamed or deleted.
The function key
Pressing the function key will open a pop-up window to display a
new waypoint tour or to process the displayed one. – starts after naming the waypoint tour, selecting an accept-
ance mode and displaying a new waypoint tour. A displayed waypoint tour is auto-
matically stored and can be ca lled up later from the via .
– opens a list with the waypoint s of the tour currently displayed
in the menu Waypoint navigation . The waypoints in the li st can be displayed,
deleted, moved or renamed in the map. Further waypoints can be added via the
selection from the map or the input of the GPS position. If a different waypoint tour
has to be processed instead of the one disp layed, it must first of all be called up
from the with .
Display a waypoint tour– Press on the function key in the menu Waypoint naviga-
tion .
– Press on the function key in the pop-up window.
– If a tour is already being displayed in the menu Waypoint navigation
you must select by pressing in the following menu whether you wish
to display the indicated or a .
Start
New dest.
New dest.
BackOnroad destination
Memory
Memory
Load tourEdit waypoint tour memory
Waypoint tour
Waypoint tour
Record waypoint tour
Memory
Load tour
Edit waypoint tour
Memory
Load tour
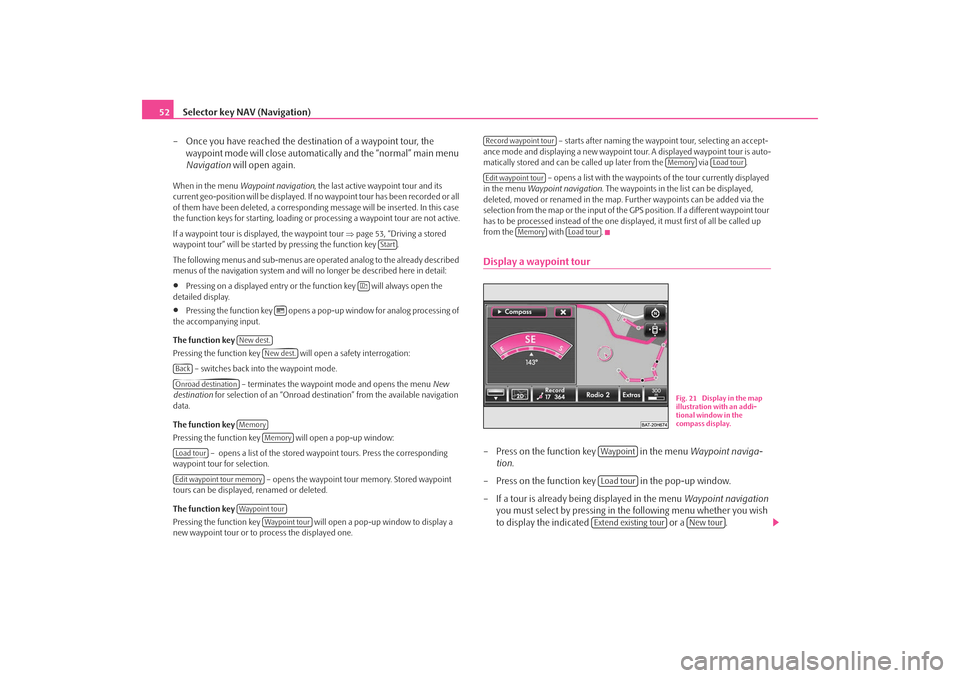
Fig. 21 Display in the map
illustration with an addi-
tional window in the
compass display.
WaypointLoad tourExtend existing tour
New tour
s2u4.6.book Page 52 Wednesday, August 13, 2008 7:57 AM
Page 55 of 75
Selector key NAV (Navigation)53
– Give a short and clear name to the waypoint tour. Confirm the displayed name by pressing .
– Select an acceptance mode by pressing the respective key.
– Press the function key to a llow the system to automatically
set the waypoints (recommended) during the display.
– Press the function key if you wish to set all waypoints yourself during the display.
– After starting the display, the number of used and still available waypoints as well as the set display mode will be indicated in the
menu Waypoint navigation .
– Press the selector key to change into the map display. Repeated pressing of the selector key will open and close the additional
window ⇒page 52, fig. 21 .
– Press on the selector key to switch back into the main menu Waypoint navigation .
– Press the function key to set the
waypoints manually. When in the ma p display you can find this func-
tion key in the pop-up window for the function key
⇒ page 52, fig. 21 ⇒ page 53, “Function key in the map display”.
Function key in the map display
The waypoints used up to no w for the tour and those still available are indicated in
the function key .
Pressing the function key ⇒page 52, fig. 21 – will open a pop-up window
for controlling the display.
– ends the recording: the last set waypoint becomes the endpoint of the
waypoint tour.
– switches on and off the functions indicating that the
waypoints are set automatically via the sensors in the vehicle when changing the
direction. A tick in the checkbox
indicates that the function is switched on. – sets a manual waypoint at the current driving
position.
Driving a stored waypoint tourBefore you start driving a waypoint tour , you must be in the vicinity of the
desired starting point of this waypoint tour.
Select a waypoint tour
– Press the function key in the menu Waypoint navigation.
– Press on the function key in the pop-up window.
– Choose a waypoint tour in the list by pressing on the respective tour.
Driving a waypoint tour
– Press the function key in the menu Waypoint navigation. The
menu Starting from which waypoint will open. Starting and finishing
points of the waypoint tour are displayed at the top.
– Press the function key in the menu to drive the
selected tour in the opposite direction.
Stopping the route guidance
– Press the third function key at the bottom of the map display for infor- mation about the distance to the closest waypoint and in the pop-up window.
– Alternatively, press the selector key and then press the function key .When driving
Follow the information regarding turns as far as possible. Once you have come as
close as 50 meters to a waypoint, the drive recommendation will appear for the
next waypoint.
OK
AutomaticManualMAP
MAPNAVStore current position as waypoint
Record
RecordRecord
Record
Stop Automatic recording
Add current position as waypoint
Memory
Load tour
StartReverse waypoint tour
Stop route guidance
NAV
Stop
s2u4.6.book Page 53 Wednesday, August 13, 2008 7:57 AM
Page 56 of 75
Selector key NAV (Navigation)
54If a waypoint has not been reached, you mu st ignore it, otherwise the system will
continue to try and guide you to this wayp oint. The distance to the next waypoint
and the number of it according to the sequen ce in the waypoint tour is indicated in
the third function key at the bottom of the map display.
Press this function key and choose in the pop-up window to ignore
the waypoint to which the system wishes to guide you.
Alternatively, press the selector key and press the function key .
Press the function key or in the corresponding
menu to approach the last waypoint again.
While you are approaching a waypoint tour, press on the third function key at the
bottom of the map display and on in the pop-up
window in order to supplement the tour with further waypoints. For example, you
can designate route marks an d name them later or store new detours on route.
Alternatively, call up this function by pressing the selector key and the func-
tion key .
Next Waypoint
NAV
Next Waypoint
Prev. Waypnt.
Previous waypoint
Add current position as waypoint
NAV
Waypoint tour
s2u4.6.book Page 54 Wednesday, August 13, 2008 7:57 AM
Page 57 of 75

Selector key NAV (Navigation)55
Route guidanceStarting and stopping route guidanceSelect a travel destination or enter a tour and start route guidance as
described in the respective chapter. The unit will switch over to the map
display ⇒fig. 22 .
Route guidance in the map display
– Press on the function key in the map display and on ⇒fig. 22 in the pop-up window to interrupt the
route guidance.
– If you press the function keys and in
the opening pop-up window the rout e guidance will continue at the
current position.
Route guidance in the main menu Navigation
– Press the selector key after rout e guidance has started to switch
to the main menu Navigation. – Pressing the function key will interrupt the route guidance and
“Start ” will be displayed again the function key.
– If you press the function key the route guidance will continue at the current position.
Select one of three alternative routes
– If you have selected the function “ Propose 3 alternative routes” in
the menu Navigation set-ups , three selected routes to the chosen
travel destination will be calculated after the start of route guidance.
– If the calculation is terminated, three routes to the destination will be indicated in the overview map. The three routes correspond to the
selectable route options “fast”, “short” and “economical”.
– You are given further information to the respective route in the func- tion keys on the right. Route guidance will start on the selected route
as soon as you press one of these function keys. The route options for
the navigation are changed according to the selected route. You can
change the route options at a later time.
After route guidance has started, the route becomes the first travel destination and
is calculated according to the specified information.
When switching to the map display, the ma p will always be displayed in the last
selected type of display (2D, 3D, topographic).
Fig. 22 3D map display
during a route guidance.
... / ...
Stop route guidance
Navigation
Start route guidance
NAV
StopStart
s2u4.6.book Page 55 Wednesday, August 13, 2008 7:57 AM