2008 SKODA OCTAVIA radio
[x] Cancel search: radioPage 26 of 75
Selector key MEDIA
24restrictions, via the radio navigation unit and depends largely on the type of the
connection.
Selectable video sources in the Video DVD menu
– changes over to an optionally connected external video source.
– if a TV Tuner* is connected, it is changed in the TV mode ⇒page 33.
– changes over to a Video-DVD ⇒page 31 inserted into the internal CD/DVD
drive.
Additional function keys in the audio menu
– changes over into the Video DVD menu and plays the last selected video
source.
– opens a pop-up window in which the repeating function determines
whether the or the (in audio CD operation) respectively the current (in the MP3 operation ⇒page 26) should be repeated.
– opens a pop-up window in which the random play function Mix or the
automatic play Scan can be started or the ca pacity of the hard disk HDD capacity
can be displayed.
– opens the title list of the current audio source in order to choose
another title or audio source.
Additional function keys in the Video DVD menu
– changes to the Audio menu and plays the last selected video source.
– switches over the Video DVD played in the internal CD/DVD drive to the
menu selection of the film and also opens the incorporated menu control.
– opens a set-up menu to adapt the display set-ups for the current film. – opens the chapter selection for th e Video DVD played in the internal
CD/DVD drive.
Inserting or ejecting a CD/DVDInserting a CD/DVD
– Push a CD/DVD with the written side facing up as far as possible into
the CD/DVD case until it is automatically drawn in. The play function
will start automatically.
Ejecting a CD/DVD
– Press the button to move the CD/DVD in the internal CD/DVD drive into the Eject position.If a CD/DVD is not removed when ejected, it will be reinserted after approximately
ten seconds for safety reasons.
Playable MP3 and WMA data can also be stored on the hard disk of the unit
⇒ page 29.
WMA Data (Windows Media Audio)
The copyright of audi o data compressed by Windows Media Audio, can also be
protected by the DRM procedure ( Digital Rights Management). Such WMA data is
not supported by the unit.Inserting or removing a memory card Inserting a memory card
– Push the memory card into the me mory card case with the trimmed
edge to the front right (horizontal case) or to the front top (vertical
case), until it is locked in position . The play function will start automat-
ically.
Taking out a memory card
– Press against the spring resistance of the inserted memory card, the memory card “skips” back into the Eject position.
AVTVDVDVideoRepeat
title
CD
folderExtrasSelectionAudioMenuDisplayChapter
s2u4.6.book Page 24 Wednesday, August 13, 2008 7:57 AM
Page 30 of 75
Selector key MEDIA
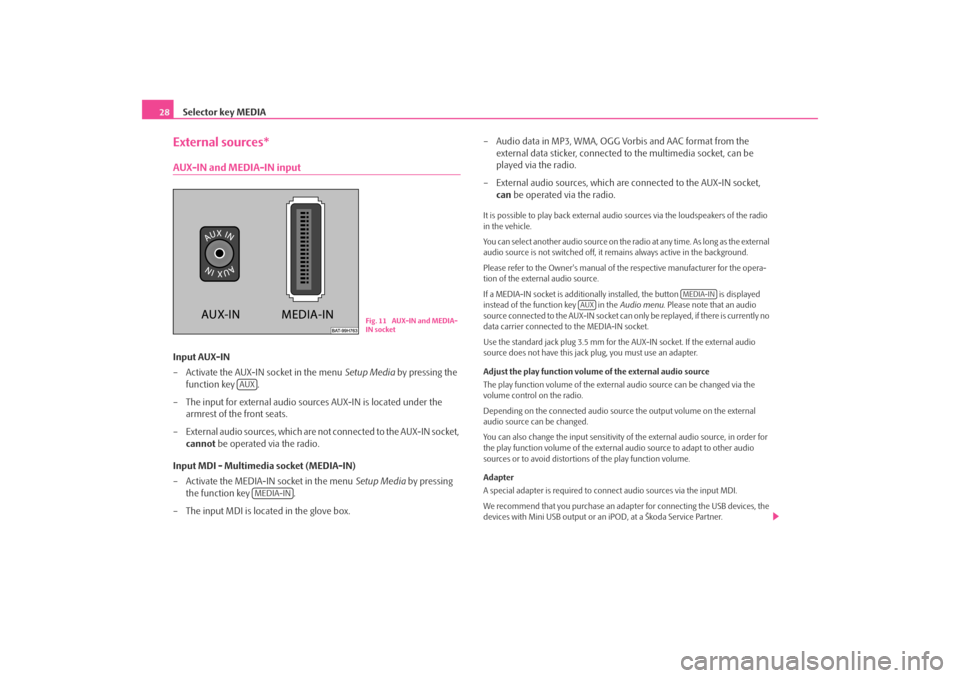
28External sources*AUX-IN and MEDIA-IN inputInput AUX-IN
– Activate the AUX-IN socket in the menu Setup Media by pressing the
function key .
– The input for external audio sources AUX-IN is located under the armrest of the front seats.
– External audio sources, which are no t connected to the AUX-IN socket,
cannot be operated via the radio.
Input MDI - Multimedia socket (MEDIA-IN)
– Activate the MEDIA-IN socket in the menu Setup Media by pressing
the function key .
– The input MDI is located in the glove box. – Audio data in MP3, WMA, OGG Vorbis and AAC format from the
external data sticker, connected to the multimedia socket, can be
played via the radio.
– External audio sources, which are connected to the AUX-IN socket,
can be operated via the radio.
It is possible to play back external audio sources via the loudspeakers of the radio
in the vehicle.
You can select another audio source on the ra dio at any time. As long as the external
audio source is not switched off, it re mains always active in the background.
Please refer to the Owner's manual of the respective manufacturer for the opera-
tion of the external audio source.
If a MEDIA-IN socket is additionally installed, the button is displayed
instead of the function key in the Audio menu. Please note that an audio
source connected to the AUX-IN socket can on ly be replayed, if there is currently no
data carrier connected to the MEDIA-IN socket.
Use the standard jack plug 3.5 mm for the AUX-IN socket. If the external audio
source does not have this jack plug, you must use an adapter.
Adjust the play function volume of the external audio source
The play function volume of the external audio source can be changed via the
volume control on the radio.
Depending on the connected audio source the output volume on the external
audio source can be changed.
You can also change the input sensitivity of the external audio source, in order for
the play function volume of the external audio source to adapt to other audio
sources or to avoid distortions of the play function volume.
Adapter
A special adapter is required to connect audio sources via the input MDI.
We recommend that you purchase an adap ter for connecting the USB devices, the
devices with Mini USB output or an iPOD, at a Škoda Service Partner.
Fig. 11 AUX-IN and MEDIA-
IN socket
AUX
MEDIA-IN
MEDIA-IN
AUX
s2u4.6.book Page 28 Wednesday, August 13, 2008 7:57 AM
Page 31 of 75
Selector key MEDIA29
Conditions for proper connection•
Only USB devices with the spec ification 2.0 can be connected.
•
The version of the file allocation tabl e FAT (File Allocation Table) of the
connected device must be FAT16 (< 2 GB) or FAT32 (> 2 GB).
•
In order to replay from a unit with a hard disk (HDD) which includes a large data
volume, it can lead to a time delay when reading in the overview of the music data.
•
In order to replay from a unit, which includes a complicated folder structure, it
can lead to a time delay when readin g in the overview of the music data.
•
The folder structure in the connected unit must not exceed a depth of 8 levels.
One folder must not contain more than 1°000° data.
•
A USB extension cable or USB distributo r (HUB) must not be used to connect
the unit.
WARNING
•
On no account place an external audio source on the dash panel. You
could make sudden manoeuvres in th e passenger compartment and injure
the occupants.
•
On no account place an external audio source close to the airbags. You
could be thrown back in the passen ger compartment by the airbags being
deployed and injure the occupants.
•
You must not hold the external audio source in the hand or on the knees
while driving. You could make sudden manoeuvres in the passenger
compartment and injure the occupants.
•
Always guide the connection cable of th e external audio source in such a
way that is does not restrict you when driving.Caution
The AUX-IN socket must only be used for audio sources!
Note
•
The external audio source, which is conne cted via AUX-IN, can only be used if
no unit is connected via MDI at the same time.
•
If an external audio source is connected via AUX-IN, which is equipped with an
adapter for external power supply, it can o ccur that the audio signal is interrupted.
This depends on the quality of the adapter which is used.
•
The loudspeakers in the vehicle are matched to a power output of the radio of
30°W.
Storing and processing audio data (HDD)Storing MP3 and WMA data on the hard disk (HDD)Selecting titles or folders to be stored
– Check the available audio sources fo r titles or folders which you may
wish to store on the hard disk. You can select the complete contents of
an installed data carrier for storing on the hard disk in the selection
window of the available audio sources.
– If you press the function key behind the display of a title or folder, a pop-up window will open.
– Pressing in the pop-up window will start the play function.
– Press in the pop-up window to store the respective title or
folder on the hard disk.
– Press in the following pop-up window for confirmation that you have taken note of the message.
Selecting storage space and store titles
– Press , if the title or folder should be stored
directly on the first level, which is the root folder of the hard disk. In
this connection please observe ⇒page 27, “Playing sequence of MP3
data and folders”.
Play
CopyContinueDrop file/folder here
s2u4.6.book Page 29 Wednesday, August 13, 2008 7:57 AM
Page 35 of 75
Selector key MEDIA33
TV mode*Explanation of the technical terms“Terrestrial television” or DVB-T (Digital Video Broadcasting-Terrestric)
With DVB-T, digital television signals are transmitted terrestrially (earthbound) and
can also be received via an aerial. DVB-T therefore offers mobile reception of high
quality without the need of a fixed aerial connection. DVB-T is therefore described
as “Terrestrial television”.
Advantages of DVB-T
In addition to a significant gain in quality, the transmitter capacity of a television
channel can be realised more effectivel y through digital transmitter technology
rather than analog signals. The greater da ta rate enables several programs of one
television channel to be transmitted bund led in one data flow (so called “Multi-
plex”). Part of the transmitter capacity can also be used for additional services, e.g.
electronic program guides or radio.
“Hybrid tuner” for analog and digital reception
The supply of DVB-T has up to now been restricted to densely populated regions,
so that an analog television receiver in the vehicle is still a prerequisite. It is for this
reason that a Hybrid tuner was developed for the unit, which consists of a
common analog TV receiver and a DVB-T receiver.
Display of analog and digital TV stations
The TV stations, which can be received, are indicated in the display of the combina-
tion instrument and when switching over and calling up the TV menus on the
screen. Analog and digital TV stations are displayed differently and are marked
⇒ page 34, “Displays in TV mode” on the touch-screen with “ Analog” or “DVB-
T ”.
OverviewThe TV picture will only be displaye d when the vehicle is stationary. The
touch-screen is switched off while driving, but the sound can still be
heard.
Starting TV mode
– Press the selector key to switch to the main MEDIA menu. The
last used media source will continue to play.
– Press the touch-screen in the Video DVD menu to open the Video DVD
menu.
– Press the function key to start the TV mode. The last set TV channel will be displayed in the pre-set aspect ratio in full picture mode.
Masking and unmasking the TV menu
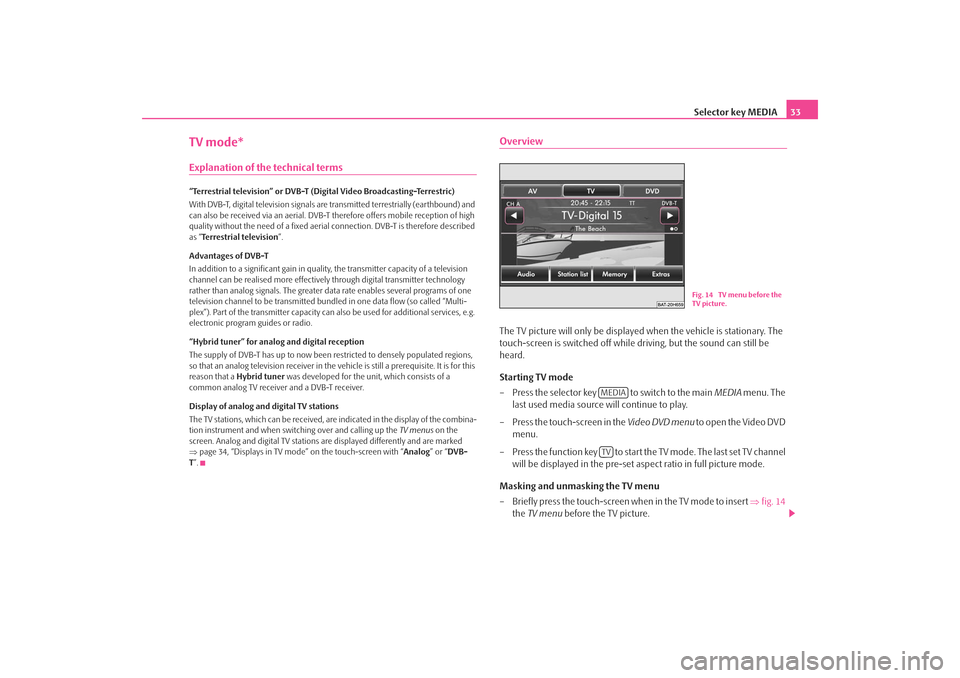
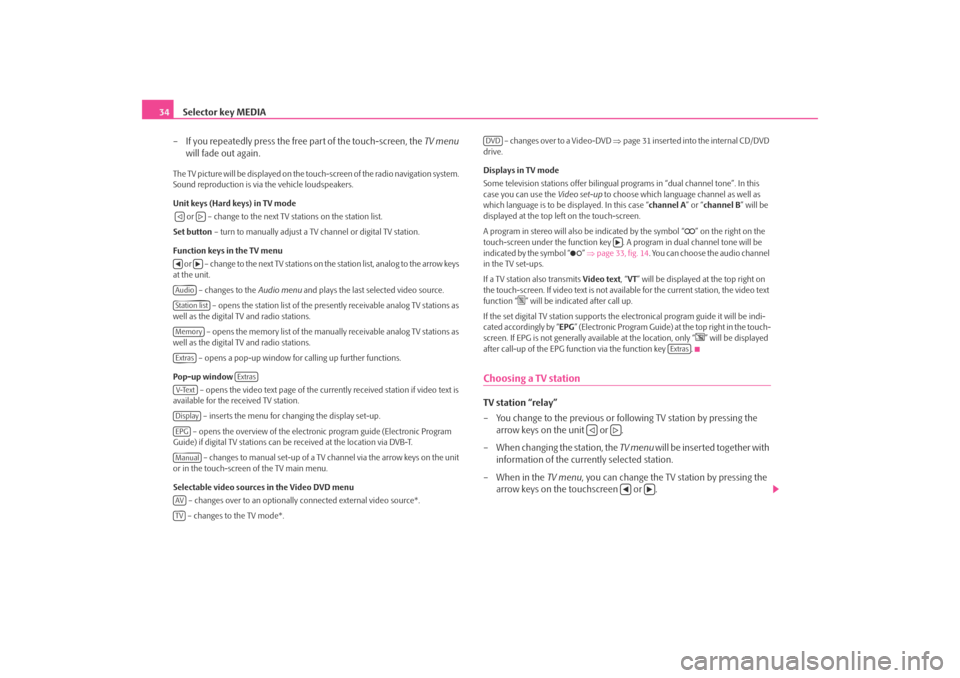
– Briefly press the touch-screen when in the TV mode to insert ⇒fig. 14
the TV menu before the TV picture.
Fig. 14 TV menu before the
TV picture.
MEDIATV
s2u4.6.book Page 33 Wednesday, August 13, 2008 7:57 AM
Page 36 of 75
Selector key MEDIA
34
– If you repeatedly press the free part of the touch-screen, the TV menu
will fade out again.The TV picture will be displayed on the touch-screen of the radio navigation system.
Sound reproduction is via the vehicle loudspeakers.
Unit keys (Hard keys) in TV mode
or – change to the next TV stations on the station list.
Set button – turn to manually adjust a TV channel or digital TV station.
Function keys in the TV menu o r – c h a n g e to t h e n e x t T V s t a t i o n s o n the station list, analog to the arrow keys
at the unit.
– changes to the Audio menu and plays the last selected video source.
– opens the station list of the presently receivable analog TV stations as
well as the digital TV and radio stations.
– opens the memory list of the manually receivable analog TV stations as
well as the digital TV and radio stations.
– opens a pop-up window for calling up further functions.
Pop-up window – opens the video text page of the currently received station if video text is
available for the received TV station.
– inserts the menu for changing the display set-up.
– opens the overview of the electronic program guide (Electronic Program
Guide) if digital TV stations can be received at the location via DVB-T.
– changes to manual set-up of a TV channel via the arrow keys on the unit
or in the touch-screen of the TV main menu.
Selectable video sources in the Video DVD menu
– changes over to an optionally connected external video source*.
– changes to the TV mode*. – changes over to a Video-DVD
⇒page 31 inserted into the internal CD/DVD
drive.
Displays in TV mode
Some television stations of fer bilingual programs in “d ual channel tone”. In this
case you can use the Video set-up to choose which language channel as well as
which language is to be displayed. In this case “channel A” or “channel B ” will be
displayed at the top left on the touch-screen.
A program in stereo will also be indicated by the symbol “
” on the right on the
touch-screen under the function key . A program in dual channel tone will be
indicated by the symbol “
” ⇒ page 33, fig. 14 . You can choose the audio channel
in the TV set-ups.
If a TV station also transmits Video text, “VT ” will be displayed at the top right on
the touch-screen. If video text is not availa ble for the current station, the video text
function “
” will be indicated after call up.
If the set digital TV station supports the electronical program guide it will be indi-
cated accordingly by “ EPG” (Electronic Program Guide) at the top right in the touch-
screen. If EPG is not generally av ailable at the location, only “
” will be displayed
after call-up of the EPG function via the function key .
Choosing a TV stationTV station “relay”
– You change to the previous or following TV station by pressing the arrow keys on the unit or .
– When changing the station, the TV menu will be inserted together with
information of the currently selected station.
– When in the TV menu, you can change the TV station by pressing the
arrow keys on the touchscreen or .
AudioStation listMemoryExtras
Extras
V-TextDisplayEPGManualAVTV
DVD
Extras
s2u4.6.book Page 34 Wednesday, August 13, 2008 7:57 AM
Page 40 of 75
Selector key NAV (Navigation)
38Selector key NAV (Navigation)OverviewSafety information regarding the use of the navigation systemThe route is recalculated each time if you ignore driving recommendations or
change the route. This process takes only a few seconds. Driving recommendations
can only then be re-transmitted.
Incomplete navigation data
The navigation system cannot receive any da ta from GPS satellites if you drive for
longer periods under thick forest canopy or when your vehicle is in a garage, under-
pass or tunnel. In this case, th e navigation system orientates itself solely with the
help of the vehicle sensors.
In regions not at all or only partially digitalised and stored as such on the navigation
DVD, the navigation system will try to provide guidance to the destination. Please
note that under these circumstances the guidance to the destination may not be
completely correct if, for example, one-wa y streets and road categories (motorway,
country road etc.) are not at all or only partially included in the navigation data
used.
WARNING
Always concentrate fully on your drivin g. Inattention by the driver can lead
to accidents and injuries.•
Do not allow yourself to be distracted or loose your concentration, pay
attention to the traffic situation and do not carry out settings or use the radio
navigation system.
•
Only use the radio navigation system if road, weather and traffic situa-
tions permit this and you are not distracted.
•
The various volume settings must be selected in such a way that audible
signals from the outside, such as e.g. a Martins horn from police cars and fire
brigade, can be heard at all times.
WARNING
Please observe the legal requirements for road traffic when following the
driving recommendations provided by your radio navigation system.•
The driving recommendations provided may vary from current situa-
tions, e.g. due to road works or out of date navigation data. In such a case,
always observe the traffic regulations and ignore the driving recommenda-
tions.
•
Traffic signs and traffice regulations al ways have priority over the driving
recommendations provided by the navigation system.
•
Route guidance is subject to constant changes, particularly to informa-
tion relating to one-way streets, pedestrian zones etc. stored on the naviga-
tion DVD. Information on traffic lights, stop and right of way signs, parking
and stopping restrictions as well as lane constrictions and speed restrictions
is not included in the radio navigation system.
•
Adjust your speed to suit weather, road and traffic conditions. Do not
allow the navigation system to make yu drive faster in fog – risk of
accident!
Navigation data and the navigation DVDStoring navigation data in the unit
– Push a navigation DVD with as far as possible into the CD/DVD case
with the written side facing up until it is automatically drawn in. The
unit will compare the data on the navigation DVD with the data in the
navigation system memory. No message will appear if the data in the
navigation system memory of the unit is identical to the data on the
navigation DVD.
– Press the function key , to find out that the storing process has
been completed.
Notify
s2u4.6.book Page 38 Wednesday, August 13, 2008 7:57 AM
Page 58 of 75

Selector key NAV (Navigation)
56Receiving driving recommendations– Press the key at the unit , if you wish to repeat the last audible
driving recommendation.
– Press the selector key in the map display to insert the additional
window.
– Press the function key at the top left in the additional window.
– In the pop-up window press on to display the direction
arrows in the additional window ⇒fig. 23 .
– Press on in the pop-up window to display an overview map in the additional window with the starting and finishing point. Press
briefly on this map to change its type of display.
– Press the function key or the selector key to close the addi- tional window.Route guidance tour plan
When driving to a tour plan, route guidan ce will start automatically to the next
destination after reaching a stopover dest ination. If a stopover destination cannot be reached exactly, it must be deleted from
the tour plan before route guidance can
continue to the next destinat ion. If route guidance to the next destination has been
started manually, only this destination wi ll be approached and all further destina-
tions of the tour plan are ignored.
Note
•
If you have missed a turn-off during route guidance and there is no other
opportunity to turn at that moment, cont inue driving until the navigation system
offers you an alternative route.
•
The quality of the messages transmitte d by the unit depends on the available
navigation data and, during traffic problems, also on the available traffic reports.
The radio stations broadcasting the traffic reports are responsible for the content
and quality of the available traffic reports.
Dynamic route guidance with TMCSwitching the dynamic navigation on or off
– Press the function key in the main menu Navigation.
– In the map display, press on or on ⇒page 55,
fig. 22 during a route guidance and on in the pop-up
window.
– In the menu Route options, press on the function key
and select the desired set-up by pressing your
choice in the pop-up window.
– Press to confirm your input.Traffic problems received via TMC which af fect the route are displayed in the map
by means of a coloured symbol. Traffic prob lems, which do not affect the route, are
displayed in the map by means of a grey symbol. The direction in which a traffic
problem is found, is displayed by means of an arrow in the symbol. The duration of
a traffic problem on the route is displayed in the map by means of continuous PKW
(motor car) symbols
.
Fig. 23 Optical driving
recommendation in the addi-
tional window of the map
display.
A7
MAP
Symbol
Overview
MAP
Options
Navigation
... / ...
Route options
Dynamic route
OK
s2u4.6.book Page 56 Wednesday, August 13, 2008 7:57 AM
Page 59 of 75

Selector key NAV (Navigation)57
Dynamic route
Off
When the dynamic navigation is switched off you will not be advised of traffic prob-
lems affecting your route during route guidance and you are not directed away
from or through the traffic problems. TMC traffic reports are updated ⇒page 57,
“Requirements for a dynamic route guid ance” automatically in the unit and
displayed by pressing the selector key .
If one of the announced traffic problems is on your route, you can also switch on
the dynamic route guidance during the cu rrent route guidance or block the route
manually ⇒page 58, “Manually blocking a stretch of the route”.
Dynamic route
Manual
If the dynamic navigation is set to manual and you are in route guidance mode you
can select to avoid the announced traffic problems on your route ⇒page 57,
“Requirements for a dynamic route guidance”.
If the navigation system is alerted of a tr affic problem on the calculated route, the
driver will be notified of this by means of an audible message and information in a
pop-up window.
The expected delay incurred in avoiding this traffic problem and the length of the
alternative route will be displayed. The expected time lost when driving through
this traffic problem will also be displayed.
•
Press to remain on the calculated route and to pass through the
traffic problem.
•
Press for an alternative route to be calculated taking into account
the announced traffic problem.
Dynamic route
Automatic
If the dynamic navigati on system is set to Automatic and you are in tour guidance
mode, you will automa tically be guided ⇒page 57, “Requirements for a dynamic
route guidance” around the announced traffic problem on your route.
After input of relevant traffic information for your route you will be advised of the
change in the current route guidance by means of an acoustic message. You will
automatically be guided around announced traffic jams or blocked roads, if this
saves time. Such announcements will take place if a
traffic problem affects the original route
calculation, the traffic problem has been solved and the navigation system can see
only one possibility of driving the actually most advantagous route.
Requirements for a dynamic route guidance
TMC (Traffic Message Channel) is a digital radio data service for continuous trans-
mission of traffic information.
The unit has a continuous background of TMC traffic reports providing a TMC
station at the current location can be received.
The quality of the transmitted traffic reports depends on the broadcast editing
carried out by the radio station. The rece ption of the TMC traffic reports cannot be
switched on or off.
The station you are listening to does not have to be a TMC station.
TMC traffic reports can only be evaluated and displayed by the unit if the navigation
data for the currently driven area is stored in the unit memory or can be called up
via an inserted navigation DVD.
The current TMC traffic reports can be di splayed by pressing the selector key
.
Note
•
There may not be any advantantage in avoiding the traffic jam if, as a result of
the TMC traffic reports, the dive rsion is also heavily congested.
•
You can manually block the information for the route in front of you if a traffic
problem ahead has not yet been included in the TMC traffic reports ⇒page 58.
TRAFFIC
Keep routeDetour route
TRAFFIC
s2u4.6.book Page 57 Wednesday, August 13, 2008 7:57 AM