2008 SKODA OCTAVIA Traffic
[x] Cancel search: TrafficPage 4 of 25
General information
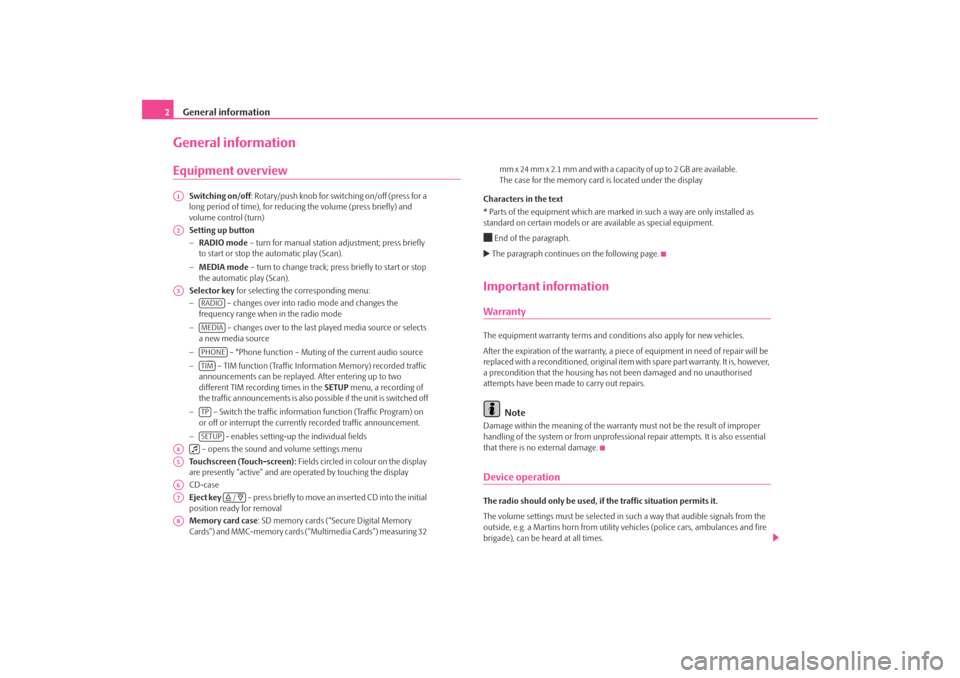
2General informationEquipment overview
Switching on/off : Rotary/push knob for switching on/off (press for a
long period of time), for reducing the volume (press briefly) and
volume control (turn)
Setting up button
− RADIO mode – turn for manual station adjustment; press briefly
to start or stop the automatic play (Scan).
− MEDIA mode – turn to change track; press briefly to start or stop
the automatic play (Scan).
Selector key for selecting the corresponding menu:
− – changes over into radio mode and changes the
frequency range when in the radio mode
− – changes over to the last pl ayed media source or selects
a new media source
− – °Phone function – Muting of the current audio source
− – TIM function (Traffic Information Memory) recorded traffic
announcements can be replayed . After entering up to two
different TIM recording times in the SETUP menu, a recording of
the traffic announcements is also possible if the unit is switched off
− – Switch the traffic information function (Traffic Program) on
or off or interrupt the currently recorded traffic announcement.
− - enables setting-up the individual fields
– opens the sound and volume settings menu
Touchscreen (Touch-screen): Fields circled in colour on the display
are presently “active” and are op erated by touching the display
CD-case
Eject key – press briefly to move an inserted CD into the initial
position ready for removal
Memory card case : SD memory cards (“Secure Digital Memory
Cards”) and MMC-memory cards (“Multimedia Cards”) measuring 32 mm x 24 mm x 2.1 mm and with a capacity of up to 2 GB are available.
The case for the memory card
is located under the display
Characters in the text
* Parts of the equipment which are marked in such a way are only installed as
standard on certain models or are available as special equipment.
End of the paragraph. The paragraph continues on the following page.Important informationWarrantyThe equipment warranty terms and conditions also apply for new vehicles.
After the expiration of the warranty, a piec e of equipment in need of repair will be
replaced with a reconditioned, original item with spare part warranty. It is, however,
a precondition that the housing has not been damaged and no unauthorised
attempts have been made to carry out repairs.
Note
Damage within the meaning of the warranty must not be the result of improper
handling of the system or from unprofession al repair attempts. It is also essential
that there is no external damage.Device operationThe radio should only be used, if the traffic situation permits it.
The volume settings must be selected in such a way that audible signals from the
outside, e.g. a Martins horn from utility vehicles (police cars, ambulances and fire
brigade), can be heard at all times.
A1A2A3
RADIOMEDIAPHONETIMTPSETUP
A4
A5A6A7
/
A8s3d0.3.book Page 2 Monday, August 11, 2008 12:49 PM
Page 5 of 25
General information3
WARNING
Please concentrate fully at all times on your driving! As the driver you are
fully responsible for road safety. Only use the functions of the radio in such
a way that you are always in full contro l of your vehicle in all traffic situa-
tions!
Caution
•
Inserting a second CD while a CD is being ejected can destroy the CD drive in
the unit. Please note that the CD ejecti on lasts a few seconds after pressing the
Eject key . During this time the lock in fron t of the CD case is open. It is essen-
tial that you wait until the CD has been fully ejected before you try to insert a new
CD.
•
Press the buttons and the keys of the uni t gently in order to avoid damaging
them. Gentle pressure on the appropriate key is sufficient to operate the unit.
Please note that the rotary/push knobs have predetermined breaking points, in
order to reduce the risk of injury.
•
Do not use any pointed or sharp-edged objects to operate the touch-screen.
Slight finger pressure sufficient to oper ate the equipment. A text in the display,
which cannot be called up by pressing the button, is therefore not available at that
time.
Using the displayCarefully handle the display because dent s and scratches can occur through pres-
sure of the finger or contact with sharp objects.
The display can be cleaned with a soft cl oth and finger marks can be wiped away
with pure alcohol.
Note
Do not use solvent such as turpentine or petrol as they will corrode the display
surface.
Anti-theft protectionAnti-theft codingYour radio is equipped with a convenience coding. If the radio is being operated for
the first time, the safety code is not only st ored in the radio but also in the vehicle.
After disconnecting and reconnecting the battery, first of all switch on the ignition
and then the radio.
If you wish to install the radio in another vehicle, the safety code must be entered.
In this case, please do not hesitate to contact a Škoda Service Partner or a Škoda
importer.
As the unit only functions afte r entering the safety code, this practically excludes its
use after a theft - a contribution to increased anti-theft safety.
Note
The code is stored in the instrument cluste r. This ensures that it is automatically
decoded (convenience coding). Manual input of the code is normally not
necessary.Enter codeIf a keypad appears after switching on with the command to enter the
code, the unit can be unlocked by ente ring the correct four-digit code
number. The number of the possible attempts is shown in the second
display line.
– Press directly a digit from to on the digit block displayed on the
display. The digit is accepted in the entry line.
– After a four-digit order has been entered, the group of digits will turn grey (inactive) and no further digits can be accepted in the entry line.
– Press on the display to erase the digits in the entry line from right
to left and thereby correct your input, if necessary.
/
0
9
s3d0.3.book Page 3 Monday, August 11, 2008 12:49 PM
Page 8 of 25
Basic setting
6Basic settingSwitching the unit on and off– The system is switched on or off by pressing the rotary/push knob
for a long period of time.The last active audio source before switching off is repeated.
If the key is pulled out of the ignition lo ck with the unit switched on, the unit wil
switch off automatically. You can then switch the unit on again. When the ignition is
switched off, the unit switches off automa tically after approx. one hour (discharge
protection of the vehicle battery). This process can be repeated as often as
necessary.Audio settings By pressing the button you can select the following parameters:•
- Setting of height, middle and depth;
•
- Volume ratio (left and right = balance), (front and rear = fader);
•
- , and * - Switch on
volume, traffic announcements and volume of park distance control signal;
•
- Speed dependent volume adaptation;
•
- Switching on or off the tone signal when storing the radio
stations.
Reducing the volume when activating the parking aid (PDC)*
If your vehicle is equipped with “parking aid”, the volume is automatically
decreased to a pre-defined value, wh en the “parking aid” is active.
GALA function
Your radio increases automatically its volu me with the increasing vehicle speed. A
higher setting value results in a stronger volume increase.
RADIO selector keySelecting a radio stationCall up RADIO main menu and choose frequency range
– Press the range selector key to call up the RADIO main menu.
The currently heard radio station is indicated at the top of the display.
– To change the frequency range, press the function key or the function key and on or in the opening pop-up
window. The current frequency range is indicated at the top left of the
display.
Changing radio station
– By pressing the arrow keys on the display of the RADIO main menu,
you can change to the previous or the following station.
Selecting a radio station from the station list
– Press the function key to display all radio stations that can currently be received. The list “skips” directly to the display of the
currently heard radio station.
– Choose the desired station by pressing the respective selection. After about 20 seconds without operation the image of the station list will
close automatically.Function keys in the Radio main menu
to – Station keys for storing or calling up a stored radio station.
– Button for selecting th e desired frequency range.
– opens the list of the presently receivable radio station.
– opens the list of the stored radio station.
A1
Height-Middle-DepthBalance faderVo lume
Switch on volume
Traffic announcements
PDC
GALAConfirmation tone
RADIO
RADIO
band
FM
AM
Station list
1...
...42
BandStation listMemory
s3d0.3.book Page 6 Monday, August 11, 2008 12:49 PM
Page 10 of 25
Basic setting
8If a radio station sends additional inform ation via the RDS function while a station
is being stored, it can occur that the name of the radio station is later displayed
incorrectly in the memory list.Traffic information function– Press on the button , in order to switch the traffic information func- tion on or off.The display “ TP” in combination with a station name (e. g. in the station or memory
list), indicates a traffic information station.
Irrespective of which radio station is heard, an additional receiver part in the unit
ensures that a traffic information station can always be received as long as the traffic
information function is switched on.
The operational readiness of the traffic information function is indicated by “ TP” at
the top right in the display.
If no traffic information st ation can be received becaus e, for example, radio recep-
tion is interrupted in general, “ No TP” will be displayed instead of “TP ”. Remember
that car parks, tunnels, high buildings or mountains can interrupt the radio signal
up to the total loss of reception.
Incoming traffic announcement
When a traffic announcemen t is being received, a pop-up window will open.
If you wish to interrupt the transmission of the traffic announcement, press on the
function key in the pop-up window Traffic announcement. The traffic infor-
mation function remains available and a following traffic announcement is made
again while the audio mode is in op eration. Pressing the function key
will switch off the traffic information function permanently.Traffic information memoryAutomatic recording of traffic reports
If the traffic information function is switched on and a traffic information station is
received, the incoming traffic reports will be recorded , as long as the ignition is switched on. This way you are informed at
any time of the current traffic situation,
even if you have your radio switched off for a lengthy period while driving.
If the vehicle is not in use (ignition off) while a traffic information station is received
and the traffic information function is sw itched on, incoming traffic reports from
this station are recorded for two hours.
When switching the ignition off the current traffic information station is displayed
for about five seconds, from which the ne xt two hours of traffic reports will be
recorded. During this display of five seco nds, you can select another traffic infor-
mation station using the arrow keys on the unit, which will be recorded.
If, when the vehicle is not in use, the rece ption of the set traffic information station
is too poor because of external influences , it will automatically search for another
traffic information station.
A maximum of nine traffic a nnouncements with a total length of up to four minutes
can be recorded. The oldest traffic report will always be overwritten if the memory
is full.
TIM recording times
You also have the possibility to set two TIM recording times, to which the unit will
also record traffic reports when the vehicl e is not in use. Then the radio starts
according to the set TIM recording time with the recording of all the incoming traffic
reports on the set traffic information station.
For example, when you drive your vehicle to work everyday at a certain time, only
enter the approximate start time. The radio starts with the recording 90 minutes
before the set start time and ends the recording 30 minutes afterwards. In this way,
before you begin your journey, you can retrie ve the last traffic reports and tune into
the current traffic situation of the distance to be driven.
Note
•
In case of a message of over four minu tes long, the beginning is overwritten.
•
If the vehicle has not been used for mo re than three days, no further traffic
reports are recorded, in order to stop the vehicle battery from running down.
TP
Cancel
TP deactivateds3d0.3.book Page 8 Monday, August 11, 2008 12:49 PM
Page 11 of 25
Basic setting9
Playing traffic reports– Press on the button , in order to li sten to the stored traffic reports.
The play function starts with the last recorded traffic report and runs
through to the oldest recorded traffic report.
– Press on the button , in order to switch to the beginning of the currently heard traffic report.
– In order to skip a traffic report, press on the button .
– You can interrupt the play function by pressing the button . The button changes to . Pressing the button will continue the play
function from the last point.Range selector key MEDIAMEDIA main menu Calling up the main MEDIA menu and changing media source
– By pressing the button the play function of the last played
media source will continue.If audio sources are currently selectable at the unit, use the range selector key
to change between the last audio sources.
If a previously played media source is se lected again, play will continue from the
last played part.
If an audio source cannot be selected at the present time because, for example, no
data carrier has been inserted (e.g no memory card), the function key will be
displayed with a grey background.
Function keys for controlling the current audio sources
– pressing this briefly changes over to the beginning of the current title or
chapter, repeated pressing changes over to the beginning of the previous title or
chapter. – briefly pressing this changes over to the next title or chapter.
– Pause: The play function is stoppe d in the current position - the symbol
changes to , – pressing will continue the play function in this position.
Selectable audio sources in the menu MEDIA – changes over to the last played CD from the CD changer.
– changes over to an inserted memory card.
– changes over to a connected external video source*. Operating an exter-
nally connected audio source is possible with certain restrictions and depends
largely on the type of the connection.
Additional function keys in the MEDIA main menu
– starts the automatic play Scan. If is already disp layed with the func-
tion key, the automatic play has started - briefly press the function key to terminate.
– starts the random play function Mix. If is already displayed with the
function key, the automatic play has started - briefly press the function key to termi-
nate.
– opens the pop-up window for switch ing on the repeat function. In addi-
tion, it is determined if only the cu rrent or the current or the current
for the MP3 operation is repeated.
– opens the title list of the current media source in order to choose
another title or another media source.
Inserting or ejecting a CDInserting the CD
–Press the button .
– Choose the location .... for stor ing the CD in the internal CD
changer. Wait until “ Please insert CD” is displayed.
– Push a CD with the written side facing up as far as possible into the CD case until it is automatically drawn in. The play function will start auto-
matically.
TIM
MEDIA
MEDIA
CDSD cardAUXScan
Scan
Mix
Mix
Repeat
Tra c k
CD
FolderSelection
/
1
6
s3d0.3.book Page 9 Monday, August 11, 2008 12:49 PM
Page 16 of 25
Basic setting
14Conditions for proper connection•
Only USB devices with the specification 2.0 can be connected.
•
The version of the file allocation tabl e FAT (File Allocation Table) of the
connected device must be FAT16 (< 2 GB) or FAT32 (> 2 GB).
•
In order to replay from a unit with a hard disk (HDD) which includes a large data
volume, it can lead to a time delay when reading in the overview of the music data.
•
In order to replay from a unit, which incl udes a complicated folder structure, it
can lead to a time delay when readin g in the overview of the music data.
•
The folder structure in the connected uni t must not exceed a depth of 8 levels.
One folder must not contai n more than 1°000° data.
•
A USB extension cable or USB distributo r (HUB) must not be used to connect
the unit.
WARNING
•
On no account place an external audio source on the dash panel. You
could make sudden manoeuvres in th e passenger compartment and injure
the occupants.
•
On no account place an external audio source close to the airbags. You
could be thrown back in the passen ger compartment by the airbags being
deployed and injure the occupants.
•
You must not hold the external audio source in the hand or on the knees
while driving. You could make sudden manoeuvres in the passenger
compartment and injure the occupants.
•
Always guide the connection cable of the external audio source in such a
way that is does not re strict you when driving.Caution
The AUX-IN socket must only be used for audio sources!
Note
•
The external audio source, which is conne cted via AUX-IN, can only be used if
no unit is connected via MDI at the same time.
•
If an external audio source is connecte d via AUX-IN, which is equipped with an
adapter for external power supply, it can o ccur that the audio signal is interrupted.
This depends on the quality of the adapter which is used.
•
The loudspeakers in the vehicle are matc hed to a power output of the radio of
30°W.
Range selector key SETUPMain menu set-ups (Setup)– Press the range selector key to open the main menu Set-ups.
– Select the area for which you wish to change the set-ups or carry out set-ups by pressing on your selection.
– Press on the function key , to switch back to the last selected menu.Overview of the set-up menus – When in the radio mode, carry out set-ups for the function of the arrow
keys, for the displayed memory keys, th e memory list and the traffic reports.
– Determine the set-ups for the play and display of MP3 data and activate
or deactivate the external audio sources.
– Change the system set-ups such as voice response and time and cancel
or delete stored set-ups in individual areas.
– Select preferred TMC station and determine the area for TMC
announcements.
– Adjust the brightness of the displa y, day/night design of the map display
and select/deselect the confirmation tone for the keystroke.
– Update the phone book in the unit, delete all call lists and modify the
assignment of the shortcut keys.
SETUP
RadioMediaSystemTraffic informationScreenPhone
s3d0.3.book Page 14 Monday, August 11, 2008 12:49 PM
Page 17 of 25
Basic setting15
Setup RadioCall up the menu Setup Radio by pressing the selector key and the
function key . Press on the f unction key or on the func-
tion key to determine from which list in the radio mode the
stations are to be selected with the arrow keys. If the is
selected, only stored stations from the memory list are called up.
“ Memory ” is displayed at the top left in the main menu RADIO.
Select station keys for display
– Press on the function key behind the function key in the menu Setup°Radio .
– In the pop-up window, press and select the station keys to be displayed in the main menu RADIO.
Switching the RDS function on or off (RDS regional)
– Press on the function key and select a set-up in the
opening pop-up window.
– Press on the function key , doing so will always choose the frequency for the radio station heard, which offers the best reception
at the present time.
– When pressing on the function ke y , the unit attempts to hold a
radio station emitting regionally long enough until the reception
quality is so bad, that there is a risk of a program loss.
Delete memory list
– In the menu Setup Radio move the sliding regulator to the bottom to
display the function key .
– Press the function key and confirm the following
safety interrogation in order to eras e all radio stations stored in the
memory list.
Preferred TMC station
If the “preferred” TMC station can no long er be received, the system automatically
searches for the TMC station offering the best reception for the currently driven
area. You can determine in the Setup Radio from which TMC station the reports are
to be announced.Traffic station set-upsCall up the TIM Setup recording time menu by pressing the range selector
key and the function key .
– Press on the left of the display on TIM recording time, in order to open the Time setting menu.
–In the Time setting menu, briefly press on the arrow keys or on
the display, below the display of the hours or minutes, in order to
gradually change the respective time unit down or up.
– Keep pressing the corresponding arrow key, in order to continuously change the time unit. Release the button if the desired value has been
reached.
– Press on the function key in or der to take over the indicated TIM
recording time and to exit the menu Time setting.
– In this way you can set both desired TIM recording times.
– Activate or deactivate the desired TIM recording time by pressing the function key . If the check-box is active
the accompanying
TIM recording time is activated.
The unit starts with the recording 90 minutes before the set start time and ends the
recording 30 minutes afterwards.
SETUP
Radio
station list
memory list
Memory listStation keys
RDS regionalAutomatic
Fix
Delete memory listErase memory list
SETUP
Traffic information
Active
s3d0.3.book Page 15 Monday, August 11, 2008 12:49 PM