Page 17 of 47

Media drives
16
Do not use any force when inserting a CD into the drive. The CD will
be drawn into the slot automatically.
– Make sure that a CD is not already loaded in the CD slot.
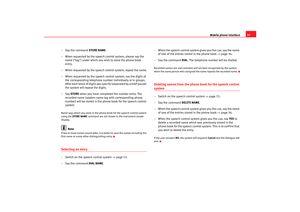
– Hold the CD straight with the text facing upwards and insert it into the CD slot. The CD will be pulled in automatically.Ejecting a CD– Press the CD eject button.After it has been ejected, the CD will automatically be pulled back into the CD
player after about 15 seconds if it is not removed from the CD slot.
Note
Please observe the notes for handling CDs ⇒page 16.
Handling CDsUse of laser equipment
Laser devices are divided into the safety classes 1 to 4, as specified by DIN
IEC 76 (CO) 6/VDE 0837. The laser devices used on your vehicle are classified
as safety class 1. Lasers used in devices that fall into this category are very
weak and well screened, so there is no danger if used correctly.
Requirements for good sound reproduction
Please note the following in order to ensure perfect high-quality sound repro-
duction and avoid damage to media drives:•
Do not use dirty CDs
•
Do not use damaged or scratched CDs
•
Do not use labels
•
Do not use protective rings
•
Do not use a CD cover or a stabiliser
•
Do not use non-circular CDs (shape CDs)
•
Do not use single CDs (8 mm / 3" in diameter)
Always store unused CDs in a suitable CD case and do not expose them to
direct sunlight.
Cleaning media drives and CDs
Never use a CD player cleaning disc to clean the media drives.
Clean CDs with a soft lint-free cloth. Wipe the disc in a straight line from the
centre outwards. If necessary, dirt ca n be removed with a commercially avail-
able CD cleaner or with isopropyl al cohol. Please never use petrol, paint
thinner or record cleaner, as these can damage the CDs.
Fault displays
If the display indicates a read error (ERROR , CHECK CD or CD ERR ) any of the
following causes are possible:
Fig. 7 Ejecting a CD
Adagio_EN Seite 16 Dienstag, 7. Oktober 2008 10:55 10
Page 18 of 47

Media drives17
If SERVICE appears on the display, please contact a Dealer or qualified work-
shop.
Note
Never remove the cover of the equipment. The equipment has no compo-
nents that can be serviced by the owner.
iPod interface*General notes
The iPod interface can be used to connect an iPod to your in-
car entertainment system and allows you to play audio files
directly over the car's sound system.The iPod interface is located in your car' s glove box. It is compatible with 3rd
generation or higher iPod
1) devices (made from about 2003 onwards), with
the exception of the iPod Shuffle.
The iPod is controlled using the CD function ⇒page 24.
•
The sound system orders (first numerically and then alphabetically) the
playlists with the tracks stored in the iPod and then assigns them in the
sequence CD 1 to CD 5. For easier playing of these playlists through the
vehicle's sound system, we recommend you create five playlists (e.g. 1.... to
5....) in your iPod.
•
If you select CD 6, all the tracks on th e iPod will be played even if they are
stored in different playlists. If you select an artist, a track, an album or a
podcast before connecting the iPod, your selection will be kept until you
change CD.
Information stored on the iPod, such as artist, track, album and genre, or the
name of a playlist, does not appear on the sound system display.Caution
Very high or very low temperatures (a common occurrence in a car's interior)
can cause damage to the iPod and/or impair its performance.•
Please do not leave your iPod in the vehicle in case of extreme tempera-
tures.
Problem
Remedy
CD is dirty.
Clean the CD.
CD is scratched.
Inspect the CD for scratches.
CD was inserted upside down.
Insert the CD with the text facing
upwards.
Condensation has formed on the CD.
Wait until the equipment is dry.
A mechanical malfunction has
occurred on the media drive.
Contact a Dealer or qualified work-
shop.
1)iPod is a registered trademark of Apple Computer Inc.
Adagio_EN Seite 17 Dienstag, 7. Oktober 2008 10:55 10
Page 19 of 47

Media drives
18
NotePlease refer to the iPod operating instructions for important information on
how to use your iPod.Choosing the adapter
The iPod interface is supplied with a choice of adapters for
connecting your iPod.iPods come in different sizes. Therefore, you will need to match the iPod inter-
face ⇒fig. 8 to your iPod using one of the adapters supplied. You will
need two adapters for certain iPod models (touch, 5G (video), classic).
The iPod interface is supplied with the following adapters:
1. Narrow adapters of different heights for inserting into the central slot
below the bay . 2.
Flat adapter plates for inserting into the slot above the bay .
3. Wide adapter casing for inserting into the bay .
There are also some iPods that do no t require an adapter (e.g. iPod Photo 60
GB)
Caution
The iPod must be firmly seated in the iPod interface. The iPod may be
damaged if it is not installed correctly.
Fig. 8 iPod interface with
slots for adapters
A1A2
iPod
Nº adapter
classic 80 GB,
4G 20 GB
1
5G (video) 30 GB, touch*
3
5G (video) 60/80 GB,
Photo 30 GB
4
classic 160 GB,
3G 10-20 GB
5
iPod
Nº adapter
classic 160 GB,
5G (video) 30/60/80 GB
8
classic 80 GB
12
touch*
13
iPod
Nº adapter
nano 2G
10
nano 3G
11A3
A4
Adagio_EN Seite 18 Dienstag, 7. Oktober 2008 10:55 10
Page 20 of 47

Media drives19
•
Make sure that the iPod is fixed in place with one of the adapters
supplied.Note
•
Your Dealer also offers appropriate adapters for iPods that are not latest
generation.
•
For further information on adapter adaptation, please see the information
enclosed with the adapters supplied.
Inserting the iPod into the iPod interface– Switch on the sound system ⇒page 9.
– With the display facing upwards and the contact towards the front, slide the iPod into the bay until you hear it engage. The
iPod will switch on automatically and the battery will be charged.
– If the sound system does not detect the iPod after you insert it, please “reset” the iPod (refer to the iPod operating instructions).To start the iPod, press the button several times ⇒page 19.
The iPod is switched off automatically when you switch off the sound system
or the ignition.
Note
•
To ensure optimum sound quality, you should enable the “sound check”
setting on the iPod and disable the “EQ” (equaliser) before inserting the iPod
(please refer to the iPod operating instructions).
•
Slight scoring marks may occur on the iPod when used with the adapter.
Functions
The iPod is operated just like an external CD changer using
the controls on your car's sound system.To start the iPod, press the button until the display shows CD positions
CD 1 to CD 6 ⇒ page 24.
The following functions are available:•
Play all tracks stored on the iPod
•
Select and play up to five playlists (just like selecting CD 1 to 5 on an
external CD changer)
•
Change between playlists (just like changing the CD on an external CD
changer)
•
Change tracks within a playlist
•
Fast forward and rewind within a track
•
Play tracks in shuffle mode ("mix")
•
SCAN function
For further information on operation, please refer to the “CD” chapter
⇒ page 24.
NotesHere are some tips and points to remember when using the iPod in the car:•
Track numbers appear with a maximum of two digits in the sound system
display. The first digit is suppressed if you select a track with a three-digit
number, i.e. track 125 and track 25 are both displayed as track “25”. For this
reason we do not recommend allocating mo re than 99 tracks to each playlist.
•
If you reach the end of a playlist when selecting a track directly
(forward/reverse), the count is resumed at track “1”.
CD
CD
Adagio_EN Seite 19 Dienstag, 7. Oktober 2008 10:55 10
Page 21 of 47
.
USB port*Introduction
You can connect a memory stick or an MP3")
Media drives
20•
The track numbers are counted up sequentially in the sound system
display when you play tracks in shuffle mode (MIX).
USB port*Introduction
You can connect a memory stick or an MP3 player to the USB
port for operating through the sound system.The USB port is located in your car's glove compartment. The port is compat-
ible with all memory sticks and MP3 players ( ⇒table on page 21). Problems
can occur if you use a memory stick or MP3 player not listed in the table. Your
memory device must be USB-certi fied as a minimum requirement.
WARNING
Today's driving conditions require your full attention. As the driver, you
bear the responsibility for road safety. Do not remove the memory stick or
MP3 player while driving. Failure to do so may cause an accident.
Caution
Very high or very low temperatures (a common occurrence in a car's interior)
can cause damage to the memory stick or MP3 player and/or impair its
performance.•
Never leave your memory stick or MP3 player in the vehicle in case of
extreme temperatures.
Note
Please refer to the manufacturer's oper ating instructions for important infor-
mation on how to use your memory stick or MP3 player.Connecting a memory stick / MP3 player
For problem-free operation, use only approved memory sticks
and MP3 players.– Switch on your car's sound system.
–Enable radio mode.
–Plug the memory stick into the USB port ⇒fig. 9 (arrow), or
–Connect the MP3 player to a standard USB extension cable and
plug the extension cable into the USB port ⇒ .
Fig. 9 USB port in glove
compartment
Adagio_EN Seite 20 Dienstag, 7. Oktober 2008 10:55 10
Page 22 of 47

Media drives21
– Before you remove the memory device, switch the audio source for the sound system back to radio.
It may take several seconds for the USB port to detect the memory device.
The MP3 player is switched off automatically when you switch off the sound
system or the ignition. The USB port stores the position of the last track you
were playing. If you do not alter the contents of your memory device, the
music will be continued at the point where you stopped playing.
MP3 players and USB sticks which are not explicitly approved must have
“CERTIFIED USB
TM” or “CERTIFIED HIGH SPEED USB
TM” status.
Approved MP3 players Approved memory sticks
Manufacturer
Model
Memory
Cebop
Run XL
1024 MB
Commodore
mpet II
256 MB
Grundig
MP 500
256 MB
iPod
Shuffle
512 MB
iPod
Shuffle
1 GB
Mambox
Color
256 MB
Maxfield
MaxRobot
512 MB
Philips
SA 177
512 MB
Time
DPA-20 FL+
128 MB
Trekstor
Musik Stick 100
256 MB
Trekstor
21617, i.Beat
512 MB
Manufacturer
Model
Memory
Buffalo
Firestix
2 GB
CnMemory
Blue Pearl
64 MB
CnMemory
Red Pearl
512 MB
DisgoLite
256 MB
EasyDisk
256 MB
Hama
Mini USB2.0
512 MB
Kingston
Data Traveler
512 MB
Lexar
JumpDrive
128 MB
Lexar
256 MB
LG
Mirror USB Drive
128 MB
Memorex
Traveldrive II
1 GB
MyFlash
PD2
128 MB
MyFlash
PD2
512 MB
Pretec
I-Disk Tiny 2.0
128 MB
SanDisk
512 MB
Silver Pearl
Micro X
1024 MB
Sony
USM 512 E
512 MB
Sony
USM 512 REX
512 MB
To s hi b a
UD 512-T-02
512 MB
Adagio_EN Seite 21 Dienstag, 7. Oktober 2008 10:55 10
Page 23 of 47

Media drives
22
Caution•
Do not connect a device other than a memory stick or MP3 player to the
USB port. It is not possible to operate hard disks or USB hubs, etc. via the USB
port.
•
Do not connect the MP3 player directly to the USB port. This could
damage the device.
•
Never remove a memory device when the USB port is selected as source
(CD). This could damage your memory device.
Functions
Music files are played just like on a CD changer using the
controls on the sound system.To start the memory stick or MP3 player, press the button several times
until the display shows CD positions CD 1 to CD 6 ⇒ page 24.
The following functions are available:•
Play all tracks stored on the memory device (if no folders are stored on the
memory device)
•
Select and play up to six main folders with music files (just like selecting
CD 1 to 6 on a CD changer)
•
Change between main folders with music files (just like changing the CD
on a CD changer)
•
Change tracks within a main folder
•
Fast forward and rewind within a track
•
SCAN function
•
Play tracks in shuffle mode ("mix")
For further information on operations, please refer to the “CD” chapter
⇒ page 24.
NotesHere are some tips and points to reme mber when playing music files in the
car:•
We recommend that, instead of storing music files in the main directory of
the memory stick or MP3 player, you create separate folders e.g. for tracks
belonging to the same genre or artist. Therefore, bear in mind that your sound
system can display and play a maximum of six folders. The folders are allo-
cated first in numerical order and then in alphabetical order as CD 1 to CD 6.
Folders that do not contain music file s are automatically ignored. You can
create any number of subfolders.
•
If there are no folders on your memory device, the sound system will allo-
cate all the music files it finds to CD 1.
•
Track numbers appear with a maximum of two digits in the sound system
display. The first digit is suppressed if you select a track with a three-digit
number, i.e. track 125 and track 25 are both displayed as track “25”. We
therefore do not recommend allocating more than 99 tracks to each folder.
•
Bear in mind that special characters (umlauts, accents, etc) are at the end
of the alphabet.
The following music formats are supported:
•
mp3 (MPEG1 Layer3 from 32 to 320 kbps)
•
wma (from 8 to 192 kbps)
•
wav (11.025, 22.050 and 44.1 kHz sa mpling frequency with 16-bit
encoding, stereo)
•
ogg vorbis (up to q10, 48 kHz, stereo)
DRM music formats are not supported.Caution
Never store important data on the memory stick or MP3 player. SEAT is not
liable in any manner for any data or files that may be damaged or lost.
CD
Adagio_EN Seite 22 Dienstag, 7. Oktober 2008 10:55 10
Page 24 of 47

Media drives23
Aux-in connectionIntroduction
Portable players can be plugged into the Aux-in connection
using a 3.5 mm jack plug.The Aux-in socket is located in the centre console. It is compatible with port-
able players with a 3.5 mm jack plug. It cannot be guaranteed that all port-
able players will function without any problems.
Caution
•
Very high or very low temperatures (a common occurrence in a car's inte-
rior) can cause damage to portable pl ayers and/or impair their performance.
Never leave the portable player in the vehicle in case of extreme temperatures
(either very high or very low)
•
Never store important data on portable players. SEAT is not liable in any
manner for any data or files that may be damaged or lost.Note
Please refer to the operating instructions of your portable player for important
information on its operation.Connecting a portable player– Switch on your car's sound system.
– Enable radio mode. – Connect the portable player to a 3.5 mm jack plug and plug the
extension cable into the Aux-in socket.
– Before you remove the memory device, switch the audio source for the sound system back to radio.
To start the portable player, press the button several times until the EXT.
SOURCE ("external source") message appears on the display ⇒page 26.
After the player has been detected successfully, the display will show
External audio source is active .
You can select the audio files using the controls on the portable player.
The volume can be adjusted using the sound system in your vehicle, the
multi-function steering wheel* or the portable player.
WARNING
Today's driving conditions require your full attention. As the driver, you
bear the responsibility for road safety. Never operate a portable player
while driving, as this could result in an accident.
Note
•
We recommend setting the output level of the portable player to about
70 percent of maximum. Before adjusting the volume using the sound system
in your vehicle, you should first use the volume adjuster of the portable
player.
•
Using a portable player with the engine switched off will drain the
battery.
CD
Adagio_EN Seite 23 Dienstag, 7. Oktober 2008 10:55 10