2008 PONTIAC GRAND PRIX fuel cap
[x] Cancel search: fuel capPage 1 of 450

Seats and Restraint Systems........................... 1-1
Front Seats
............................................... 1-2
Rear Seats
............................................... 1-9
Safety Belts
.............................................1-10
Child Restraints
.......................................1-29
Airbag System
.........................................1-52
Restraint System Check
............................1-66
Features and Controls..................................... 2-1
Keys
........................................................ 2-2
Doors and Locks
......................................2-10
Windows
.................................................2-16
Theft-Deterrent Systems
............................2-18
Starting and Operating Your Vehicle
...........2-23
Mirrors
....................................................2-38
OnStar
®System
......................................2-40
Storage Areas
.........................................2-43
Sunroof
..................................................2-44
Instrument Panel............................................. 3-1
Instrument Panel Overview
.......................... 3-4
Climate Controls
......................................3-28
Warning Lights, Gages, and Indicators
........3-38
Driver Information Center (DIC)
..................3-55
Audio System(s)
.......................................3-94Driving Your Vehicle....................................... 4-1
Your Driving, the Road, and Your Vehicle
..... 4-2
Towing
...................................................4-27
Service and Appearance Care.......................... 5-1
Service
..................................................... 5-3
Fuel
......................................................... 5-5
Checking Things Under the Hood
...............5-10
Headlamp Aiming
.....................................5-51
Bulb Replacement
....................................5-54
Windshield Replacement
...........................5-61
Windshield Wiper Blade Replacement
.........5-61
Tires
......................................................5-62
Appearance Care
...................................5-109
Vehicle Identi�cation
...............................5-119
Electrical System
....................................5-120
Capacities and Speci�cations
...................5-128
Maintenance Schedule..................................... 6-1
Maintenance Schedule
................................ 6-2
Customer Assistance Information.................... 7-1
Customer Assistance and Information
........... 7-2
Reporting Safety Defects
...........................7-14
Vehicle Data Recording and Privacy
...........7-16
Index................................................................ 1
2008 Pontiac Grand Prix Owner ManualM
Page 167 of 450
If the Light is Flashing
The following can prevent more serious damage
to your vehicle:
Reduce vehicle speed.
Avoid hard accelerations.
Avoid steep uphill grades.
If you are towing a trailer, reduce the amount of
cargo being hauled as soon as it is possible.
If the light stops �ashing and remains on steady, see
“If the Light Is On Steady” following.
If the light continues to �ash, when it is safe to do so,
stop the vehicle. Find a safe place to park the vehicle.
Turn the ignition off, wait at least 10 seconds, and restart
the engine. If the light remains on steady, see “If the
Light Is On Steady” following. If the light is still �ashing,
follow the previous steps and see your dealer/retailer
for service as soon as possible.
If the Light Is On Steady
You might be able to correct the emission system
malfunction by considering the following:
Did you recently put fuel into your vehicle?
If so, reinstall the fuel cap, making sure to fully install
the cap. SeeFilling the Tank on page 5-8. The
diagnostic system can determine if the fuel cap has
been left off or improperly installed. A loose or missing
fuel cap allows fuel to evaporate into the atmosphere.
A few driving trips with the cap properly installed should
turn the light off.
Did you just drive through a deep puddle of water?
If so, your vehicle’s electrical system might be wet. The
condition is usually corrected when the electrical system
dries out. A few driving trips should turn the light off.
Have you recently changed brands of fuel?
If so, be sure to fuel your vehicle with quality fuel. See
Gasoline Octane on page 5-5. Poor fuel quality causes
the engine not to run as efficiently as designed. You
might notice this as stalling after start-up, stalling when
you put the vehicle into gear, mis�ring, hesitation on
acceleration, or stumbling on acceleration — these
conditions might go away once the engine is warmed up.
This will be detected by the system and cause the light
to turn on.
3-51
Page 170 of 450

Highbeam On Light
This light comes on when
the high-beam headlamps
are in use.
SeeHeadlamp High/Low-Beam Changer on page 3-9
for more information.
Fuel Gage
The fuel gage shows
about how much fuel is
left in the fuel tank
when the ignition is on.
When the indicator nears empty, there is still a little fuel
left, but you should get more soon.
Here are four things owners usually ask about the fuel
gage. All these situations are normal and do not
indicate a problem with the fuel gage:
At the gas station the pump shuts off before the
gage reads full.
It takes more or less fuel to �ll up than the gage
indicates. For example, the gage reads half full,
but it took more or less than half the tank’s capacity
to �ll it.
The gage pointer may move while cornering,
braking or speeding up.
The gage may not indicate full when the ignition is
turned off.
3-54
Page 186 of 450
CHECK GAS CAP
This message displays when the fuel cap is not on,
or is not fully tightened. Check the fuel cap to ensure it is
on and properly tightened. The diagnostic system can
determine if the fuel cap has been left off or improperly
installed. A loose or missing fuel cap allows fuel to
evaporate into the atmosphere. A few driving trips with
the cap properly installed should turn this message off.
SeeFilling the Tank on page 5-8for more information.
This message displays while the ignition is in ON/RUN.
A chime sounds for two seconds when this message
is displayed and then the message continues to display.
Press the set/reset button to acknowledge this
message and to clear it from the screen.
This message continues to display for three seconds
if it has not been acknowledged when the engine
is turned off. It also re-displays for three seconds if the
message has been acknowledged, but the condition
still exists when the engine is turned off.
If the condition still exists, the message re-appears
when the engine is turned on.
CHECK TIRE PRESSURE
This message displays when the pressure in one or
more of the vehicle’s tires needs to be checked. This
message also displays LEFT FRONT, RIGHT FRONT,LEFT REAR, or RIGHT REAR to indicate which tire
needs to be checked. You can receive more than one tire
pressure message at a time. To read the other messages
that may have been sent at the same time, press the
set/reset button. If a tire pressure message appears on
the DIC, stop as soon as you can. Have the tire pressures
checked and set to those shown on the Tire Loading
Information label. SeeTires on page 5-62,Loading Your
Vehicle on page 4-22, andInflation - Tire Pressure on
page 5-69. The DIC also shows the tire pressure values.
SeeDIC Operation and Displays (Uplevel DIC with Trip
Computer) on page 3-55orDIC Operation and Displays
(Base Level DIC) on page 3-62. If the tire pressure is low,
the low tire pressure warning light comes on. SeeTire
Pressure Light on page 3-49.
This message displays while the ignition is in ON/RUN.
Press the set/reset button to acknowledge this
message and to clear it from the screen.
This message continues to display for three seconds
if it has not been acknowledged when the engine
is turned off. It also re-displays for three seconds if the
message has been acknowledged, but the condition
still exists when the engine is turned off.
If the condition still exists, the message re-appears
when the engine is turned on.
3-70
Page 260 of 450
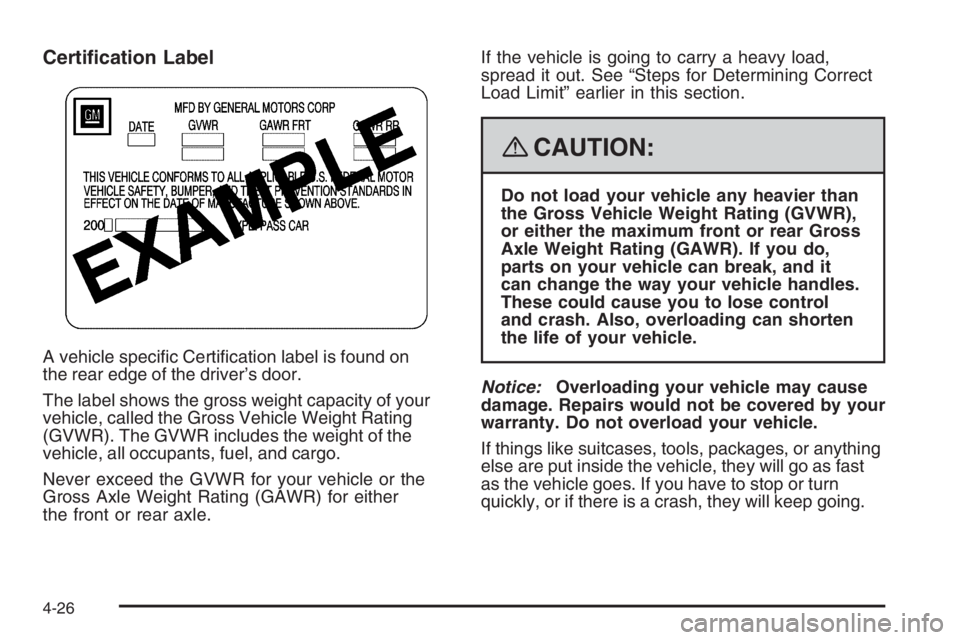
Certi�cation Label
A vehicle speci�c Certi�cation label is found on
the rear edge of the driver’s door.
The label shows the gross weight capacity of your
vehicle, called the Gross Vehicle Weight Rating
(GVWR). The GVWR includes the weight of the
vehicle, all occupants, fuel, and cargo.
Never exceed the GVWR for your vehicle or the
Gross Axle Weight Rating (GAWR) for either
the front or rear axle.If the vehicle is going to carry a heavy load,
spread it out. See “Steps for Determining Correct
Load Limit” earlier in this section.
{CAUTION:
Do not load your vehicle any heavier than
the Gross Vehicle Weight Rating (GVWR),
or either the maximum front or rear Gross
Axle Weight Rating (GAWR). If you do,
parts on your vehicle can break, and it
can change the way your vehicle handles.
These could cause you to lose control
and crash. Also, overloading can shorten
the life of your vehicle.
Notice:Overloading your vehicle may cause
damage. Repairs would not be covered by your
warranty. Do not overload your vehicle.
If things like suitcases, tools, packages, or anything
else are put inside the vehicle, they will go as fast
as the vehicle goes. If you have to stop or turn
quickly, or if there is a crash, they will keep going.
4-26
Page 263 of 450
Towing a Trailer
{CAUTION:
If you do not use the correct equipment and
drive properly, you can lose control when you
pull a trailer. For example, if the trailer is too
heavy, the brakes may not work well — or
even at all. You and your passengers could
be seriously injured. You may also damage
your vehicle; the resulting repairs would
not be covered by your warranty. Pull a trailer
only if you have followed all the steps in this
section. Ask your dealer/retailer for advice
and information about towing a trailer with
your vehicle.The vehicle can tow a trailer if it is equipped with the
proper trailer towing equipment. To identify the trailering
capacity of the vehicle, read the information in “Weight of
the Trailer” that appears later in this section. Trailering is
different than just driving the vehicle by itself. Trailering
means changes in handling, durability, and fuel economy.
Successful, safe trailering takes correct equipment, and it
has to be used properly.
That is the reason for this part. In it are many
time-tested, important trailering tips and safety rules.
Many of these are important for your safety and that of
your passengers. So please read this section carefully
before pulling a trailer.
Load-pulling components such as the engine,
transmission, wheel assemblies, and tires are forced
to work harder against the drag of the added weight.
The engine is required to operate at relatively higher
speeds and under greater loads, generating extra heat.
The trailer also adds considerably to wind resistance,
increasing the pulling requirements.
4-29
Page 271 of 450

Service............................................................5-3
Accessories and Modi�cations..........................5-3
California Proposition 65 Warning.....................5-3
California Perchlorate Materials Requirements.....5-4
Doing Your Own Service Work.........................5-4
Adding Equipment to the Outside of Your
Vehicle......................................................5-5
Fuel................................................................5-5
Gasoline Octane............................................5-5
Gasoline Speci�cations....................................5-6
California Fuel...............................................5-6
Additives.......................................................5-6
Fuels in Foreign Countries...............................5-7
Filling the Tank..............................................5-8
Filling a Portable Fuel Container.....................5-10
Checking Things Under the Hood....................5-10
Hood Release..............................................5-11
Engine Compartment Overview.......................5-12
Engine Oil...................................................5-15
Engine Oil Life System..................................5-18
Engine Air Cleaner/Filter................................5-20
Automatic Transmission Fluid.........................5-22
Engine Coolant.............................................5-24
Pressure Cap...............................................5-27
Engine Overheating.......................................5-27Overheated Engine Protection
Operating Mode........................................5-29
Cooling System............................................5-30
Power Steering Fluid.....................................5-39
Windshield Washer Fluid................................5-40
Brakes........................................................5-41
Battery........................................................5-45
Jump Starting...............................................5-46
Headlamp Aiming...........................................5-51
Bulb Replacement..........................................5-54
Halogen Bulbs..............................................5-54
Headlamps and Sidemarker Lamps.................5-54
Front Turn Signal, Parking and Fog Lamps......5-57
Taillamps, Turn Signal, and Stoplamps............5-58
Back-Up Lamps............................................5-59
License Plate Lamp......................................5-60
Replacement Bulbs.......................................5-60
Windshield Replacement.................................5-61
Windshield Wiper Blade Replacement..............5-61
Tires..............................................................5-62
Tire Sidewall Labeling...................................5-63
Tire Terminology and De�nitions.....................5-66
In�ation - Tire Pressure.................................5-69
Tire Pressure Monitor System.........................5-71
Section 5 Service and Appearance Care
5-1
Page 278 of 450
Filling the Tank
{CAUTION:
Fuel vapor burns violently and a fuel �re can
cause bad injuries. To help avoid injuries to
you and others, read and follow all the
instructions on the pump island. Turn off your
engine when you are refueling. Do not smoke
if you are near fuel or refueling your vehicle.
Do not use cellular phones. Keep sparks,
�ames, and smoking materials away from fuel.
Do not leave the fuel pump unattended when
refueling your vehicle. This is against the law in
some places. Do not re-enter the vehicle while
pumping fuel. Keep children away from the fuel
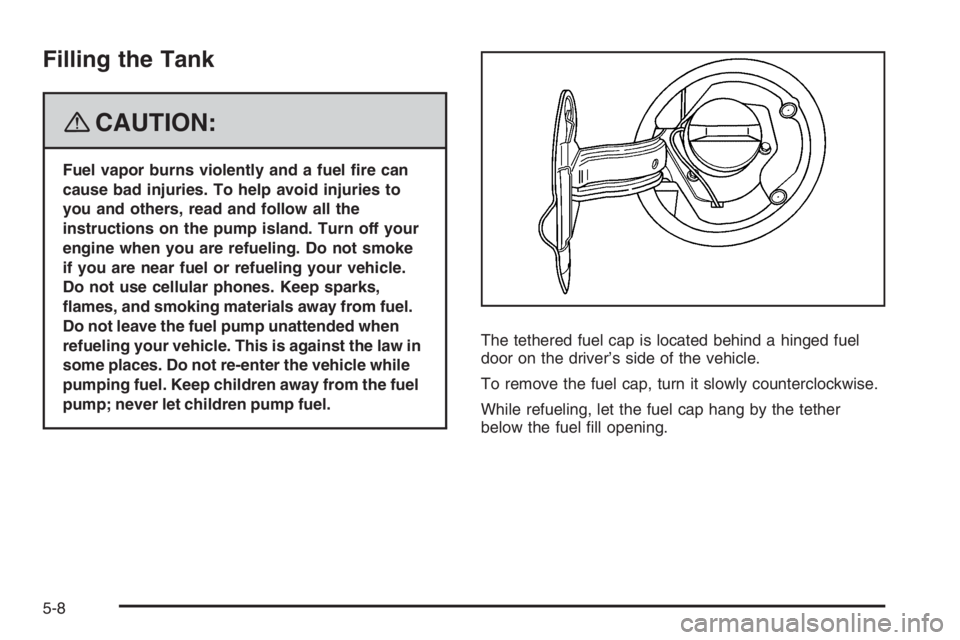
pump; never let children pump fuel.The tethered fuel cap is located behind a hinged fuel
door on the driver’s side of the vehicle.
To remove the fuel cap, turn it slowly counterclockwise.
While refueling, let the fuel cap hang by the tether
below the fuel �ll opening.
5-8