Page 22 of 217
Black plate (25,1)
Model "NAV2-N" EDITED: 2007/ 3/ 9
3. A confirmation message is displayed. High-
light [Yes] and push.
INFO:
If a route is cancelled, [Cancel Route] changes
to [Resume Route].
Highlight [Resume Route] and push
to reactivate the cancelled route.
This is available only until a new route is set.
HOW TO VIEW MAP SCREEN
The navigation system displays various informa-
tion on the map screen.
Screen information
&1Vehicle icon:
Indicates the current vehicle location and
the direction that you are traveling.
&2Starting point:
Displays the vehicle location, with which the
route is set, as the starting point.
&3Guide point:
Indicates a guide point on the route.
OPERATING MAPS
Getting started2-17
Page 27 of 217
![NISSAN XTERRA 2008 N50 / 2.G 06IT Navigation Manual Black plate (30,1)
Model "NAV2-N" EDITED: 2007/ 3/ 9
3. Push<BACK>, or highlight [Delete] and
push<ENTER>to delete the last number
entered.
Push and hold<BACK>to delete all the
numbers entered.
4. Aft NISSAN XTERRA 2008 N50 / 2.G 06IT Navigation Manual Black plate (30,1)
Model "NAV2-N" EDITED: 2007/ 3/ 9
3. Push<BACK>, or highlight [Delete] and
push<ENTER>to delete the last number
entered.
Push and hold<BACK>to delete all the
numbers entered.
4. Aft](/manual-img/5/795/w960_795-26.png)
Black plate (30,1)
Model "NAV2-N" EDITED: 2007/ 3/ 9
3. Push, or highlight [Delete] and
pushto delete the last number
entered.
Push and holdto delete all the
numbers entered.
4. After finishing the entry, highlight [Map] and
push.
INFO:
.You can pushon the control
panel to return to the previous screen, but
only after deleting all the numbers entered.
.When you touch [BACK] on the screen, the
screen returns to the previous screen even
when numbers have been entered.NISSAN Voice Recognition allows hands-free
operation of the navigation system and other
systems equipped on this vehicle, such as the
display, audio, climate control and phone.
INFO:
For the voice commands for the audio, air
conditioner and other systems (except naviga-
tion system) , refer to the vehicle Owner’s
Manual.
CONFIRMING VOICE COMMANDS
If you are controlling the system by voice
commands for the first time or do not know the
appropriate voice command, confirm the voice
command lists.
The following information describes how to
display the navigation command list and the
help list. For information about the operations of
other functions, refer to the vehicle Owner’s
Manual.
NISSAN VOICE RECOGNITION
2-22Getting started
Page 28 of 217
![NISSAN XTERRA 2008 N50 / 2.G 06IT Navigation Manual Black plate (31,1)
Model "NAV2-N" EDITED: 2007/ 3/ 9
Example: Displaying the navigation command list
1. Push<INFO>.
2. Highlight [Others] and push<ENTER>.
3. Highlight [Voice Recognition] and push
<EN NISSAN XTERRA 2008 N50 / 2.G 06IT Navigation Manual Black plate (31,1)
Model "NAV2-N" EDITED: 2007/ 3/ 9
Example: Displaying the navigation command list
1. Push<INFO>.
2. Highlight [Others] and push<ENTER>.
3. Highlight [Voice Recognition] and push
<EN](/manual-img/5/795/w960_795-27.png)
Black plate (31,1)
Model "NAV2-N" EDITED: 2007/ 3/ 9
Example: Displaying the navigation command list
1. Push.
2. Highlight [Others] and push.
3. Highlight [Voice Recognition] and push
.
4. Highlight [Command List] and push
.
5. Highlight [Navigation] and push.
6. Highlight the preferred item and push
.
Available items:
.Destination:
Allows you to set a destination.
.Search:
Allows you to search for a location.
.Map:
Allows you to change the map settings.
.Route:
Allows you to set a route in detail.
.Others:
Allows you to store locations or set the
route guidance.
7. You can confirm the list by scrolling the
screen using the up and down switches of
the main directional buttons or the center
dial.
8. Pressto return to the previous
screen.
For further details about the displayed command
list, refer to section 9.
“Command List” (page 9-3)
BEFORE STARTING
To get the best recognition performance out of
NISSAN Voice Recognition, observe the follow-
ing:
.The interior of the vehicle should be as quiet
as possible. Close the windows to eliminate
the surrounding noises (traffic noise and
vibration sounds, etc.) , which may prevent
the system from correctly recognizing the
voice commands.
Getting started2-23
Page 55 of 217
Black plate (58,1)
Model "NAV2-N" EDITED: 2007/ 3/ 9
MAP SYMBOLS
This navigation system uses symbols to display facilities.
3-22Map settings
Page 62 of 217

Black plate (65,1)
Model "NAV2-N" EDITED: 2007/ 3/ 9
the list screen. If this occurs, enter more
characters to further reduce the number of
matches.
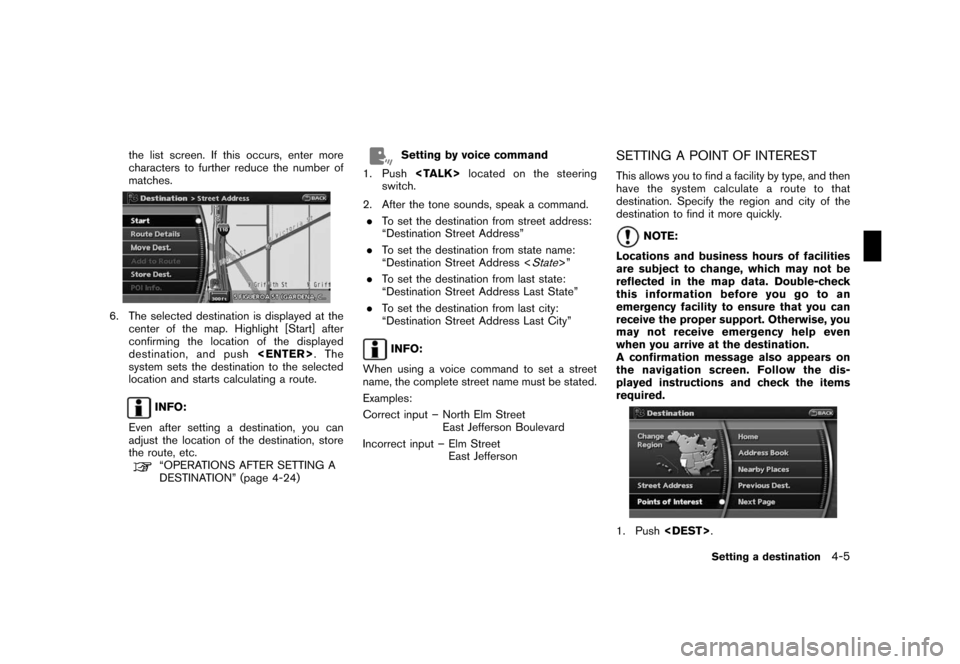
6. The selected destination is displayed at the
center of the map. Highlight [Start] after
confirming the location of the displayed
destination, and push.The
system sets the destination to the selected
location and starts calculating a route.
INFO:
Even after setting a destination, you can
adjust the location of the destination, store
the route, etc.
“OPERATIONS AFTER SETTING A
DESTINATION” (page 4-24)
Setting by voice command
1. Pushlocated on the steering
switch.
2. After the tone sounds, speak a command.
.To set the destination from street address:
“Destination Street Address”
.To set the destination from state name:
“Destination Street Address <
State>”
.To set the destination from last state:
“Destination Street Address Last State”
.To set the destination from last city:
“Destination Street Address Last City”
INFO:
When using a voice command to set a street
name, the complete street name must be stated.
Examples:
Correct input – North Elm Street
East Jefferson Boulevard
Incorrect input – Elm Street
East Jefferson
SETTING A POINT OF INTEREST
This allows you to find a facility by type, and then
have the system calculate a route to that
destination. Specify the region and city of the
destination to find it more quickly.
NOTE:
Locations and business hours of facilities
are subject to change, which may not be
reflected in the map data. Double-check
this information before you go to an
emergency facility to ensure that you can
receive the proper support. Otherwise, you
may not receive emergency help even
when you arrive at the destination.
A confirmation message also appears on
the navigation screen. Follow the dis-
played instructions and check the items
required.
1. Push.
Setting a destination4-5
Page 108 of 217
![NISSAN XTERRA 2008 N50 / 2.G 06IT Navigation Manual Black plate (111,1)
Model "NAV2-N" EDITED: 2007/ 3/ 9
After setting the route, select [Start] to begin
route guidance.
Throughout route guidance, the system navi-
gates you through the guide points us NISSAN XTERRA 2008 N50 / 2.G 06IT Navigation Manual Black plate (111,1)
Model "NAV2-N" EDITED: 2007/ 3/ 9
After setting the route, select [Start] to begin
route guidance.
Throughout route guidance, the system navi-
gates you through the guide points us](/manual-img/5/795/w960_795-107.png)
Black plate (111,1)
Model "NAV2-N" EDITED: 2007/ 3/ 9
After setting the route, select [Start] to begin
route guidance.
Throughout route guidance, the system navi-
gates you through the guide points using visual
and voice guidance.
CAUTION
.The navigation system’s visual and
voice guidance is for reference
purposes only. The contents of the
guidance may be inappropriate de-
pending on the situation.
.When driving along the suggested
route, follow all traffic regulations
(e.g., one-way traffic) .
“ROUTE GUIDANCE” (page 10-9)
VOICE GUIDANCE DURING ROUTE
GUIDANCE
When approaching a guide point (intersection or
corner) , destination, etc. during route guidance,
voice guidance announces the remaining dis-
tance and/or turning direction. Push
to repeat voice guidance.
Example of voice guidance
&1“In about one quarter mile (400 meters) ,
right (left) turn.”
“Right (left) turn ahead.”
&2“In about one quarter mile (400 meters)
freeway entrance on your right onto (road
number and direction) .”
“Freeway entrance on your right onto (road
number and direction) .”
&3“In about one mile (1.6 kilometers) , exit on
your right.”
“Take the second exit on your right.”
&4“You have arrived at your destination. Ending
route guidance.”
ABOUT ROUTE GUIDANCE
Route guidance5-23
Page 118 of 217
![NISSAN XTERRA 2008 N50 / 2.G 06IT Navigation Manual Black plate (121,1)
Model "NAV2-N" EDITED: 2007/ 3/ 9
OTHER SETTINGS
You can also store a tracked route using the
following procedure.
1. Push<SETTING>.
2. Highlight [Navigation] and push<ENTER>.
3. H NISSAN XTERRA 2008 N50 / 2.G 06IT Navigation Manual Black plate (121,1)
Model "NAV2-N" EDITED: 2007/ 3/ 9
OTHER SETTINGS
You can also store a tracked route using the
following procedure.
1. Push<SETTING>.
2. Highlight [Navigation] and push<ENTER>.
3. H](/manual-img/5/795/w960_795-117.png)
Black plate (121,1)
Model "NAV2-N" EDITED: 2007/ 3/ 9
OTHER SETTINGS
You can also store a tracked route using the
following procedure.
1. Push.
2. Highlight [Navigation] and push.
3. Highlight [Address Book] and push
.
4. Highlight [Stored Tracking] and push
.
5. Highlight [None (Add New)] and push
.
INFO:
You can store the tracked route on the setting
screen only when [Current Tracking] is set to on.An Avoid Area can be stored.
The Avoid Area is an area that you want to
exclude from a route, such as a road that is
always congested. Once you store Avoid Areas,
the system avoids those areas when calculating
a route. Up to 10 Avoid Areas can be stored.
1. Push.
2. Highlight [Navigation] and push.
3. Highlight [Avoid Area Settings] and push
.
INFO:
You can also access and store an Avoid
Area from the Address Book.
4. Highlight [None (Add New)] and push
.
INFO:
A maximum of 10 Avoid Areas can be
stored.
“DELETING A STORED ITEM”
(page 6-21)
STORING AN AVOID AREA
Storing a location/route6-7
Page 120 of 217

Black plate (123,1)
Model "NAV2-N" EDITED: 2007/ 3/ 9
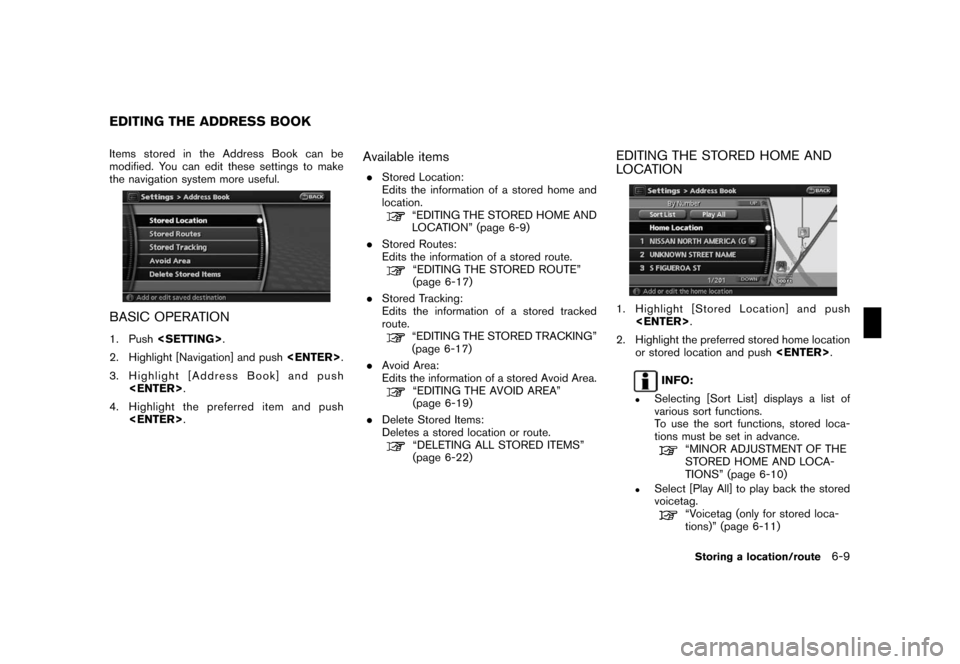
Items stored in the Address Book can be
modified. You can edit these settings to make
the navigation system more useful.
BASIC OPERATION
1. Push.
2. Highlight [Navigation] and push.
3. Highlight [Address Book] and push
.
4. Highlight the preferred item and push
.
Available items
.Stored Location:
Edits the information of a stored home and
location.
“EDITING THE STORED HOME AND
LOCATION” (page 6-9)
.Stored Routes:
Edits the information of a stored route.
“EDITING THE STORED ROUTE”
(page 6-17)
.Stored Tracking:
Edits the information of a stored tracked
route.
“EDITING THE STORED TRACKING”
(page 6-17)
.Avoid Area:
Edits the information of a stored Avoid Area.
“EDITING THE AVOID AREA”
(page 6-19)
.Delete Stored Items:
Deletes a stored location or route.
“DELETING ALL STORED ITEMS”
(page 6-22)
EDITING THE STORED HOME AND
LOCATION
1. Highlight [Stored Location] and push
.
2. Highlight the preferred stored home location
or stored location and push.
INFO:
.Selecting [Sort List] displays a list of
various sort functions.
To use the sort functions, stored loca-
tions must be set in advance.
“MINOR ADJUSTMENT OF THE
STORED HOME AND LOCA-
TIONS” (page 6-10)
.Select [Play All] to play back the stored
voicetag.
“Voicetag (only for stored loca-
tions)” (page 6-11)
EDITING THE ADDRESS BOOK
Storing a location/route6-9