Page 115 of 217
Black plate (118,1)
Model "NAV2-N" EDITED: 2007/ 3/ 9
INFO:
The location is stored in the first available
position number in the Address Book list.
Setting by voice command
1. Pushlocated on the steering
switch.
2. After the tone sounds, speak a command.
To store a current location:
“Store Location”
STORING A LOCATION BY MOVING
THE MAP
1. Move to the preferred location on the map
and push.
2. Highlight [Store Location] and push
. A message is displayed, and
the location is stored in the Address Book.
3. Push
Page 116 of 217
Black plate (119,1)
Model "NAV2-N" EDITED: 2007/ 3/ 9
A calculated route can be stored.
A maximum of 5 routes can be stored.
Stored routes can be easily retrieved and set as
the suggested route.
INFO:
Stored route includes only locations (destination
and waypoints) and route calculation conditions,
not the route itself.
1. Push.
2. Highlight [Route Information] and push
.
3. Highlight [Store Route] and push
.
4. A confirmation message is displayed. Con-
firm the contents of the message, highlight
[Yes] and push.
The current route is stored.
OTHER SETTINGS
You can also store a route using the following
procedure.
1) Push.
2) Highlight [Navigation] and push.
3) Highlight [Address Book] and push
.
4) Highlight [Stored Routes] and push
.
5) Highlight [None (Add New)] and push
.
6) A confirmation message is displayed. Con-
firm the contents of the message, highlight
[Yes] and push.
The current route is stored.
STORING A ROUTE
Storing a location/route6-5
Page 117 of 217

Black plate (120,1)
Model "NAV2-N" EDITED: 2007/ 3/ 9
INFO:
.The route is stored in the first available
position number in the store current route
list.
.A maximum of 5 routes can be stored. When
5 routes are stored in the Address Book, a
new route cannot be stored until a route is
deleted.
“DELETING A STORED ITEM”
(page 6-21)
.If you have not set any waypoints on the
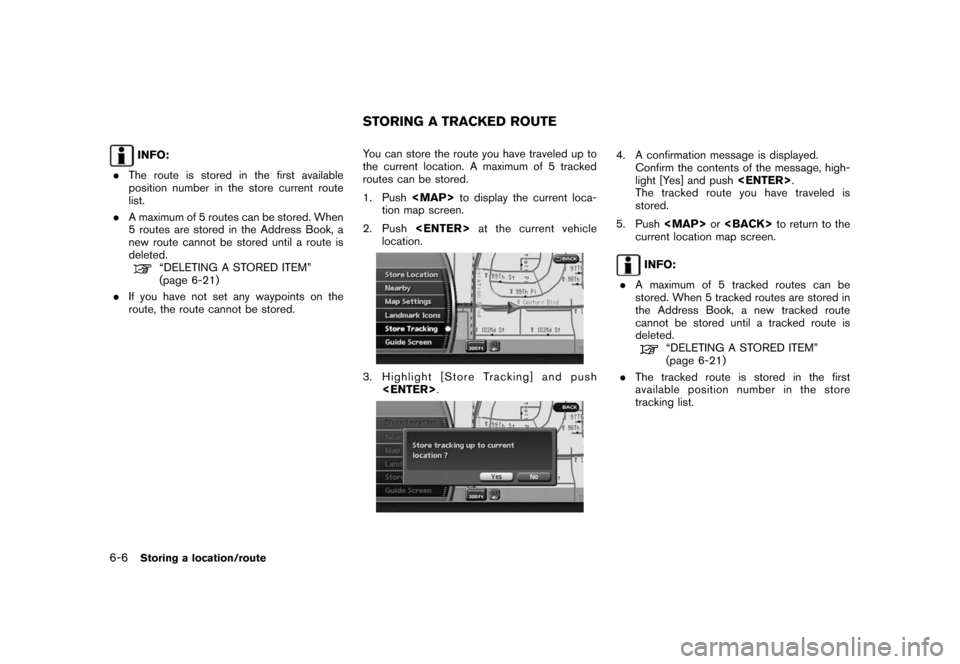
route, the route cannot be stored.You can store the route you have traveled up to
the current location. A maximum of 5 tracked
routes can be stored.
1. Push
Page 118 of 217
![NISSAN XTERRA 2008 N50 / 2.G 06IT Navigation Manual Black plate (121,1)
Model "NAV2-N" EDITED: 2007/ 3/ 9
OTHER SETTINGS
You can also store a tracked route using the
following procedure.
1. Push<SETTING>.
2. Highlight [Navigation] and push<ENTER>.
3. H NISSAN XTERRA 2008 N50 / 2.G 06IT Navigation Manual Black plate (121,1)
Model "NAV2-N" EDITED: 2007/ 3/ 9
OTHER SETTINGS
You can also store a tracked route using the
following procedure.
1. Push<SETTING>.
2. Highlight [Navigation] and push<ENTER>.
3. H](/manual-img/5/795/w960_795-117.png)
Black plate (121,1)
Model "NAV2-N" EDITED: 2007/ 3/ 9
OTHER SETTINGS
You can also store a tracked route using the
following procedure.
1. Push.
2. Highlight [Navigation] and push.
3. Highlight [Address Book] and push
.
4. Highlight [Stored Tracking] and push
.
5. Highlight [None (Add New)] and push
.
INFO:
You can store the tracked route on the setting
screen only when [Current Tracking] is set to on.An Avoid Area can be stored.
The Avoid Area is an area that you want to
exclude from a route, such as a road that is
always congested. Once you store Avoid Areas,
the system avoids those areas when calculating
a route. Up to 10 Avoid Areas can be stored.
1. Push.
2. Highlight [Navigation] and push.
3. Highlight [Avoid Area Settings] and push
.
INFO:
You can also access and store an Avoid
Area from the Address Book.
4. Highlight [None (Add New)] and push
.
INFO:
A maximum of 10 Avoid Areas can be
stored.
“DELETING A STORED ITEM”
(page 6-21)
STORING AN AVOID AREA
Storing a location/route6-7
Page 119 of 217
Black plate (122,1)
Model "NAV2-N" EDITED: 2007/ 3/ 9
5. Highlight the appropriate method to search
for a location and push.
“4. Setting a destination”
6. Set the following items for the searched
location.Available setting items
.Rename:
Changes the name.
“Rename” (page 6-19)
.Move Location:
Adjusts the location of the Avoid Area.
“Move Location” (page 6-19)
.Resize Area:
Adjusts the range of the Avoid Area.
“Resize Area” (page 6-20)
.FWY:
Avoids freeways.
“FWY” (page 6-20)
.Delete:
Deletes the avoid area.
“Delete” (page 6-20)
7. After finishing the setting, highlight [OK] and
push.
OTHER SETTINGS
You can also store an avoid area using the
following procedure.
1. Push.
2. Highlight [Navigation] and push.
3. Highlight [Address Book] and push
.
4. Highlight [Avoid Area] and push.
5. Highlight [None (Add New)] and push
.
6-8Storing a location/route
Page 120 of 217

Black plate (123,1)
Model "NAV2-N" EDITED: 2007/ 3/ 9
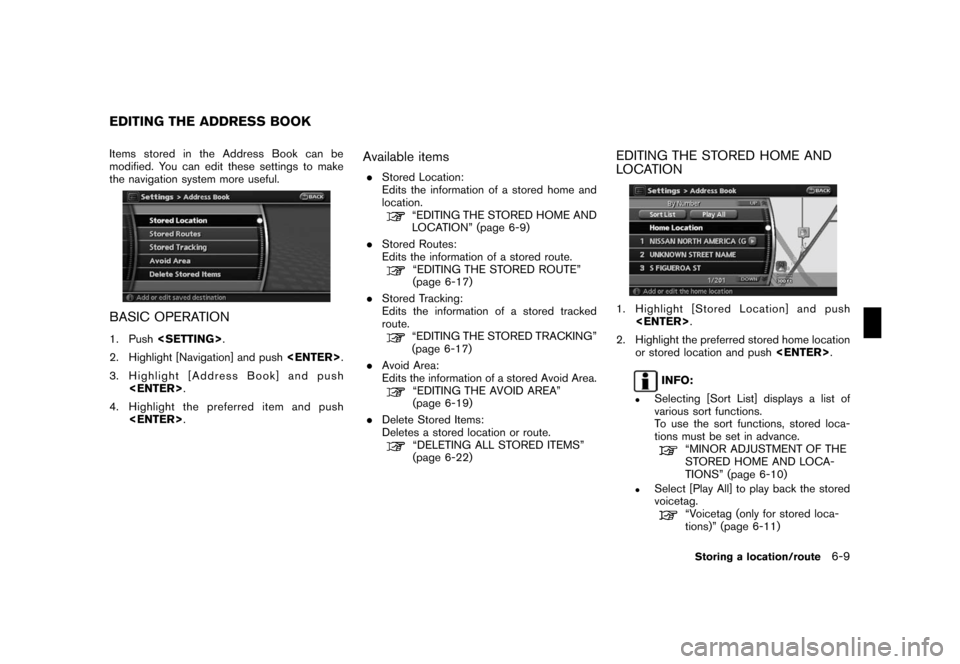
Items stored in the Address Book can be
modified. You can edit these settings to make
the navigation system more useful.
BASIC OPERATION
1. Push.
2. Highlight [Navigation] and push.
3. Highlight [Address Book] and push
.
4. Highlight the preferred item and push
.
Available items
.Stored Location:
Edits the information of a stored home and
location.
“EDITING THE STORED HOME AND
LOCATION” (page 6-9)
.Stored Routes:
Edits the information of a stored route.
“EDITING THE STORED ROUTE”
(page 6-17)
.Stored Tracking:
Edits the information of a stored tracked
route.
“EDITING THE STORED TRACKING”
(page 6-17)
.Avoid Area:
Edits the information of a stored Avoid Area.
“EDITING THE AVOID AREA”
(page 6-19)
.Delete Stored Items:
Deletes a stored location or route.
“DELETING ALL STORED ITEMS”
(page 6-22)
EDITING THE STORED HOME AND
LOCATION
1. Highlight [Stored Location] and push
.
2. Highlight the preferred stored home location
or stored location and push.
INFO:
.Selecting [Sort List] displays a list of
various sort functions.
To use the sort functions, stored loca-
tions must be set in advance.
“MINOR ADJUSTMENT OF THE
STORED HOME AND LOCA-
TIONS” (page 6-10)
.Select [Play All] to play back the stored
voicetag.
“Voicetag (only for stored loca-
tions)” (page 6-11)
EDITING THE ADDRESS BOOK
Storing a location/route6-9
Page 121 of 217

Black plate (124,1)
Model "NAV2-N" EDITED: 2007/ 3/ 9
3. Highlight the preferred item and push
.
Available setting items
.Edit:
Edits the stored location information.
.Move Location:
Adjusts the location of the stored location.
.Delete:
Deletes the stored location.
.OK:
Applies the settings.
MINOR ADJUSTMENT OF THE
STORED HOME AND LOCATIONS
When you select [Edit], you can edit the
following items of the home or stored location.
.Show Icon on Map
.Name (only for stored locations)
.Voicetag (only for stored locations)
.Icon
.Sound
.Direction
.Distance
.Phone No.
.Group (only for stored locations)
.Entry Number (only for stored locations)
Show Icon on Map
Displays the home icon or the stored location
icon on the map.
1. Highlight [Edit] and push.
2. Highlight [Show Icon on Map] and push
.
3. The indicator illuminates when the item is
set. Then the system displays the icon on
the map.
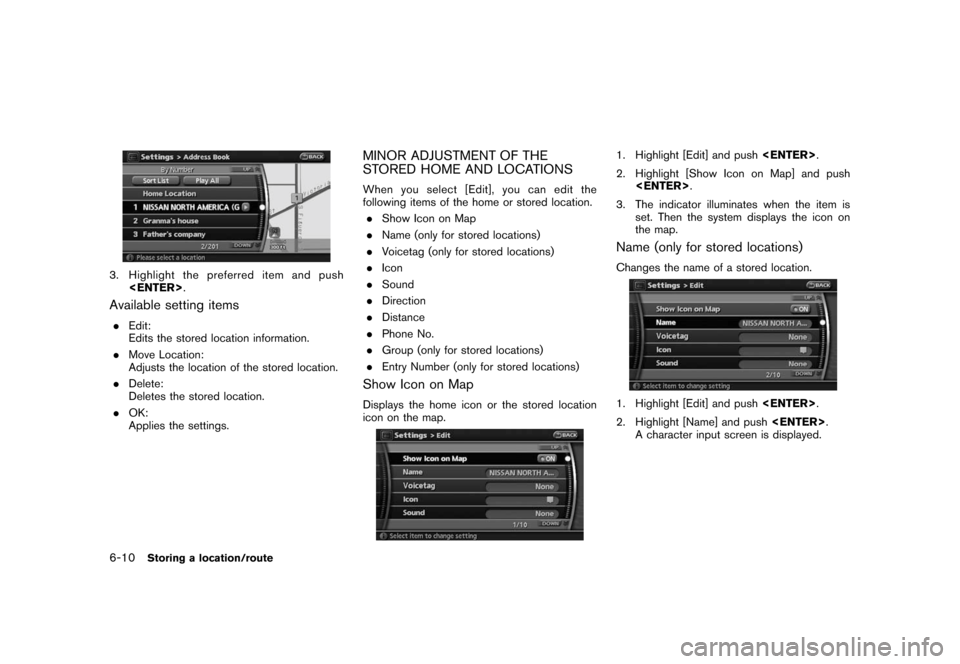
Name (only for stored locations)
Changes the name of a stored location.
1. Highlight [Edit] and push.
2. Highlight [Name] and push.
A character input screen is displayed.
6-10Storing a location/route
Page 122 of 217
![NISSAN XTERRA 2008 N50 / 2.G 06IT Navigation Manual Black plate (125,1)
Model "NAV2-N" EDITED: 2007/ 3/ 9
3. Enter the preferred name for the stored
location.
“CHARACTER (letter and number)
INPUT SCREEN” (page 2-20)
4. Highlight [OK] and push<ENTER NISSAN XTERRA 2008 N50 / 2.G 06IT Navigation Manual Black plate (125,1)
Model "NAV2-N" EDITED: 2007/ 3/ 9
3. Enter the preferred name for the stored
location.
“CHARACTER (letter and number)
INPUT SCREEN” (page 2-20)
4. Highlight [OK] and push<ENTER](/manual-img/5/795/w960_795-121.png)
Black plate (125,1)
Model "NAV2-N" EDITED: 2007/ 3/ 9
3. Enter the preferred name for the stored
location.
“CHARACTER (letter and number)
INPUT SCREEN” (page 2-20)
4. Highlight [OK] and push.
The name is stored.
Voicetag (only for stored locations)
Stores a voicetag to be used for voice com-
mands. By storing voicetags, you can set a
destination by voice command more easily.
1. Highlight [Edit] and push.
2. Highlight [Voice Tag] and push.
3. Highlight [Store] and push.
4. A tone sounds, and the system enters the
voice command reception mode.
5. Speak the name to be used as the voicetag.
6. If the system recognizes it, the voicetag is
stored.
INFO:
.The Address Book can store up to 200
voicetags.
.Select [Play] to play back the stored
voicetag.
.Select [Delete] to delete a stored voicetag.
.If the voicetag is already set, [Restore] is
displayed instead of [Store]. To restore the
voicetag, highlight [Restore] and push
.
.Voicetags are specific to each user. For
example, the system will not be able to
recognize the wife’s voice if the voicetag is
recorded in the husband’s voice.
Storing a location/route6-11