2008 NISSAN QUEST ECO mode
[x] Cancel search: ECO modePage 248 of 376

“Change priority”sD
Use the Change Priority command to change the
priority level of the active phone.
The priority level determines which phone is ac-
tive when more than one paired BluetoothT
phone is in the vehicle.
The system states the priority level of the active
phone and asks for a new priority level (1, 2, 3, 4,
5) .
If the new priority level is already being used for
another phone, the two phones will swap priority
levels.
For example, if the current priority levels are:
Priority Level 1 = Phone A
Priority Level 2 = Phone B
Priority Level 3 = Phone C
and you change the priority level of Phone C to
Level 1, then:
Priority Level 1 = Phone C
Priority Level 2 = Phone B
Priority Level 3 = Phone A
“Delete phone”
sE
Use the Delete Phone command to delete a
specific phone or all phones from the BluetoothT
Hands-Free Phone System.The system announces the names of the phones
already paired with the system and their priority
level. The system then gives you the option to
delete a specific phone, all phones or listen to the
list again.
Once you choose to delete a phone or all phones,
the system asks you to confirm this action.
NOTE:
When you delete a phone, the associated
phone book for that phone will also be
deleted.
“Select ringtone”
sF
Use the Select Ringtone command to select the
tone heard in the vehicle when an incoming call is
received.
The system announces the name of the active
phone and asks you to choose from the following
commands:
c“Ringtone” — The system plays a ringtone
and asks if you would like to select that tone.
If you say “No”, the system plays the next
ringtone available and continues to cycle
through the ringtones until you select one or
quit.
c“Silent” — The system asks you to confirm
your wish to disable the ringtone.“Bluetooth off”
sG
Use the Bluetooth Off command to turn off the
BluetoothTHands-Free Phone System.
When the BluetoothTHands-Free Phone Sys-
tem is off, you will not be able to make or receive
calls using NISSAN Voice Recognition. Also, you
will not have access to the Phone Book.
You can still use the Memo Pad and access
Setup.
SPEAKER ADAPTATION (SA) MODE
Speaker Adaptation allows up to two out-of-
dialect users to train the system to improve rec-
ognition accuracy. By repeating a number of
commands, the users can create a voice model of
their own voice that is stored in the system. The
system is capable of storing a different speaker
adaptation model for memory A and memory B.
If memory A is available, the system will use
memory A to store the model. If memory A is in
use and memory B is available, the system will
use memory B to store the model. If both of the
memory locations are in use, the system will ask
the user to select which memory location should
be overwritten.
4-86Display screen, heater, air conditioner, audio and phone systems
ZREVIEW COPYÐ2008 Quest(van)
Owners ManualÐUSA_English(nna)
06/29/07Ðdebbie
X
Page 249 of 376

Training procedure
The procedure for training a voice is as follows.
1. Position the vehicle in a reasonably quiet
outdoor location.
2. Sit in the driver’s seat with the engine run-
ning, the parking brake on, and the transmis-
sion in P (Park) .
3. Press and hold the
button for more
than 5 seconds.
4. The system announces: “Press the
PHONE/SEND (
) button for the
hands-free phone system to enter the
speaker adaptation mode or press the
PHONE/END (
) button to select a dif-
ferent language.”
5. Press the
button.
For information on selecting a different lan-
guage, see “Choosing a language” earlier in
this section.
6. Voice memory A or memory B is selected
automatically. If both memory locations are
already in use, the system will prompt you to
overwrite one. Follow the instructions pro-
vided by the system.
7. When preparation is complete and you are
ready to begin, the press the
button.8. The SA mode will be explained. Follow the
instructions provided by the system.
9. When training is finished, the system will tell
you an adequate number of phrases have
been recorded.
10. The system will ask you to say your name.
Follow the instructions to register your
name.
11. The system will announce that speaker ad-
aptation has been completed and the sys-
tem is ready.
The SA mode will stop if:
cThe
button is pressed for more than 5
seconds in SA mode.
cThe vehicle begins moving during SA mode.
cThe ignition switch is turned to the OFF or
LOCK position.
Training phrases
During the SA mode, the system instructs the
trainer to say the following phrases. (The system
will prompt you for each phrase.)
cphone book new entry
cdial three oh four two nine
cdelete call back numbercsetup pair phone
cmemo pad play
ceight pause nine three two pause seven
cdelete all entries
ccall seven two four zero nine
cphone book delete entry
cmemo pad record
cdial star two one seven oh
cYe s
cNo
cselect ring tone
cdial eight five six nine two
cBluetooth on
csetup change priority
ccall three one nine oh two
cnine seven pause pause three oh eight
cCancel
ccall back number
ccall star two zero nine five
cdelete phone
Display screen, heater, air conditioner, audio and phone systems4-87
ZREVIEW COPYÐ2008 Quest(van)
Owners ManualÐUSA_English(nna)
06/29/07Ðdebbie
X
Page 251 of 376

TROUBLESHOOTING GUIDE
The system should respond correctly to all voice
commands without difficulty. If problems are en-
countered, try the following solutions.
Where the solutions are listed by number, try
each solution in turn, starting with number 1, until
the problem is resolved.
Symptom Solution
System fails to interpret the command correctly.1. Ensure that the command is valid. See “List of voice commands” earlier in this section.
2. Ensure that the command is spoken after the tone.
3. Speak clearly without pausing between words and at a level appropriate to the ambient noise level in the vehicle.
4. Ensure that the ambient noise level is not excessive (for example, windows open or defroster on) . NOTE: If it is too
noisy to use the phone, it is likely that the voice commands will not be recognized.
5. If more than one command was said at a time, try saying the commands separately.
6. If the system consistently fails to recognize commands, the voice training procedure should be carried out to im-
prove the recognition response for the speaker. See “Speaker adaptation (SA) mode” earlier in this section.
The system consistently selects the wrong entry from the
phone book.1. Ensure that the phone book entry name requested matches what was originally stored. This can be confirmed by
using the “List Names” command. See “Phone book” earlier in this section.
2. Replace one of the names being confused with a new name.
Display screen, heater, air conditioner, audio and phone systems4-89
ZREVIEW COPYÐ2008 Quest(van)
Owners ManualÐUSA_English(nna)
06/29/07Ðdebbie
X
Page 260 of 376

1. Apply the parking brake.
2. Move the shift selector lever to P (Park) or N
(Neutral) . P (Park) is recommended.
The shift selector lever cannot be
moved out of P (Park) and into any of
the other gear positions if the ignition
key is turned to the OFF position or if
the key is removed from the ignition
switch.
The starter is designed not to operate if
the shift selector lever is in any of the
driving positions.
3. Crank the enginewith your foot off the
accelerator pedalby turning the ignition
key to START. Release the key when the
engine starts. If the engine starts, but fails to
run, repeat the above procedure.
cIf the engine is very hard to start in ex-
tremely cold weather or when restarting,
depress the accelerator pedal a little (ap-
proximately 1/3 to the floor) and hold it
and then crank the engine. Release the
key and the accelerator pedal when the
engine starts.
cIf the engine is very hard to start because
it is flooded, depress the accelerator
pedal all the way to the floor and hold it.
Crank the engine for 5-6 seconds. Aftercranking the engine, release the accel-
erator pedal. Crank the enginewith your
foot off the accelerator pedalby turn-
ing the ignition key to START. Release the
key when the engine starts. If the engine
starts, but fails to run, repeat the above
procedure.
CAUTION
Do not operate the starter for more than
15 seconds at a time. If the engine does
not start, turn the key off and wait 10
seconds before cranking again, otherwise
the starter could be damaged.
4. Allow the engine to idle for at least 30 sec-
onds after starting. Do not race the engine
while warming it up. Drive at moderate
speed for a short distance first, especially in
cold weather.
In cold weather, keep the engine running for
a minimum of 2–3 minutes before shutting it
off. Starting and stopping the engine over a
short period of time may make the vehicle
more difficult to start.
AUTOMATIC TRANSMISSION
WARNING
cDo not depress the accelerator pedal
while shifting from P (Park) or N (Neu-
tral) to R (Reverse) , or L (Low) . Always
depress the brake pedal until shifting is
completed. Failure to do so could cause
you to lose control and have an
accident.
cCold engine idle speed is high, so use
caution when shifting into a forward or
reverse gear before the engine has
warmed up.
cNever shift to P (Park) or R (Reverse)
while the vehicle is moving. This could
cause an accident.
CAUTION
cWhen stopping the vehicle on an uphill
grade, do not hold the vehicle by de-
pressing the accelerator pedal. The foot
brake should be used for this purpose.
cDo not downshift abruptly on slippery
roads. This may cause a loss of control.
The automatic transmission in your vehicle is
electronically controlled to produce maximum
power and smooth operation.
STARTING THE ENGINE DRIVING THE VEHICLE
5-8Starting and driving
ZREVIEW COPYÐ2008 Quest(van)
Owners ManualÐUSA_English(nna)
06/29/07Ðdebbie
X
Page 267 of 376

cAccelerate slowly and smoothly. Maintain
cruising speeds with a constant accelerator
position.
cDrive at moderate speeds on the highway.
Driving at high speed lowers fuel economy.
cAvoid unnecessary stopping and braking.
Maintain a safe distance behind other ve-
hicles.
cUse a proper gear range which suits road
conditions. On level roads, shift into high
gear as soon as possible.
cAvoid unnecessary engine idling.
cKeep your engine tuned up.
cFollow the recommended periodic mainte-
nance schedule.
cKeep the tires inflated to the correct pres-
sure. Low tire pressure increases tire wear
and lowers fuel economy.
cKeep the wheels in correct alignment. Im-
proper alignment increases tire wear and
lowers fuel economy.
cAir conditioner operation lowers fuel
economy. Use the air conditioner only when
necessary.cWhen cruising at highway speeds, it is more
economical to use the air conditioner and
leave the windows closed to reduce drag.
cUse the recommended viscosity engine oil.
See “Engine oil and oil filter recommenda-
tion” in “Technical and consumer informa-
tion” later in this manual.
INCREASING FUEL ECONOMY
Starting and driving5-15
ZREVIEW COPYÐ2008 Quest(van)
Owners ManualÐUSA_English(nna)
06/29/07Ðdebbie
X
Page 287 of 376

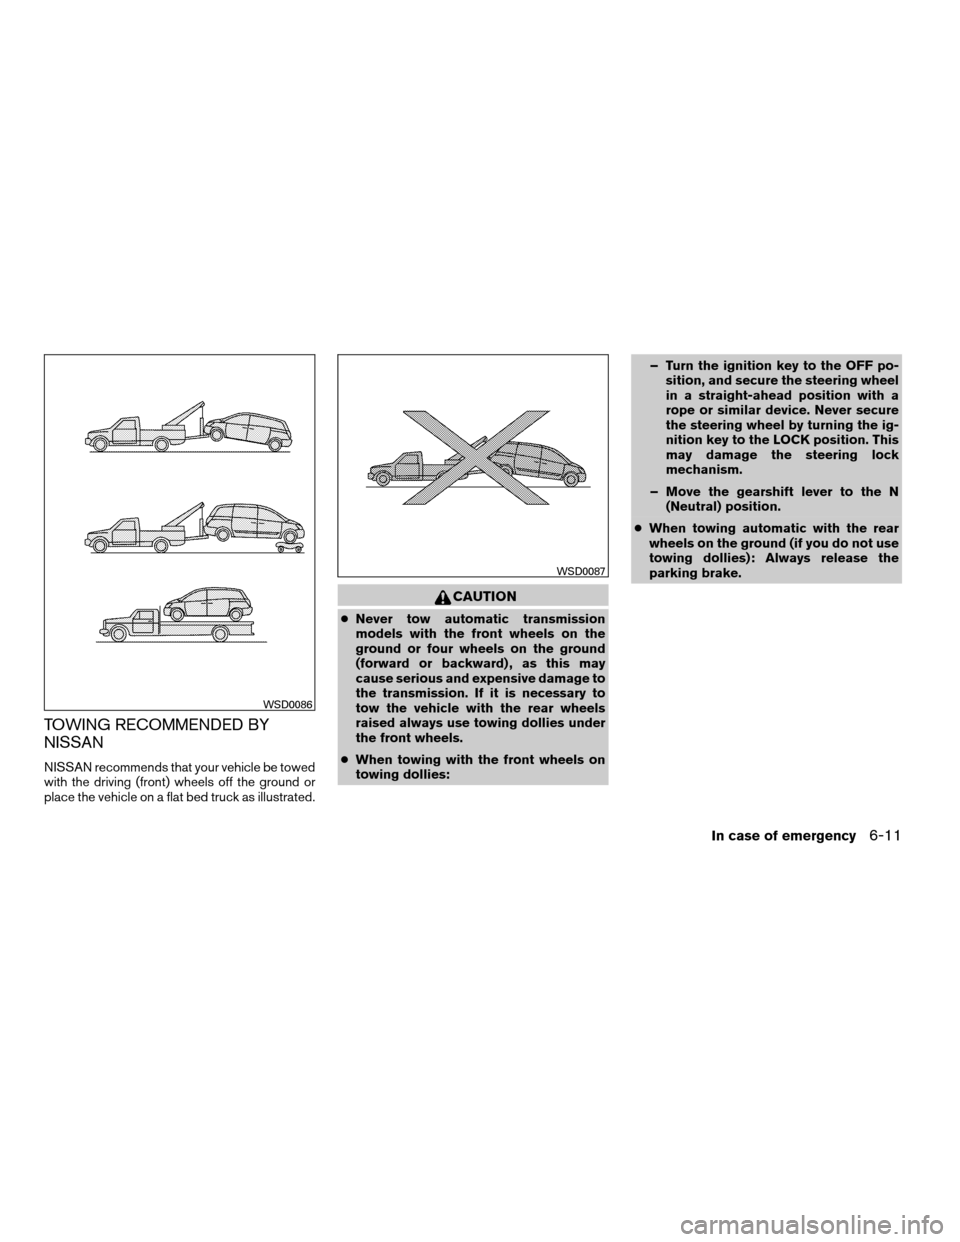
TOWING RECOMMENDED BY
NISSAN
NISSAN recommends that your vehicle be towed
with the driving (front) wheels off the ground or
place the vehicle on a flat bed truck as illustrated.
CAUTION
cNever tow automatic transmission
models with the front wheels on the
ground or four wheels on the ground
(forward or backward) , as this may
cause serious and expensive damage to
the transmission. If it is necessary to
tow the vehicle with the rear wheels
raised always use towing dollies under
the front wheels.
cWhen towing with the front wheels on
towing dollies:– Turn the ignition key to the OFF po-
sition, and secure the steering wheel
in a straight-ahead position with a
rope or similar device. Never secure
the steering wheel by turning the ig-
nition key to the LOCK position. This
may damage the steering lock
mechanism.
– Move the gearshift lever to the N
(Neutral) position.
cWhen towing automatic with the rear
wheels on the ground (if you do not use
towing dollies): Always release the
parking brake.
WSD0086
WSD0087
In case of emergency6-11
ZREVIEW COPYÐ2008 Quest(van)
Owners ManualÐUSA_English(nna)
06/29/07Ðdebbie
X
Page 292 of 376

Occasionally remove loose dust from the interior
trim, plastic parts and seats using a vacuum
cleaner or soft bristled brush. Wipe the vinyl and
leather surfaces with a clean, soft cloth damp-
ened in mild soap solution, then wipe clean with a
dry, soft cloth.
Regular care and cleaning is required in order to
maintain the appearance of the leather.
Before using any fabric protector, read the manu-
facturer’s recommendations. Some fabric pro-
tectors contain chemicals that may stain or
bleach the seat material.
Use a cloth dampened only with water to clean
the meter and gauge lens.
CAUTION
cNever use benzine, thinner or any simi-
lar material.
cSmall dirt particles can be abrasive and
damaging to leather surfaces and
should be removed promptly. Do not
use saddle soap, car waxes, polishes,
oils, cleaning fluids, solvents, deter-
gents or ammonia-based cleaners as
they may damage the leather’s natural
finish.cNever use fabric protectors unless rec-
ommended by the manufacturer.
cDo not use glass or plastic cleaner on
meter or gauge lens covers. It may dam-
age the lens cover.
FLOOR MATS
The use of genuine NISSAN floor mats can ex-
tend the life of your vehicle carpet and make it
easier to clean the interior.No matter what
mats are used, be sure they are fitted for
your vehicle and are properly positioned in
the footwell to prevent interference with
pedal operation.Mats should be maintained
with regular cleaning and replaced if they be-
come excessively worn.
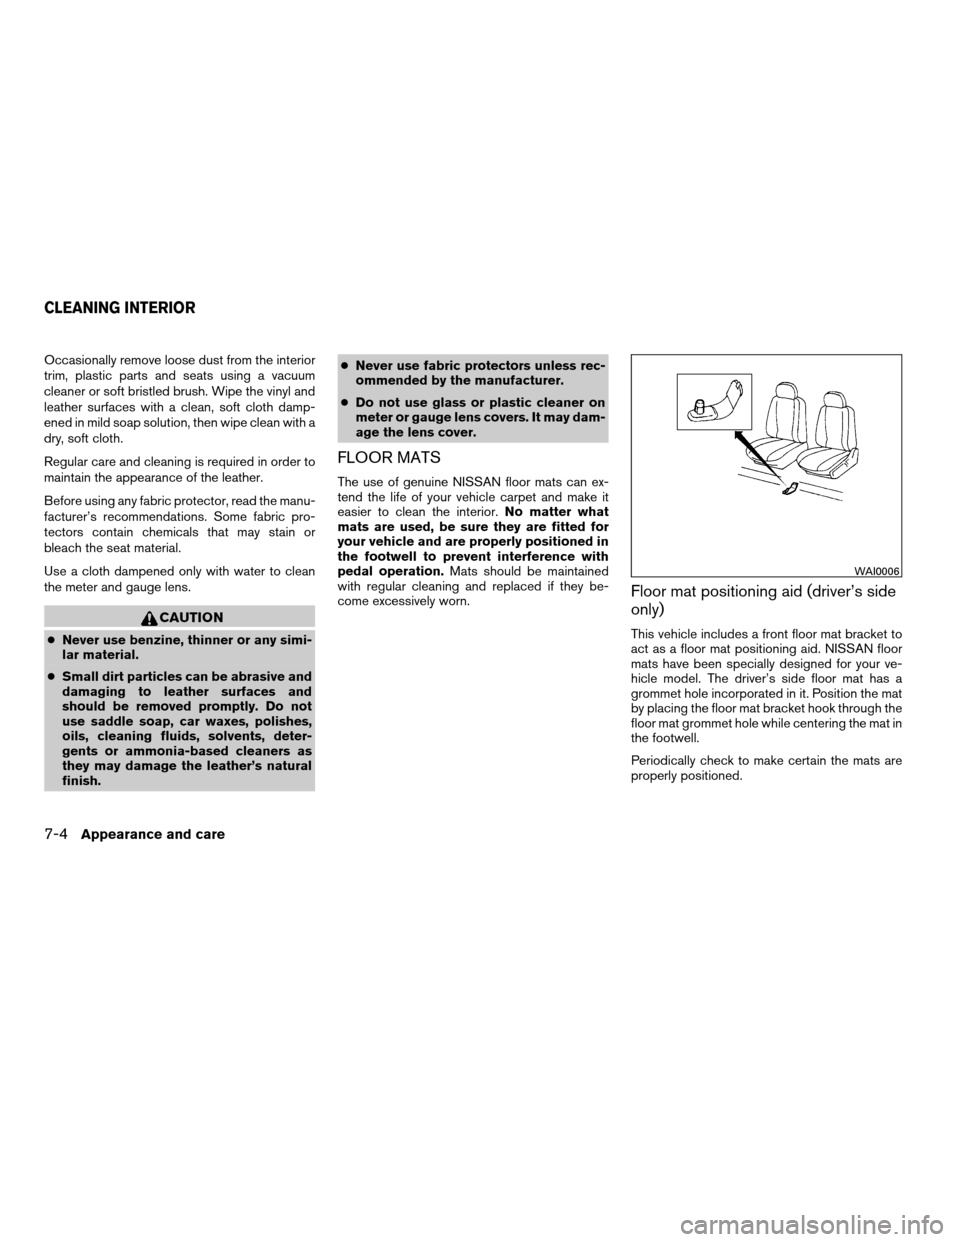
Floor mat positioning aid (driver’s side
only)
This vehicle includes a front floor mat bracket to
act as a floor mat positioning aid. NISSAN floor
mats have been specially designed for your ve-
hicle model. The driver’s side floor mat has a
grommet hole incorporated in it. Position the mat
by placing the floor mat bracket hook through the
floor mat grommet hole while centering the mat in
the footwell.
Periodically check to make certain the mats are
properly positioned.
WAI0006
CLEANING INTERIOR
7-4Appearance and care
ZREVIEW COPYÐ2008 Quest(van)
Owners ManualÐUSA_English(nna)
06/29/07Ðdebbie
X
Page 324 of 376

If you have a flat tire, see the “In case of
emergency” section of this manual.
TIRE PRESSURE
Tire Pressure Monitoring System
(TPMS)
This vehicle is equipped with the Tire
Pressure Monitoring System (TPMS) . It
monitors tire pressure of all tires except
the spare. When the low tire pressure
warning light is lit, one or more of your
tires is significantly under-inflated. If
equipped, the system also displays pres-sure of all tires (except the spare tire) on
the display screen by sending a signal
from a sensor that is installed in each
wheel.
The TPMS will activate only when the
vehicle is driven at speeds above 16 MPH
(25 km/h) . Also, this system may not de-
tect a sudden drop in tire pressure (for
example a flat tire while driving) .
For more details, refer to “Low tire pres-
sure warning light” in the “Instruments and
controls” section, “Tire pressure informa-
tion” in the “Display screen, heater, air
conditioner and audio and phone sys-
tems” section, “Tire Pressure Monitoring
System (TPMS)” in the “Starting and driv-
ing” section, and “Flat tire” in the “In case
of emergency” section.Tire inflation pressure
Check the tire pressures (including the
spare) often and always prior to long dis-
tance trips. The recommended tire pres-
sure specifications are shown on the
F.M.V.S.S./C.M.V.S.S. certification label
or the Tire and Loading Information labelunder the “Cold Tire Pressure” heading.
The Tire and Loading Information label is
affixed to the driver side center pillar. Tire
pressures should be checked regularly
because:
cMost tires naturally lose air over time.
cTires can lose air suddenly when
driven over potholes or other objects
or if the vehicle strikes a curb while
parking.
The tire pressures should be checked
when the tires are cold. The tires are
considered COLD after the vehicle has
been parked for 3 or more hours, or driven
less than 1 mile (1.6 km) at moderate
speeds.
Incorrect tire pressure, including un-
der inflation, may adversely affect
tire life and vehicle handling.
WDI0210
WHEELS AND TIRES
8-30Maintenance and do-it-yourself
ZREVIEW COPYÐ2008 Quest(van)
Owners ManualÐUSA_English(nna)
06/29/07Ðdebbie
X