2008 NISSAN QUEST ECO mode
[x] Cancel search: ECO modePage 142 of 376

CAUTION
Listed below are conditions or occur-
rences which will damage the keyfob:
cDo not allow the keyfob to become wet.
cDo not drop the keyfob.
cDo not strike the keyfob sharply against
another object.
cDo not place the keyfob for an extended
period in an area where temperatures
exceed 140°F (60°C) .
If a keyfob is lost or stolen, NISSAN rec-
ommends erasing the ID code of that key-
fob. This will prevent the keyfob from un-
authorized use to unlock the vehicle. For
information regarding the erasing proce-
dure, please contact a NISSAN dealer.
HOW TO USE REMOTE KEYLESS
ENTRY SYSTEM
Locking doors
1. Close all windows.
2. Remove the key from the ignition switch.
3. Close the hood and all doors.
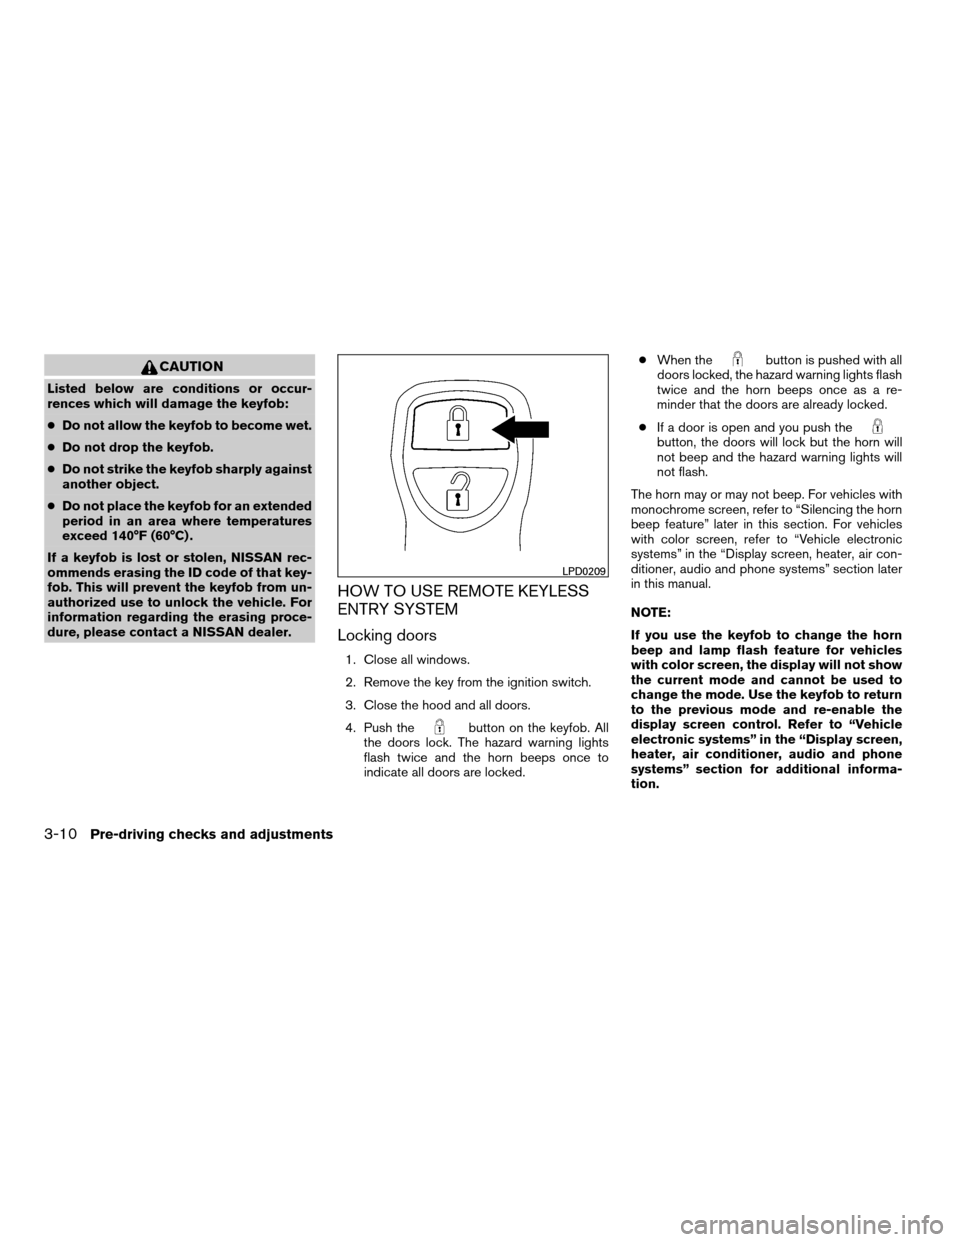
4. Push the
button on the keyfob. All
the doors lock. The hazard warning lights
flash twice and the horn beeps once to
indicate all doors are locked.cWhen the
button is pushed with all
doors locked, the hazard warning lights flash
twice and the horn beeps once as a re-
minder that the doors are already locked.
cIf a door is open and you push the
button, the doors will lock but the horn will
not beep and the hazard warning lights will
not flash.
The horn may or may not beep. For vehicles with
monochrome screen, refer to “Silencing the horn
beep feature” later in this section. For vehicles
with color screen, refer to “Vehicle electronic
systems” in the “Display screen, heater, air con-
ditioner, audio and phone systems” section later
in this manual.
NOTE:
If you use the keyfob to change the horn
beep and lamp flash feature for vehicles
with color screen, the display will not show
the current mode and cannot be used to
change the mode. Use the keyfob to return
to the previous mode and re-enable the
display screen control. Refer to “Vehicle
electronic systems” in the “Display screen,
heater, air conditioner, audio and phone
systems” section for additional informa-
tion.
LPD0209
3-10Pre-driving checks and adjustments
ZREVIEW COPYÐ2008 Quest(van)
Owners ManualÐUSA_English(nna)
06/29/07Ðdebbie
X
Page 145 of 376

Silencing the horn beep feature
If desired, the horn beep feature can be deacti-
vated using the keyfob.NOTE:
If you use the keyfob to change the horn
beep and lamp flash feature for vehicles
with color screen, the display will not show
the current mode and cannot be used to
change the mode. Use the keyfob to return
to the previous mode and re-enable the
display screen control. Refer to “Vehicle
electronic systems” in the “Display screen,
heater, air conditioner, audio and phone
systems” section for additional informa-
tion.
To deactivate:Press and hold the
andbuttonsfor at least 2 seconds.
The hazard warning lights will flash three times to
confirm that the horn beep feature has been
deactivated.
To activate:Press and hold the
andbuttonsfor at least 2 seconds
once more.
The hazard warning lights will flash once and the
horn will sound once to confirm that the horn
beep feature has been reactivated.
Deactivating the horn beep feature does not si-
lence the horn if the alarm is triggered.
Using the interior lights
Push thebutton on the keyfob once to turn
on the interior lights and puddle lamps (if so
equipped) .
For additional information, refer to “Lights on
demand switch” in the “Instruments and controls”
section earlier in this manual.
LPD0262
Pre-driving checks and adjustments3-13
ZREVIEW COPYÐ2008 Quest(van)
Owners ManualÐUSA_English(nna)
06/29/07Ðdebbie
X
Page 149 of 376

Reverse:
The power lift gate will reverse direction immedi-
ately during power open or power close if the
keyfob, overhead console or rear pillar switch is
pressed. A chime will sound to announce the
reversal.
Auto Reverse:
If an obstacle is detected during power open or
power close, a warning chime will sound and the
lift gate will reverse direction and return to the full
open or full close position. If a second obstacle is
detected, the lift gate motion will stop and the
drive motor will disengage. The lift gate will enter
manual mode.
A pinch strip is mounted on each side of the lift
gate. If an obstacle is detected by a pinch strip
during power close, the lift gate will reverse di-
rection and return to the full open position.NOTE:
If the pinch strip is damaged or removed,
the power close function will not operate.
WARNING
There are some small distances immedi-
ately before the closed position which
cannot be detected. Make sure that all
passengers have their hands, etc., inside
the vehicle before closing the lift gate.
Manual Mode:
If power operation is not available, the lift gate
may be operated manually. Power operation may
not be available if the main ON/OFF switch is in
the OFF position, if multiple obstacles have been
detected in a single power cycle, or if battery
voltage is low.Safe Mode:
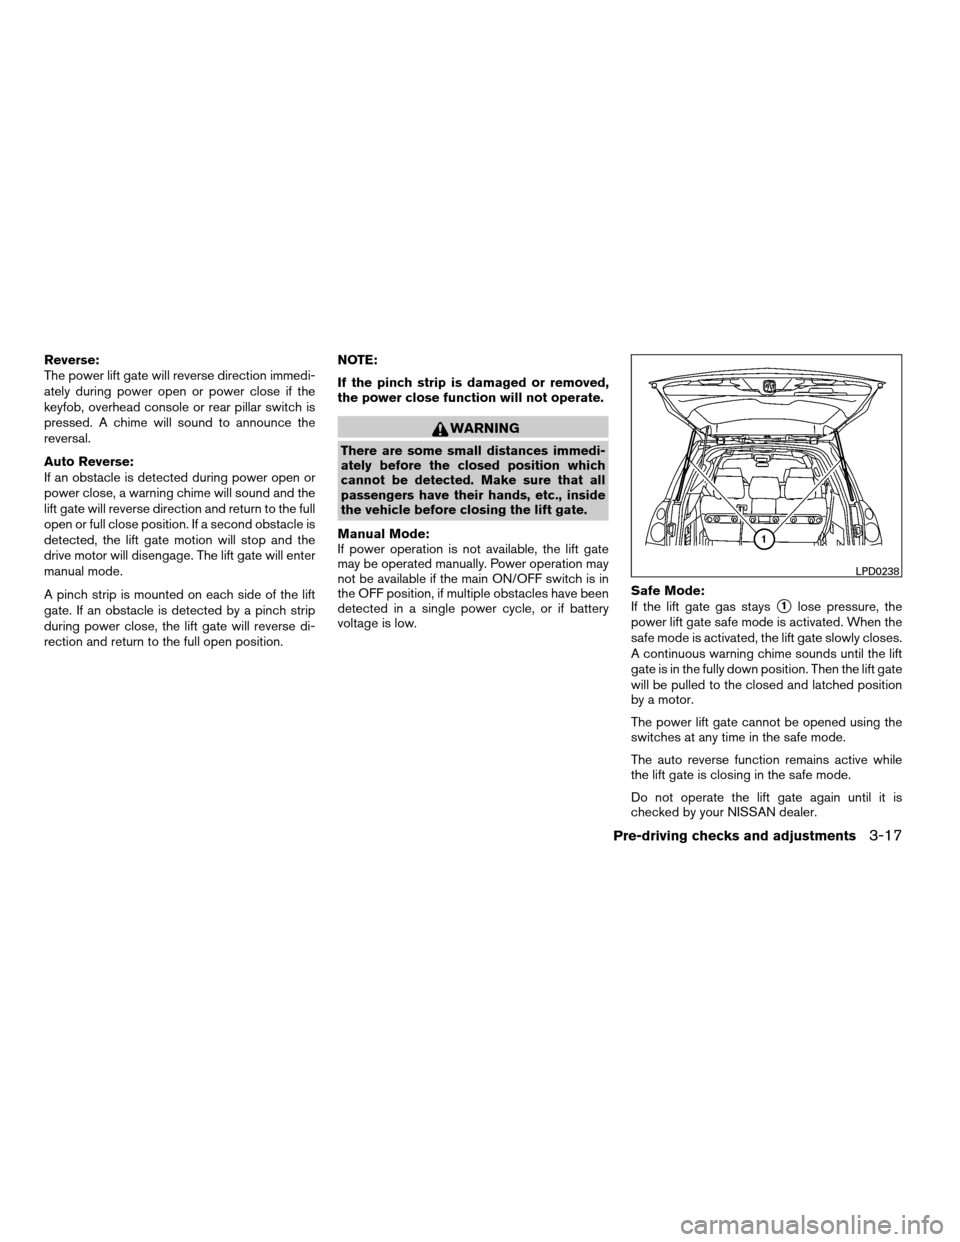
If the lift gate gas stays
s1lose pressure, the
power lift gate safe mode is activated. When the
safe mode is activated, the lift gate slowly closes.
A continuous warning chime sounds until the lift
gate is in the fully down position. Then the lift gate
will be pulled to the closed and latched position
by a motor.
The power lift gate cannot be opened using the
switches at any time in the safe mode.
The auto reverse function remains active while
the lift gate is closing in the safe mode.
Do not operate the lift gate again until it is
checked by your NISSAN dealer.
LPD0238
Pre-driving checks and adjustments3-17
ZREVIEW COPYÐ2008 Quest(van)
Owners ManualÐUSA_English(nna)
06/29/07Ðdebbie
X
Page 165 of 376

Reference symbols:
TRIP button — This is a button on the control
panel. By pressing this button you can select the
item or perform this action.
HOW TO USE THE TRIP BUTTON
When the TRIP button is pressed, the following
modes will display on the screen.
Dist. to Empty!Average Speed!Fuel
Economy!Tire Pressure!Audio or OFF!
Dist. to Empty
Distance to empty (MI or km)
The Distance To Empty (DTE) mode provides you
with an estimation of the distance that can be
driven before refueling. The DTE is constantly
calculated based on the amount of fuel in the fuel
tank and the actual fuel consumption. The display
is updated every 30 seconds. When the fuel level
is low, the DTE display will change to — .
NOTE:
cIf the amount of fuel added while the ignition
switch is OFF is small, the display just before
the ignition switch is turned OFF may con-
tinue to be displayed.cWhen driving uphill or rounding curves, the
fuel in the tank shifts, which may momentarily
change the display.
LHA0617
Display screen, heater, air conditioner, audio and phone systems4-3
ZREVIEW COPYÐ2008 Quest(van)
Owners ManualÐUSA_English(nna)
06/29/07Ðdebbie
X
Page 166 of 376

Average speed (MPH or km/h)
The Average Speed mode shows the average
speed since the last reset. To calculate the aver-
age speed, driving distance is divided by driving
time.
For approximately the first 30 seconds after a
reset or reconnecting the battery cables, the
display will show —.
Resetting average speed
The average speed calculation can be reset to 0.
Press the TRIP button for more than approxi-
mately 2 seconds.
Fuel economy (MPG or L/100 km)
The Fuel Economy mode shows the average fuel
economy since the last reset.
For approximately the first 30 seconds and 1/3
mile (500 m) after a reset or connecting the
battery cables, the display will show —.
Resetting fuel economy
The fuel economy calculation can be reset to 0.
Press the TRIP button for more than approxi-
mately 2 seconds.
Tire pressure information
Pressure indication in **psi on the screen indi-
cates that the pressure is being measured. After
a few driving trips, the pressure for each tire will
be displayed randomly.
The order of the tire pressure figures displayed
on the screen does not correspond with the
actual order of the tire position.
Tire pressure rises and falls depending on the
heat caused by the vehicle’s operation and the
outside temperature.
LHA0618LHA0619LHA0620
4-4Display screen, heater, air conditioner, audio and phone systems
ZREVIEW COPYÐ2008 Quest(van)
Owners ManualÐUSA_English(nna)
06/29/07Ðdebbie
X
Page 167 of 376

In case of low tire pressure, a message “LOW
PRESSURE” or “CHECK ALL TIRES” is dis-
played on the screen:
LOW PRESSURE — CHECK ALL TIRES.
WARNING
cWhen a spare tire is mounted or a wheel
is replaced, tire pressure will not be
indicated, the Tire Pressure Monitoring
System (TPMS) will not function and
the low tire pressure warning light will
flash for approximately 1 minute. The
light will remain on after 1 minute. Con-
tact your NISSAN dealer as soon as
possible for tire replacement and/or
system resetting.
cReplacing tires with those not originally
specified by NISSAN could affect the
proper operation of the TPMS.
HOW TO USE THE SETTING
BUTTON
Pressing the SETTING button will change the
settings menu as follows:
Backlight!Day Mode Brightness!Night
Mode Brightness!Clock Adjust HOURS!Clock Adjust MINUTES!Units!Lang!MP3
Disp Type (if so equipped)!Audio or OFF!
Backlight
Backlight
To turn off the screen, select “OFF” of the Back-
light mode by pressing the TUNE button.
The message “Press SETTINGS to resume” will
display for approximately 5 seconds then the
screen will turn off.
To turn on the screen, press the SETTING button
and select “ON” by pressing the TUNE button.
When any button besides SETTING is pressed
with the screen off, the screen turns on for further
operation. The screen will turn off automatically
after the operation is finished.
Day mode brightness
The brightness of the screen during the day can
be changed by pressing the TUNE button.
For additional information, see “
button”
later in this section.
Night mode brightness
The brightness of the screen during the night can
be changed by pressing the TUNE button.
For additional information, see “
button”
later in this section.
Clock operation
The digital clock displays time when the ignition
key is in ACC or ON.
If the power supply is disconnected, the
clock will not indicate the correct time.
Readjust the time.
Clock adjust hours
Press the SETTING button until Clock Adjust
HOURS is shown in the display. Press the TUNE
button up or down to adjust the hour.
Clock adjust minutes
Press the SETTING button again Clock Adjust
Minutes is shown in the display. Press the TUNE
button up or down to adjust the minutes.
To exit the clock adjustment, press the SETTING
button repeatedly. The screen will return to the
audio display if the audio is on. If the audio is not
on, the screen will return to a blank display.
Units
To change the units press the TUNE button to
select “ENGLISH” or “METRIC”.
Unit: US — MI, °F, MPG
Metric — km, °C, L/100 km
Display screen, heater, air conditioner, audio and phone systems4-5
ZREVIEW COPYÐ2008 Quest(van)
Owners ManualÐUSA_English(nna)
06/29/07Ðdebbie
X
Page 168 of 376

Language
The language can be changed to “ENGLISH” or
“FRANÇAIS” by pressing the TUNE button.
MP3 display type (if so equipped)
To change how MP3 discs are displayed, press
the TUNE button to select “DISC NUMBER” or
“FOLDER NUMBER”.
Disc number mode will display the file number in
the disc.
Folder number mode will display the file number
in the current folder.
For additional information, see “Audio System”
later in this section.
BUTTON
To change the display brightness, press
thebutton. Pressing the button with the
headlights off will prompt the “BRIGHTNESS
NIGHT (MANUAL)” or “BRIGHTNESS AUTO-
MATIC”. If “BRIGHTNESS NIGHT (MANUAL)” is
selected, the brightness of the screen will not be
affected by the headlight operation. The bright-
ness of the screen will be dependent on the
settings in the Night Mode Brightness, described
earlier in this section.Pressing the button with the headlights on will
prompt the “BRIGHTNESS DAY (MANUAL)” or
“BRIGHTNESS AUTOMATIC”. If “BRIGHT-
NESS DAY (MANUAL)” is selected the bright-
ness of the screen will not be affected by the
headlight operation. The brightness of the screen
will be dependent on the settings in the Day
Mode Brightness, described earlier in this sec-
tion.
DOOR WARNING
The DOOR OPEN screen will be automatically
displayed as shown when both of the following
conditions are met:
cThe vehicle is driven with a door(s) open for
longer than 2.5 seconds.
cThe vehicle speed is greater than 3 MPH (5
km/h) .
Beeping will occur during the door warning; to
disable the beeping press any button. If a change
in any door condition occurs during the time the
beep is cancelled, a warning will return.
LHA0643
4-6Display screen, heater, air conditioner, audio and phone systems
ZREVIEW COPYÐ2008 Quest(van)
Owners ManualÐUSA_English(nna)
06/29/07Ðdebbie
X
Page 170 of 376

HOW TO USE THE TRIP BUTTON
When the TRIP button is pressed, the following
modes will display on the screen.
Warning message (if any)!TRIP 1!TRIP 2!
FUEL ECONOMY!MAINTENANCE!Audio
or OFF!TRIP 1
Each trip display tracks an independent trip and
displays the following:
cElapsed Time - Journey time since the last
reset up to a maximum of 99 hours and 59
minutes.
cDriving Distance - Distance driven (mile or
km) since the last reset.cAverage Speed - Average speed driven
(MPH or km/h) since the last reset.
Resetting trip 1 and trip 2
Each trip screen can be reset to 0. Press the TRIP
button to select the TRIP screen to be reset.
cSelect the “Reset” key on screen by press-
ing the ENTER button, or
cPress the TRIP button for more than approxi-
mately 1.5 seconds.
Fuel economy
Press the TRIP button to display Average Fuel
Economy and Distance To Empty.
Average fuel economy (MPG or L/100 km)
The Average Fuel Economy is calculated based
on fuel consumption since the last reset. The
display is updated every 30 seconds and 1/3
mile (500 m) . After a reset or connecting the
battery cables, the display will show (**.*) .
LHA0552LHA0553
4-8Display screen, heater, air conditioner, audio and phone systems
ZREVIEW COPYÐ2008 Quest(van)
Owners ManualÐUSA_English(nna)
06/29/07Ðdebbie
X