2008 NISSAN QUEST ECO mode
[x] Cancel search: ECO modePage 224 of 376

1. Volume control switch
2. MODE select switch
3. POWER on/off switch
4. Tuning switch1. Volume control switch
2. Phone operation switch
3. POWER on and MODE select switch
4. Tuning switch
STEERING WHEEL SWITCH FOR
AUDIO CONTROL
The audio system can be operated using the
controls on the steering wheel.
POWER on/off switch
With the ignition key turned to the ACC or ON
position, push the POWER switch to turn the
audio system on or off.If you have the Type B switch, with the ignition key
turned to the ACC or ON position, push the
MODE switch to turn the audio system on.
MODE select switch
Push the MODE select switch to change the
mode in the following sequence: PRESET A!
PRESET B!PRESET C!CD!DVD (if so
equipped)!AUX.
While in one of the preset radio station banks (A,
B or C) , use the tuning switch
orto
select one of the preset radio stations (1-6) .
Volume control switch
Push the volume control switch up or down to
increase or decrease the volume.
Tuning
Memory change (radio):
While in one of the preset radio station banks (A,
B or C) , push the tuning switch
orfor less than 1.5 seconds to change to the next
preset station in memory.
Seek tuning (radio):
Push the tuning switch
orfor more
than 1.5 seconds to seek the next or previous
radio station.
Type A
WHA0640
Type B
WHA0637
4-62Display screen, heater, air conditioner, audio and phone systems
ZREVIEW COPYÐ2008 Quest(van)
Owners ManualÐUSA_English(nna)
06/29/07Ðdebbie
X
Page 225 of 376

Next/Previous track (CD):
Push the tuning switch
orfor less
than 1.5 seconds to return to the beginning of the
present track or skip to the next track. Push
several times to skip back or skip through tracks.
This system searches for the blank intervals be-
tween selections. If there is a blank interval within
1 program or there is no interval between pro-
grams, the system may not stop in the desired or
expected location.
Change disc (CD) (if so equipped):
Push the SEEK tuning switch
orfor
more than 1.5 seconds to change the playing
disc up or down.
1. VOL (volume) control button
2. MODE select button
3.
speaker control button
4. NEXT button
5. SEEK button
6. Headphone jacks7. Infrared headphone transmitter lens*
*Red transmitters will be visible when
infrared headphones are on.
LHA0322
Display screen, heater, air conditioner, audio and phone systems4-63
ZREVIEW COPYÐ2008 Quest(van)
Owners ManualÐUSA_English(nna)
06/29/07Ðdebbie
X
Page 229 of 376
6. DISPLAY button
7. MODE button
8. SUBTITLE button
9. AUDIO button
10. ANGLE button
11. CLEAR button
12. PAUSE button
13. PLAY button
14. FAST FORWARD/FAST REVERSE
button
15. MENU button
16. NAVIGATION keys
17. BACK button
18. NUMERIC KEYPAD
REMOTE CONTROL
Refer to “Playing a digital video disc (DVD)” later
in this section for the function of each button.
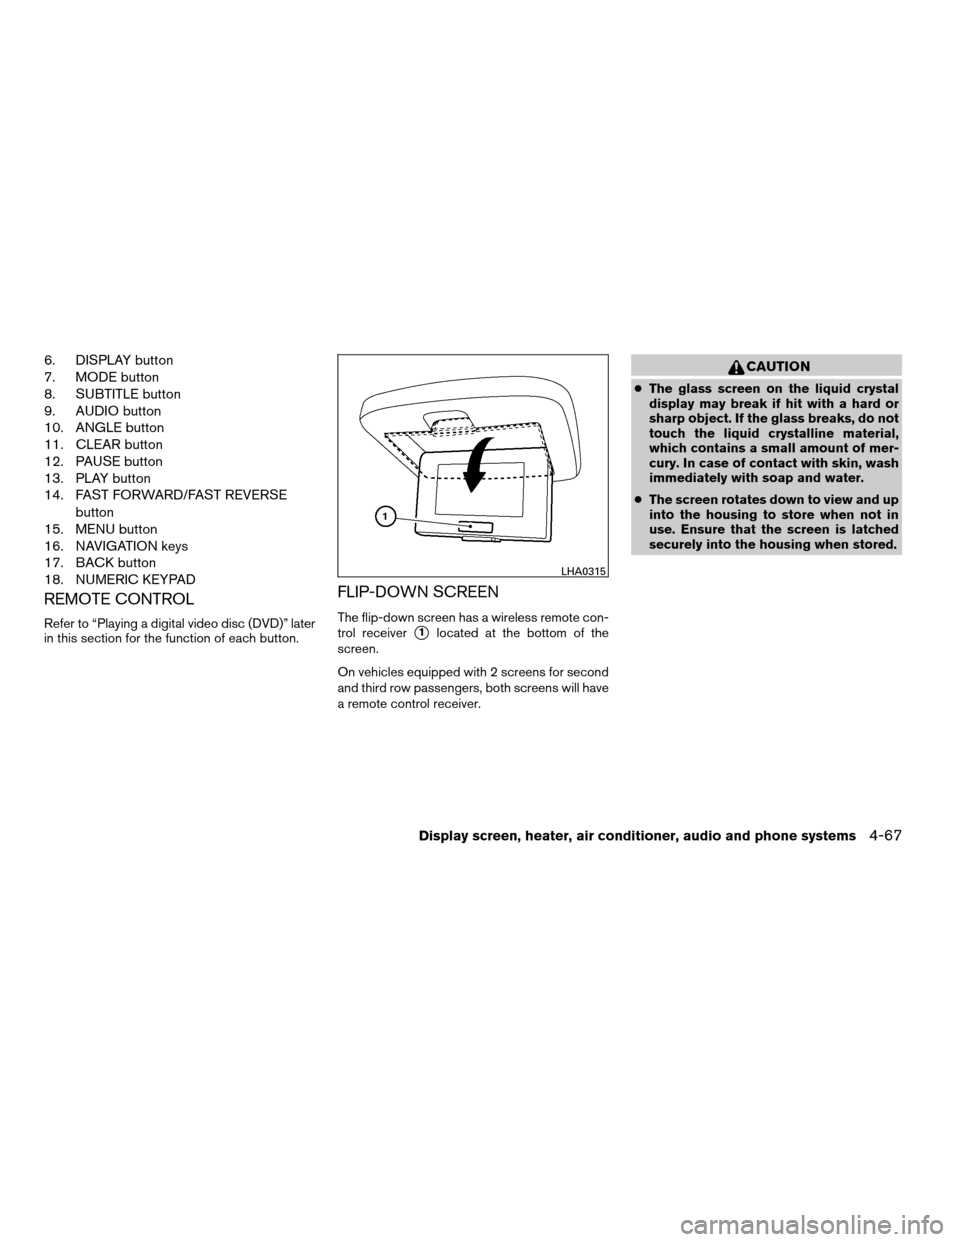
FLIP-DOWN SCREEN
The flip-down screen has a wireless remote con-
trol receiver
s1located at the bottom of the
screen.
On vehicles equipped with 2 screens for second
and third row passengers, both screens will have
a remote control receiver.
CAUTION
cThe glass screen on the liquid crystal
display may break if hit with a hard or
sharp object. If the glass breaks, do not
touch the liquid crystalline material,
which contains a small amount of mer-
cury. In case of contact with skin, wash
immediately with soap and water.
cThe screen rotates down to view and up
into the housing to store when not in
use. Ensure that the screen is latched
securely into the housing when stored.
LHA0315
Display screen, heater, air conditioner, audio and phone systems4-67
ZREVIEW COPYÐ2008 Quest(van)
Owners ManualÐUSA_English(nna)
06/29/07Ðdebbie
X
Page 231 of 376
Pressing thebutton on the front controls
turns the rear speakers on and off.
It is possible to operate the DVD player by remote
control.
Headphones are a wireless type and no cables
are necessary. You can use them in almost all the
ranges in the rear seat. (It is not possible to use
the headphones in the front seat.)
POWER on/off button:
With the ignition switch turned to the ACC or ON
position, press the POWER button to turn the
DVD player on or off.
Insert the DVD into the slot with the label side
facing up. The DVD will be guided automatically
into the slot.
If the DVD player is off and a DVD is inserted, the
DVD player will automatically turn on.
CAUTION
Do not force the compact disc into the
slot. This could damage the player.
MODE select button:
Press the MODE button to select Audio/Video
source between DVD and AUX input (input jackson the faceplate, Red = right channel audio input,
White = left channel audio input, and Yellow =
Video input) .
The display will show the “AUX” in the upper left
corner of the display for 4 seconds once the
Mode is changed to AUX.
To use the input jacks, refer to “Auxiliary input
jacks” in this section.
orPLAY:
When the PLAY/PAUSE button on the player or
the PLAY button on the remote control is
pressed, the player will play.
In play mode, the display will briefly show
on the upper left corner of the display.
FF (Fast Forward) , REW
(Remote control only):
Press FAST FORWARD/FAST REVERSE but-
tons to carry out the fast forward or fast reverse
presentation at 5 times normal play speed.
Press FAST FORWARD/FAST REVERSE but-
tons again or PLAY button to resume the normal
play speed.
NEXT CHAPTER/
PREVIOUS CHAPTER
(Remote control only):
When the
(NEXT CHAPTER) button is
pressed while the DVD is being played, the pro-
gram next to the present one will start to play from
its beginning. Press several times to skip through
programs. The DVD will advance the number of
times the button is pressed. When the
(PREVIOUS CHAPTER) button is pressed, the
program being played returns to its beginning.
Press several times to skip back through pro-
grams. The DVD will go back the number of times
the button is pressed.
orPAUSE:
When the PLAY/PAUSE button on the player or
the PAUSE button on the remote control is
pressed, the player will pause playing of the
media. In pause mode, the player will show
on the upper left corner of the display until the
player is changed to another mode.
STOP:
Press the STOP button once to stop playing the
media. The display will show
in the upper
left corner of the display for 4 seconds, and the
last disc position will be stored. When the PLAY
Display screen, heater, air conditioner, audio and phone systems4-69
ZREVIEW COPYÐ2008 Quest(van)
Owners ManualÐUSA_English(nna)
06/29/07Ðcathy
X
Page 232 of 376

button is pressed again, it will resume at the
stored disc track and time position.
If the STOP button is pressed again when the
player is already in Stop mode, it will reinitialize
the pointer to the beginning of the disc. In effect it
will ignore the last stored disc position and upon
receipt of the next play message it will begin at
the Title Menu, or at “the beginning of the disc”.
EJECT:
When the EJECT button is pressed with the DVD
loaded, it will be ejected.
The display will show the EJECT symbol
in
the upper left corner of the display for 4 seconds
once the EJECT button is pressed.
If the DVD is not loaded, the display will show
“NO DISC”.
If the DVD comes out and is not removed within
25 seconds, it will be pulled back into the slot to
protect it.
DISPLAY:
If the DISPLAY control is pressed for less than 2
seconds, the display menu will appear on the
screen.
cThe display menu will remain on the screen
for 10 seconds if no subsequent control
activations occur.cUse NAVIGATION KEYS to navigate within
the display menu, and use ENTER to select
the item.
cHolding the DISPLAY control on the face-
plate for longer than approximately 2 sec-
onds while in the display menu will reset the
display characteristics to their nominal val-
ues. (Faceplate feature only)
If the DISPLAY control button on the faceplate is
pressed for more than 2 seconds, the media
track/time information will be displayed along the
bottom of the display. Pressing the DISPLAY
control for more than 2 seconds will remove the
media track/time information from the display.
(Faceplate feature only)
NAVIGATION KEYS:
If media is in PLAY mode, activation of the NAVI-
GATION KEYS (Up, Down, Left, and Right) will
perform the following functions: next
chapter/track, previous chapter/track, fast re-
verse and fast forward, and the display will
show
,,andrespec-
tively in the upper left corner of the display for 4
seconds. (Faceplate feature only)
If media is in PAUSE mode, activation of the
NAVIGATION KEYS (Up, Down and Right) will
perform the following functions: next
chapter/track, previous chapter/track and slowforward, and the display will show
,and a forward arrow symbol respectively in the
upper left corner of the display for 4 seconds.
(Faceplate feature only)
If media is in activated MENU mode, the NAVI-
GATION KEYS will be used to navigate Up,
Down, Left, and Right within the menu.
If display control menu is on, the NAVIGATION
KEYS will be used to navigate Up, Down, Left,
and Right within the menu.
ENTER:
In MENU mode, press the ENTER button to se-
lect MENU items.
In the display menu, press the ENTER button to
select items for modification, as per the on-
screen instructions.
MENU:
If the media is in PLAY mode and the MENU
button is pressed, the DVD menu will appear on
the screen. Use Navigation Keys to navigate
within the menu, and use ENTER to select the
item.
Press the MENU button again to return to PLAY
mode.
4-70Display screen, heater, air conditioner, audio and phone systems
ZREVIEW COPYÐ2008 Quest(van)
Owners ManualÐUSA_English(nna)
06/29/07Ðdebbie
X
Page 237 of 376
When installing a CB, ham radio or car phone in
your NISSAN, be sure to observe the following
precautions, otherwise the new equipment may
adversely affect the engine control system and
other electronic parts.
WARNING
cA cellular telephone should not be used
while driving so full attention may be
given to vehicle operation. Some juris-
dictions prohibit the use of cellular tele-
phones while driving.
cIf you must make a call while your ve-
hicle is in motion, the hands free cellu-
lar phone operational mode (if so
equipped) is highly recommended. Ex-
ercise extreme caution at all times so
full attention may be given to vehicle
operation.
cIf a conversation in a moving vehicle
requires you to take notes, pull off the
road to a safe location and stop your
vehicle before doing so.
CAUTION
cKeep the antenna as far away as pos-
sible from the electronic control
modules.
cKeep the antenna wire more than 8 in
(20 cm) away from the electronic con-
trol system harnesses. Do not route the
antenna wire next to any harness.
cAdjust the antenna standing-wave ratio
as recommended by the manufacturer.
cConnect the ground wire from the CB
radio chassis to the body.
cFor details, consult a NISSAN dealer.
WARNING
cUse a phone after stopping your vehicle
in a safe location. If you have to use a
phone while driving, exercise extreme
caution at all times so full attention may
be given to vehicle operation.
cIf you are unable to devote full attention
to vehicle operation while talking on
the phone, pull off the road to a safe
location and stop your vehicle.
CAUTION
To avoid discharging the vehicle battery,
use a phone after starting the engine.
CAR PHONE OR CB RADIO BLUETOOTHTHANDS-FREE PHONE
SYSTEM (if so equipped)
Display screen, heater, air conditioner, audio and phone systems4-75
ZREVIEW COPYÐ2008 Quest(van)
Owners ManualÐUSA_English(nna)
06/29/07Ðdebbie
X
Page 241 of 376
CONTROL BUTTONS
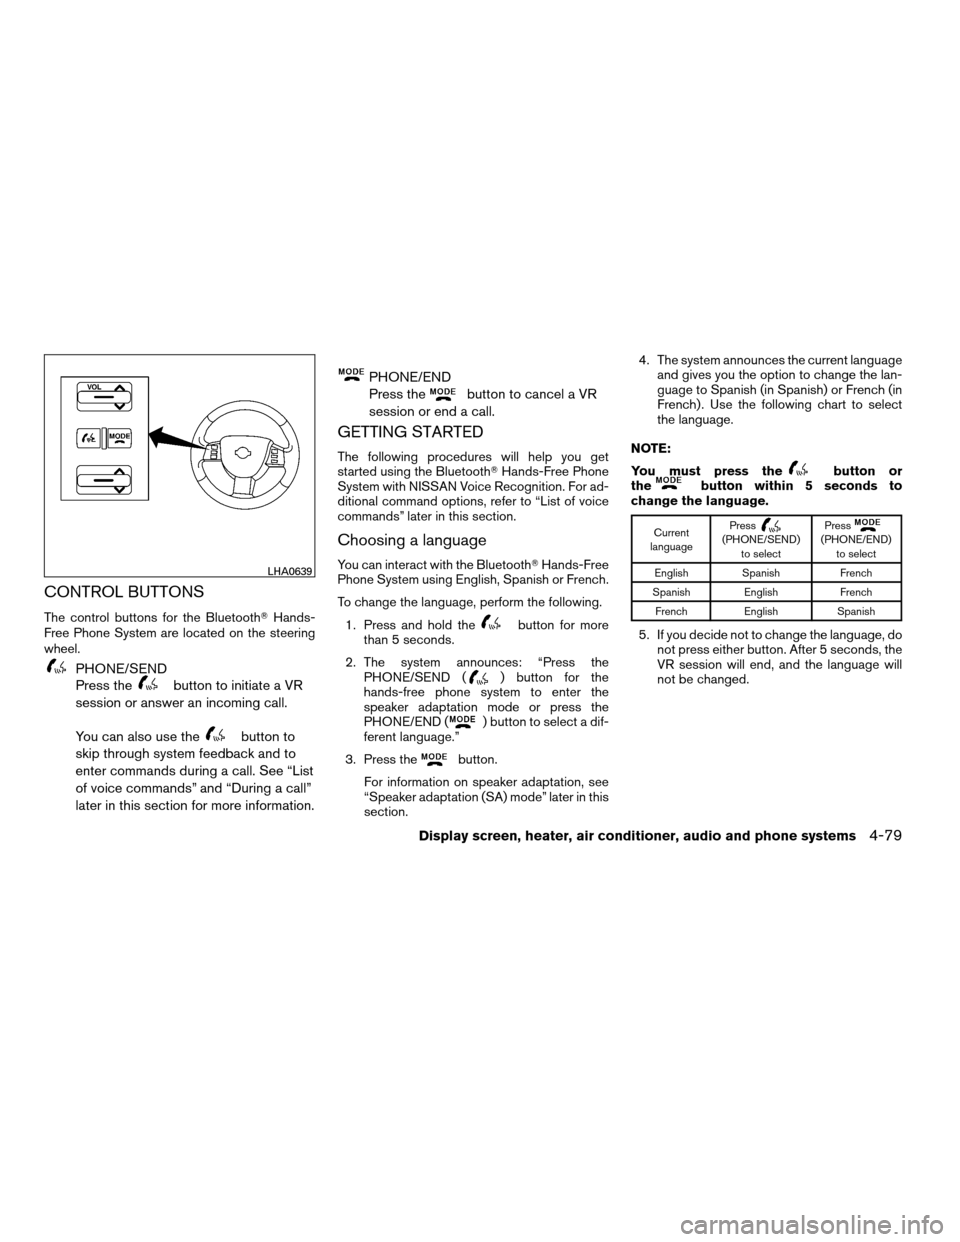
The control buttons for the BluetoothTHands-
Free Phone System are located on the steering
wheel.
PHONE/SEND
Press the
button to initiate a VR
session or answer an incoming call.
You can also use the
button to
skip through system feedback and to
enter commands during a call. See “List
of voice commands” and “During a call”
later in this section for more information.
PHONE/END
Press the
button to cancel a VR
session or end a call.
GETTING STARTED
The following procedures will help you get
started using the BluetoothTHands-Free Phone
System with NISSAN Voice Recognition. For ad-
ditional command options, refer to “List of voice
commands” later in this section.
Choosing a language
You can interact with the BluetoothTHands-Free
Phone System using English, Spanish or French.
To change the language, perform the following.
1. Press and hold the
button for more
than 5 seconds.
2. The system announces: “Press the
PHONE/SEND (
) button for the
hands-free phone system to enter the
speaker adaptation mode or press the
PHONE/END (
) button to select a dif-
ferent language.”
3. Press the
button.
For information on speaker adaptation, see
“Speaker adaptation (SA) mode” later in this
section.4. The system announces the current language
and gives you the option to change the lan-
guage to Spanish (in Spanish) or French (in
French) . Use the following chart to select
the language.
NOTE:
You must press the
button or
thebutton within 5 seconds to
change the language.
Current
languagePress(PHONE/SEND)
to selectPress(PHONE/END)
to select
English Spanish French
Spanish English French
French English Spanish
5. If you decide not to change the language, do
not press either button. After 5 seconds, the
VR session will end, and the language will
not be changed.
LHA0639
Display screen, heater, air conditioner, audio and phone systems4-79
ZREVIEW COPYÐ2008 Quest(van)
Owners ManualÐUSA_English(nna)
06/29/07Ðdebbie
X
Page 242 of 376
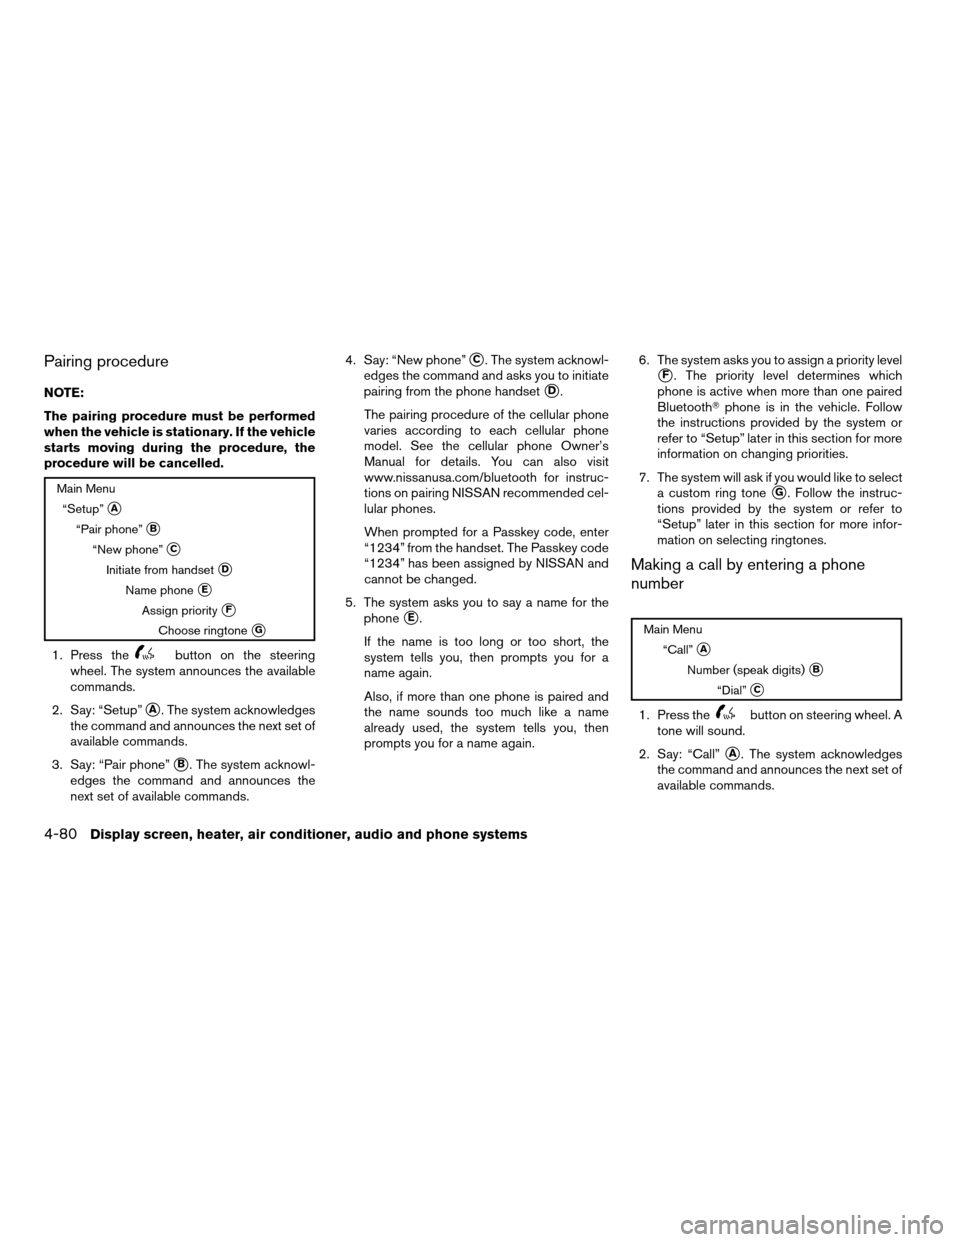
Pairing procedure
NOTE:
The pairing procedure must be performed
when the vehicle is stationary. If the vehicle
starts moving during the procedure, the
procedure will be cancelled.
Main Menu
“Setup”
sA
“Pair phone”sB
“New phone”sC
Initiate from handsetsD
Name phonesE
Assign prioritysF
Choose ringtonesG
1. Press thebutton on the steering
wheel. The system announces the available
commands.
2. Say: “Setup”
sA. The system acknowledges
the command and announces the next set of
available commands.
3. Say: “Pair phone”
sB. The system acknowl-
edges the command and announces the
next set of available commands.4. Say: “New phone”
sC. The system acknowl-
edges the command and asks you to initiate
pairing from the phone handset
sD.
The pairing procedure of the cellular phone
varies according to each cellular phone
model. See the cellular phone Owner’s
Manual for details. You can also visit
www.nissanusa.com/bluetooth for instruc-
tions on pairing NISSAN recommended cel-
lular phones.
When prompted for a Passkey code, enter
“1234” from the handset. The Passkey code
“1234” has been assigned by NISSAN and
cannot be changed.
5. The system asks you to say a name for the
phone
sE.
If the name is too long or too short, the
system tells you, then prompts you for a
name again.
Also, if more than one phone is paired and
the name sounds too much like a name
already used, the system tells you, then
prompts you for a name again.6. The system asks you to assign a priority level
sF. The priority level determines which
phone is active when more than one paired
BluetoothTphone is in the vehicle. Follow
the instructions provided by the system or
refer to “Setup” later in this section for more
information on changing priorities.
7. The system will ask if you would like to select
a custom ring tone
sG. Follow the instruc-
tions provided by the system or refer to
“Setup” later in this section for more infor-
mation on selecting ringtones.
Making a call by entering a phone
number
Main Menu
“Call”
sA
Number (speak digits)sB
“Dial”sC
1. Press thebutton on steering wheel. A
tone will sound.
2. Say: “Call”
sA. The system acknowledges
the command and announces the next set of
available commands.
4-80Display screen, heater, air conditioner, audio and phone systems
ZREVIEW COPYÐ2008 Quest(van)
Owners ManualÐUSA_English(nna)
06/29/07Ðdebbie
X