2008 NISSAN QUEST warning
[x] Cancel search: warningPage 46 of 376
straint installation using LATCH on 3rd row
bench seat (if so equipped)” in this section.
TOP TETHER STRAP CHILD
RESTRAINT
If the manufacturer of your child restraint requires
the use of a top tether strap, it must be secured to
the anchor point.
WARNING
cChild restraint anchor points are de-
signed to withstand only those loads
imposed by correctly fitted child re-
straints. Under no circumstances are
they to be used for adult seat belts or
harnesses.
cDo not allow cargo to contact the top
tether strap when it is attached to the
top tether anchor. Properly secure the
cargo so it does not contact the top
tether strap. Cargo that is not properly
secured or cargo that contacts the top
tether strap may damage it during a
collision. Your child could be seriously
injured or killed in a collision if the top
tether strap is damaged.
Top Tether Anchor Point Locations
Anchor points are located in the following loca-
tions:
cOn the floor behind the front passenger seat
(2–passenger cargo van only) as shown.
cOn the back of the 2nd row captain’s chairs
(if so equipped) as shown.
cOn the back of the 3rd row center seating
position (if so equipped) as shown.
If you have any questions when installing a
top tether strap child restraint on the rear
seat, consult your NISSAN dealer for de-
tails.
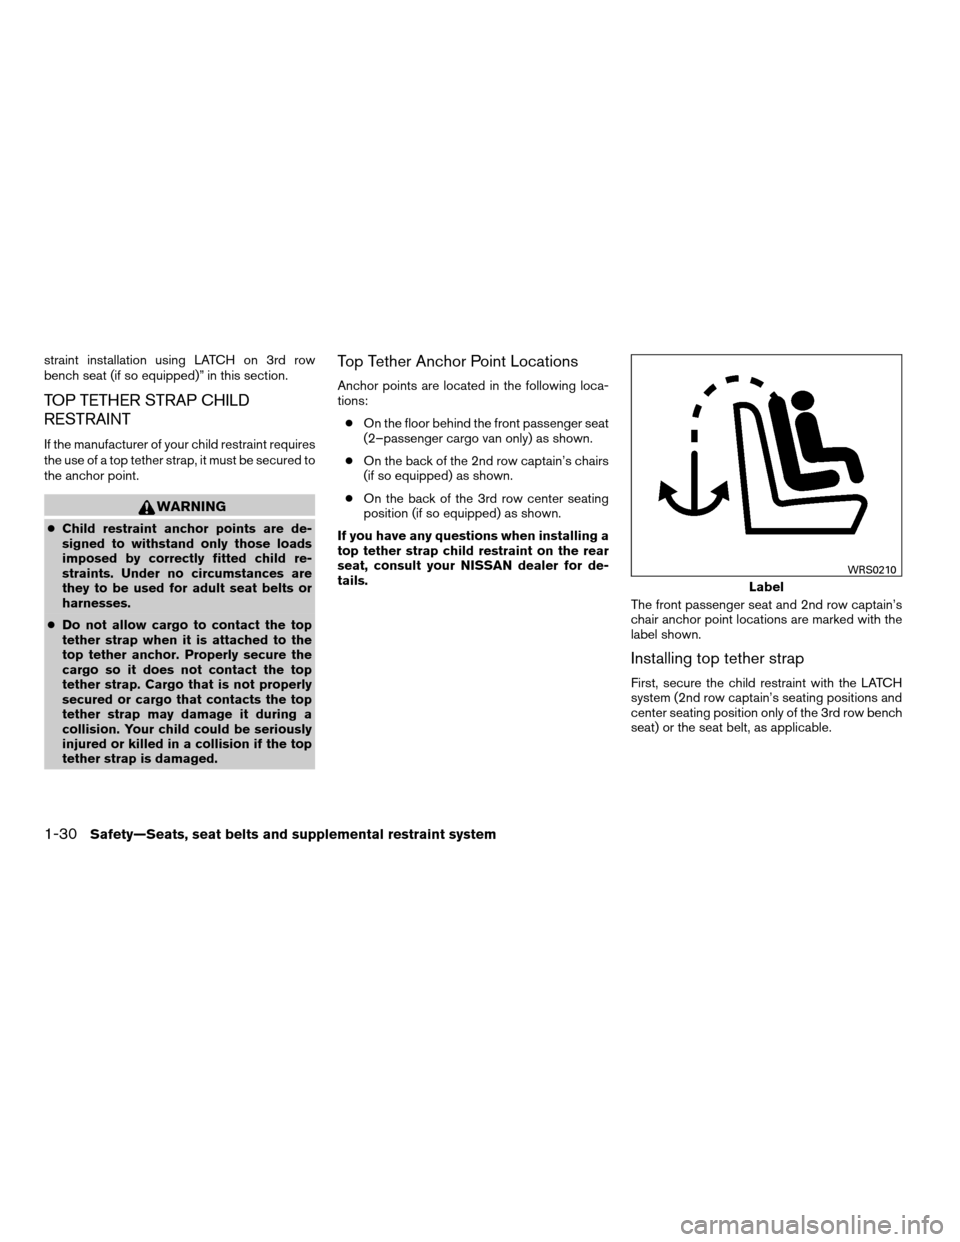
The front passenger seat and 2nd row captain’s
chair anchor point locations are marked with the
label shown.
Installing top tether strap
First, secure the child restraint with the LATCH
system (2nd row captain’s seating positions and
center seating position only of the 3rd row bench
seat) or the seat belt, as applicable.
Label
WRS0210
1-30Safety—Seats, seat belts and supplemental restraint system
ZREVIEW COPYÐ2008 Quest(van)
Owners ManualÐUSA_English(nna)
06/29/07Ðdebbie
X
Page 48 of 376
4. Tighten the tether strap according to the
manufacturer’s instructions to remove any
slack.
For best child restraint fit, see the child restraint
installation instructions in this section and the
child restraint manufacturer’s instructions.
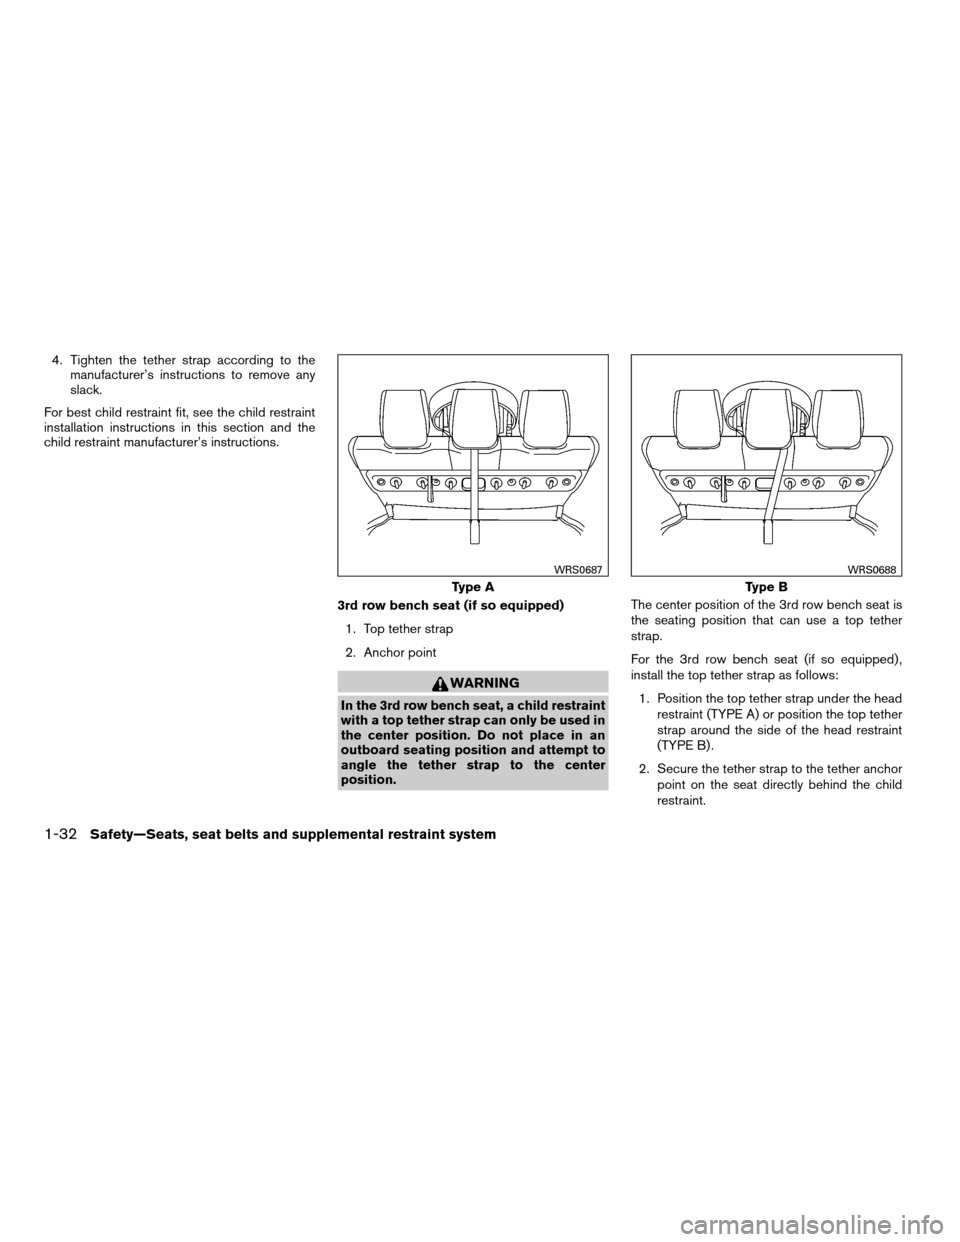
3rd row bench seat (if so equipped)
1. Top tether strap
2. Anchor point
WARNING
In the 3rd row bench seat, a child restraint
with a top tether strap can only be used in
the center position. Do not place in an
outboard seating position and attempt to
angle the tether strap to the center
position.The center position of the 3rd row bench seat is
the seating position that can use a top tether
strap.
For the 3rd row bench seat (if so equipped) ,
install the top tether strap as follows:
1. Position the top tether strap under the head
restraint (TYPE A) or position the top tether
strap around the side of the head restraint
(TYPE B) .
2. Secure the tether strap to the tether anchor
point on the seat directly behind the child
restraint.
Type A
WRS0687
Type B
WRS0688
1-32Safety—Seats, seat belts and supplemental restraint system
ZREVIEW COPYÐ2008 Quest(van)
Owners ManualÐUSA_English(nna)
06/29/07Ðdebbie
X
Page 49 of 376
3. Tighten the tether strap according to the
manufacturer’s instructions to remove any
slack.
For best child restraint fit, see the child restraint
installation instructions in this section and the
child restraint manufacturer’s instructions.
CHILD RESTRAINT INSTALLATION
USING LATCH-2ND ROW
CAPTAIN’S CHAIRS (if so equipped)
WARNING
cAttach LATCH compatible child re-
straints only at the locations shown. For
the LATCH lower anchor locations, see
“Lower Anchors and Tethers for CHil-
dren System (LATCH)” in this section. If
a child restraint is not secured properly,
your child could be seriously injured or
killed in an accident.
cThe LATCH anchors are designed to
withstand only those loads imposed by
correctly fitted child restraints. Under
no circumstance are they to be used for
adult seat belts or harnesses.cInspect the lower anchors by inserting
your fingers into the lower anchor area
and feeling to make sure there are no
obstructions over the LATCH anchors,
such as seat belt webbing or seat cush-
ion material. The child restraint will not
be secured properly if the LATCH an-
chors are obstructed.
Front-facing
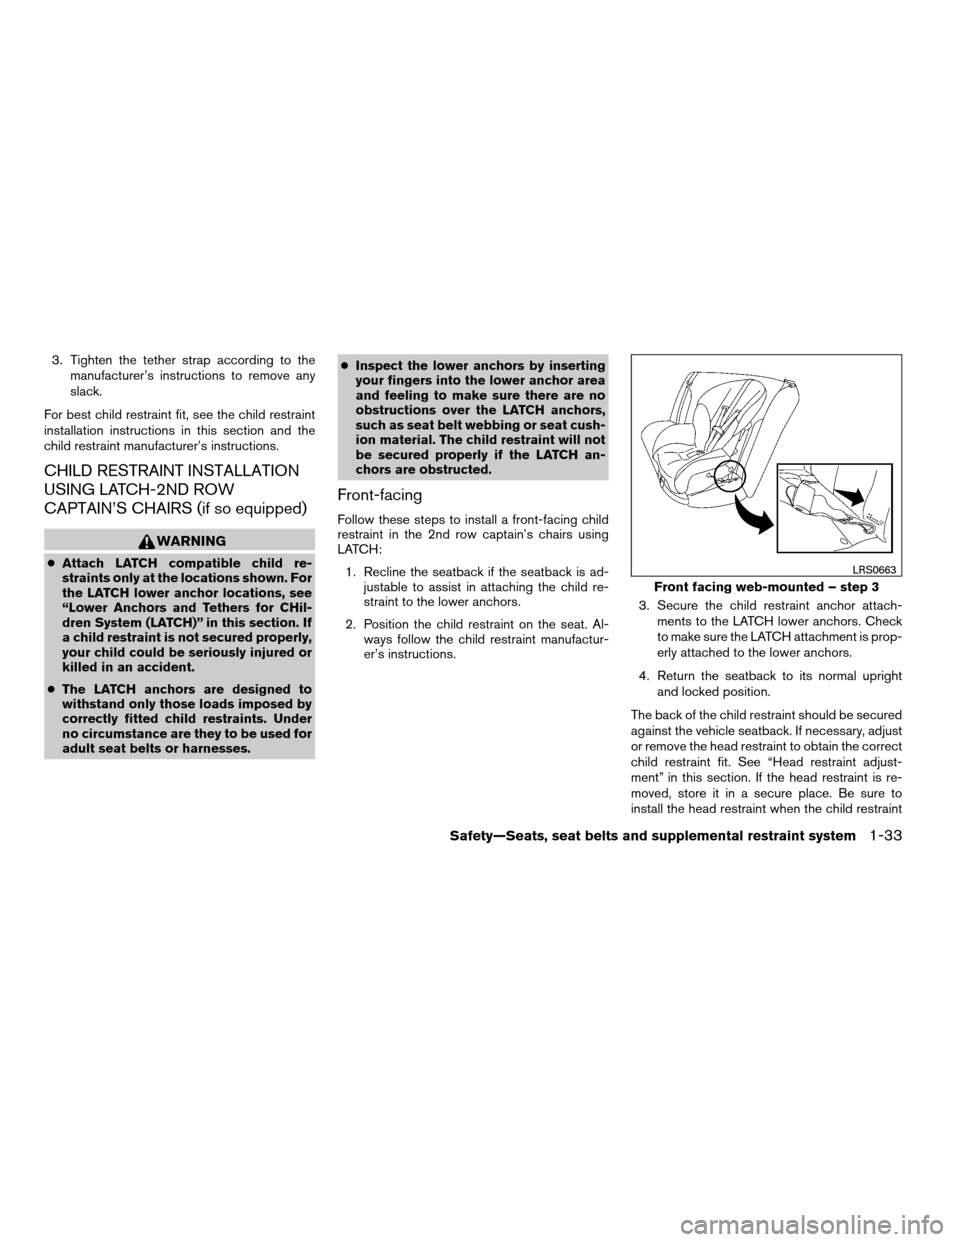
Follow these steps to install a front-facing child
restraint in the 2nd row captain’s chairs using
LATCH:
1. Recline the seatback if the seatback is ad-
justable to assist in attaching the child re-
straint to the lower anchors.
2. Position the child restraint on the seat. Al-
ways follow the child restraint manufactur-
er’s instructions.3. Secure the child restraint anchor attach-
ments to the LATCH lower anchors. Check
to make sure the LATCH attachment is prop-
erly attached to the lower anchors.
4. Return the seatback to its normal upright
and locked position.
The back of the child restraint should be secured
against the vehicle seatback. If necessary, adjust
or remove the head restraint to obtain the correct
child restraint fit. See “Head restraint adjust-
ment” in this section. If the head restraint is re-
moved, store it in a secure place. Be sure to
install the head restraint when the child restraint
Front facing web-mounted – step 3
LRS0663
Safety—Seats, seat belts and supplemental restraint system1-33
ZREVIEW COPYÐ2008 Quest(van)
Owners ManualÐUSA_English(nna)
06/29/07Ðdebbie
X
Page 52 of 376
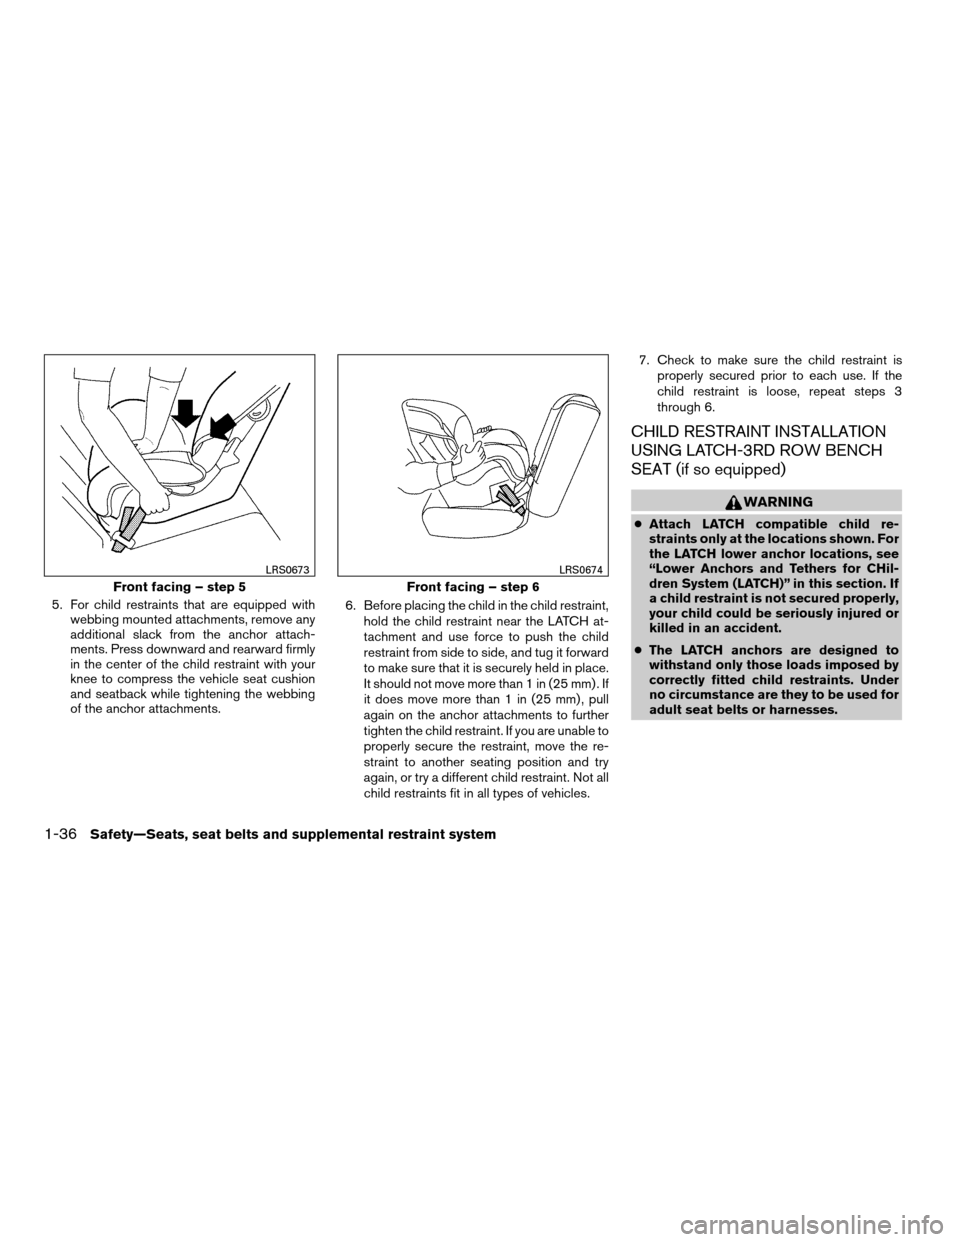
5. For child restraints that are equipped with
webbing mounted attachments, remove any
additional slack from the anchor attach-
ments. Press downward and rearward firmly
in the center of the child restraint with your
knee to compress the vehicle seat cushion
and seatback while tightening the webbing
of the anchor attachments.6. Before placing the child in the child restraint,
hold the child restraint near the LATCH at-
tachment and use force to push the child
restraint from side to side, and tug it forward
to make sure that it is securely held in place.
It should not move more than 1 in (25 mm) . If
it does move more than 1 in (25 mm) , pull
again on the anchor attachments to further
tighten the child restraint. If you are unable to
properly secure the restraint, move the re-
straint to another seating position and try
again, or try a different child restraint. Not all
child restraints fit in all types of vehicles.7. Check to make sure the child restraint is
properly secured prior to each use. If the
child restraint is loose, repeat steps 3
through 6.
CHILD RESTRAINT INSTALLATION
USING LATCH-3RD ROW BENCH
SEAT (if so equipped)
WARNING
cAttach LATCH compatible child re-
straints only at the locations shown. For
the LATCH lower anchor locations, see
“Lower Anchors and Tethers for CHil-
dren System (LATCH)” in this section. If
a child restraint is not secured properly,
your child could be seriously injured or
killed in an accident.
cThe LATCH anchors are designed to
withstand only those loads imposed by
correctly fitted child restraints. Under
no circumstance are they to be used for
adult seat belts or harnesses.
Front facing – step 5
LRS0673
Front facing – step 6
LRS0674
1-36Safety—Seats, seat belts and supplemental restraint system
ZREVIEW COPYÐ2008 Quest(van)
Owners ManualÐUSA_English(nna)
06/29/07Ðdebbie
X
Page 57 of 376
CHILD RESTRAINT INSTALLATION
USING THE SEAT BELTS
WARNING
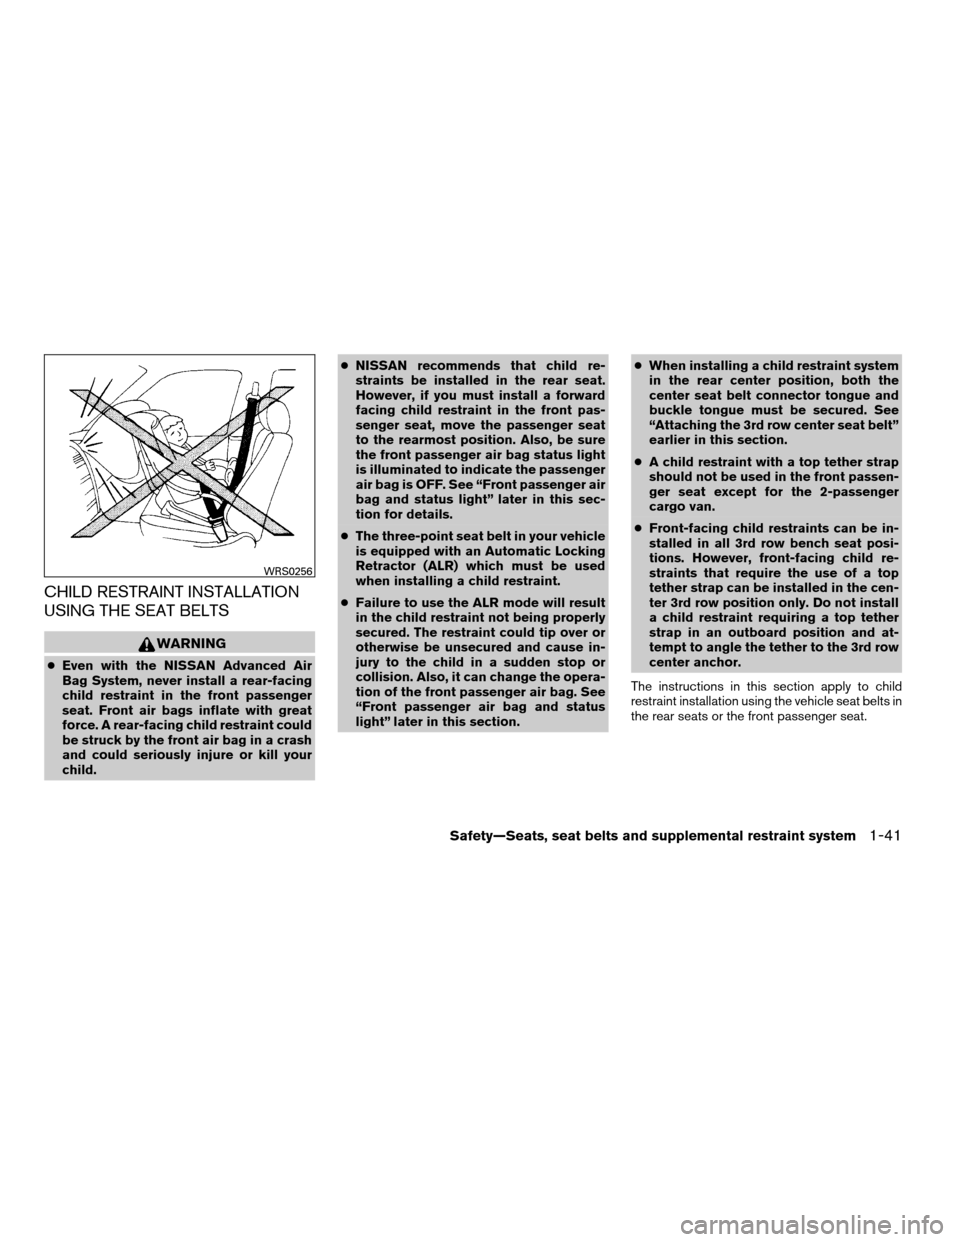
cEven with the NISSAN Advanced Air
Bag System, never install a rear-facing
child restraint in the front passenger
seat. Front air bags inflate with great
force. A rear-facing child restraint could
be struck by the front air bag in a crash
and could seriously injure or kill your
child.cNISSAN recommends that child re-
straints be installed in the rear seat.
However, if you must install a forward
facing child restraint in the front pas-
senger seat, move the passenger seat
to the rearmost position. Also, be sure
the front passenger air bag status light
is illuminated to indicate the passenger
air bag is OFF. See “Front passenger air
bag and status light” later in this sec-
tion for details.
cThe three-point seat belt in your vehicle
is equipped with an Automatic Locking
Retractor (ALR) which must be used
when installing a child restraint.
cFailure to use the ALR mode will result
in the child restraint not being properly
secured. The restraint could tip over or
otherwise be unsecured and cause in-
jury to the child in a sudden stop or
collision. Also, it can change the opera-
tion of the front passenger air bag. See
“Front passenger air bag and status
light” later in this section.cWhen installing a child restraint system
in the rear center position, both the
center seat belt connector tongue and
buckle tongue must be secured. See
“Attaching the 3rd row center seat belt”
earlier in this section.
cA child restraint with a top tether strap
should not be used in the front passen-
ger seat except for the 2-passenger
cargo van.
cFront-facing child restraints can be in-
stalled in all 3rd row bench seat posi-
tions. However, front-facing child re-
straints that require the use of a top
tether strap can be installed in the cen-
ter 3rd row position only. Do not install
a child restraint requiring a top tether
strap in an outboard position and at-
tempt to angle the tether to the 3rd row
center anchor.
The instructions in this section apply to child
restraint installation using the vehicle seat belts in
the rear seats or the front passenger seat.
WRS0256
Safety—Seats, seat belts and supplemental restraint system1-41
ZREVIEW COPYÐ2008 Quest(van)
Owners ManualÐUSA_English(nna)
06/29/07Ðdebbie
X
Page 63 of 376
7. Check that the retractor is in the ALR mode
by trying to pull more seat belt out of the
retractor. If you cannot pull any more seat
belt webbing out of the retractor, the retrac-
tor is in the ALR mode.
8. Check to make sure that the child restraint is
properly secured prior to each use. If the belt
is not locked, repeat steps 3 through 7.
After the child restraint is removed and the seat
belt fully retracted, the ALR mode (child restraint
mode) is canceled.
PRECAUTIONS ON BOOSTER
SEATS
WARNING
cInfants and small children should al-
ways be placed in an appropriate child
restraint while riding in the vehicle.
Failure to use a child restraint or
booster seat can result in serious injury
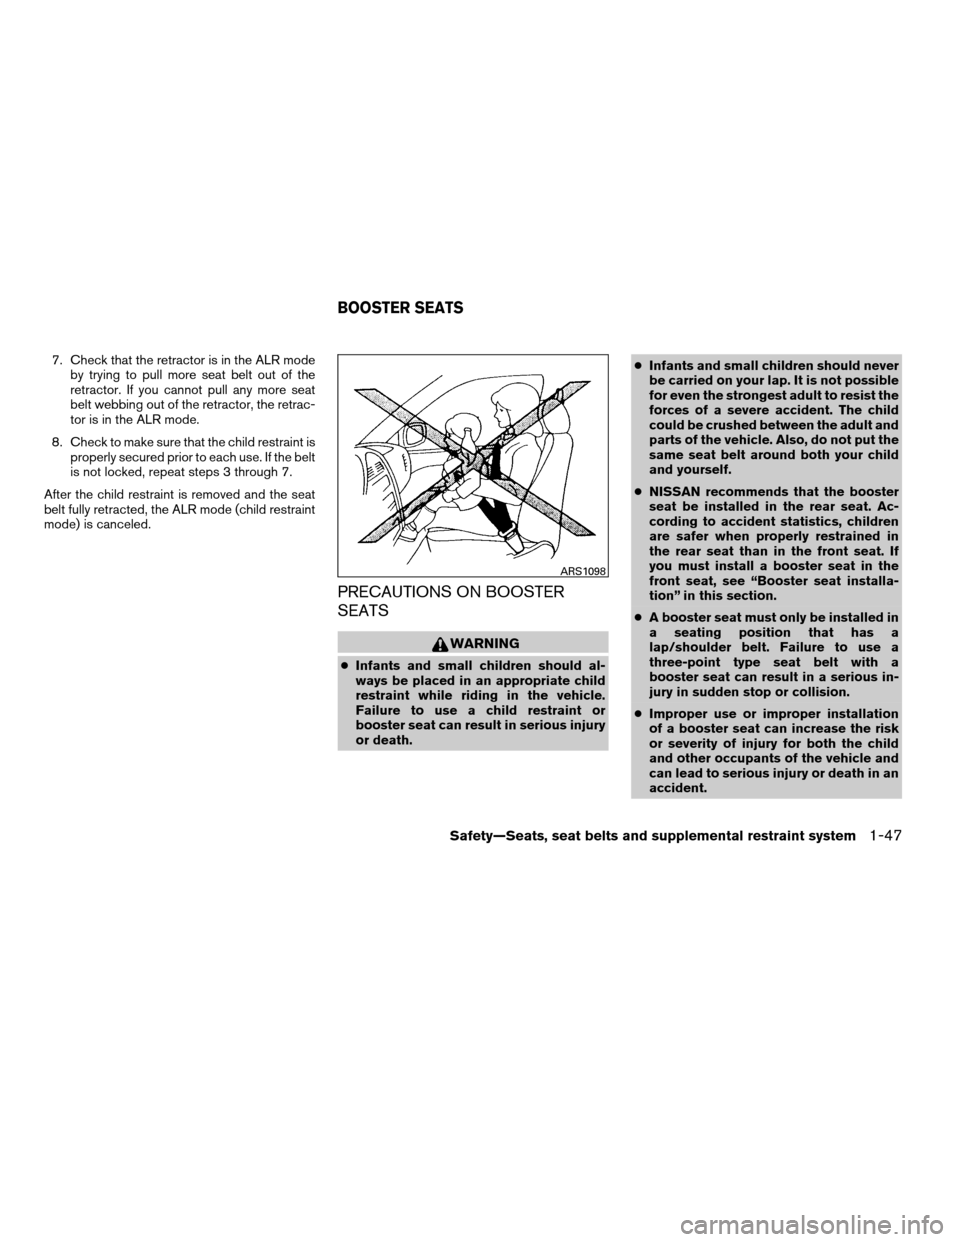
or death.cInfants and small children should never
be carried on your lap. It is not possible
for even the strongest adult to resist the
forces of a severe accident. The child
could be crushed between the adult and
parts of the vehicle. Also, do not put the
same seat belt around both your child
and yourself.
cNISSAN recommends that the booster
seat be installed in the rear seat. Ac-
cording to accident statistics, children
are safer when properly restrained in
the rear seat than in the front seat. If
you must install a booster seat in the
front seat, see “Booster seat installa-
tion” in this section.
cA booster seat must only be installed in
a seating position that has a
lap/shoulder belt. Failure to use a
three-point type seat belt with a
booster seat can result in a serious in-
jury in sudden stop or collision.
cImproper use or improper installation
of a booster seat can increase the risk
or severity of injury for both the child
and other occupants of the vehicle and
can lead to serious injury or death in an
accident.
ARS1098
BOOSTER SEATS
Safety—Seats, seat belts and supplemental restraint system1-47
ZREVIEW COPYÐ2008 Quest(van)
Owners ManualÐUSA_English(nna)
06/29/07Ðdebbie
X
Page 65 of 376
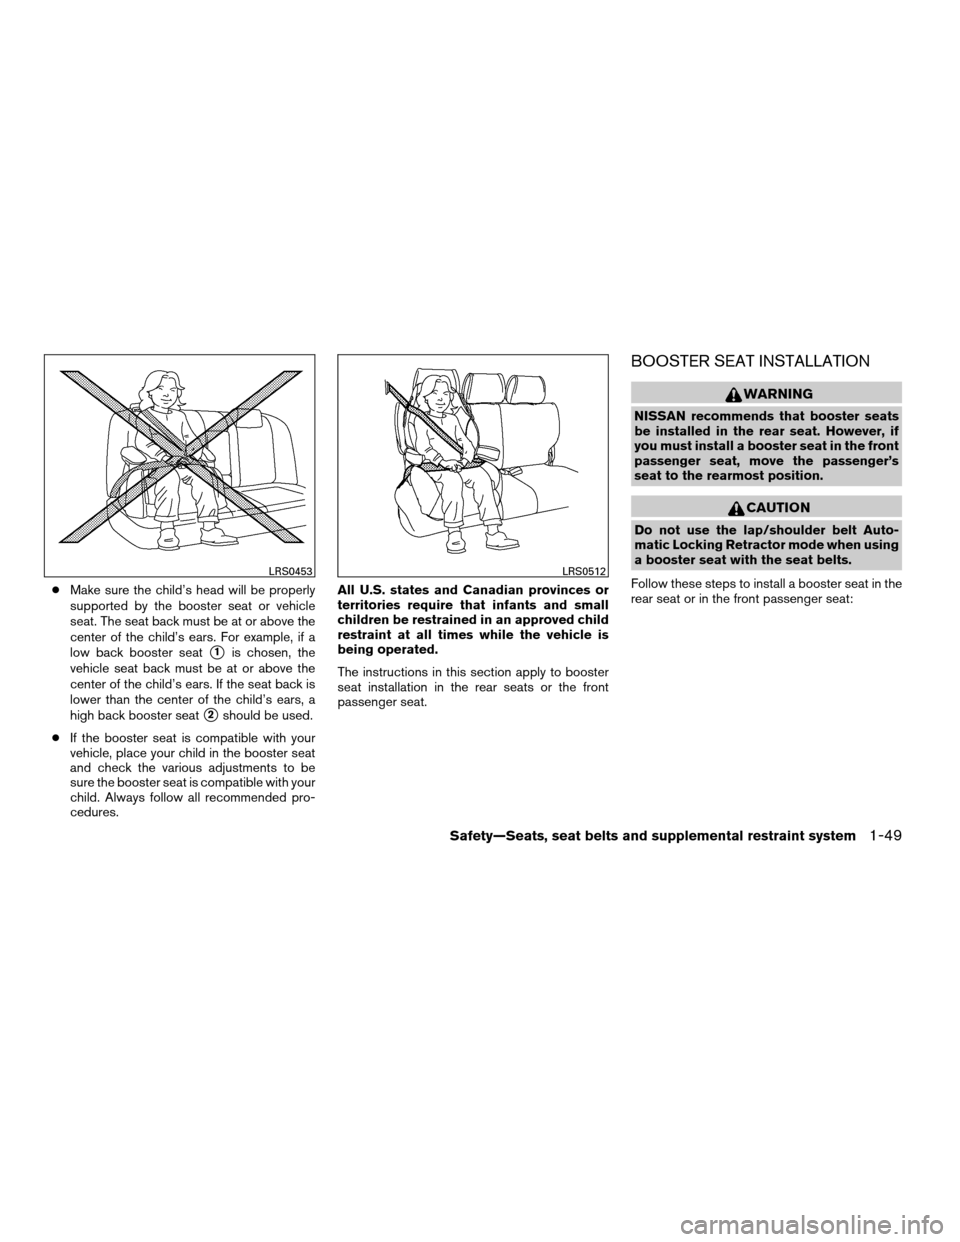
cMake sure the child’s head will be properly
supported by the booster seat or vehicle
seat. The seat back must be at or above the
center of the child’s ears. For example, if a
low back booster seat
s1is chosen, the
vehicle seat back must be at or above the
center of the child’s ears. If the seat back is
lower than the center of the child’s ears, a
high back booster seat
s2should be used.
cIf the booster seat is compatible with your
vehicle, place your child in the booster seat
and check the various adjustments to be
sure the booster seat is compatible with your
child. Always follow all recommended pro-
cedures.All U.S. states and Canadian provinces or
territories require that infants and small
children be restrained in an approved child
restraint at all times while the vehicle is
being operated.
The instructions in this section apply to booster
seat installation in the rear seats or the front
passenger seat.
BOOSTER SEAT INSTALLATION
WARNING
NISSAN recommends that booster seats
be installed in the rear seat. However, if
you must install a booster seat in the front
passenger seat, move the passenger’s
seat to the rearmost position.
CAUTION
Do not use the lap/shoulder belt Auto-
matic Locking Retractor mode when using
a booster seat with the seat belts.
Follow these steps to install a booster seat in the
rear seat or in the front passenger seat:
LRS0453LRS0512
Safety—Seats, seat belts and supplemental restraint system1-49
ZREVIEW COPYÐ2008 Quest(van)
Owners ManualÐUSA_English(nna)
06/29/07Ðdebbie
X
Page 67 of 376

4. Position the lap portion of the seat belt low
and snug on the child’s hips. Be sure to
follow the booster seat manufacturer’s in-
structions for adjusting the belt routing.
5. Pull the shoulder belt portion of the seat belt
toward the retractor to take up extra slack.
Be sure the shoulder belt is positioned
across the top, middle portion of the child’s
shoulder. Be sure to follow the booster seat
manufacturer’s instructions for adjusting the
belt routing.
6. Follow the warnings, cautions and instruc-
tions for properly fastening a seat belt
shown in the “Three-point seat belt with
retractor” earlier in this section.7. If the booster seat is installed in the front
passenger seat, turn the ignition switch to
the ON position. The front passenger air bag
status light
may or may not illuminate,
depending on the size of the child and the
type of booster seat being used. See “Front
passenger air bag and status light” later in
this section.
Front passenger position
LRS0454WRS0475
Safety—Seats, seat belts and supplemental restraint system1-51
ZREVIEW COPYÐ2008 Quest(van)
Owners ManualÐUSA_English(nna)
06/29/07Ðdebbie
X