2008 NISSAN QUEST warning
[x] Cancel search: warningPage 35 of 376
have a label certifying that it complies with Fed-
eral Motor Vehicle Safety Standards or Canadian
Motor Vehicle Safety Standards. Once the child
has grown so the shoulder belt is no longer on or
near the face and neck, use the shoulder belt
without the booster seat.
WARNING
Never let a child stand or kneel on any
seat and do not allow a child in the cargo
areas while the vehicle is moving. The
child could be seriously injured or killed in
an accident or sudden stop.
PREGNANT WOMEN
NISSAN recommends that pregnant women use
seat belts. The seat belt should be worn snug,
and always position the lap belt as low as pos-
sible around the hips, not the waist. Place the
shoulder belt over your shoulder and across your
chest. Never run the lap/shoulder belt over your
abdominal area. Contact your doctor for specific
recommendations.
INJURED PERSONS
NISSAN recommends that injured persons use
seat belts. Check with your doctor for specific
recommendations.
THREE-POINT TYPE SEAT BELT
WITH RETRACTOR
WARNING
cEvery person who drives or rides in this
vehicle should use a seat belt at all
times.
cDo not ride in a moving vehicle when
the seatback is reclined. This can be
dangerous. The shoulder belt will not
be against your body. In an accident,
you could be thrown into it and receive
neck or other serious injuries. You
could also slide under the lap belt and
receive serious internal injuries.
cFor the most effective protection when
the vehicle is in motion, the seat should
be upright. Always sit well back in the
seat with both feet on the floor and
adjust the seat belt properly.
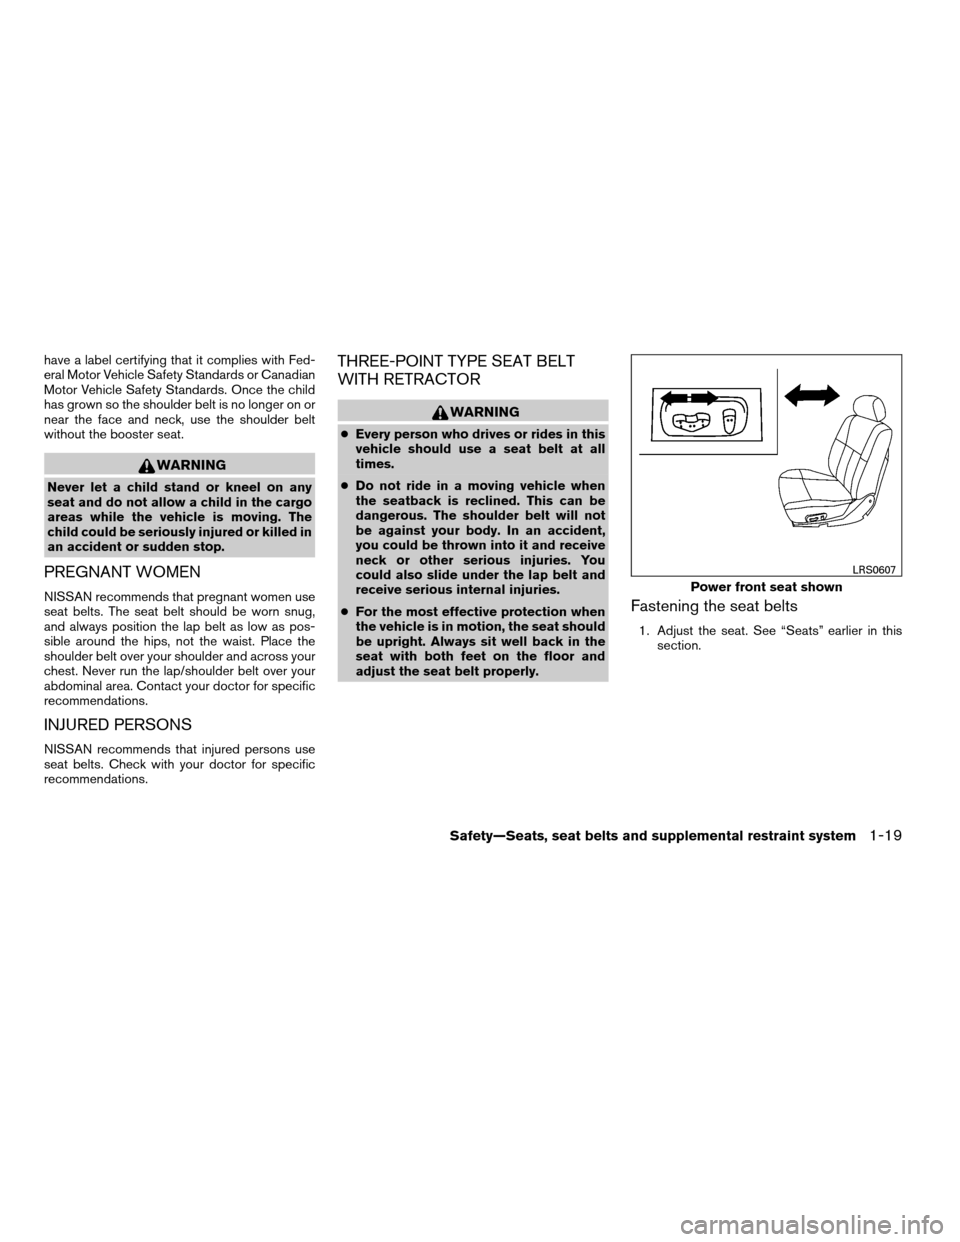
Fastening the seat belts
1. Adjust the seat. See “Seats” earlier in this
section.
Power front seat shown
LRS0607
Safety—Seats, seat belts and supplemental restraint system1-19
ZREVIEW COPYÐ2008 Quest(van)
Owners ManualÐUSA_English(nna)
06/29/07Ðdebbie
X
Page 37 of 376
WARNING
When fastening the seat belts, be certain
that the seatbacks are completely se-
cured in the latched position. If they are
not completely secured, passengers may
be injured in an accident or sudden stop.
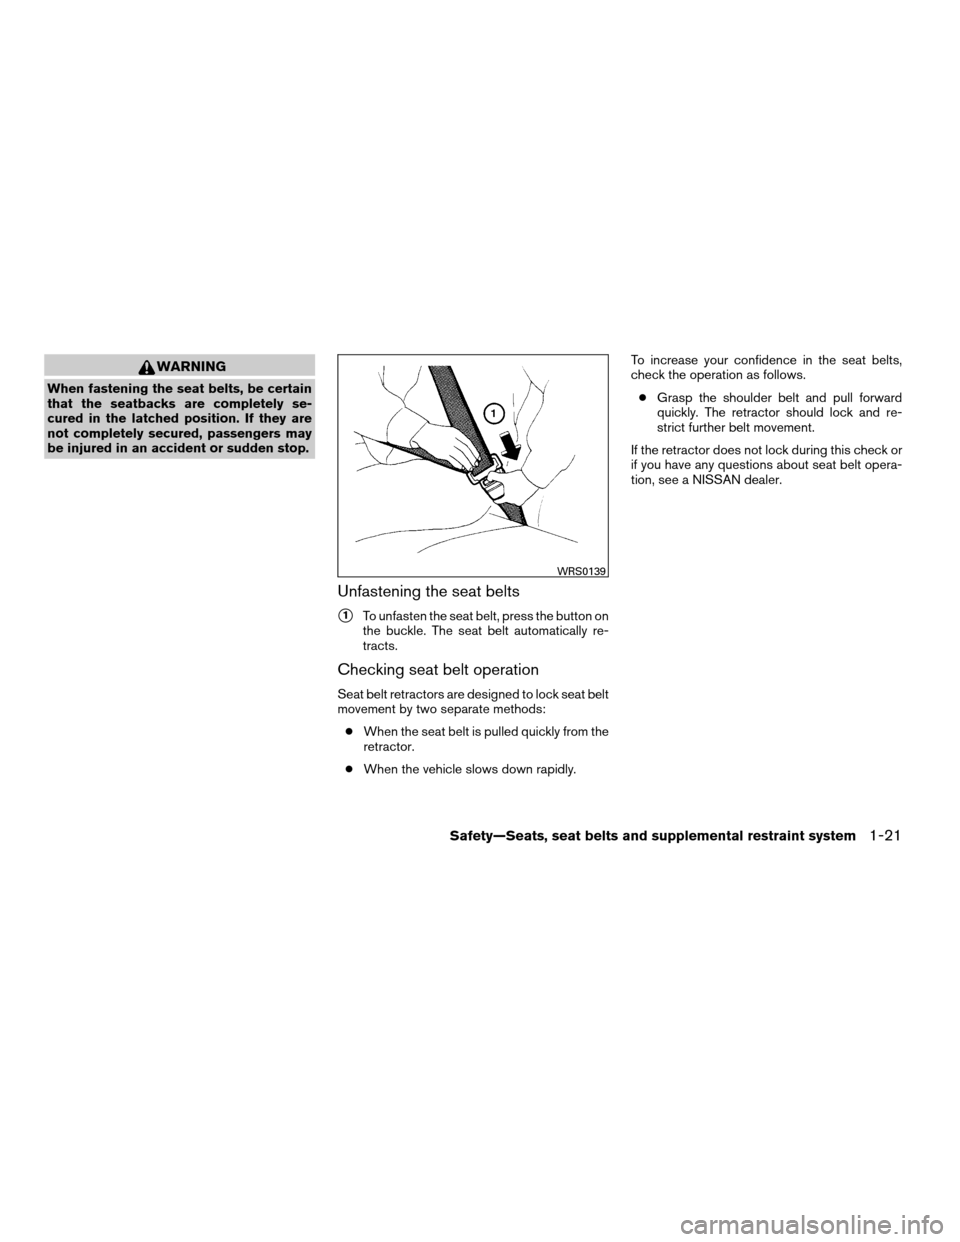
Unfastening the seat belts
s1To unfasten the seat belt, press the button on
the buckle. The seat belt automatically re-
tracts.
Checking seat belt operation
Seat belt retractors are designed to lock seat belt
movement by two separate methods:
cWhen the seat belt is pulled quickly from the
retractor.
cWhen the vehicle slows down rapidly.To increase your confidence in the seat belts,
check the operation as follows.
cGrasp the shoulder belt and pull forward
quickly. The retractor should lock and re-
strict further belt movement.
If the retractor does not lock during this check or
if you have any questions about seat belt opera-
tion, see a NISSAN dealer.
WRS0139
Safety—Seats, seat belts and supplemental restraint system1-21
ZREVIEW COPYÐ2008 Quest(van)
Owners ManualÐUSA_English(nna)
06/29/07Ðdebbie
X
Page 38 of 376
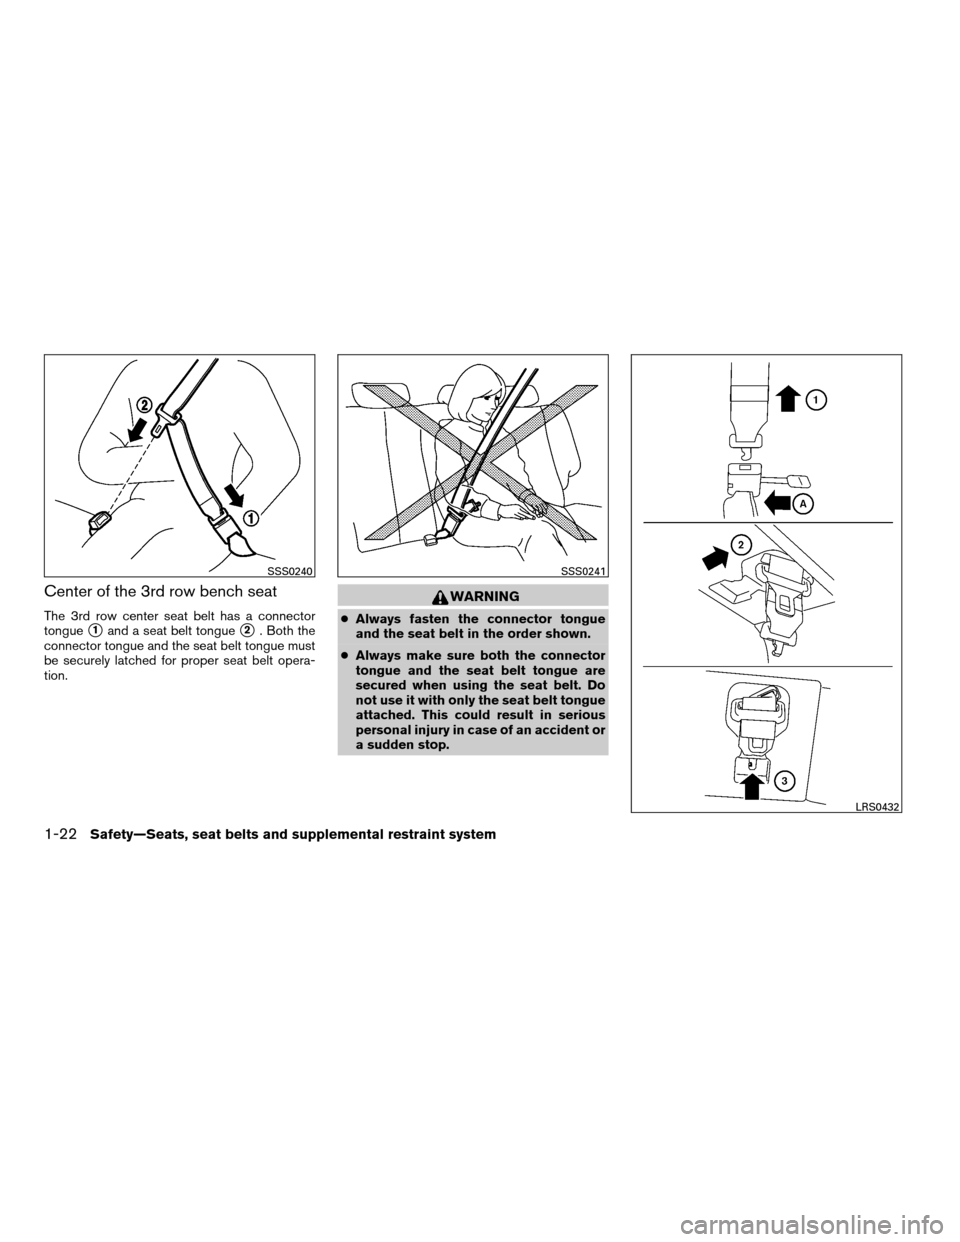
Center of the 3rd row bench seat
The 3rd row center seat belt has a connector
tongue
s1and a seat belt tongues2. Both the
connector tongue and the seat belt tongue must
be securely latched for proper seat belt opera-
tion.
WARNING
cAlways fasten the connector tongue
and the seat belt in the order shown.
cAlways make sure both the connector
tongue and the seat belt tongue are
secured when using the seat belt. Do
not use it with only the seat belt tongue
attached. This could result in serious
personal injury in case of an accident or
a sudden stop.
SSS0240SSS0241
LRS0432
1-22Safety—Seats, seat belts and supplemental restraint system
ZREVIEW COPYÐ2008 Quest(van)
Owners ManualÐUSA_English(nna)
06/29/07Ðdebbie
X
Page 39 of 376
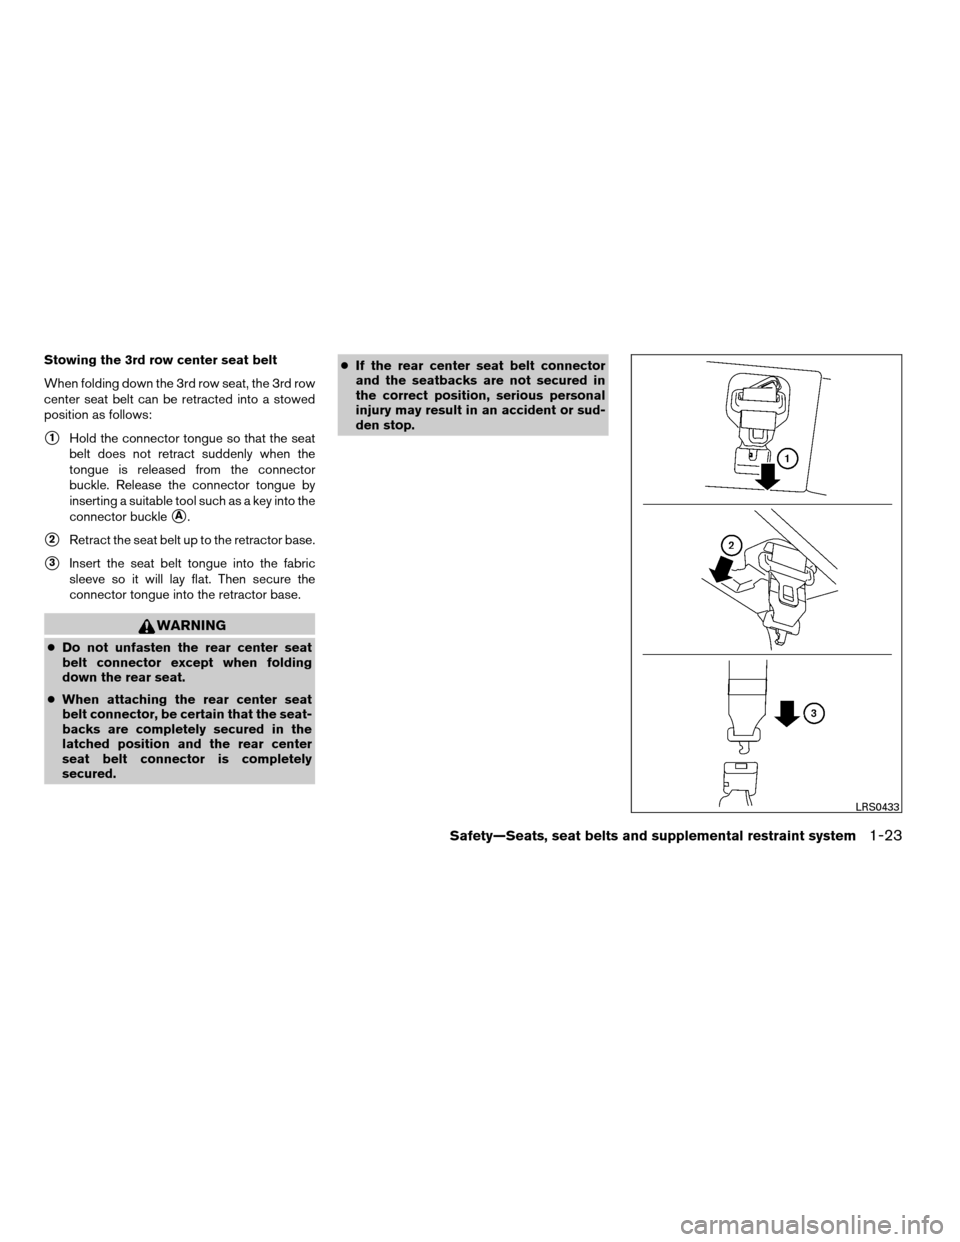
Stowing the 3rd row center seat belt
When folding down the 3rd row seat, the 3rd row
center seat belt can be retracted into a stowed
position as follows:
s1Hold the connector tongue so that the seat
belt does not retract suddenly when the
tongue is released from the connector
buckle. Release the connector tongue by
inserting a suitable tool such as a key into the
connector buckle
sA.
s2Retract the seat belt up to the retractor base.
s3Insert the seat belt tongue into the fabric
sleeve so it will lay flat. Then secure the
connector tongue into the retractor base.
WARNING
cDo not unfasten the rear center seat
belt connector except when folding
down the rear seat.
cWhen attaching the rear center seat
belt connector, be certain that the seat-
backs are completely secured in the
latched position and the rear center
seat belt connector is completely
secured.cIf the rear center seat belt connector
and the seatbacks are not secured in
the correct position, serious personal
injury may result in an accident or sud-
den stop.
LRS0433
Safety—Seats, seat belts and supplemental restraint system1-23
ZREVIEW COPYÐ2008 Quest(van)
Owners ManualÐUSA_English(nna)
06/29/07Ðdebbie
X
Page 40 of 376
Attaching the 3rd row center seat belt
Always be sure the 3rd row center seat belt
connector tongue and connector buckle are at-
tached. Disconnect only when folding down the
rear seat.
To connect the buckle:
s1Pull out the connector tongue from the re-
tractor base.
s2Pull out the seat belt tongue from the fabric
sleeve.
s3Pull the seat belt and secure the receiver
buckle until it clicks.
The center seat belt connector tongue and re-
ceiver buckle are indicated by the > and < mark.
The center seat belt connector tongue can be
attached only into the rear center seat belt con-
nector buckle.
To fasten the seat belt, see “Fastening the seat
belt” earlier in this section.
WARNING
cDo not unfasten the rear center seat
belt connector except when folding
down the rear seat.
cWhen attaching the rear center seat
belt connector, be certain that the seat-
backs are completely secured in the
latched position and the rear center
seat belt connector is completely
secured.
cIf the rear center seat belt connector
and the seatbacks are not secured in
the correct position, serious personal
injury may result in an accident or sud-
den stop.
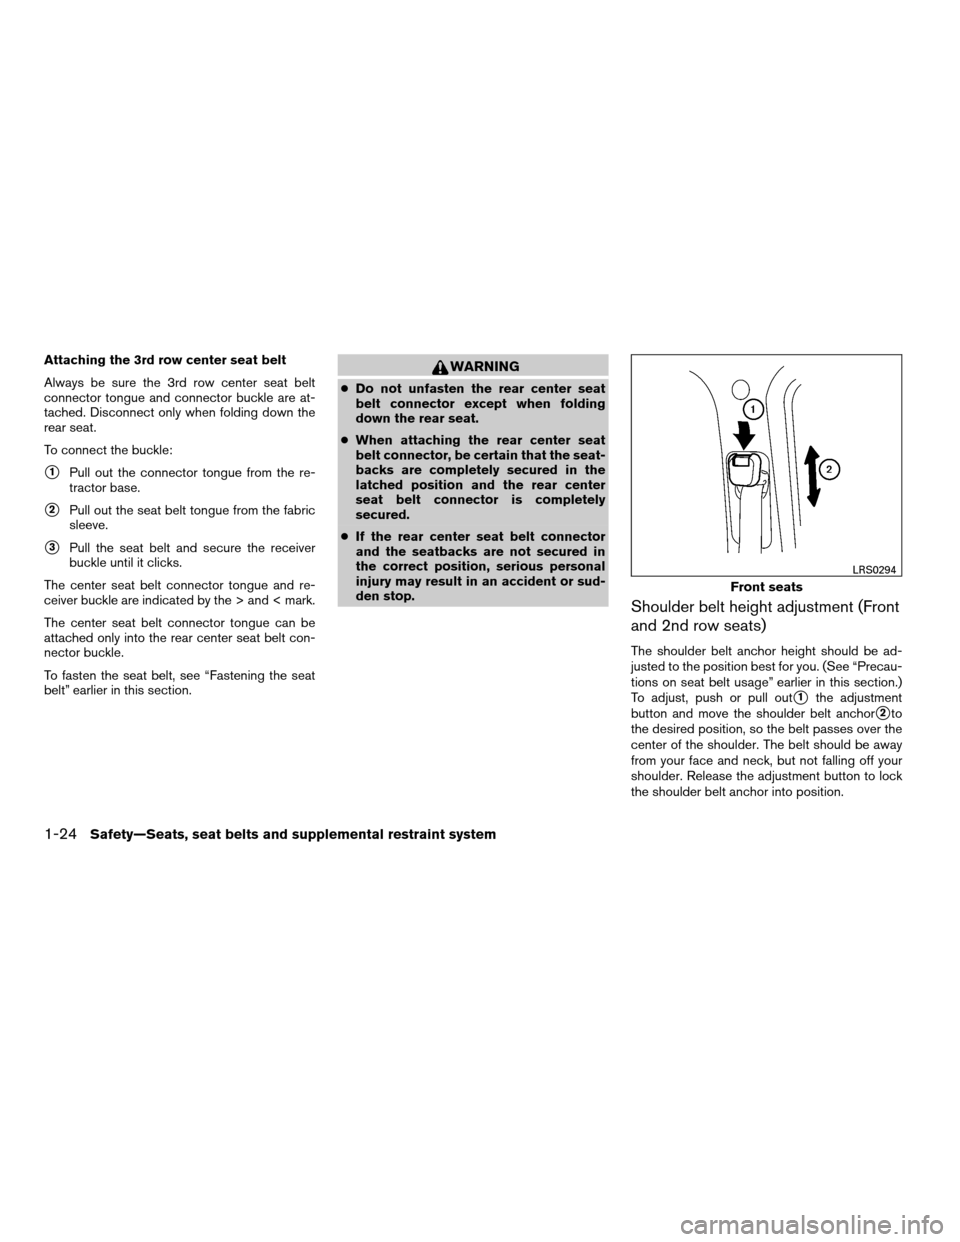
Shoulder belt height adjustment (Front
and 2nd row seats)
The shoulder belt anchor height should be ad-
justed to the position best for you. (See “Precau-
tions on seat belt usage” earlier in this section.)
To adjust, push or pull out
s1the adjustment
button and move the shoulder belt anchor
s2to
the desired position, so the belt passes over the
center of the shoulder. The belt should be away
from your face and neck, but not falling off your
shoulder. Release the adjustment button to lock
the shoulder belt anchor into position.
Front seats
LRS0294
1-24Safety—Seats, seat belts and supplemental restraint system
ZREVIEW COPYÐ2008 Quest(van)
Owners ManualÐUSA_English(nna)
06/29/07Ðdebbie
X
Page 41 of 376
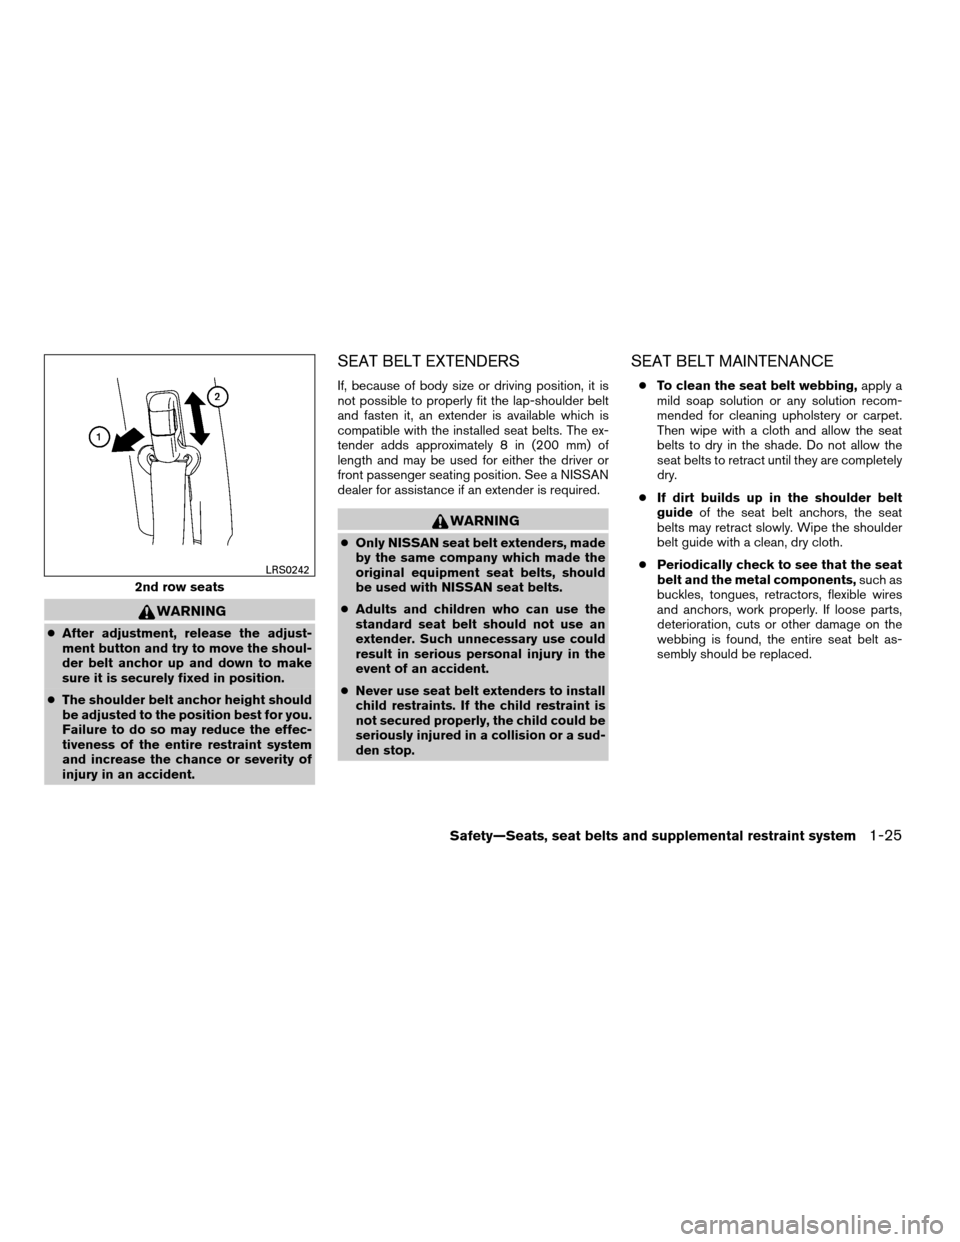
WARNING
cAfter adjustment, release the adjust-
ment button and try to move the shoul-
der belt anchor up and down to make
sure it is securely fixed in position.
cThe shoulder belt anchor height should
be adjusted to the position best for you.
Failure to do so may reduce the effec-
tiveness of the entire restraint system
and increase the chance or severity of
injury in an accident.
SEAT BELT EXTENDERS
If, because of body size or driving position, it is
not possible to properly fit the lap-shoulder belt
and fasten it, an extender is available which is
compatible with the installed seat belts. The ex-
tender adds approximately 8 in (200 mm) of
length and may be used for either the driver or
front passenger seating position. See a NISSAN
dealer for assistance if an extender is required.
WARNING
cOnly NISSAN seat belt extenders, made
by the same company which made the
original equipment seat belts, should
be used with NISSAN seat belts.
cAdults and children who can use the
standard seat belt should not use an
extender. Such unnecessary use could
result in serious personal injury in the
event of an accident.
cNever use seat belt extenders to install
child restraints. If the child restraint is
not secured properly, the child could be
seriously injured in a collision or a sud-
den stop.
SEAT BELT MAINTENANCE
cTo clean the seat belt webbing,apply a
mild soap solution or any solution recom-
mended for cleaning upholstery or carpet.
Then wipe with a cloth and allow the seat
belts to dry in the shade. Do not allow the
seat belts to retract until they are completely
dry.
cIf dirt builds up in the shoulder belt
guideof the seat belt anchors, the seat
belts may retract slowly. Wipe the shoulder
belt guide with a clean, dry cloth.
cPeriodically check to see that the seat
belt and the metal components,such as
buckles, tongues, retractors, flexible wires
and anchors, work properly. If loose parts,
deterioration, cuts or other damage on the
webbing is found, the entire seat belt as-
sembly should be replaced.
2nd row seats
LRS0242
Safety—Seats, seat belts and supplemental restraint system1-25
ZREVIEW COPYÐ2008 Quest(van)
Owners ManualÐUSA_English(nna)
06/29/07Ðdebbie
X
Page 42 of 376
PRECAUTIONS ON CHILD
RESTRAINTSWARNING
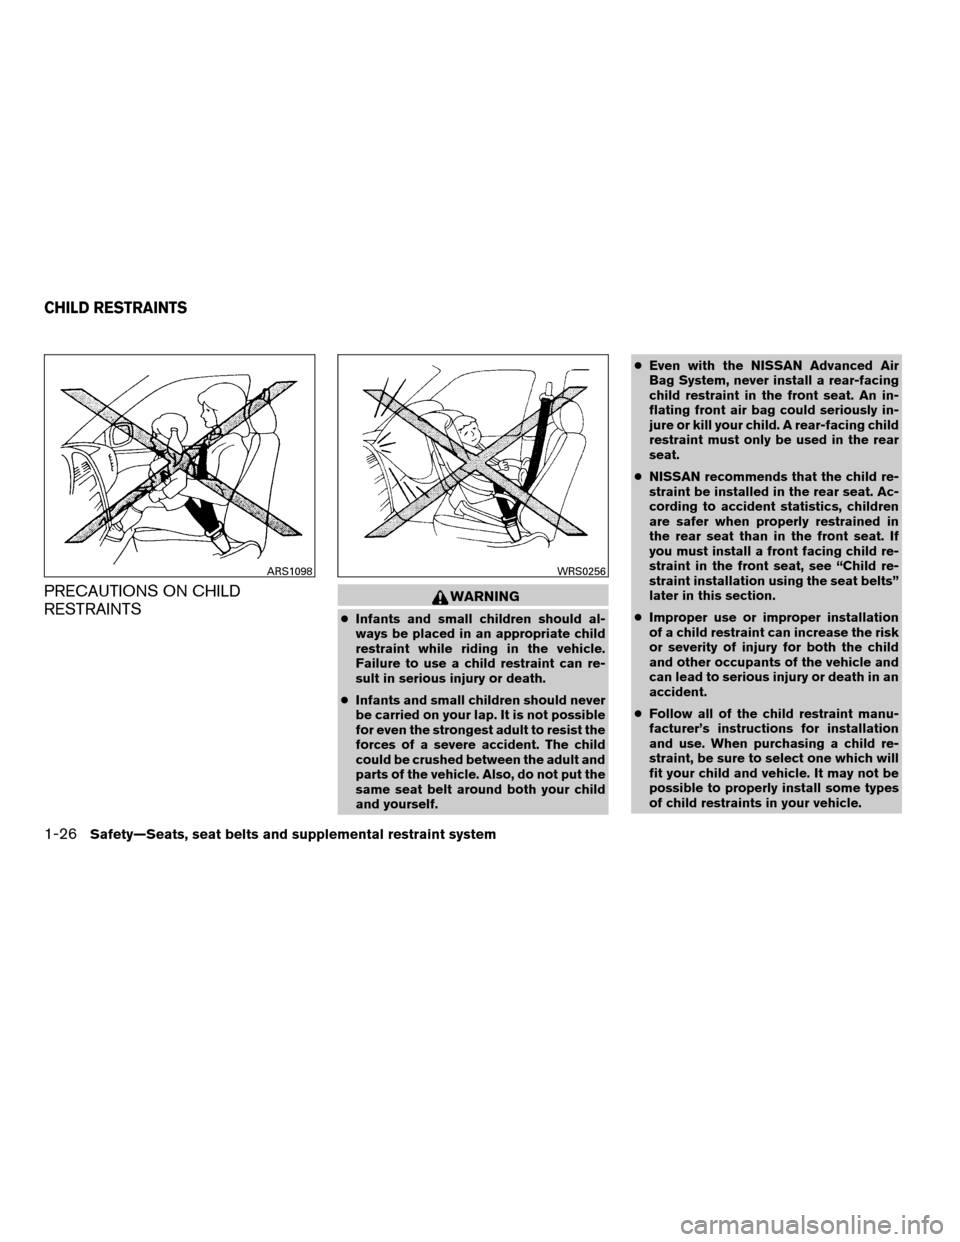
cInfants and small children should al-
ways be placed in an appropriate child
restraint while riding in the vehicle.
Failure to use a child restraint can re-
sult in serious injury or death.
cInfants and small children should never
be carried on your lap. It is not possible
for even the strongest adult to resist the
forces of a severe accident. The child
could be crushed between the adult and
parts of the vehicle. Also, do not put the
same seat belt around both your child
and yourself.cEven with the NISSAN Advanced Air
Bag System, never install a rear-facing
child restraint in the front seat. An in-
flating front air bag could seriously in-
jure or kill your child. A rear-facing child
restraint must only be used in the rear
seat.
cNISSAN recommends that the child re-
straint be installed in the rear seat. Ac-
cording to accident statistics, children
are safer when properly restrained in
the rear seat than in the front seat. If
you must install a front facing child re-
straint in the front seat, see “Child re-
straint installation using the seat belts”
later in this section.
cImproper use or improper installation
of a child restraint can increase the risk
or severity of injury for both the child
and other occupants of the vehicle and
can lead to serious injury or death in an
accident.
cFollow all of the child restraint manu-
facturer’s instructions for installation
and use. When purchasing a child re-
straint, be sure to select one which will
fit your child and vehicle. It may not be
possible to properly install some types
of child restraints in your vehicle.
ARS1098WRS0256
CHILD RESTRAINTS
1-26Safety—Seats, seat belts and supplemental restraint system
ZREVIEW COPYÐ2008 Quest(van)
Owners ManualÐUSA_English(nna)
06/29/07Ðdebbie
X
Page 44 of 376
LOWER ANCHORS AND TETHERS
FOR CHILDREN SYSTEM (LATCH)
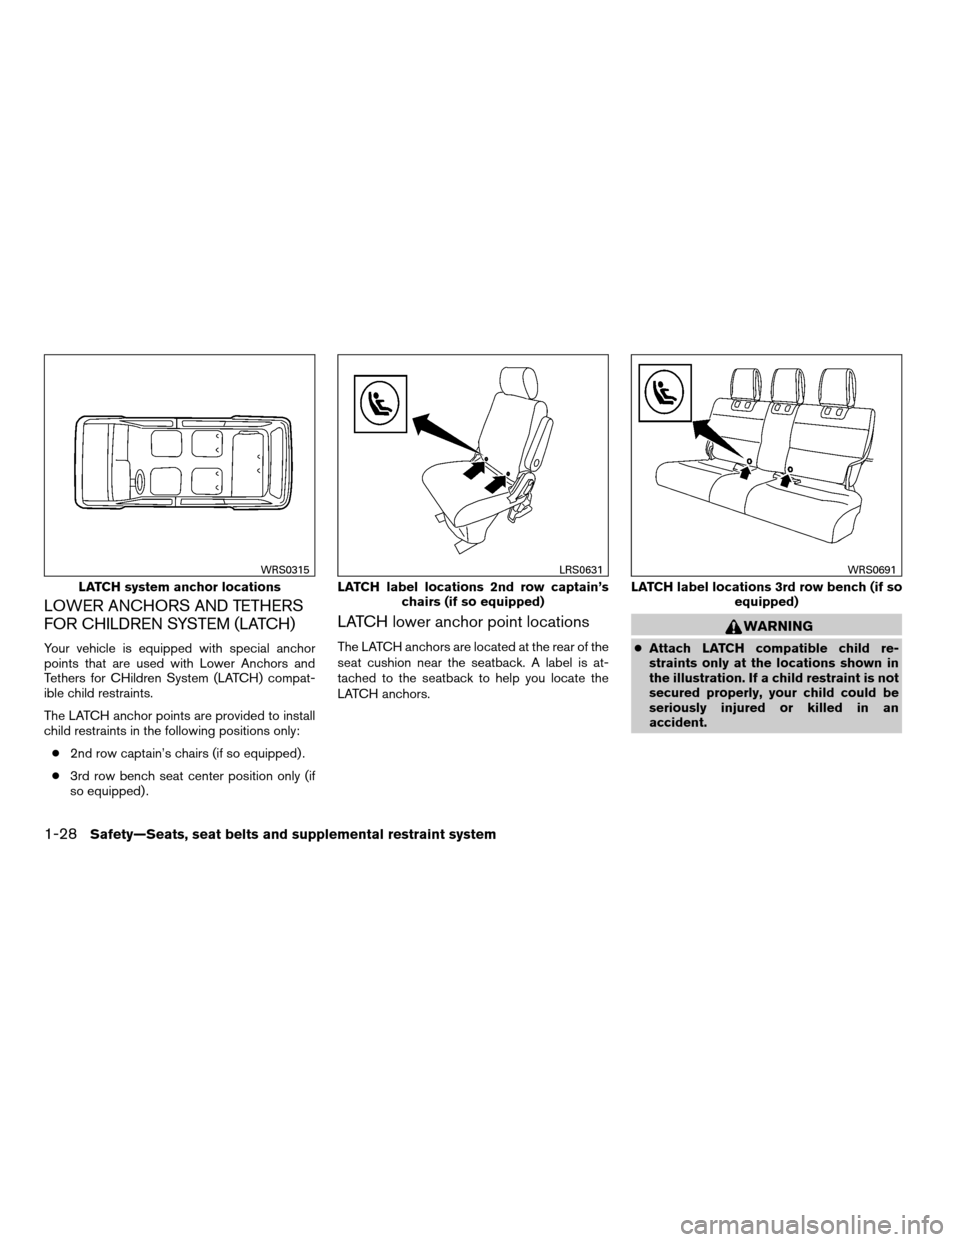
Your vehicle is equipped with special anchor
points that are used with Lower Anchors and
Tethers for CHildren System (LATCH) compat-
ible child restraints.
The LATCH anchor points are provided to install
child restraints in the following positions only:
c2nd row captain’s chairs (if so equipped) .
c3rd row bench seat center position only (if
so equipped) .
LATCH lower anchor point locations
The LATCH anchors are located at the rear of the
seat cushion near the seatback. A label is at-
tached to the seatback to help you locate the
LATCH anchors.
WARNING
cAttach LATCH compatible child re-
straints only at the locations shown in
the illustration. If a child restraint is not
secured properly, your child could be
seriously injured or killed in an
accident.
LATCH system anchor locations
WRS0315
LATCH label locations 2nd row captain’s
chairs (if so equipped)
LRS0631
LATCH label locations 3rd row bench (if so
equipped)
WRS0691
1-28Safety—Seats, seat belts and supplemental restraint system
ZREVIEW COPYÐ2008 Quest(van)
Owners ManualÐUSA_English(nna)
06/29/07Ðdebbie
X