2008 NISSAN QUEST lights
[x] Cancel search: lightsPage 141 of 376

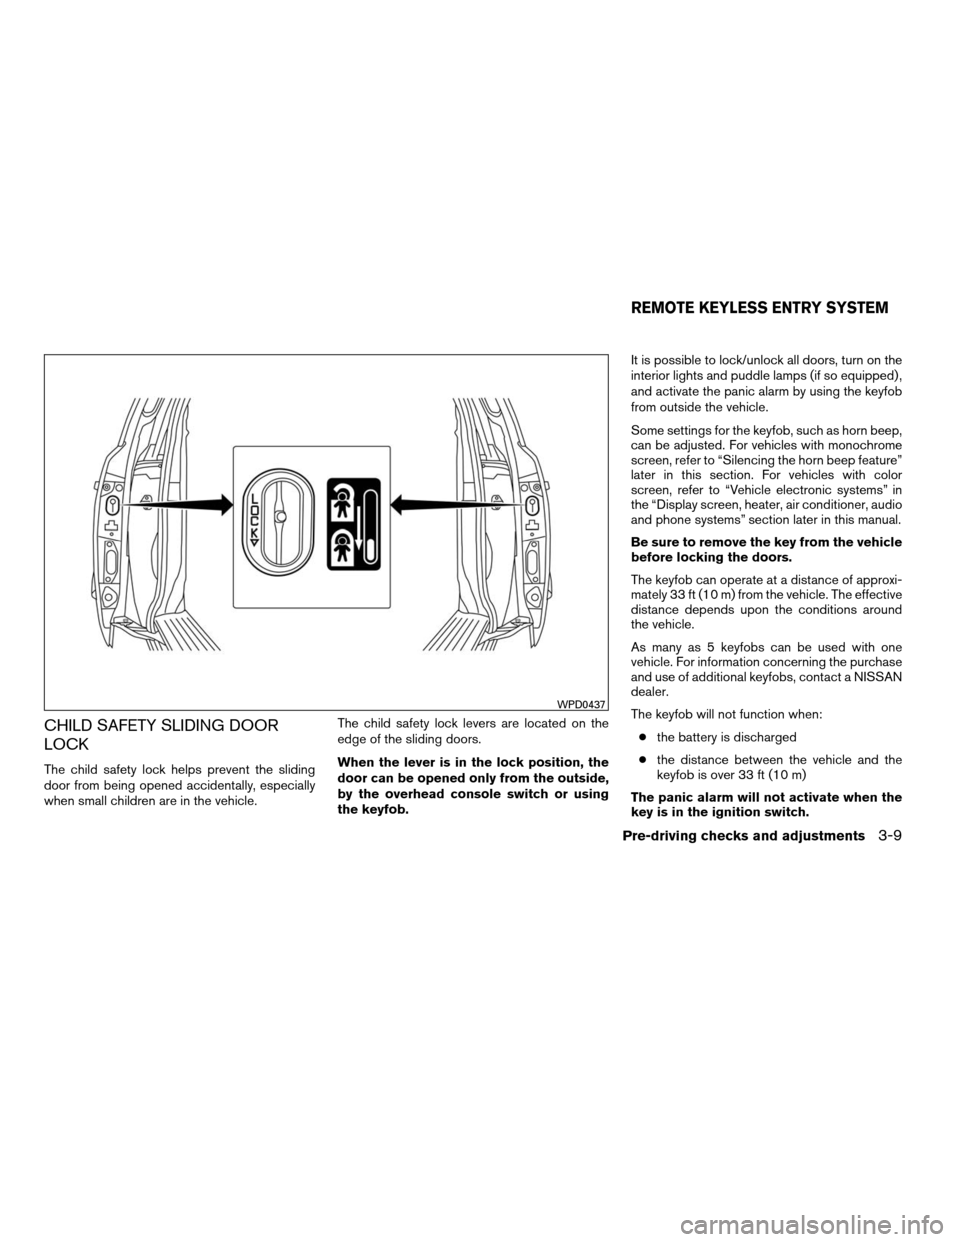
CHILD SAFETY SLIDING DOOR
LOCK
The child safety lock helps prevent the sliding
door from being opened accidentally, especially
when small children are in the vehicle.The child safety lock levers are located on the
edge of the sliding doors.
When the lever is in the lock position, the
door can be opened only from the outside,
by the overhead console switch or using
the keyfob.It is possible to lock/unlock all doors, turn on the
interior lights and puddle lamps (if so equipped) ,
and activate the panic alarm by using the keyfob
from outside the vehicle.
Some settings for the keyfob, such as horn beep,
can be adjusted. For vehicles with monochrome
screen, refer to “Silencing the horn beep feature”
later in this section. For vehicles with color
screen, refer to “Vehicle electronic systems” in
the “Display screen, heater, air conditioner, audio
and phone systems” section later in this manual.
Be sure to remove the key from the vehicle
before locking the doors.
The keyfob can operate at a distance of approxi-
mately 33 ft (10 m) from the vehicle. The effective
distance depends upon the conditions around
the vehicle.
As many as 5 keyfobs can be used with one
vehicle. For information concerning the purchase
and use of additional keyfobs, contact a NISSAN
dealer.
The keyfob will not function when:
cthe battery is discharged
cthe distance between the vehicle and the
keyfob is over 33 ft (10 m)
The panic alarm will not activate when the
key is in the ignition switch.
WPD0437
REMOTE KEYLESS ENTRY SYSTEM
Pre-driving checks and adjustments3-9
ZREVIEW COPYÐ2008 Quest(van)
Owners ManualÐUSA_English(nna)
06/29/07Ðdebbie
X
Page 142 of 376

CAUTION
Listed below are conditions or occur-
rences which will damage the keyfob:
cDo not allow the keyfob to become wet.
cDo not drop the keyfob.
cDo not strike the keyfob sharply against
another object.
cDo not place the keyfob for an extended
period in an area where temperatures
exceed 140°F (60°C) .
If a keyfob is lost or stolen, NISSAN rec-
ommends erasing the ID code of that key-
fob. This will prevent the keyfob from un-
authorized use to unlock the vehicle. For
information regarding the erasing proce-
dure, please contact a NISSAN dealer.
HOW TO USE REMOTE KEYLESS
ENTRY SYSTEM
Locking doors
1. Close all windows.
2. Remove the key from the ignition switch.
3. Close the hood and all doors.
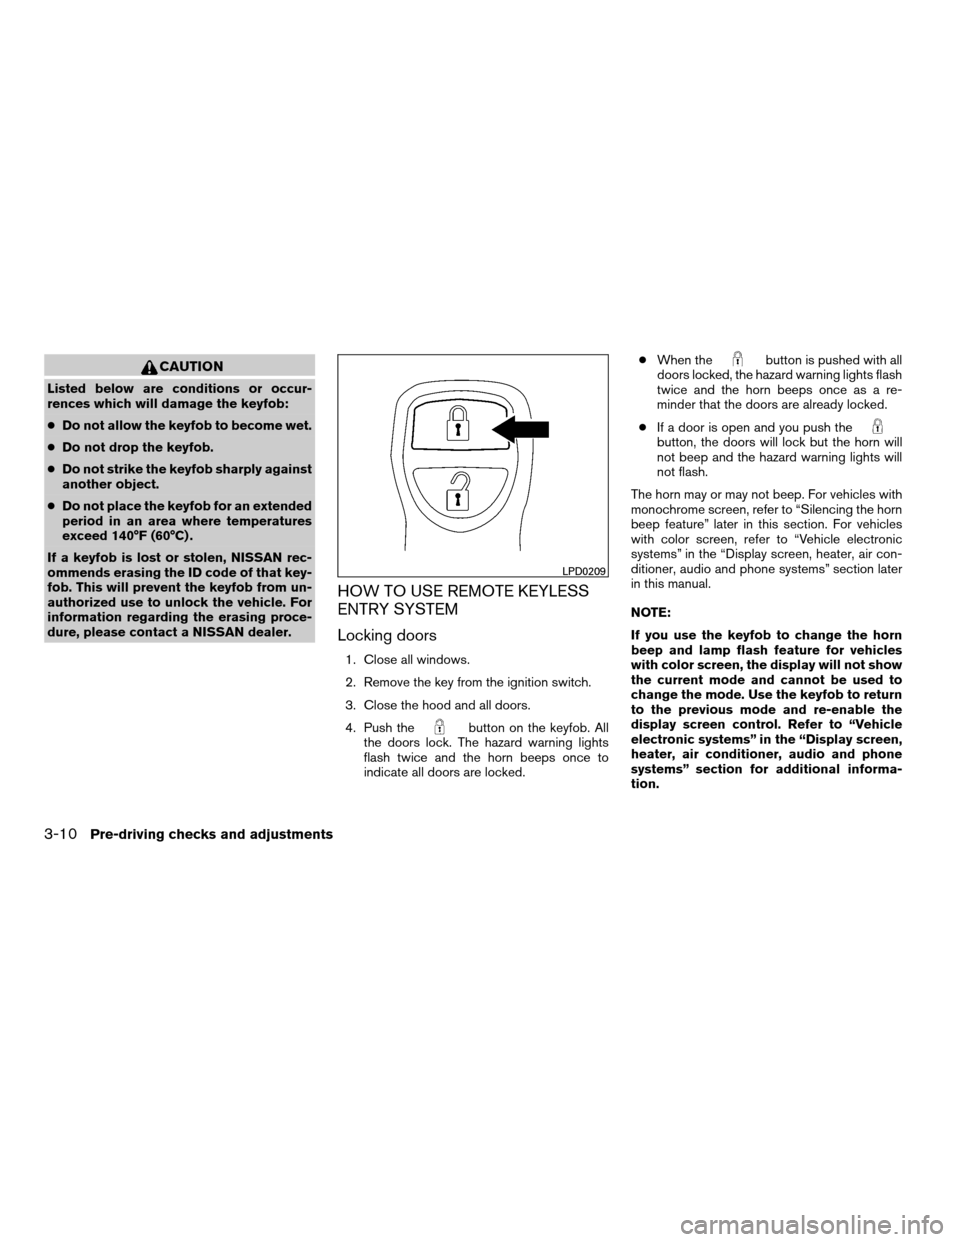
4. Push the
button on the keyfob. All
the doors lock. The hazard warning lights
flash twice and the horn beeps once to
indicate all doors are locked.cWhen the
button is pushed with all
doors locked, the hazard warning lights flash
twice and the horn beeps once as a re-
minder that the doors are already locked.
cIf a door is open and you push the
button, the doors will lock but the horn will
not beep and the hazard warning lights will
not flash.
The horn may or may not beep. For vehicles with
monochrome screen, refer to “Silencing the horn
beep feature” later in this section. For vehicles
with color screen, refer to “Vehicle electronic
systems” in the “Display screen, heater, air con-
ditioner, audio and phone systems” section later
in this manual.
NOTE:
If you use the keyfob to change the horn
beep and lamp flash feature for vehicles
with color screen, the display will not show
the current mode and cannot be used to
change the mode. Use the keyfob to return
to the previous mode and re-enable the
display screen control. Refer to “Vehicle
electronic systems” in the “Display screen,
heater, air conditioner, audio and phone
systems” section for additional informa-
tion.
LPD0209
3-10Pre-driving checks and adjustments
ZREVIEW COPYÐ2008 Quest(van)
Owners ManualÐUSA_English(nna)
06/29/07Ðdebbie
X
Page 143 of 376

Unlocking doors
Push thebutton on the keyfob once.
cOnly the driver’s door unlocks.
cThe hazard indicator flashes once if all doors
are completely closed with the ignition key in
any position except the ON position.
cThe interior lights and puddle lamps (if so
equipped) turn on and the light timer acti-
vates for 30 seconds when the lights on
demand switch is in the
position with
the ignition key in any position except the
ON position.Push the
button on the keyfob again within
5 seconds.
cAll doors unlock.
cThe hazard indicator flashes once if all doors
are completely closed.
The interior lights and puddle lamps (if so
equipped) can be turned off without waiting 30
seconds by inserting the key into the ignition and
turning to the ON or START position, locking the
doors with the keyfob or pushing the interior light
switch to the OFF position.
Auto relock
When thebutton on the keyfob is pushed,
all doors will lock automatically within 1 minute
unless one of the following operations is per-
formed:
cAny door is opened.
cA key is inserted into the ignition switch and
the key is turned from OFF to ON.
Opening windows
The keyfob allows you to open windows
equipped with automatic operation simulta-
neously.
cTo open the windows, press the
but-
ton on the keyfob forlonger than 3 sec-
ondsafter all doors are unlocked.
The door windows will open while pressing
the
button on the keyfob.
The door windows cannot be closed by
using the keyfob.
Linking the keyfob to automatic drive
positioner memory
If the vehicle is equipped with automatic drive
positioner, the keyfob can be linked to a memory
setting.
See “Automatic drive positioner” later in this sec-
tion.
LPD0210
Pre-driving checks and adjustments3-11
ZREVIEW COPYÐ2008 Quest(van)
Owners ManualÐUSA_English(nna)
06/29/07Ðdebbie
X
Page 144 of 376

Operating the power sliding door (if so
equipped)
Push and hold the button on the keyfob for about
0.5 second to open or close the power sliding
door.
The door will reverse direction immediately dur-
ing power open or power close if the keyfob
button is pressed. A chime will sound to an-
nounce the reversal.
For more information, see “Operating the power
sliding door” earlier in this section.
Operating the power lift gate (if so
equipped)
Push and hold the button on the keyfob for about
0.5 second to open or close the lift gate. The
hazard warning lights flash and a chime sounds
to indicate the power open or power close se-
quence has started.
The lift gate will reverse direction immediately
during power open or power close if the keyfob
button is pressed. A chime will sound to an-
nounce the reversal.
For more information, see “Lift gate” later in this
section.
Using the panic alarm
If you are near your vehicle and feel threatened,
you may activate the panic alarm to call attention
by pushing and holding the
button on the
keyfob forlonger than 0.5 second.
The panic alarm and headlights will stay on for 25
seconds.
The panic alarm stops when:
cit has run for 25 seconds, or
cany button is pushed on the keyfob.
WPD0336WPD0337LPD0211
3-12Pre-driving checks and adjustments
ZREVIEW COPYÐ2008 Quest(van)
Owners ManualÐUSA_English(nna)
06/29/07Ðdebbie
X
Page 145 of 376

Silencing the horn beep feature
If desired, the horn beep feature can be deacti-
vated using the keyfob.NOTE:
If you use the keyfob to change the horn
beep and lamp flash feature for vehicles
with color screen, the display will not show
the current mode and cannot be used to
change the mode. Use the keyfob to return
to the previous mode and re-enable the
display screen control. Refer to “Vehicle
electronic systems” in the “Display screen,
heater, air conditioner, audio and phone
systems” section for additional informa-
tion.
To deactivate:Press and hold the
andbuttonsfor at least 2 seconds.
The hazard warning lights will flash three times to
confirm that the horn beep feature has been
deactivated.
To activate:Press and hold the
andbuttonsfor at least 2 seconds
once more.
The hazard warning lights will flash once and the
horn will sound once to confirm that the horn
beep feature has been reactivated.
Deactivating the horn beep feature does not si-
lence the horn if the alarm is triggered.
Using the interior lights
Push thebutton on the keyfob once to turn
on the interior lights and puddle lamps (if so
equipped) .
For additional information, refer to “Lights on
demand switch” in the “Instruments and controls”
section earlier in this manual.
LPD0262
Pre-driving checks and adjustments3-13
ZREVIEW COPYÐ2008 Quest(van)
Owners ManualÐUSA_English(nna)
06/29/07Ðdebbie
X
Page 148 of 376

OPERATING THE POWER LIFT
GATE (if so equipped)
NOTE:
To open, close or reverse the power lift
gate, the shift selector lever must be in P
(Park) . Also, the power lift gate will not
operate if battery voltage is low.
Power Open:
The power lift gate automatically moves from the
fully closed position to the fully open position in
approximately5–8seconds. The power open
feature can be activated by the switch on thekeyfob and the overhead console and by the
outside opener handle. The hazard lights flash
and a chime sounds to indicate the power open
sequence has been started.
cThe lift gate can be opened by the overhead
console switch and the keyfob even if the
vehicle is locked. The lift gate will individually
unlock and open. Once the lift gate is
closed, its lock will align to the vehicle’s lock
or unlock status.
cThe keyfob button must be held for 0.5 sec-
ond before the lift gate opens.cThe lift gate must be unlocked to open it with
the outside opener handle.
cThe switch on the rear pillar cannot be used
to open the lift gate.
A warning chime will sound if the shift selector
lever is moved out of P (Park) during a power
open operation.
Power Close:
The power lift gate automatically moves from the
fully open position to the secondary position.
When the lift gate reaches the secondary posi-
tion, the cinching motor engages and pulls the lift
gate to its primary latch position. Power close
takes approximately7–10seconds. The power
close feature can be activated by the switch on
the keyfob, the overhead console and the rear
pillar. The hazard lights flash and a chime sounds
to indicate the power close sequence has been
started.
cIf the outside opener handle is activated
while the cinching motor is engaged, the
cinching motor will disengage and release
the latch.
cThe keyfob button must be held for 0.5 sec-
ond before the lift gate closes.
cThe switch on the rear pillar can only be used
to close the lift gate if the main ON/OFF
switch is ON.
Rear pillar switch
WPD0339
Overhead console switch
WPD0340
3-16Pre-driving checks and adjustments
ZREVIEW COPYÐ2008 Quest(van)
Owners ManualÐUSA_English(nna)
06/29/07Ðdebbie
X
Page 155 of 376

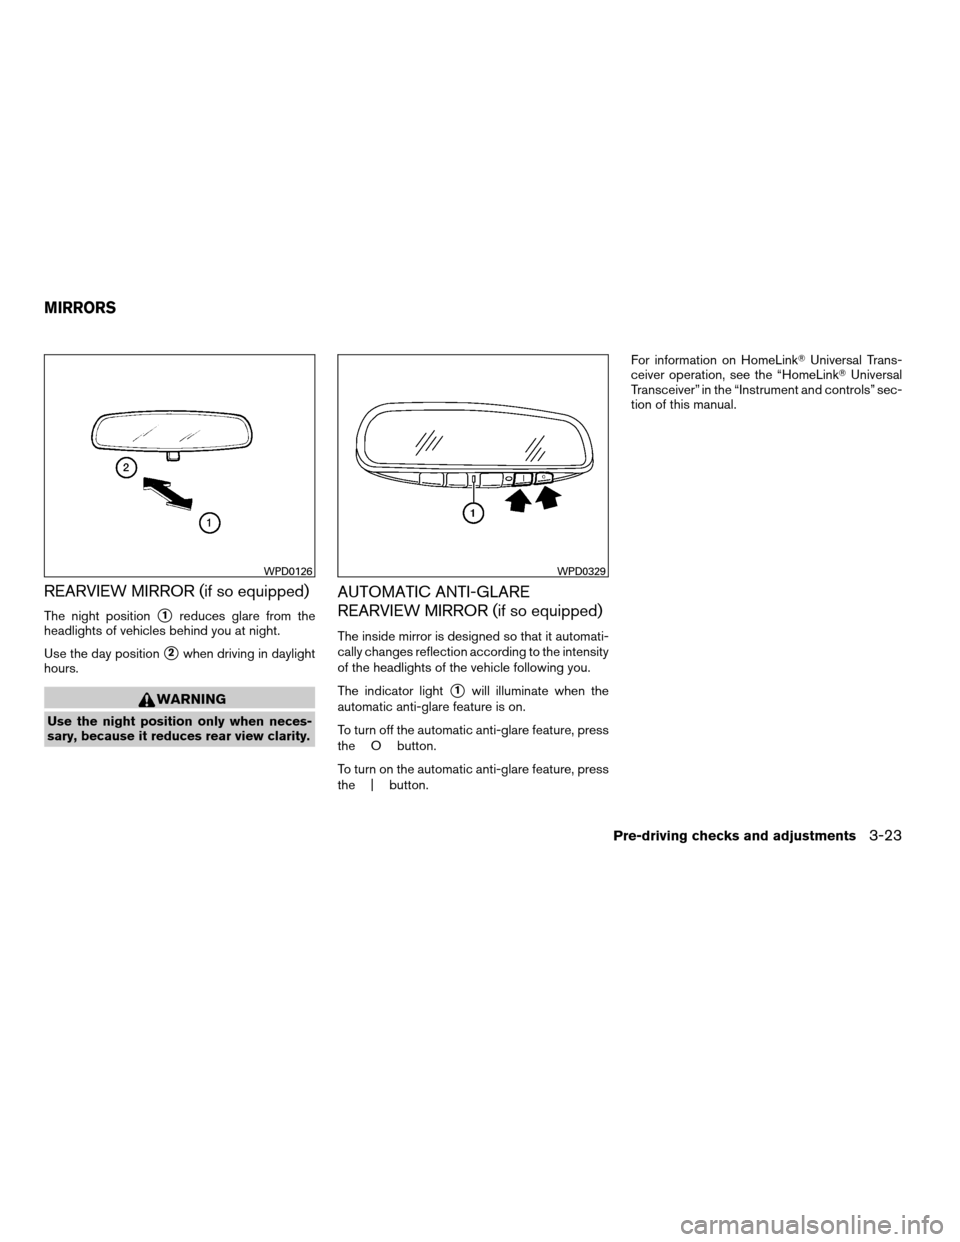
REARVIEW MIRROR (if so equipped)
The night positions1reduces glare from the
headlights of vehicles behind you at night.
Use the day position
s2when driving in daylight
hours.
WARNING
Use the night position only when neces-
sary, because it reduces rear view clarity.
AUTOMATIC ANTI-GLARE
REARVIEW MIRROR (if so equipped)
The inside mirror is designed so that it automati-
cally changes reflection according to the intensity
of the headlights of the vehicle following you.
The indicator light
s1will illuminate when the
automatic anti-glare feature is on.
To turn off the automatic anti-glare feature, press
the O button.
To turn on the automatic anti-glare feature, press
the | button.For information on HomeLinkTUniversal Trans-
ceiver operation, see the “HomeLinkTUniversal
Transceiver” in the “Instrument and controls” sec-
tion of this manual.
WPD0126WPD0329
MIRRORS
Pre-driving checks and adjustments3-23
ZREVIEW COPYÐ2008 Quest(van)
Owners ManualÐUSA_English(nna)
06/29/07Ðdebbie
X
Page 156 of 376

OUTSIDE MIRRORS
WARNING
Objects viewed in the outside mirror on
the passenger side are closer than they
appear. Be careful when moving to the
right. Using only this mirror could cause
an accident. Use the inside mirror or
glance over your shoulder to properly
judge distances to other objects.
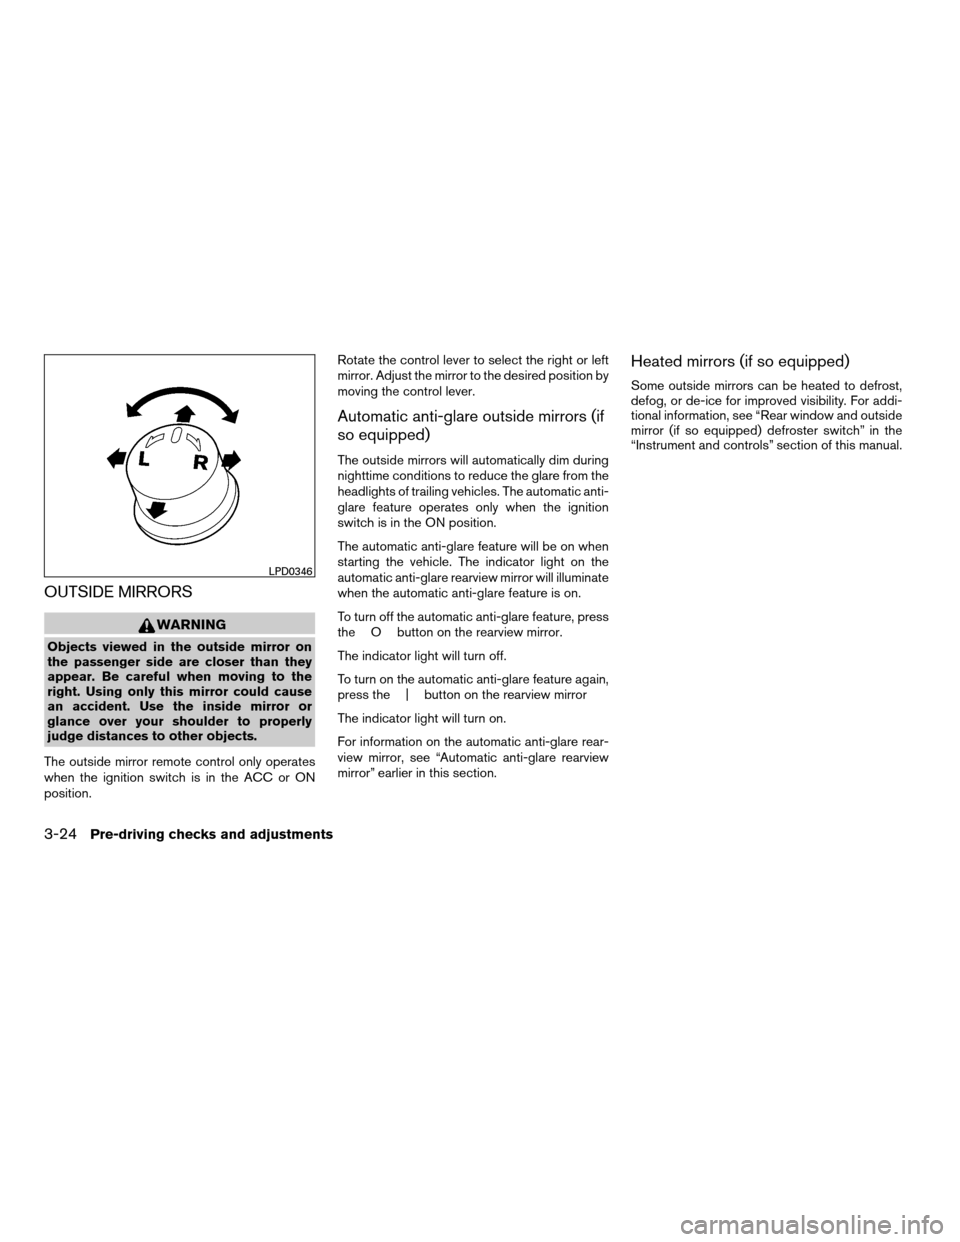
The outside mirror remote control only operates
when the ignition switch is in the ACC or ON
position.Rotate the control lever to select the right or left
mirror. Adjust the mirror to the desired position by
moving the control lever.
Automatic anti-glare outside mirrors (if
so equipped)
The outside mirrors will automatically dim during
nighttime conditions to reduce the glare from the
headlights of trailing vehicles. The automatic anti-
glare feature operates only when the ignition
switch is in the ON position.
The automatic anti-glare feature will be on when
starting the vehicle. The indicator light on the
automatic anti-glare rearview mirror will illuminate
when the automatic anti-glare feature is on.
To turn off the automatic anti-glare feature, press
the O button on the rearview mirror.
The indicator light will turn off.
To turn on the automatic anti-glare feature again,
press the | button on the rearview mirror
The indicator light will turn on.
For information on the automatic anti-glare rear-
view mirror, see “Automatic anti-glare rearview
mirror” earlier in this section.
Heated mirrors (if so equipped)
Some outside mirrors can be heated to defrost,
defog, or de-ice for improved visibility. For addi-
tional information, see “Rear window and outside
mirror (if so equipped) defroster switch” in the
“Instrument and controls” section of this manual.
LPD0346
3-24Pre-driving checks and adjustments
ZREVIEW COPYÐ2008 Quest(van)
Owners ManualÐUSA_English(nna)
06/29/07Ðdebbie
X