2008 NISSAN ALTIMA engine
[x] Cancel search: enginePage 4 of 36
INTELLIGENT K EY SYSTEM
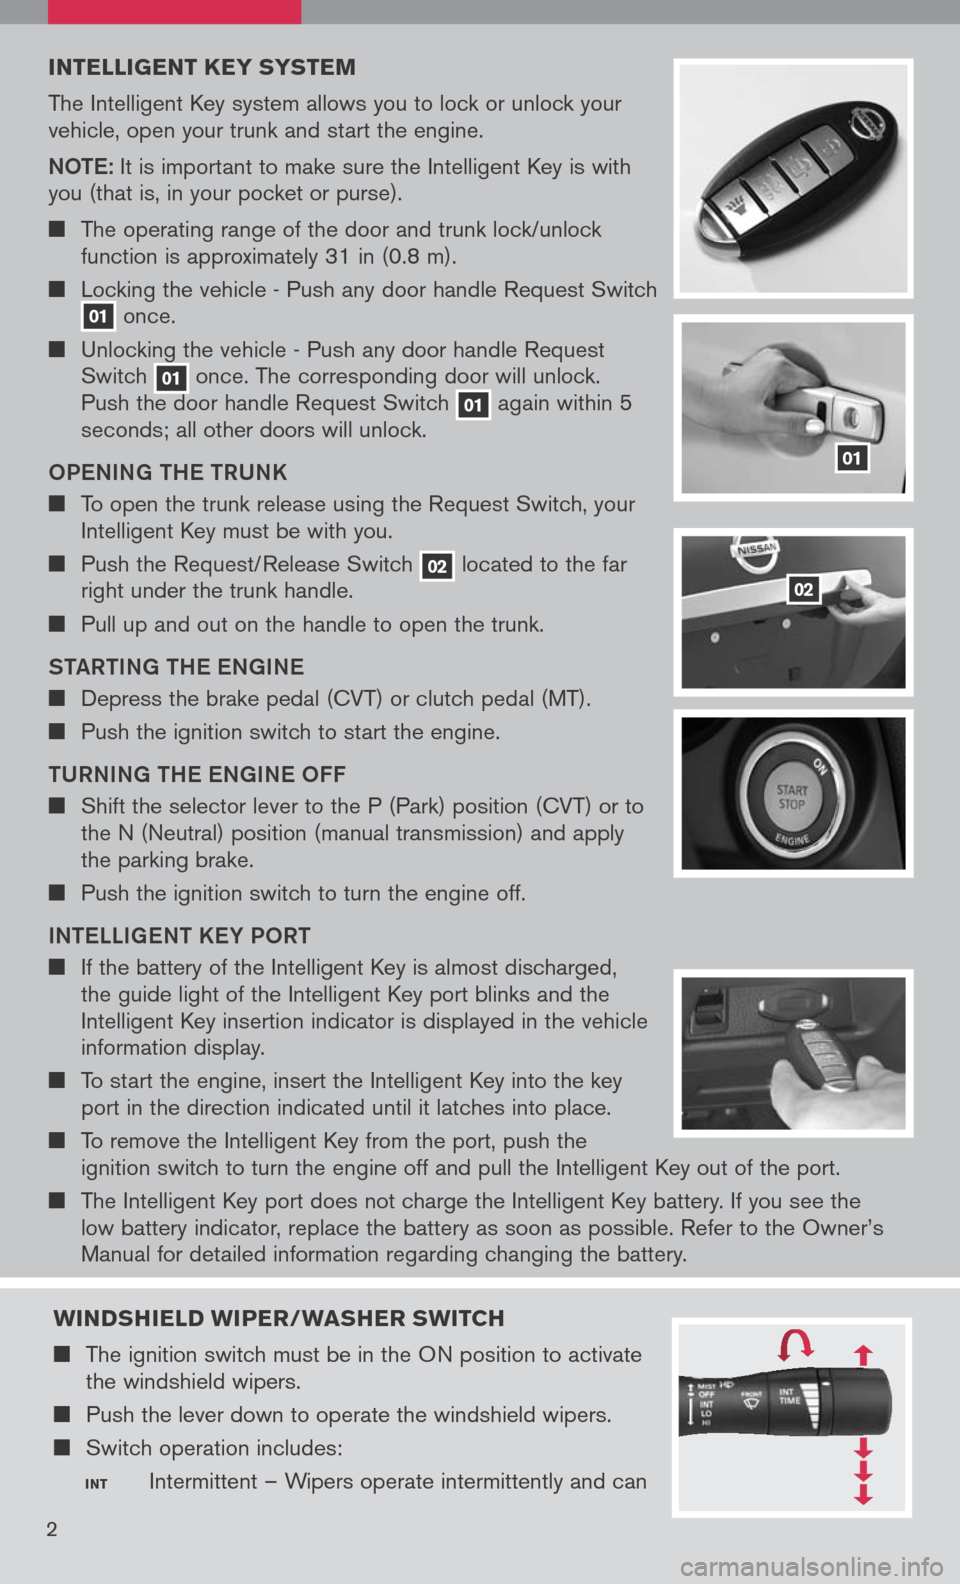
The Intelligent Key system allows you to lock or unlock your vehicle, open your trunk and start the engine.
Note: It is important to make sure the Intelligent Key is with you (that is, in your pocket or purse).
The operating range of the door and trunk lock/unlock function is approximately 31 in (0.8 m).
Locking the vehicle - Push any door handle Request Switch 01 once.
Unlocking the vehicle - Push any door handle Request Switch 01 once. The corresponding door will unlock. Push the door handle Request Switch 01 again within 5 seconds; all other doors will unlock.
o Pe NING tH e tRUNK
To open the trunk release using the Request Switch, your Intelligent Key must be with you.
Push the Request/Release Switch 02 located to the far right under the trunk handle.
Pull up and out on the handle to open the trunk.
S tAR tING tH e eNGIN e
Depress the brake pedal (CVT) or clutch pedal (MT).
Push the ignition switch to start the engine.
t URNING tH e eNGIN e oFF
Shift the selector lever to the P (Park) position (CVT) or to the N (Neutral) position (manual transmission) and apply the parking brake.
Push the ignition switch to turn the engine off.
IN te LLIG eN t K eY P oRt
If the battery of the Intelligent Key is almost discharged, the guide light of the Intelligent Key port blinks and the Intelligent Key insertion indicator is displayed in the vehicle information display.
To start the engine, insert the Intelligent Key into the key port in the direction indicated until it latches into place.
To remove the Intelligent Key from the port, push the ignition switch to turn the engine off and pull the Intelligent Key out of the port.
The Intelligent Key port does not charge the Intelligent Key battery. If you see the low battery indicator, replace the battery as soon as possible. Refer to the Owner’s
Manual for detailed information regarding changing the battery.
01
02
2
WINDSHIELD WIPER/WASHER SWITCH
The ignition switch must be in the ON position to activate the windshield wipers.
Push the lever down to operate the windshield wipers.
Switch operation includes:
INT Intermittent – Wipers operate intermittently and can
Page 6 of 36
CRUISE CONTROL
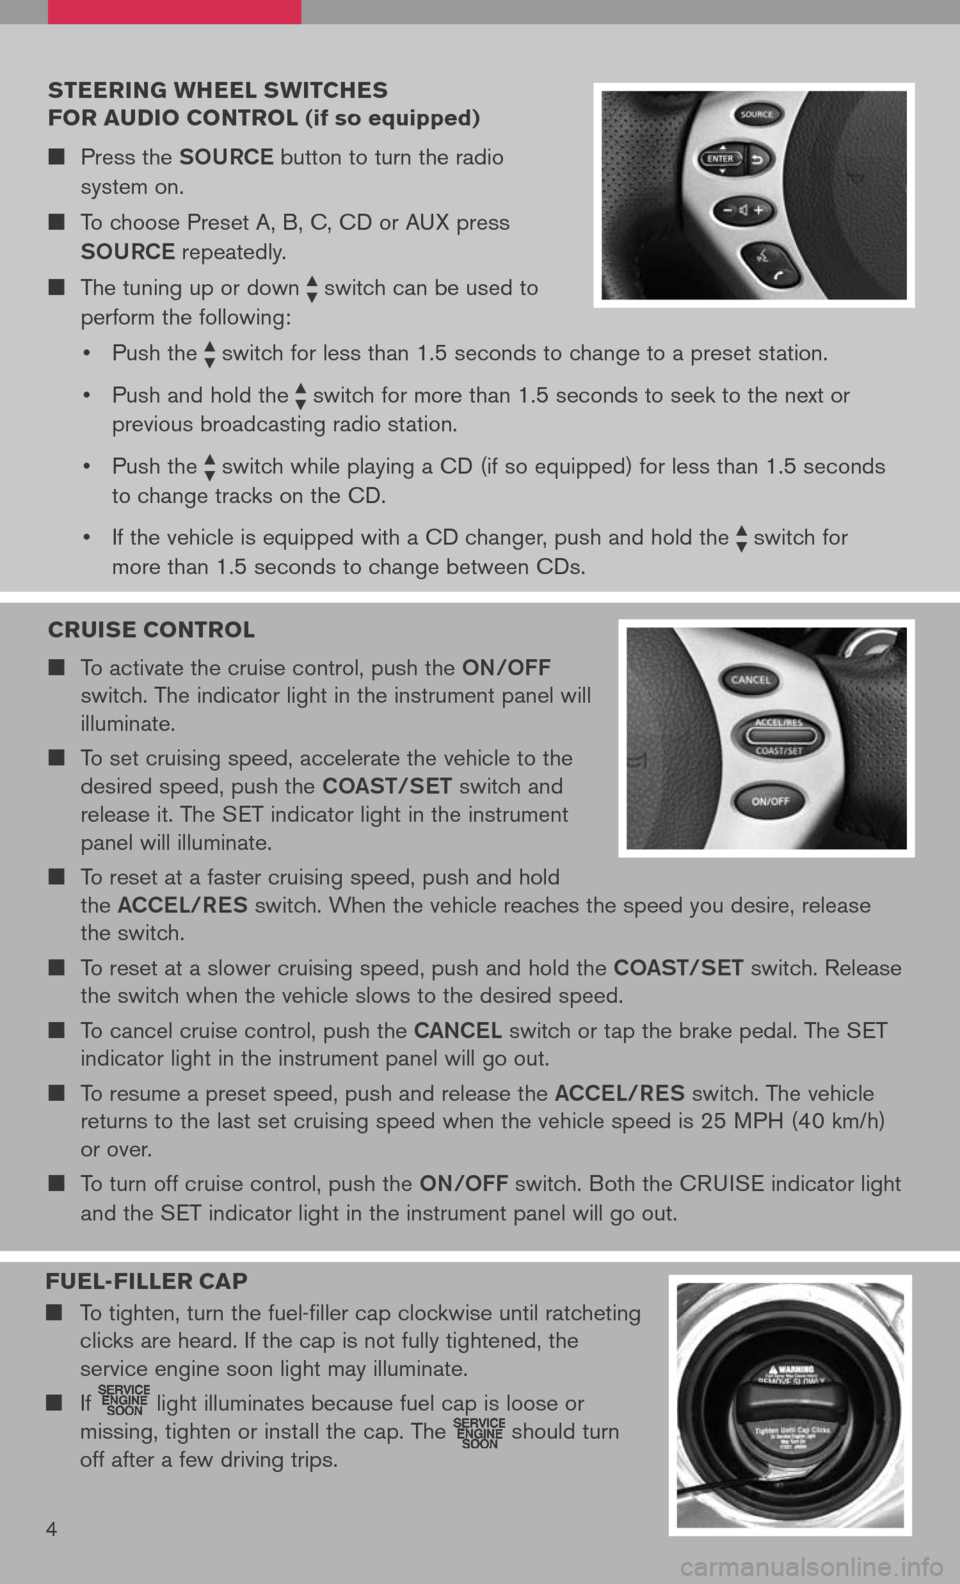
To activate the cruise control, push the oN/oFF
switch. The indicator light in the instrument panel will
illuminate.
To set cruising speed, accelerate the vehicle to the
desired speed, push the Co ASt/S et switch and
release it. The SET indicator light in the instrument
panel will illuminate.
To reset at a faster cruising speed, push and hold
the ACCe L/ReS switch. When the vehicle reaches the speed you desire, release
the switch.
To reset at a slower cruising speed, push and hold the Co ASt/S et switch. Release
the switch when the vehicle slows to the desired speed.
To cancel cruise control, push the CANCeL switch or tap the brake pedal. The SET
indicator light in the instrument panel will go out.
To resume a preset speed, push and release the ACCeL/ReS switch. The vehicle
returns to the last set cruising speed when the vehicle speed is 25 MPH (40 km/h)
or over.
To turn off cruise control, push the oN/oFF switch. Both the CRUISE indicator light
and the SET indicator light in the instrument panel will go out.
STEERING WHEEL SWITCHES
FOR AUDIO CONTROL (if so equipped)
Press the SoURCe button to turn the radio
system on.
To choose Preset A, B, C, CD or AUX press
SoURCe
repeatedly.
The tuning up or down switch can be used to
perform the following:
• Push the
switch for less than 1.5 seconds to change to a preset station.
• Push and hold the
switch for more than 1.5 seconds to seek to the next or
previous broadcasting radio station.
• Push the
switch while playing a CD (if so equipped) for less than 1.5 seconds
to change tracks on the CD.
• If the vehicle is equipped with a CD changer, push and hold the
switch for
more than 1.5 seconds to change between CDs.
4
FUEL -FILLER C AP
To tighten, turn the fuel-filler cap clockwise until ratcheting
clicks are heard. If the cap is not fully tightened, the
service engine soon light may illuminate.
If light illuminates because fuel cap is loose or
missing, tighten or install the cap. The should turn
off after a few driving trips.
Page 10 of 36
VEHICLE INFORMATION DISPLAY
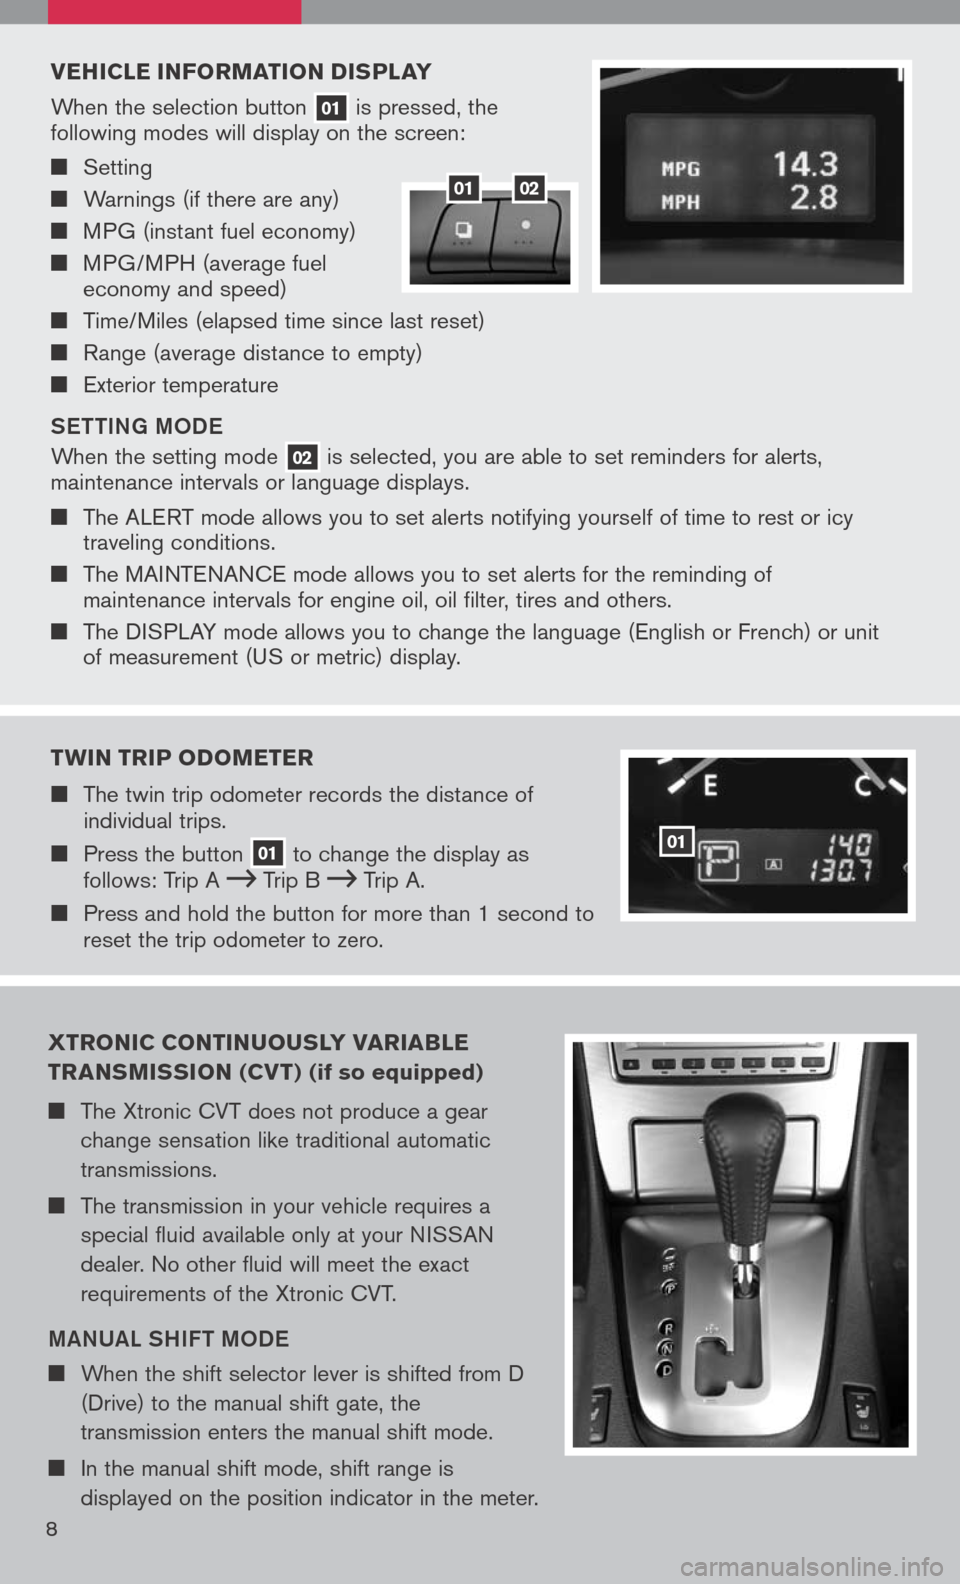
When the selection button 01 is pressed, the following modes will display on the screen:
Setting
Warnings (if there are any)
MPG (instant fuel economy)
MPG/MPH (average fuel economy and speed)
Time/Miles (elapsed time since last reset)
Range (average distance to empty)
Exterior temperature
S ett ING M oDe
When the setting mode 02 is selected, you are able to set reminders for alerts, maintenance intervals or language displays.
The ALERT mode allows you to set alerts notifying yourself of time to rest or icy traveling conditions.
The MAINTENANCE mode allows you to set alerts for the reminding of maintenance intervals for engine oil, oil filter, tires and others.
The DISPLAY mode allows you to change the language (English or French) or unit of measurement (US or metric) display.
0102
TWIN TRIP ODOMETER
The twin trip odometer records the distance of individual trips.
Press the button 01 to change the display as follows: Trip A Trip B Trip A.
Press and hold the button for more than 1 second to reset the trip odometer to zero.
01
XTRONIC CONTINUOUSLY VARIA bLE
TRANSMISSION (CV T) (if so equipped)
The Xtronic CVT does not produce a gear
change sensation like traditional automatic
transmissions.
The transmission in your vehicle requires a
special fluid available only at your NISSAN
dealer. No other fluid will meet the exact
requirements of the Xtronic CVT.
MANUAL SHIF t MoDe
When the shift selector lever is shifted from D
(Drive) to the manual shift gate, the
transmission enters the manual shift mode.
In the manual shift mode, shift range is
displayed on the position indicator in the meter.
8
Page 12 of 36
TIRE PRESSURE MONITORING SYSTEM (TPMS)
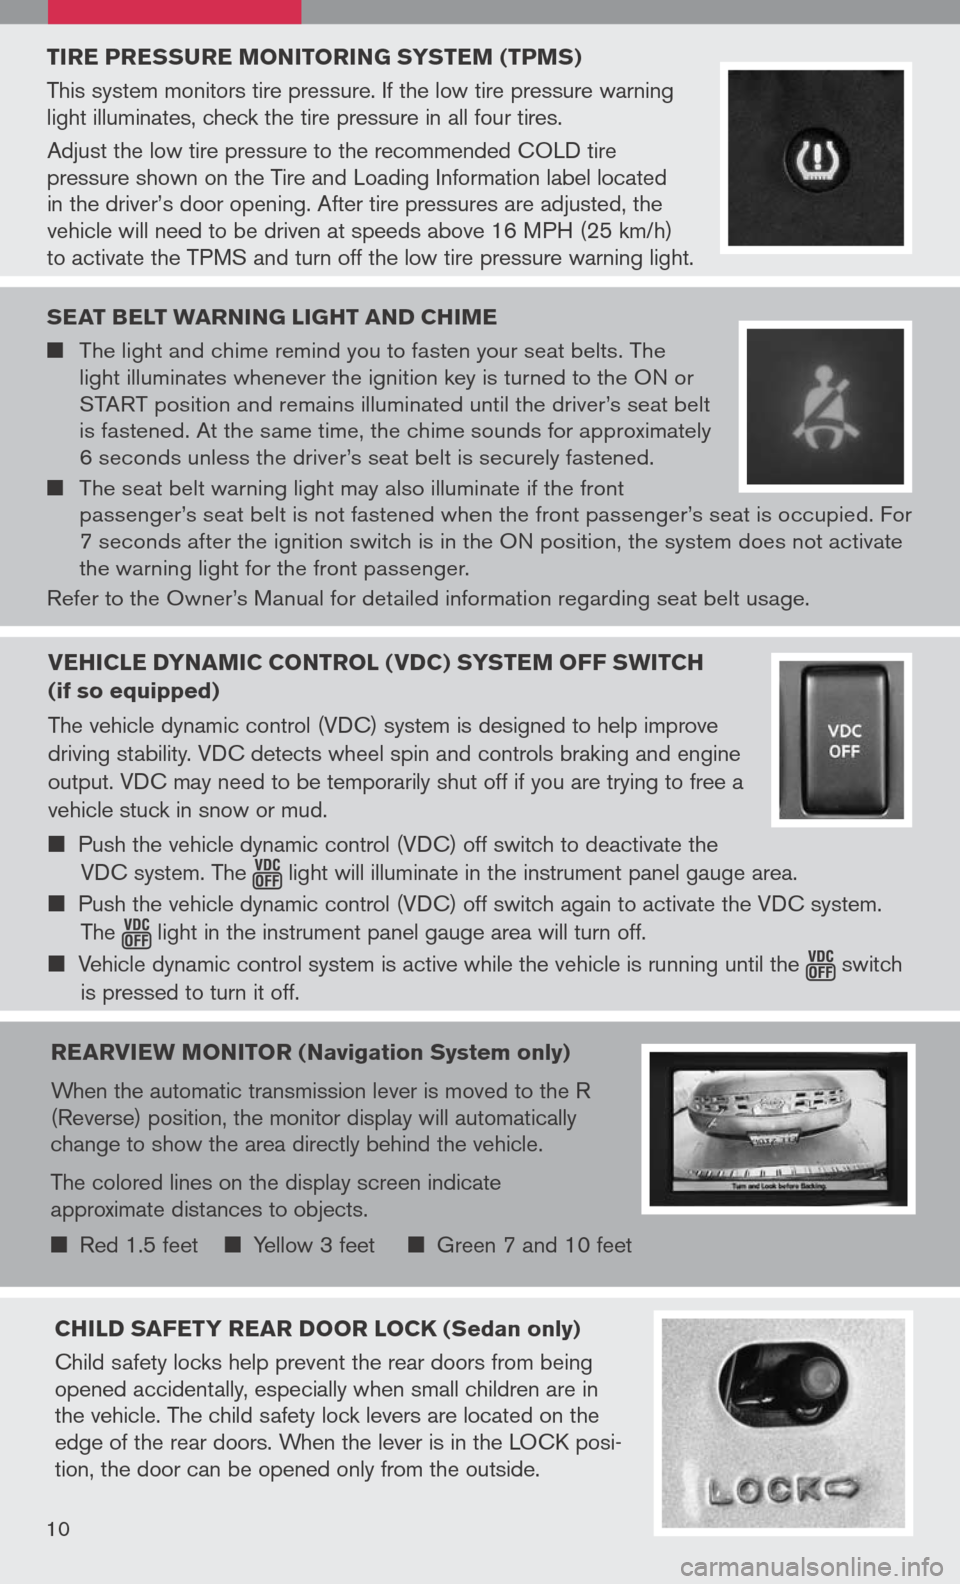
This system monitors tire pressure. If the low tire pressure warning light illuminates, check the tire pressure in all four tires.
Adjust the low tire pressure to the recommended COLD tire pressure shown on the Tire and Loading Information label located in the driver’s door opening. After tire pressures are adjusted, the vehicle will need to be driven at speeds above 16 MPH (25 km/h) to activate the TPMS and turn off the low tire pressure warning light.
SEAT bELT WARNING LIGHT AND CHIME
The light and chime remind you to fasten your seat belts. The light illuminates whenever the ignition key is turned to the ON or START position and remains illuminated until the driver’s seat belt is fastened. At the same time, the chime sounds for approximately 6 seconds unless the driver’s seat belt is securely fastened.
The seat belt warning light may also illuminate if the front passenger’s seat belt is not fastened when the front passenger’s seat is occupied. For 7 seconds after the ignition switch is in the ON position, the system does not activate the warning light for the front passenger.
Refer to the Owner’s Manual for detailed information regarding seat belt usage.
REARVIEW MONITOR (Navigation System only)
When the automatic transmission lever is moved to the R (Reverse) position, the monitor display will automatically change to show the area directly behind the vehicle.
The colored lines on the display screen indicate approximate distances to objects.
Red 1.5 feet Yellow 3 feet Green 7 and 10 feet
CHILD SAFETY REAR DOOR LOCK (Sedan only)
Child safety locks help prevent the rear doors from being opened accidentally, especially when small children are in the vehicle. The child safety lock levers are located on the edge of the rear doors. When the lever is in the LOCK posi-tion, the door can be opened only from the outside.
10
VEHICLE DYNAMIC CONTROL (VDC) SYSTEM OFF SWITCH
(if so equipped)
The vehicle dynamic control (VDC) system is designed to help improve
driving stability. VDC detects wheel spin and controls braking and engine
output. VDC may need to be temporarily shut off if you are trying to free a
vehicle stuck in snow or mud.
Push the vehicle dynamic control (VDC) off switch to deactivate the
VDC system. The light will illuminate in the instrument panel gauge area.
Push the vehicle dynamic control (VDC) off switch again to activate the VDC system.
The light in the instrument panel gauge area will turn off.
Vehicle dynamic control system is active while the vehicle is running until the switch
is pressed to turn it off.
Page 15 of 36
13
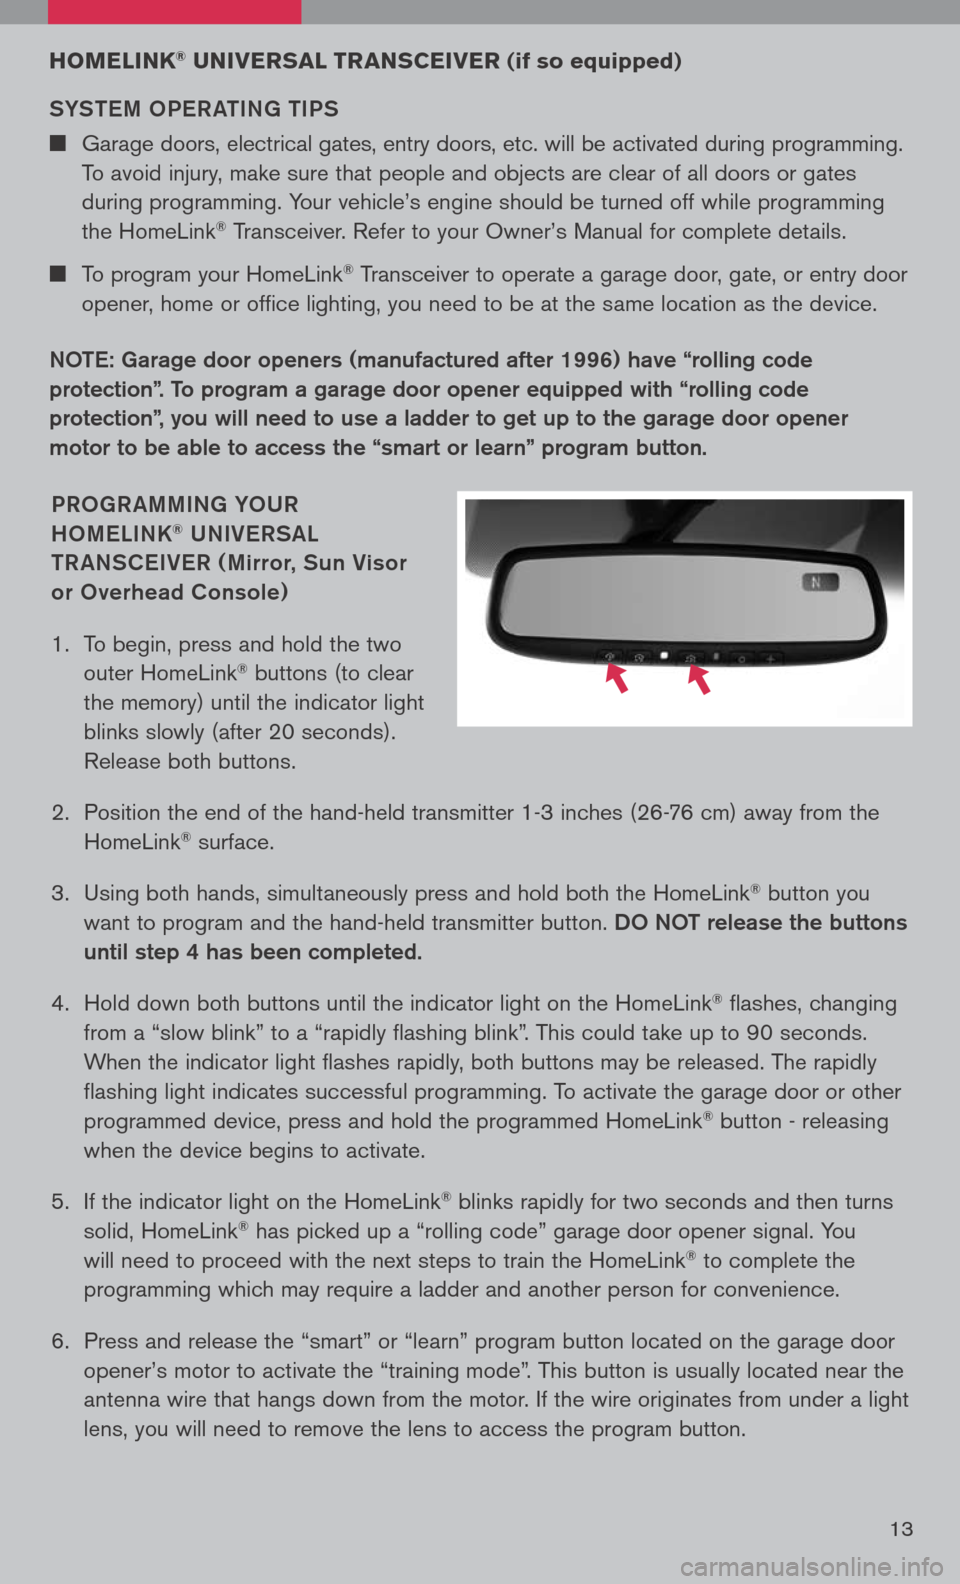
PRoGR AMMING Y oUR
H o M eLINK® UNIV eRSAL
t R ANSC eIV eR ( Mirror, Sun Visor
or overhead Console)
1. To begin, press and hold the two
outer HomeLink® buttons (to clear
the memory) until the indicator light
blinks slowly (after 20 seconds).
Release both buttons.
2. Position the end of the hand-held transmitter 1-3 inches (26-76 cm) away from the
HomeLink® surface.
3. Using both hands, simultaneously press and hold both the HomeLink
® button you
want to program and the hand-held transmitter button. Do Not release the buttons
until step 4 has been completed.
4. Hold down both buttons until the indicator light on the HomeLink
® flashes, changing
from a “slow blink” to a “rapidly flashing blink”. This could take up to 90 seconds.
When the indicator light flashes rapidly, both buttons may be released. The rapidly
flashing light indicates successful programming. To activate the garage door or other
programmed device, press and hold the programmed HomeLink® button - releasing
when the device begins to activate.
5. If the indicator light on the HomeLink
® blinks rapidly for two seconds and then turns
solid, HomeLink® has picked up a “rolling code” garage door opener signal. You
will need to proceed with the next steps to train the HomeLink® to complete the
programming which may require a ladder and another person for convenience.
6. Press and release the “smart” or “learn” program button located on the garage door
opener’s motor to activate the “training mode”. This button is usually located near the
antenna wire that hangs down from the motor. If the wire originates from under a light
lens, you will need to remove the lens to access the program button.
HOMELINK® UNIVERSAL TRANSCEIVER (if so equipped)
SYS teM oPe R A tING tIPS
Garage doors, electrical gates, entry doors, etc. will be activated during programming.
To avoid injury, make sure that people and objects are clear of all doors or gates
during programming. Your vehicle’s engine should be turned off while programming
the HomeLink® Transceiver. Refer to your Owner’s Manual for complete details.
To program your HomeLink® Transceiver to operate a garage door, gate, or entry door
opener, home or office lighting, you need to be at the same location as the device.
Note: Garage door openers (manufactured after 1996) have “rolling code
protection”. to program a garage door opener equipped with “rolling code
protection”, you will need to use a ladder to get up to the garage door opener
motor to be able to access the “smart or learn” program button.