2008 NISSAN ALTIMA reset
[x] Cancel search: resetPage 6 of 36

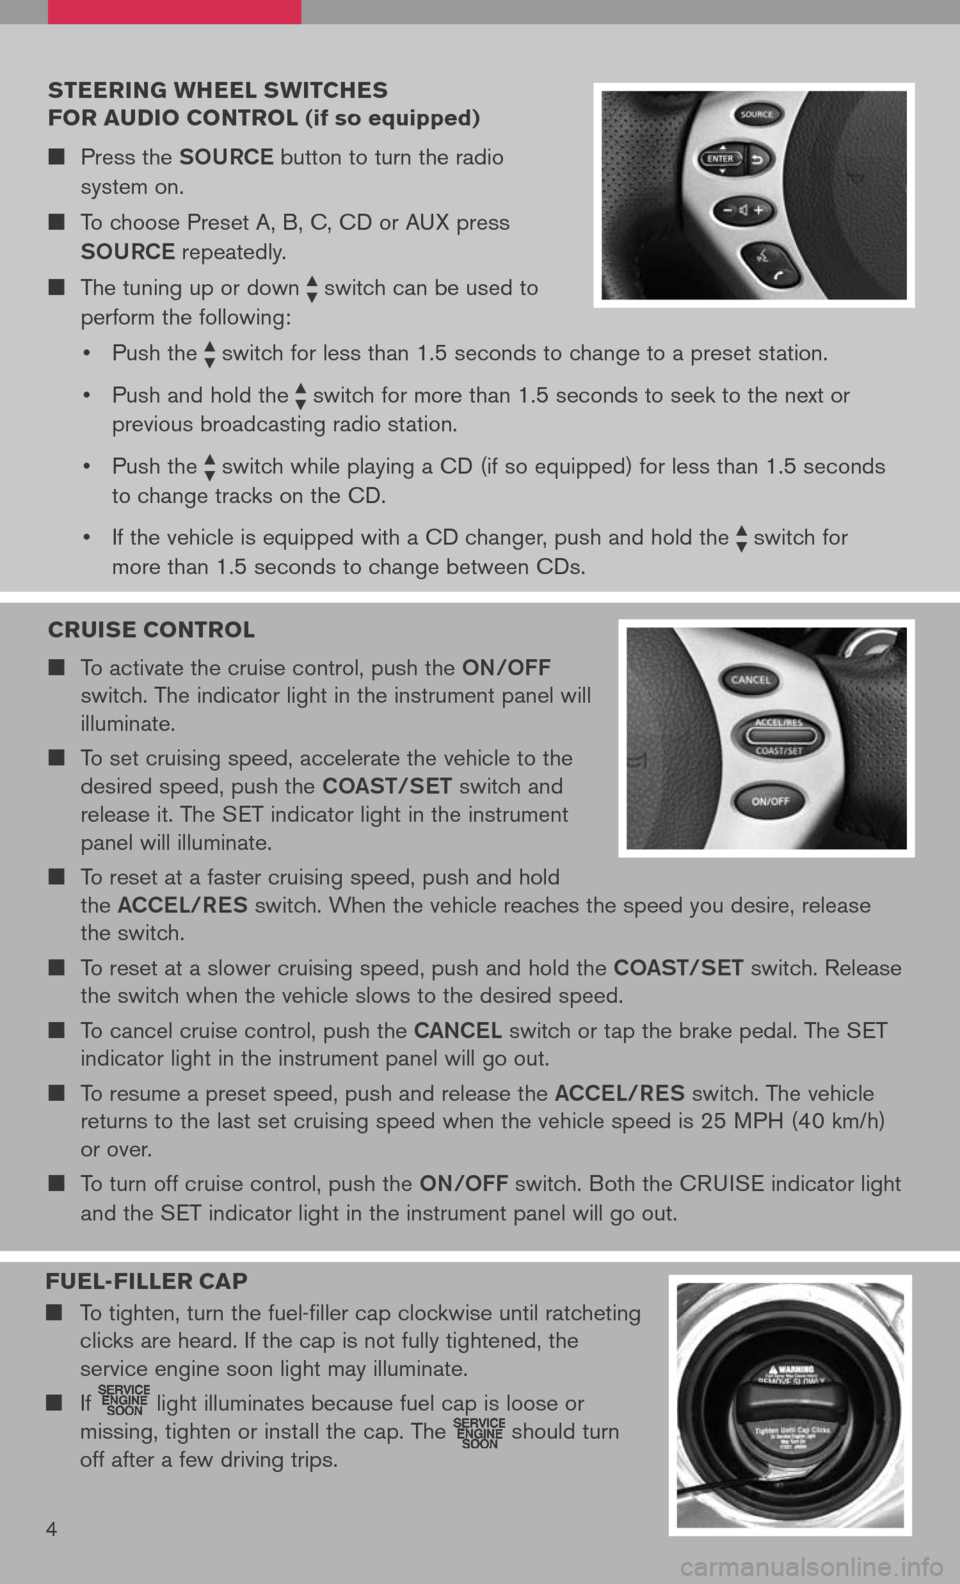
CRUISE CONTROL
To activate the cruise control, push the oN/oFF
switch. The indicator light in the instrument panel will
illuminate.
To set cruising speed, accelerate the vehicle to the
desired speed, push the Co ASt/S et switch and
release it. The SET indicator light in the instrument
panel will illuminate.
To reset at a faster cruising speed, push and hold
the ACCe L/ReS switch. When the vehicle reaches the speed you desire, release
the switch.
To reset at a slower cruising speed, push and hold the Co ASt/S et switch. Release
the switch when the vehicle slows to the desired speed.
To cancel cruise control, push the CANCeL switch or tap the brake pedal. The SET
indicator light in the instrument panel will go out.
To resume a preset speed, push and release the ACCeL/ReS switch. The vehicle
returns to the last set cruising speed when the vehicle speed is 25 MPH (40 km/h)
or over.
To turn off cruise control, push the oN/oFF switch. Both the CRUISE indicator light
and the SET indicator light in the instrument panel will go out.
STEERING WHEEL SWITCHES
FOR AUDIO CONTROL (if so equipped)
Press the SoURCe button to turn the radio
system on.
To choose Preset A, B, C, CD or AUX press
SoURCe
repeatedly.
The tuning up or down switch can be used to
perform the following:
• Push the
switch for less than 1.5 seconds to change to a preset station.
• Push and hold the
switch for more than 1.5 seconds to seek to the next or
previous broadcasting radio station.
• Push the
switch while playing a CD (if so equipped) for less than 1.5 seconds
to change tracks on the CD.
• If the vehicle is equipped with a CD changer, push and hold the
switch for
more than 1.5 seconds to change between CDs.
4
FUEL -FILLER C AP
To tighten, turn the fuel-filler cap clockwise until ratcheting
clicks are heard. If the cap is not fully tightened, the
service engine soon light may illuminate.
If light illuminates because fuel cap is loose or
missing, tighten or install the cap. The should turn
off after a few driving trips.
Page 8 of 36

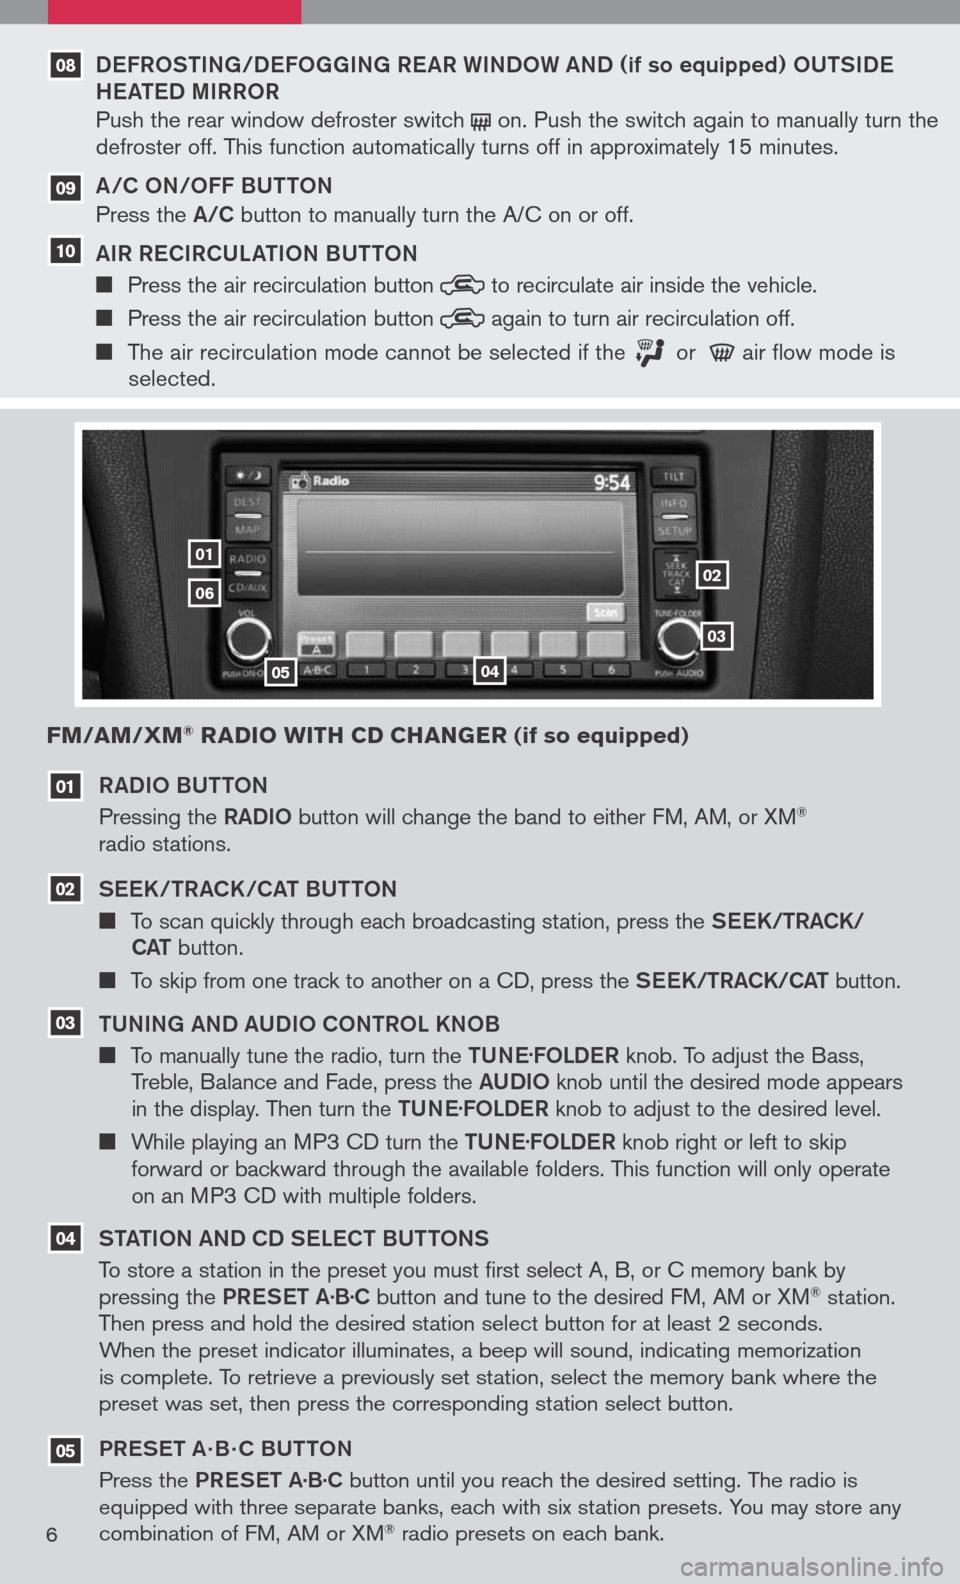
RADIo BU tto N
Pressing the RADIo button will change the band to either FM, AM, or XM® radio stations.
See K/tRACK/CA t BU tto N
To scan quickly through each broadcasting station, press the See K/tRACK/
CA t button.
To skip from one track to another on a CD, press the See K/tRACK/CA t button.
t UNING AND AUDI o C oNtR o L KN oB
To manually tune the radio, turn the tUN e.
F o LD eR knob. To adjust the Bass, Treble, Balance and Fade, press the AUDIo knob until the desired mode appears in the display. Then turn the tUN e.
F o LD eR knob to adjust to the desired level.
While playing an MP3 CD turn the tUN e.
F o LD eR knob right or left to skip forward or backward through the available folders. This function will only operate on an MP3 CD with multiple folders.
S tA tIo N AND CD S eLe C t BU tto NS
To store a station in the preset you must first select A, B, or C memory bank by pressing the PReS et A·B·C button and tune to the desired FM, AM or XM® station. Then press and hold the desired station select button for at least 2 seconds. When the preset indicator illuminates, a beep will sound, indicating memorization is complete. To retrieve a previously set station, select the memory bank where the preset was set, then press the corresponding station select button.
PR eS et A · B · C BU ttoN
Press the PReS et A·B·C button until you reach the desired setting. The radio is equipped with three separate banks, each with six station presets. You may store any combination of FM, AM or XM® radio presets on each bank.
03
02
01
0102
03
0405
06
FM/AM/XM® RADIO WITH CD CHANGER (if so equipped)
04
05
6
DeFR oStING/D eFo GGING R eAR WIND oW AND (if so equipped) oUtSID e
H eAte D MIRR oR
Push the rear window defroster switch on. Push the switch again to manually turn the defroster off. This function automatically turns off in approximately 15 minutes.
A/C oN/ oFF BU ttoN
Press the A/C button to manually turn the A/C on or off.
AIR R eCIRCULA tIo N BU ttoN
Press the air recirculation button to recirculate air inside the vehicle.
Press the air recirculation button again to turn air recirculation off.
The air recirculation mode cannot be selected if the or air flow mode is selected.
09
10
08
Page 9 of 36

06
Refer to the Owner’s Manual for detailed information regarding the audio system.
XM® presets are only available on XM® Satellite Radio equipped vehicles.
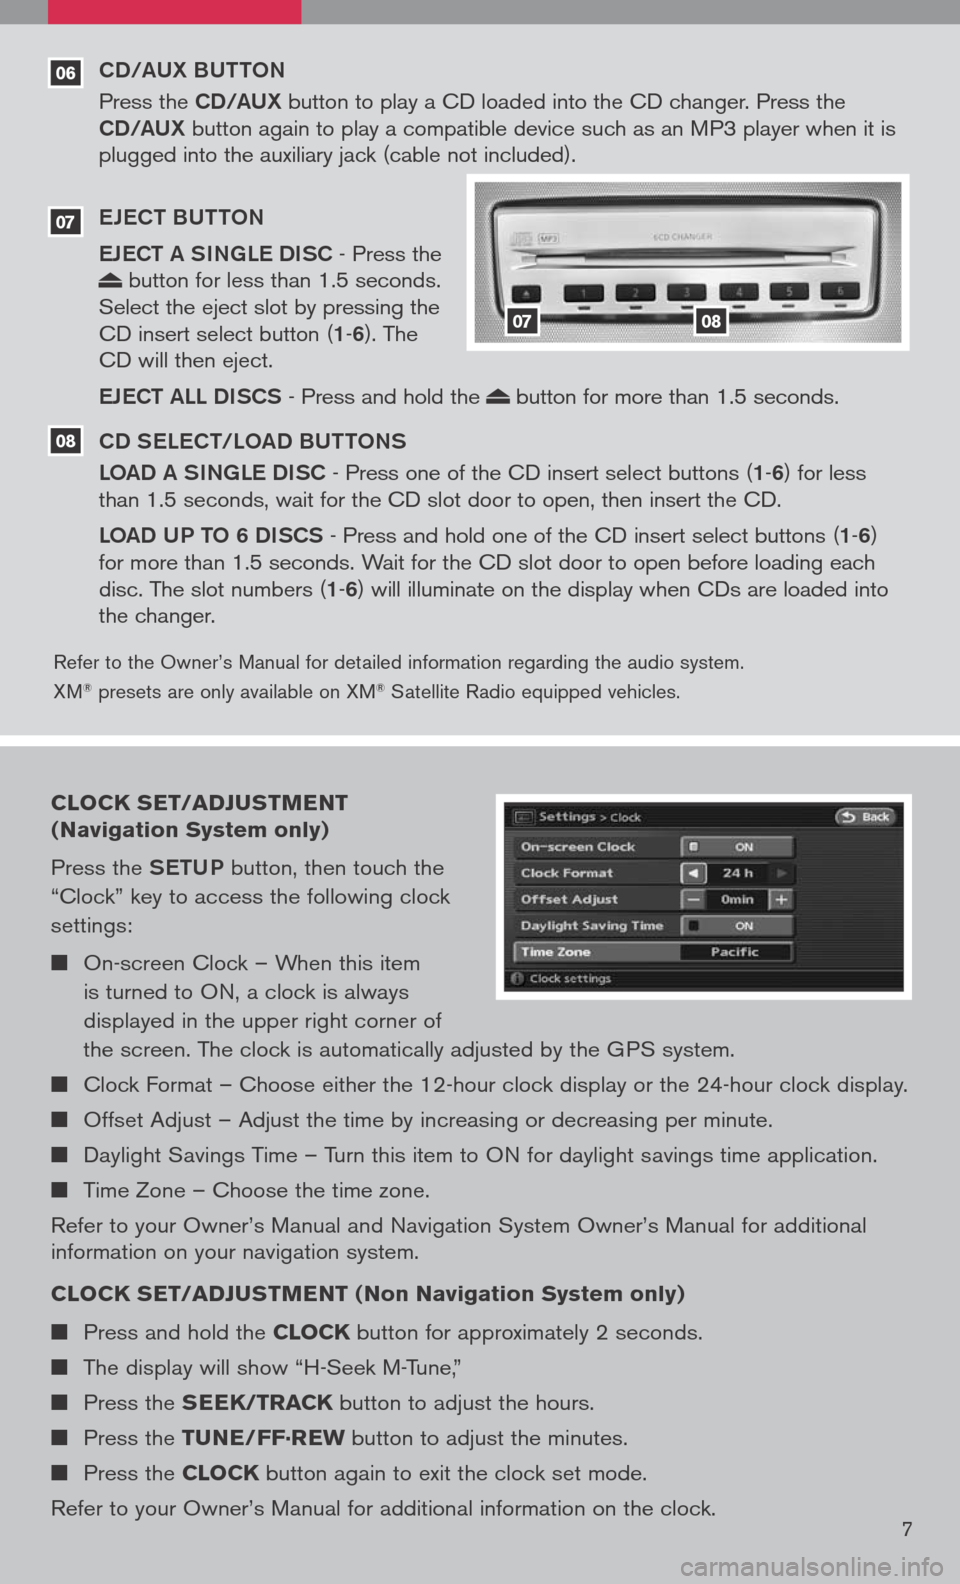
CD/AUX BUttoN
Press the CD/AUX button to play a CD loaded into the CD changer. Press the CD/AUX button again to play a compatible device such as an MP3 player when it is plugged into the auxiliary jack (cable not included).
e Je C t BU tto N
e Je C t A SINGL e DISC
- Press the button for less than 1.5 seconds. Select the eject slot by pressing the CD insert select button (1-6). The CD will then eject.
eJe C t ALL DISCS
- Press and hold the button for more than 1.5 seconds.
CD S eLe C t/L oAD BU ttoNS
L o AD A SINGL e DISC
- Press one of the CD insert select buttons (1-6) for less than 1.5 seconds, wait for the CD slot door to open, then insert the CD.
Lo AD UP to 6 DISCS
- Press and hold one of the CD insert select buttons (1-6) for more than 1.5 seconds. Wait for the CD slot door to open before loading each disc. The slot numbers (1-6) will illuminate on the display when CDs are loaded into the changer.
07
08
0708
CLOCK SET/ADJUSTMENT
(Navigation System only)
Press the SetUP button, then touch the
“Clock” key to access the following clock
settings:
On-screen Clock – When this item
is turned to ON, a clock is always
displayed in the upper right corner of
the screen. The clock is automatically adjusted by the GPS system.
Clock Format – Choose either the 12-hour clock display or the 24-hour clock display.
Offset Adjust – Adjust the time by increasing or decreasing per minute.
Daylight Savings Time – Turn this item to ON for daylight savings time application.
Time Zone – Choose the time zone.
Refer to your Owner’s Manual and Navigation System Owner’s Manual for additional information on your navigation system.
CLOCK SET/ADJUSTMENT (Non Navigation System only)
Press and hold the CLOCK button for approximately 2 seconds.
The display will show “H-Seek M-Tune,”
Press the SEEK/TRACK button to adjust the hours.
Press the TUNE/FF·REW button to adjust the minutes.
Press the CLOCK button again to exit the clock set mode.
Refer to your Owner’s Manual for additional information on the clock.7
Page 10 of 36

VEHICLE INFORMATION DISPLAY
When the selection button 01 is pressed, the following modes will display on the screen:
Setting
Warnings (if there are any)
MPG (instant fuel economy)
MPG/MPH (average fuel economy and speed)
Time/Miles (elapsed time since last reset)
Range (average distance to empty)
Exterior temperature
S ett ING M oDe
When the setting mode 02 is selected, you are able to set reminders for alerts, maintenance intervals or language displays.
The ALERT mode allows you to set alerts notifying yourself of time to rest or icy traveling conditions.
The MAINTENANCE mode allows you to set alerts for the reminding of maintenance intervals for engine oil, oil filter, tires and others.
The DISPLAY mode allows you to change the language (English or French) or unit of measurement (US or metric) display.
0102
TWIN TRIP ODOMETER
The twin trip odometer records the distance of individual trips.
Press the button 01 to change the display as follows: Trip A Trip B Trip A.
Press and hold the button for more than 1 second to reset the trip odometer to zero.
01
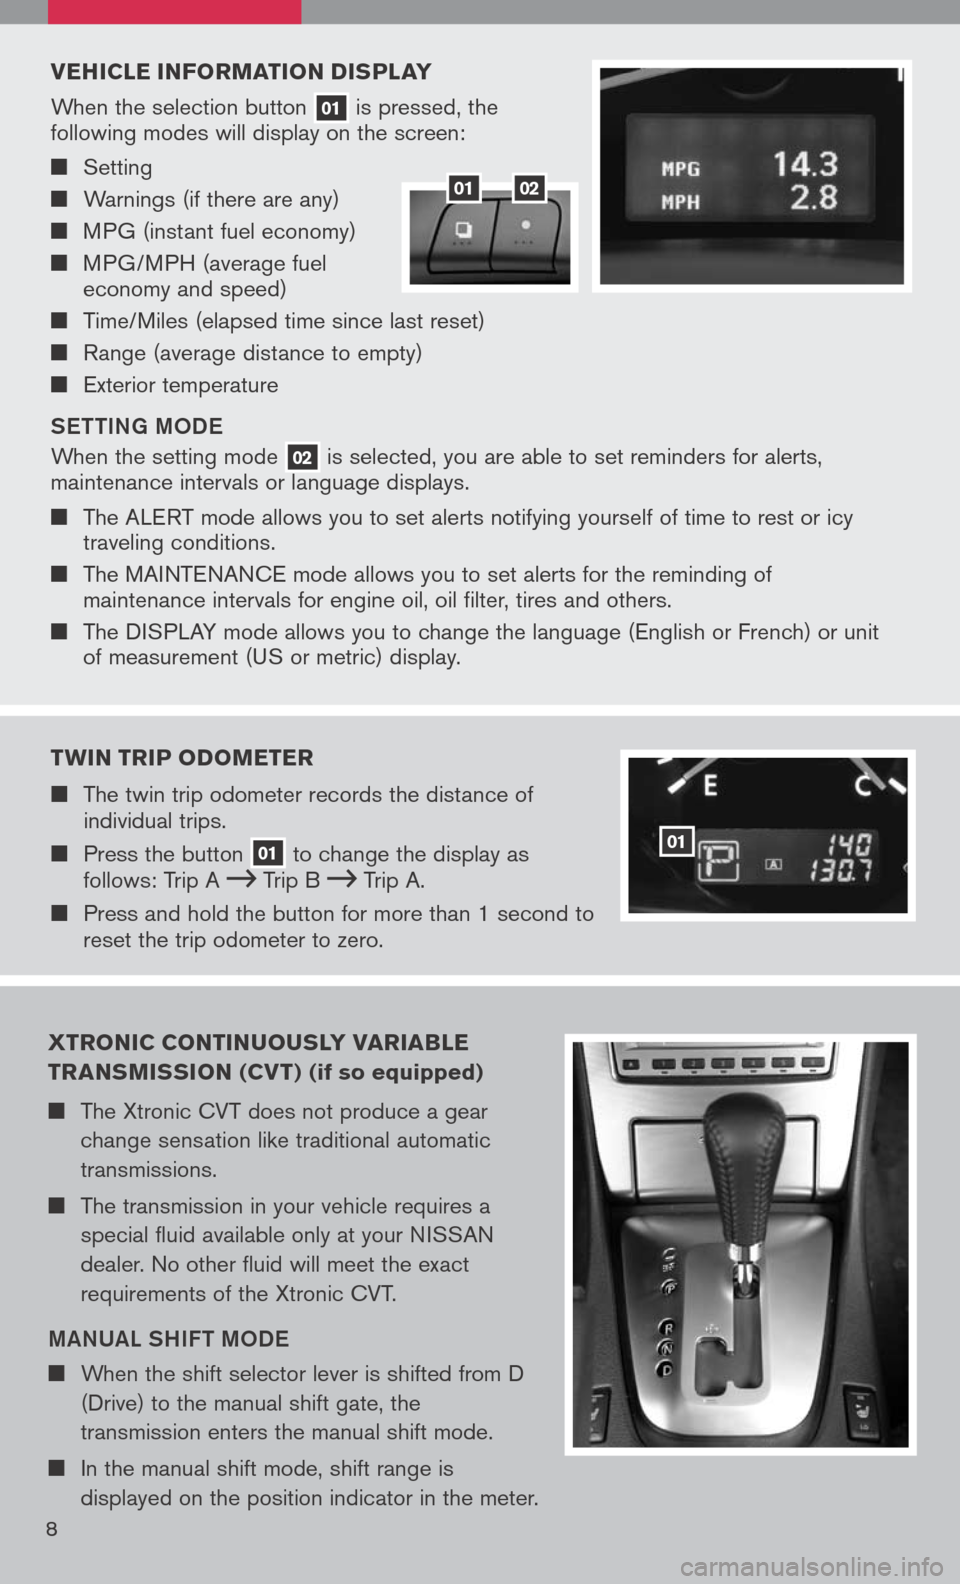
XTRONIC CONTINUOUSLY VARIA bLE
TRANSMISSION (CV T) (if so equipped)
The Xtronic CVT does not produce a gear
change sensation like traditional automatic
transmissions.
The transmission in your vehicle requires a
special fluid available only at your NISSAN
dealer. No other fluid will meet the exact
requirements of the Xtronic CVT.
MANUAL SHIF t MoDe
When the shift selector lever is shifted from D
(Drive) to the manual shift gate, the
transmission enters the manual shift mode.
In the manual shift mode, shift range is
displayed on the position indicator in the meter.
8