Page 11 of 237
MENU SCREENS AND THEIR PUR-
POSES
Press the DEST, ROUTE, INFO,or
SETUP button to display the corresponding
menu screen.
How to select a menu item
Example: DEST button
There are two ways to select keys or items on
the touch-screen.
h1To select the preferred menu item, touch the
key on the screen or
h2Push the up or down button on the steering
wheel switch. An item is highlighted
accordingly, then press the ENTER button
to select it.
LNV0424
MENU SCREEN TYPES AND HOW TO
OPERATE
Getting started2-5
ZREVIEW COPYÐ2008 Altima(alt)
Navigation System OMÐUSA_English(nna)
03/13/07Ðarosenma
X
Page 12 of 237
Using the touch-screen
Example: DEST screen
1. To select the preferred menu item, touch the
key on the screen.
2. Depending on the item selected, a detailed
menu screen, a character input screen or a
setting screen, etc. is displayed. On the
screen displayed, make adjustments, input
information, etc. accordingly.3. Touch the “
Back” key to return to the
previous screen without applying any
changes.
Using the steering wheel switches
Example: DEST screen
1. To select the preferred menu item, push the
up or down button on the steering wheel
switches. After an item is highlighted, push
the ENTER button on the steering wheel
switches to select it.LNV0057LNV0058
2-6Getting started
ZREVIEW COPYÐ2008 Altima(alt)
Navigation System OMÐUSA_English(nna)
03/06/07Ðarosenma
X
Page 13 of 237
2. Depending on the item selected, a detailed
menu screen, a character input screen or a
setting screen, etc. is displayed. On the
screen displayed, make adjustments, and
input information, etc. accordingly.3. Press thebutton on the steering
wheel switches to return to the previous
screen without applying any changes.LNV0057LNV0058
Getting started2-7
ZREVIEW COPYÐ2008 Altima(alt)
Navigation System OMÐUSA_English(nna)
03/06/07Ðarosenma
X
Page 14 of 237
USING CONTROLS TO ADJUST
VALUES, LEVELS, ETC.
Touch the keys on the screen or use the steering
wheel switches to adjust the volume of the guid-
ance volume, phone ringer vol., etc.
How to adjust
h1Touch the “–” or “+” key on the screen. The
bars of the corresponding adjustment item
changes.
h2Use the steering wheel switches by pushing
up or down to select/highlight the item and
then pressing the ENTER button. The value
or bar indicating levels increases or de-
creases accordingly.
Touch the “Back” key on the touch-screen or
the
button on the steering wheel switches
to apply the setting.
WNV0548
2-8Getting started
ZREVIEW COPYÐ2008 Altima(alt)
Navigation System OMÐUSA_English(nna)
03/13/07Ðarosenma
X
Page 15 of 237

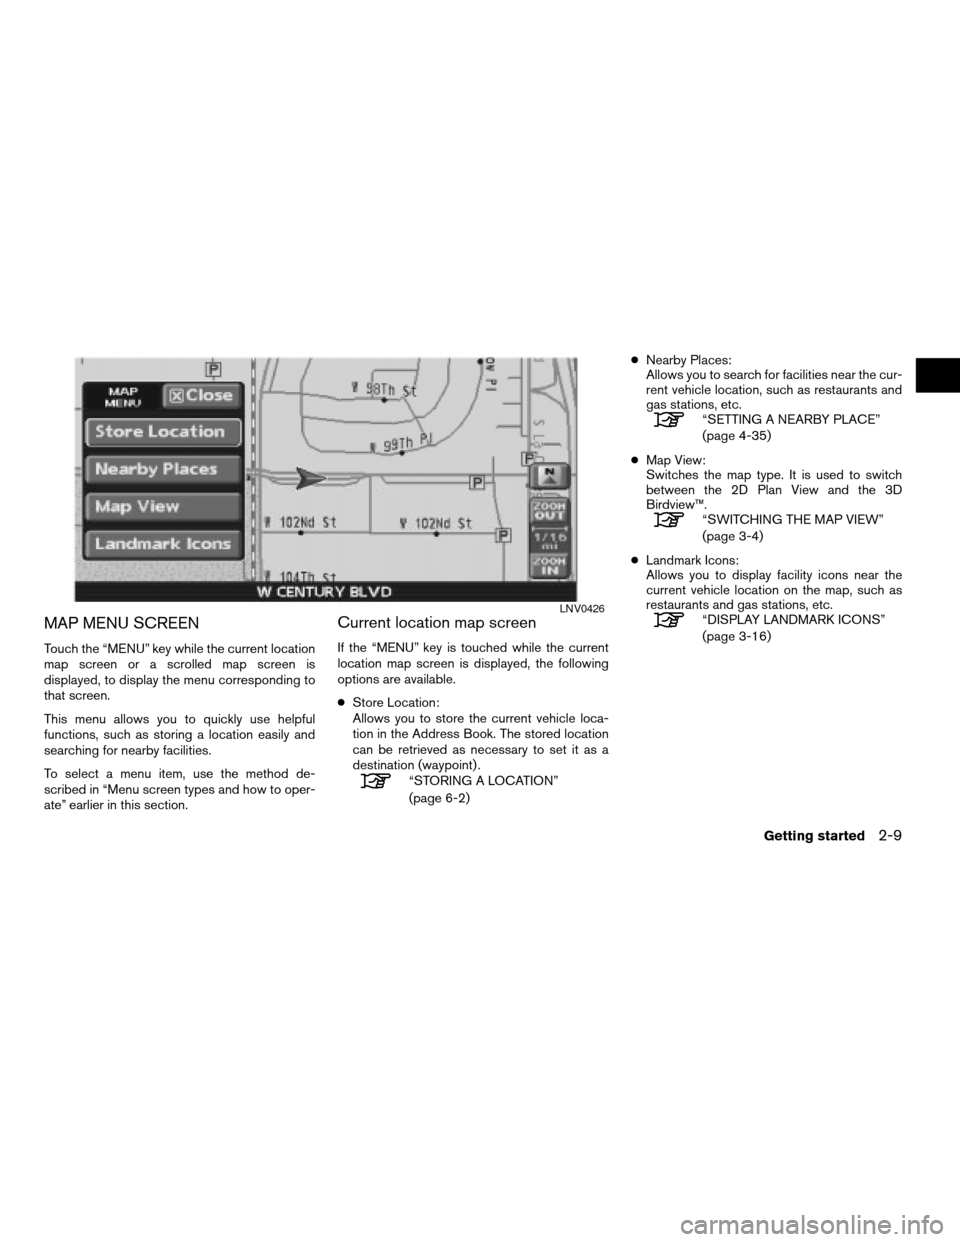
MAP MENU SCREEN
Touch the “MENU” key while the current location
map screen or a scrolled map screen is
displayed, to display the menu corresponding to
that screen.
This menu allows you to quickly use helpful
functions, such as storing a location easily and
searching for nearby facilities.
To select a menu item, use the method de-
scribed in “Menu screen types and how to oper-
ate” earlier in this section.
Current location map screen
If the “MENU” key is touched while the current
location map screen is displayed, the following
options are available.
cStore Location:
Allows you to store the current vehicle loca-
tion in the Address Book. The stored location
can be retrieved as necessary to set it as a
destination (waypoint) .
“STORING A LOCATION”
(page 6-2)cNearby Places:
Allows you to search for facilities near the cur-
rent vehicle location, such as restaurants and
gas stations, etc.
“SETTING A NEARBY PLACE”
(page 4-35)
cMap View:
Switches the map type. It is used to switch
between the 2D Plan View and the 3D
Birdview™.
“SWITCHING THE MAP VIEW”
(page 3-4)
cLandmark Icons:
Allows you to display facility icons near the
current vehicle location on the map, such as
restaurants and gas stations, etc.
“DISPLAY LANDMARK ICONS”
(page 3-16)LNV0426
Getting started2-9
ZREVIEW COPYÐ2008 Altima(alt)
Navigation System OMÐUSA_English(nna)
03/13/07Ðarosenma
X
Page 16 of 237

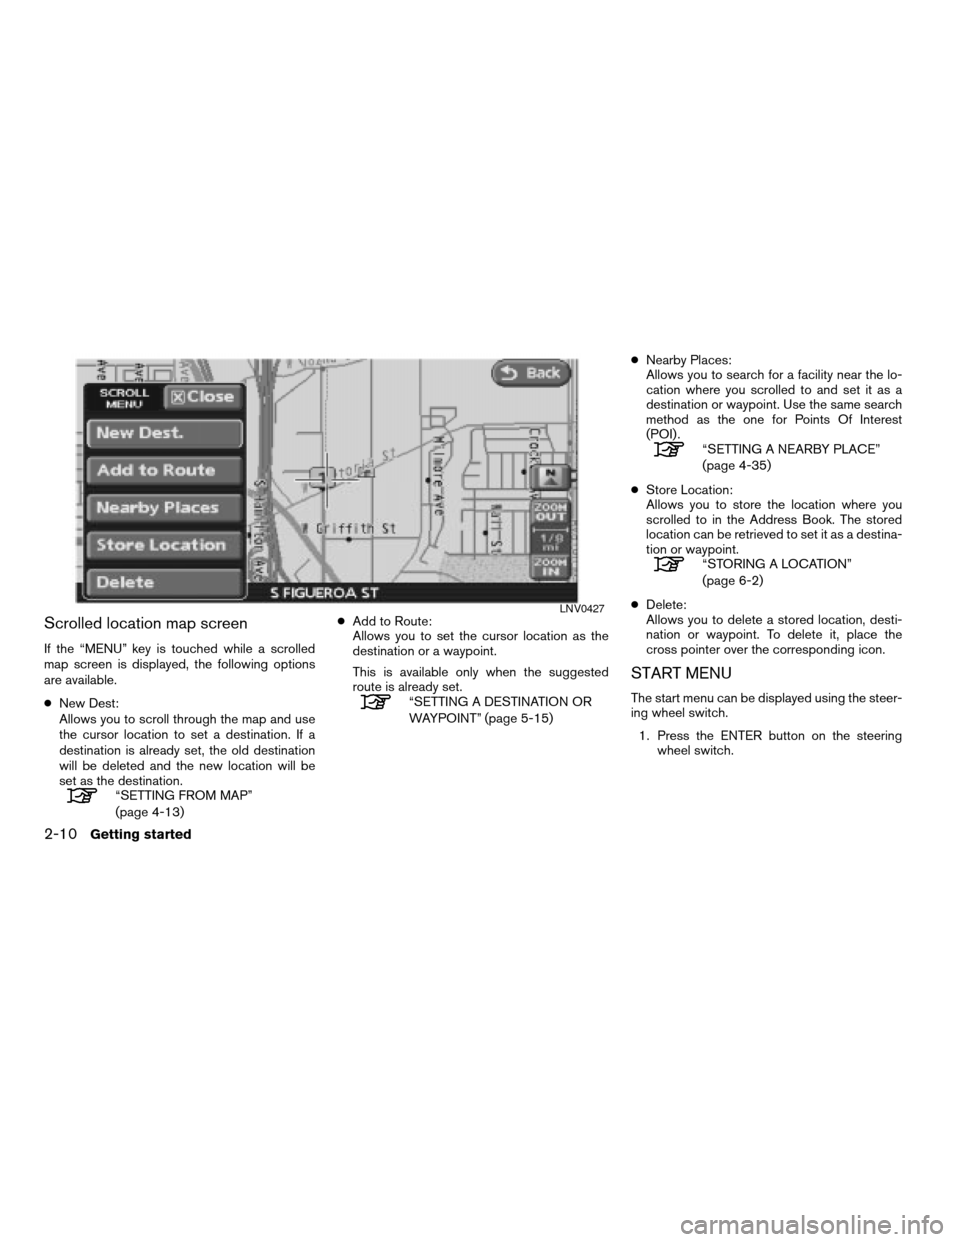
Scrolled location map screen
If the “MENU” key is touched while a scrolled
map screen is displayed, the following options
are available.
cNew Dest:
Allows you to scroll through the map and use
the cursor location to set a destination. If a
destination is already set, the old destination
will be deleted and the new location will be
set as the destination.
“SETTING FROM MAP”
(page 4-13)cAdd to Route:
Allows you to set the cursor location as the
destination or a waypoint.
This is available only when the suggested
route is already set.
“SETTING A DESTINATION OR
WAYPOINT” (page 5-15)cNearby Places:
Allows you to search for a facility near the lo-
cation where you scrolled to and set it as a
destination or waypoint. Use the same search
method as the one for Points Of Interest
(POI) .
“SETTING A NEARBY PLACE”
(page 4-35)
cStore Location:
Allows you to store the location where you
scrolled to in the Address Book. The stored
location can be retrieved to set it as a destina-
tion or waypoint.
“STORING A LOCATION”
(page 6-2)
cDelete:
Allows you to delete a stored location, desti-
nation or waypoint. To delete it, place the
cross pointer over the corresponding icon.
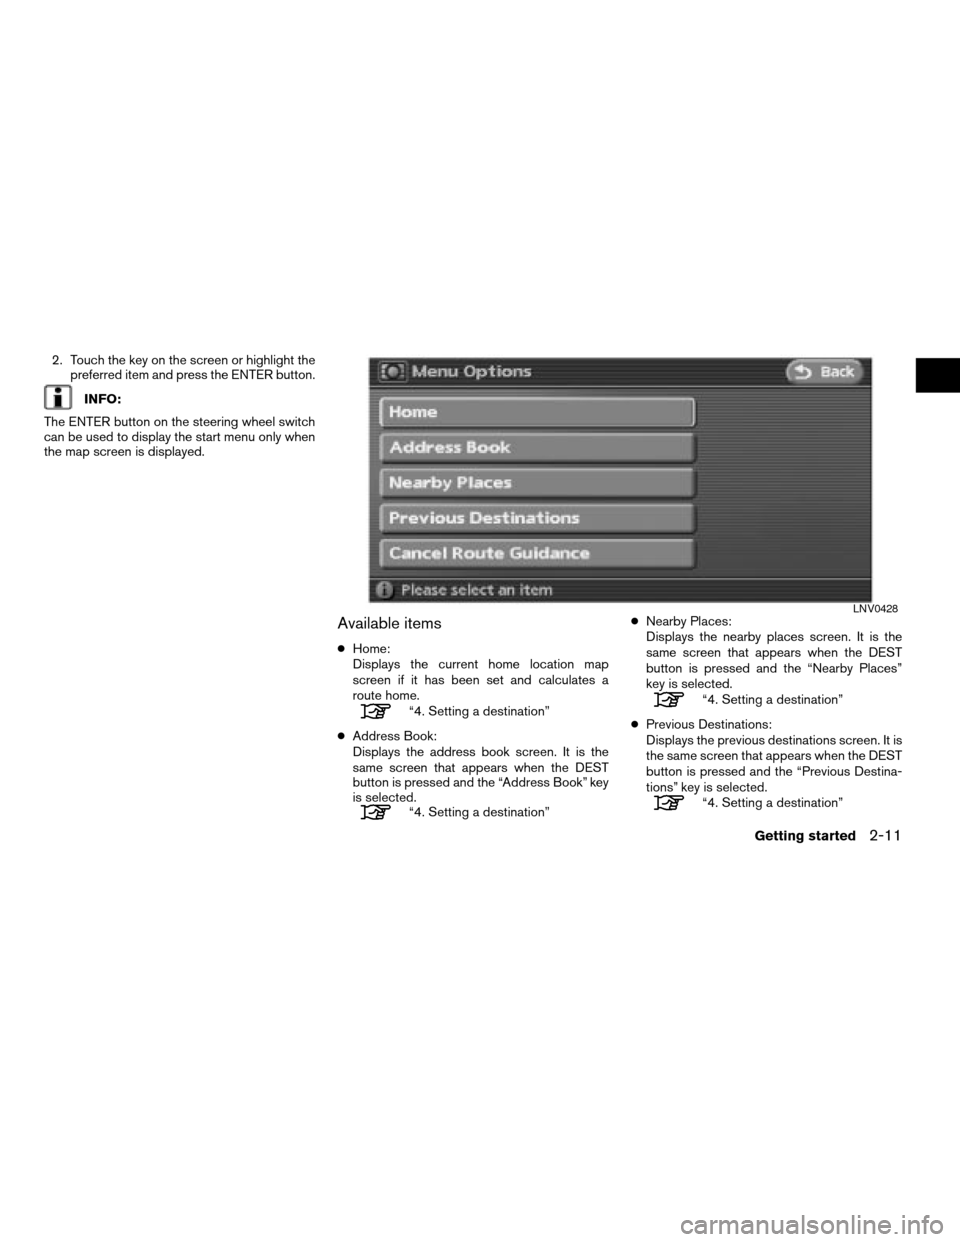
START MENU
The start menu can be displayed using the steer-
ing wheel switch.
1. Press the ENTER button on the steering
wheel switch.
LNV0427
2-10Getting started
ZREVIEW COPYÐ2008 Altima(alt)
Navigation System OMÐUSA_English(nna)
03/13/07Ðarosenma
X
Page 17 of 237

2. Touch the key on the screen or highlight the
preferred item and press the ENTER button.
INFO:
The ENTER button on the steering wheel switch
can be used to display the start menu only when
the map screen is displayed.
Available items
cHome:
Displays the current home location map
screen if it has been set and calculates a
route home.
“4. Setting a destination”
cAddress Book:
Displays the address book screen. It is the
same screen that appears when the DEST
button is pressed and the “Address Book” key
is selected.
“4. Setting a destination”cNearby Places:
Displays the nearby places screen. It is the
same screen that appears when the DEST
button is pressed and the “Nearby Places”
key is selected.
“4. Setting a destination”
cPrevious Destinations:
Displays the previous destinations screen. It is
the same screen that appears when the DEST
button is pressed and the “Previous Destina-
tions” key is selected.
“4. Setting a destination”
LNV0428
Getting started2-11
ZREVIEW COPYÐ2008 Altima(alt)
Navigation System OMÐUSA_English(nna)
03/13/07Ðarosenma
X
Page 18 of 237
cCancel Route Guidance:
Cancels the current guided route.
Not all features can be manually operated while
the vehicle is in motion. The text for these re-
stricted features turn from white to gray and can-not be selected. Alternatively, the voice recogni-
tion system may have a related command that
can be used at any time.
LNV0540
FUNCTIONS DISABLED WHILE DRIV-
ING
2-12Getting started
ZREVIEW COPYÐ2008 Altima(alt)
Navigation System OMÐUSA_English(nna)
03/13/07Ðarosenma
X