2008 MERCEDES-BENZ SLK ROADSTER towing
[x] Cancel search: towingPage 15 of 273
12
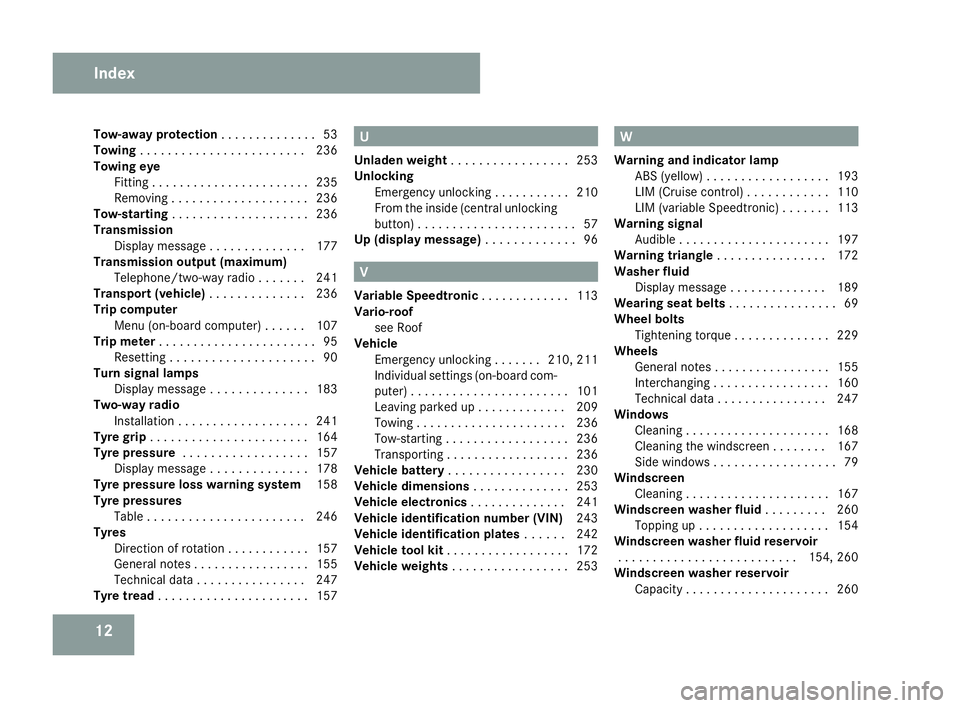
Tow-away protection
. . . . . . . . . . . . ..53
Towin g. . . . . . . . . . . . . . . . . . . . . . . .236
Towing eye Fitting . . . . . . . . . . . . . . . . . . . . . . .235
Removing . . . . . . . . . . . . . . . . . . . .236
Tow-starting . . . . . . . . . . . . . . . . . . . .236
Transmission Display message . . . . . . . . . . . . . .177
Transmission output (maximum)
Telephone/two-way radio . . . . . . .241
Transport (vehicle) . . . . . . . . . . . . ..236
Trip computer Menu (on-board computer) . . . . . .107
Trip meter . . . . . . . . . . . . . . . . . . . . . . .95
Resettin g.. . . . . . . . . . . . . . . . . . . .90
Turn signal lamps
Display message . . . . . . . . . . . . . .183
Two-way radio
Installatio n.. . . . . . . . . . . . . . . . . .241
Tyre grip . . . . . . . . . . . . . . . . . . . . . . .164
Tyre pressure . . . . . . . . . . . . . . . . . .157
Display message . . . . . . . . . . . . . .178
Tyre pressure loss warning syste m158
Tyre pressure s
Table . . . . . . . . . . . . . . . . . . . . . . .246
Tyres
Direction of rotatio n.. . . . . . . . . . .157
General notes . . . . . . . . . . . . . . . . .155
Technical data . . . . . . . . . . . . . . . .247
Tyre tread . . . . . . . . . . . . . . . . . . . . . .157 U
Unladen weight . . . . . . . . . . . . . . . . .253
Unlocking Emergency unlocking . . . . . . . . . . .210
From the inside (central unlocking
button) . . . . . . . . . . . . . . . . . . . . . . .57
Up (display message) . . . . . . . . . . . ..96 V
Variable Speedtroni c. . . . . . . . . . . . .113
Vario-roo f
see Roof
Vehicle
Emergency unlocking . . . . . . .210, 211
Individual settings (on-board com-
puter) . . . . . . . . . . . . . . . . . . . . . . .101
Leaving parked up . . . . . . . . . . . . .209
Towing . . . . . . . . . . . . . . . . . . . . . .236
Tow-starting . . . . . . . . . . . . . . . . . .236
Transporting . . . . . . . . . . . . . . . . . .236
Vehicle battery . . . . . . . . . . . . . . . . .230
Vehicle dimension s. . . . . . . . . . . . . .253
Vehicle electronics . . . . . . . . . . . . ..241
Vehicle identification number (VIN) 243
Vehicle identification plates . . . . ..242
Vehicle tool kit . . . . . . . . . . . . . . . . . .172
Vehicle weights . . . . . . . . . . . . . . . . .253 W
Warning and indicator lamp ABS (yellow) . . . . . . . . . . . . . . . . . .193
LIM (Cruise control) . . . . . . . . . . . .110
LIM (variable Speedtronic) . . . . . . .113
Warning signal
Audible . . . . . . . . . . . . . . . . . . . . . .197
Warning triangl e. . . . . . . . . . . . . . . .172
Washer fluid Display message . . . . . . . . . . . . . .189
Wearing seat belts . . . . . . . . . . . . . . ..69
Wheel bolts Tightening torque . . . . . . . . . . . . . .229
Wheels
General notes . . . . . . . . . . . . . . . . .155
Interchanging . . . . . . . . . . . . . . . . .160
Technical data . . . . . . . . . . . . . . . .247
Windows
Cleaning . . . . . . . . . . . . . . . . . . . . .168
Cleaning the windscreen . . . . . . . .167
Side windows . . . . . . . . . . . . . . . . . .79
Windscreen
Cleaning . . . . . . . . . . . . . . . . . . . . .167
Windscreen washer fluid . . . . . . . ..260
Topping up . . . . . . . . . . . . . . . . . . .154
Windscreen washer fluid reservoir
. . . . . . . . . . . . . . . . . . . . . . . . . .154, 260
Windscreen washer reservoir Capacity . . . . . . . . . . . . . . . . . . . . .260 Index
171_AKB; 3; 4, en-GB
vpfaff7,
2007-11-13T10:50:25+01:00 - Seite 12
Page 22 of 273
Exterior view
19Function Pag
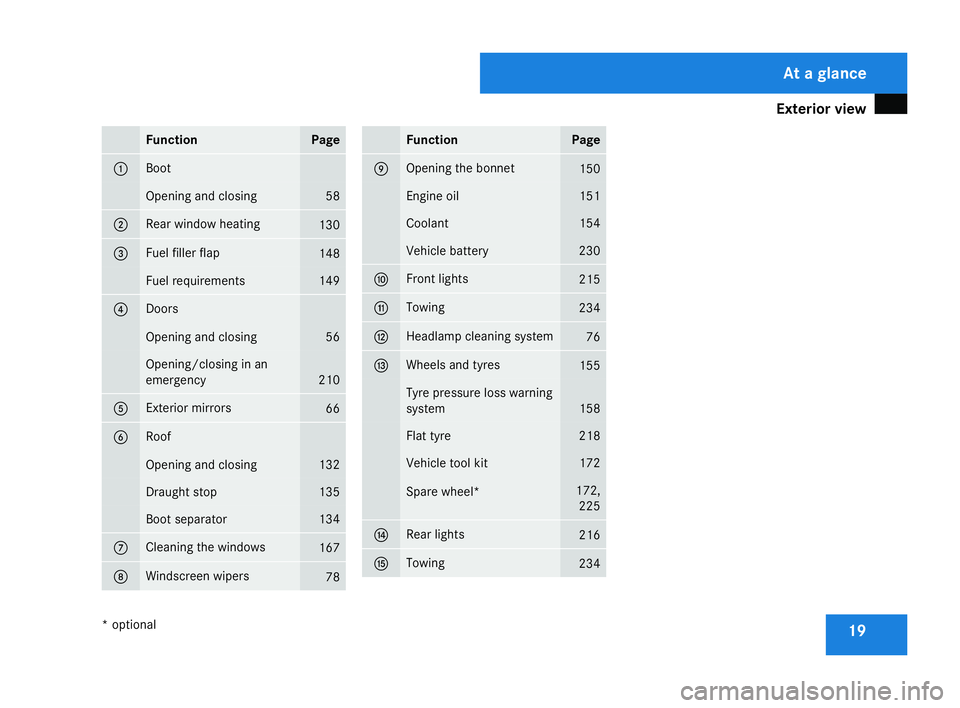
e 1 Boot
Opening and closing 58
2 Rear window heatin
g 130
3 Fuel filler fla
p 148
Fuel requirements 149
4 Doors
Opening and closing 56
Opening/closing in an
emergency
210
5 Exterior mirrors
66
6 Roof
Opening and closin
g 132
Draught stop 135
Boot separator 134
7 Cleaning the windows
16
7 8 Windscreen wipers
78 Function Page
9 Opening the bonnet
150
Engine oil 151
Coolant 154
Vehicle battery 230
a Front lights
215
b Towing
234
c Headlamp cleaning system
76
d Wheels and tyres
155
Tyre pressure loss warning
system
158
Flat tyre 218
Vehicle tool kit 172
Spare wheel* 172,
225 e Rear lights
21
6 f Towing
234 At a glance
* optional
171_AKB; 3; 4, en-GB
vpfaff7,
2007-11-13T10:50:25+01:00 - Seite 19
Page 58 of 273
55
Opening and closing
...........................56
Key positions ...................................... .59
Seats .................................................... 59
Steering wheel .................................... 63
Mirrors ................................................. 65
Memory functions* .............................68
Seat belts ............................................ .69
Lights ................................................... 73
Windscreen wipers .............................78
Side windows ...................................... 79Driving and parking
............................81
Transmission ....................................... 84
Instrument cluster ..............................90
On-board computer .............................91
Driving systems ................................ 109
Air conditioning ................................. 118
Opening/closing the roof .................132
Loading and stowing ........................136
Features ............................................. 140 Controls
171_AKB; 3; 4, en-GB
vpfaff7,
2007-11-13T10:50:25+01:00 - Seite 55
Page 139 of 273
Loading and stowing
136
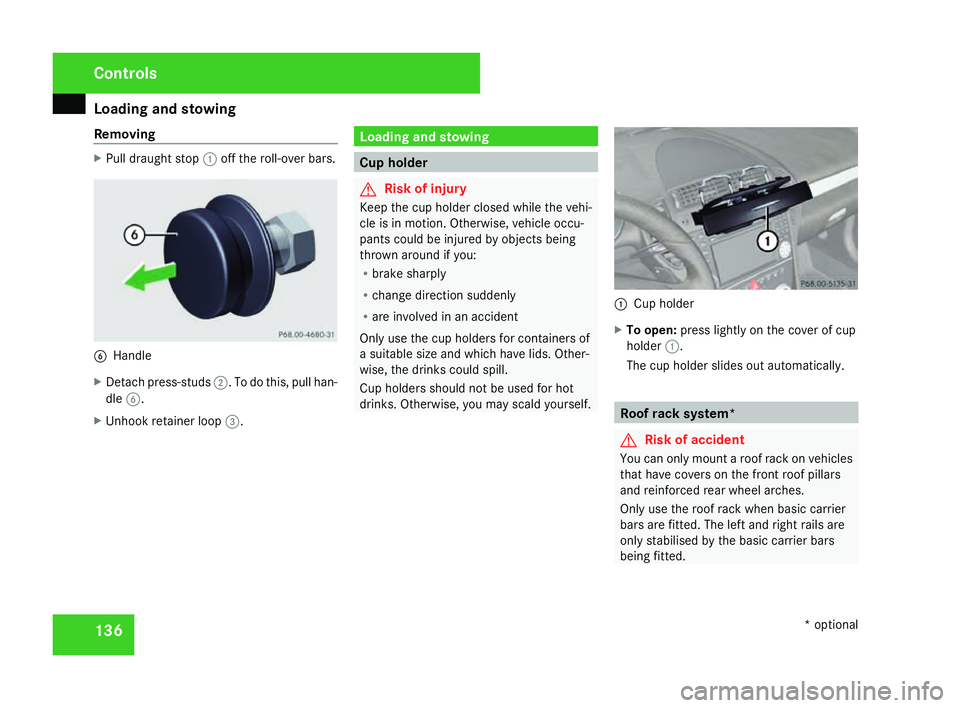
Removing X
Pull draught stop 1off the roll-over bars. 6
Handl e
X Detach press-studs 2. To do this, pull han-
dle 6.
X Unhook retainer loop 3. Loading and stowin
g Cup holder
G
Risk of injury
Keep the cup holder closed while the vehi-
cle is in motion. Otherwise, vehicle occu -
pants could be injured by objects being
thrown around if you:
R brake sharply
R change direction suddenly
R are involved in an acciden t
Only use the cup holders for containers of
a suitable size and which have lids. Other-
wise, the drinks could spill.
Cup holders should not be used for hot
drinks. Otherwise, you may scald yourself. 1
Cup holder
X To open: press lightly on the cover of cup
holder 1.
The cup holder slides out automatically. Roof rack system*
G
Risk of accident
You can only mount a roof rack on vehicles
that have covers on the front roof pillars
and reinforced rear wheel arches.
Only use the roof rack when basic carrie r
bars are fitted. The left and right rails are
only stabilised by the basic carrier bars
being fitted. Controls
* optional
171_AKB; 3; 4, en-GB
vpfaff7,
2007-11-13T10:50:25+01:00 - Seite 136
Page 140 of 273
Loading and stowing
137An incorrectly secured roof rack or load
could work loose from the vehicle and
thereby cause an accident. Follow the roo
f
rack manufacturer's installation instruc-
tions and special instructions for use.
The roof load raises the vehicle's centre of
gravity, thereby affecting vehicle handling.
You must observe the maximum roof load
of 50 kg. Always adapt your driving style to
the prevailing road, traffic and weather con-
ditions and drive with particular care if the
roof is laden.
! Mercedes-Benz recommends that you
only use roof rack systems which have
been tested and approved for Mercedes-
Benz vehicles. This helps to prevent dam-
age to the vehicle.
Position the load on the roof rack in such a
way that the vehicle will not sustain dam-
age even when it is in motion .
Do not open the roof if a roof rack is fitted.
You will otherwise damage the roof.
Leave the boot separator in the boot open
for protection.
Make sure that you can open the boot li d
completely . 1
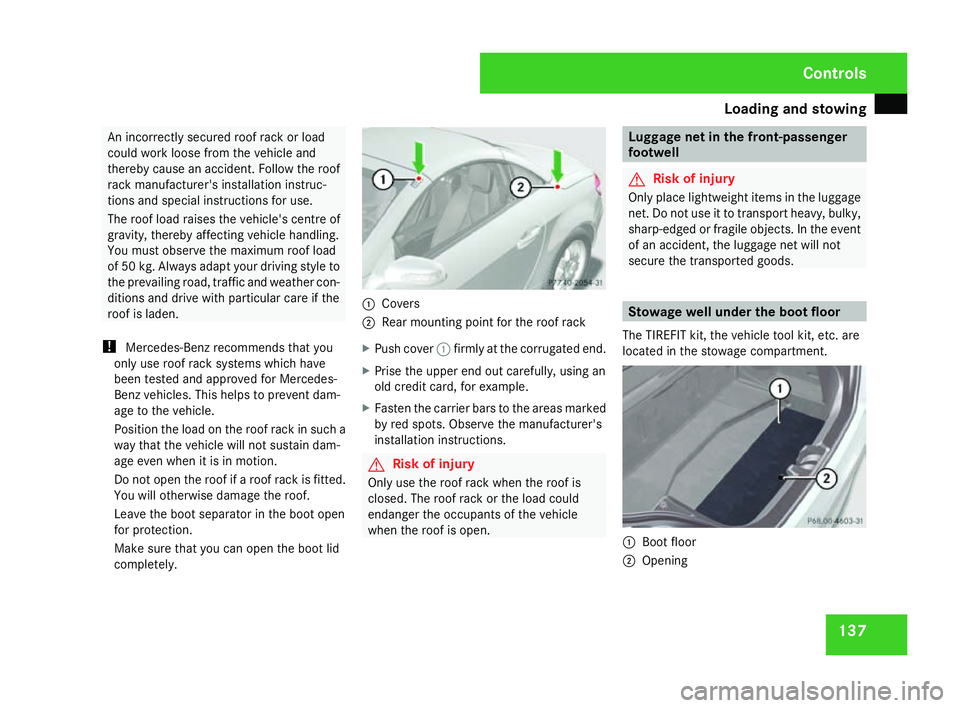
Cover s
2 Rear mounting point for the roof rac k
X Push cover 1firmly at the corrugated end.
X Prise the upper end out carefully, using an
old credit card, for example.
X Fasten the carrier bars to the areas marked
by red spots. Observe the manufacturer's
installation instructions. G
Risk of injury
Only use the roof rack when the roof is
closed. The roof rack or the load could
endanger the occupants of the vehicl e
when the roof is open. Luggage net in the front-passenger
footwell
G
Risk of injury
Only place lightweight items in the luggag e
net. Do not use it to transport heavy, bulky ,
sharp-edged or fragile objects. In the event
of an accident, the luggage net will not
secure the transported goods . Stowage well under the boot floor
The TIREFIT kit, the vehicle tool kit, etc. are
located in the stowage compartment. 1
Boot floor
2 Opening Controls
171_AKB; 3; 4, en-GB
vpfaff7,
2007-11-13T10:50:25+01:00 - Seite 137
Page 141 of 273
Loading and stowing
138
X
To open: Swing boot floor 1up by th e
opening 2. Boo
t
The boot provides space for two golf bags. We
recommend that you remove the long golf
clubs from the bags and place them sepa-
rately in the boot. Stowage compartments
G
Risk of injury
The stowage compartments must be closed
when items are stored in them. Luggage
nets are not designed to secure heavy
items of luggage.
You or other vehicle occupants could be
injured by objects being thrown around if
you:
R brake sharply
R change direction suddenly
R have an accident
Sharp-edged and fragile objects must not
be carried in the luggage net. Do not carry hard objects in the ruffled
pockets. Objects must not protrude over
the top of the ruffled pockets.
Glove compartment i
Depending on the vehicle equipment, a
CD changer* is located in the glove com-
partment.
The glove compartment is locked and
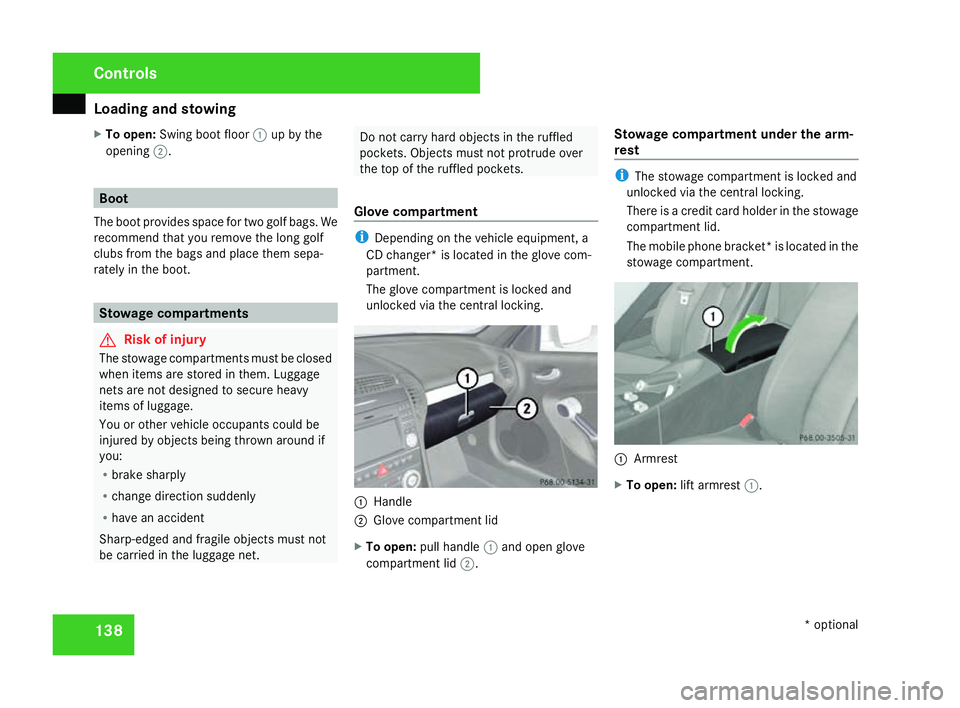
unlocked via the central locking. 1
Handl e
2 Glove compartment lid
X To open: pull handle 1and open glov e
compartment lid 2. Stowage compartment under the arm-
res t i
The stowage compartment is locked and
unlocked via the central locking.
There is a credit card holder in the stowage
compartment lid.
The mobile phone bracket* is located in the
stowage compartment. 1
Armrest
X To open: lift armrest 1. Cont
rols
* optional
171_AKB; 3; 4, en-GB
vpfaff7,
2007-11-13T10:50:25+01:00 - Seite 138
Page 142 of 273
Loading and stowing
139
Upper stowage compartment in th
e
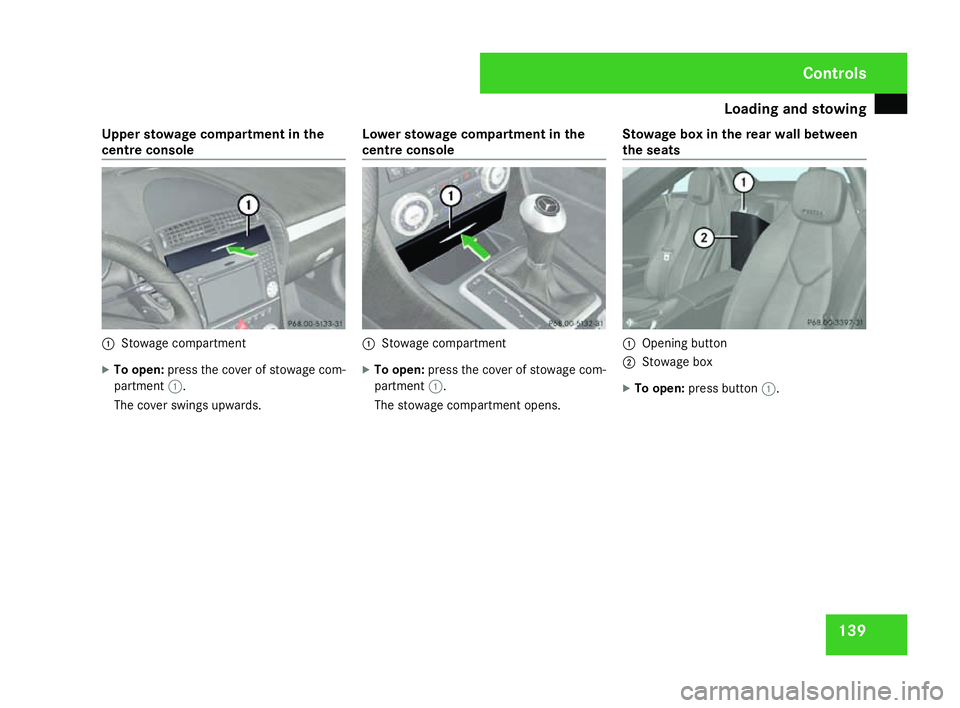
centre console 1
Stowage compartment
X To open: press the cover of stowage com-
partment 1.
The cover swings upwards. Lower stowage compartment in the
centre consol
e 1
Stowage compartment
X To open: press the cover of stowage com-
partment 1.
The stowage compartment opens. Stowage box in the rear wall between
the seats 1
Opening button
2 Stowage box
X To open: press button 1. Cont
rols
171_AKB; 3; 4, en-GB
vpfaff7,
2007-11-13T10:50:25+01:00 - Seite 139
Page 174 of 273
171
Where will I find...?
...........................172
Display messages ............................. 174
Troubleshooting ................................ 190
Locking/unlocking in an emer -
gency ................................................ .210
Changing the batteries .....................212
Changing the bulbs ...........................213
Replacing the wiper blades ..............217
Flat tyre ............................................. 218
Battery ............................................... 230
Towing and tow-starting ..................234
Fuses .................................................. 237 Practical advice
171_AKB; 3; 4, en-GB
vpfaff7
, 2007-11-13T10:50:25+01:00 - Seite 171