Page 292 of 569
291 Controls in detail
Loading
Second seat-row
Two cargo tie-down rings are located in the
footwell behind the driver’s and passenger
seat.
1Cargo tie-down ringThird seat-row
Two cargo tie-down rings are located in the
footwell behind the second-row seats.
1Cargo tie-down ringHooks
Two hooks are located on the rear com-
partment trim panels, one on each side.
1Hook
Use the hooks to secure light weight items
only. The maximum permissible weight per
hook is 9 lbs (4 kg).
Page 294 of 569

293 Controls in detail
Loading
�Place seat belt in seat belt holder 1.
�Pull release handle 2 on seat
backrest3 in direction of arrow.
Seat backrest 3 is released.
3Seat backrest
4Seat cushion
5Strap
�Move seat backrest 3 slightly for-
ward.
Seat cushion 4 is released and folds
forward automatically.
�Fold seat backrest 3 to a horizontal
position.Expanding cargo compartment fully
iStrap 5 serves to pull up the seat backrest
when bringing the third-row seats back to their
original position (
�page 297).
WarningG
Folded second-row seats are intended to
serve as cargo compartment expansion in
conjunction with folded third-row seats
only. Do not fold the second-row seats and
allow third-row seat occupants to use folded
second-row seats as a footrest while driving.
Third-row seat occupants must, like all vehi-
cle occupants, keep both feet on the floor in
front of their seat. Otherwise, occupants
could slide under the seat belt in a collision.
If occupants slide under it, the belt would
apply force at the abdomen or neck. That
could cause serious or even fatal injuries.
��
Page 306 of 569
305 Controls in detail
Useful features
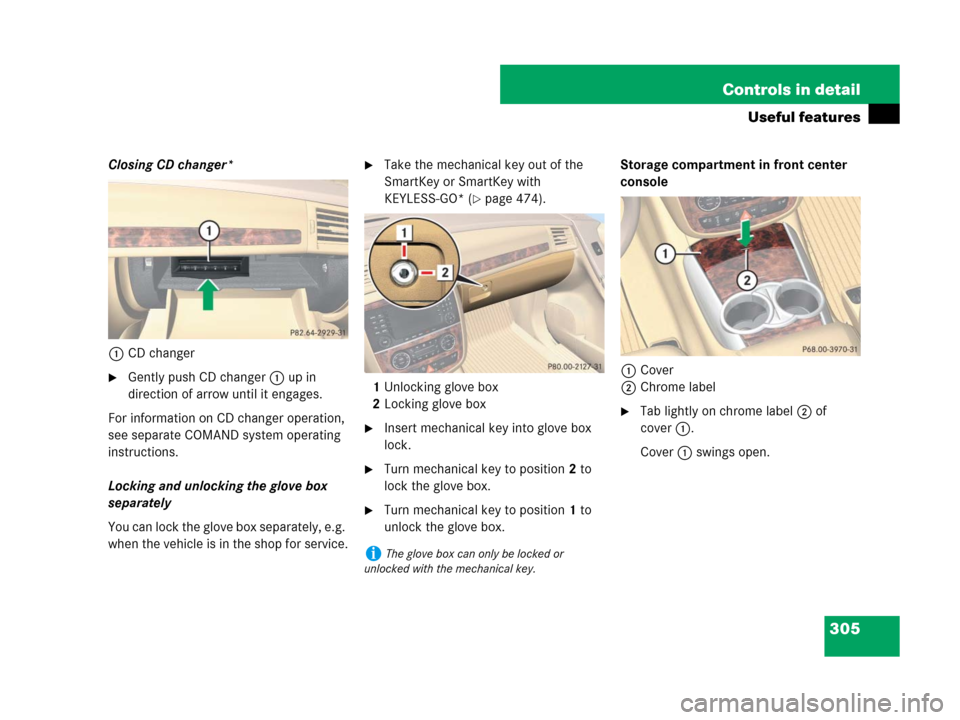
Closing CD changer*
1CD changer
�Gently push CD changer 1 up in
direction of arrow until it engages.
For information on CD changer operation,
see separate COMAND system operating
instructions.
Locking and unlocking the glove box
separately
You can lock the glove box separately, e.g.
when the vehicle is in the shop for service.
�Take the mechanical key out of the
SmartKey or SmartKey with
KEYLESS-GO* (
�page 474).
1Unlocking glove box
2Locking glove box
�Insert mechanical key into glove box
lock.
�Turn mechanical key to position 2 to
lock the glove box.
�Turn mechanical key to position 1 to
unlock the glove box.Storage compartment in front center
console
1Cover
2Chrome label
�Tab lightly on chrome label 2 of
cover1.
Cover 1 swings open.
iThe glove box can only be locked or
unlocked with the mechanical key.
Page 308 of 569

307 Controls in detail
Useful features
Rear storage compartment
A storage compartment is located in front
of the second-row seats.Third-row storage compartment
Storage compartments are located on the
side trims of the third-row seats.
1Storage compartmentParcel nets
iDepending on vehicle equipment, the upper
storage compartment may be replaced by a
control panel, for example in vehicles with rear
climate control* (
�page 220) or rear automatic
climate control* (
�page 236).
iIf your vehicle is equipped with a
3-zone automatic climate control*, the storage
compartment is replaced by an adjustable air
vent (
�page 240).
Warning!G
Do not place objects with a combined
weight of more than 4.4 lbs (2 kg) into the
parcel net on the back of the front passen-
ger seat. Otherwise, the Occupant
Classification System OCS (
�page 77) may
not be able to properly approximate the
occupant weight category.
Parcel nets are intended for storing
light-weight items only.
Heavy objects, objects with sharp edges, or
fragile objects may not be transported in the
parcel nets. In an accident, during hard
braking, or sudden maneuvers, they could
be thrown around inside the vehicle and
cause injury to vehicle occupants.
Parcel nets cannot protect transported
goods in the event of an accident.
Page 312 of 569
311 Controls in detail
Useful features
Cupholders in third-row side trim
Cupholders are located in the side trims of
the third-row seats.
1Cup holderAshtrays
Your vehicle is equipped with an ashtray
and a cigarette lighter (
�page 313)
located in the front center console and an
ashtray located in front of the second-row
seats (
�page 312).
Ashtray in the front center console
Opening the ashtray
1Cover
2Chrome label
�Tab lightly on chrome label 2 of
cover1.
Cover 1 swings open.
Removing ashtray insert
Warning!G
Remove ashtray insert only with vehicle
standing still. Set the parking brake to
secure vehicle from movement. Set auto-
matic transmission toP. With the automatic
transmission set toP, turn off the engine.
Page 314 of 569

313 Controls in detail
Useful features
1Ashtray cover
2Ashtray insert
�Push on ashtray insert 2 and pull it
out upwards.
Reinstalling ashtray insert
�Insert ashtray insert 2 into opening.
�Push down ashtray insert 2 until it
engages.
�Close ashtray cover 1.
Cigarette lighter
�Switch on the ignition (�page 39).1Cover
2Cigarette lighter
�Open cover1 (�page 311).
�Push in cigarette lighter2.
The cigarette lighter will pop out auto-
matically when hot.
�Take out cigarette lighter2.
Warning!G
Never touch the heating element or sides of
the cigarette lighter; they are extremely hot.
Hold the knob only.
Make sure that any children traveling with
you do injure themselves or start a fire with
the hot cigarette lighter.
When leaving the vehicle always remove the
SmartKey or SmartKey with KEYLESS-GO*
from the starter switch, take it with you, and
lock the vehicle. Do not leave children
unattended in the vehicle, or with access to
an unlocked vehicle. A child’s unsupervised
access to a vehicle could result in an
accident and/or serious personal injury.
Page 315 of 569

�in the second-row footwell
(
�page 315)
�on the right-hand side of the ca")
314 Controls in detail
Useful features
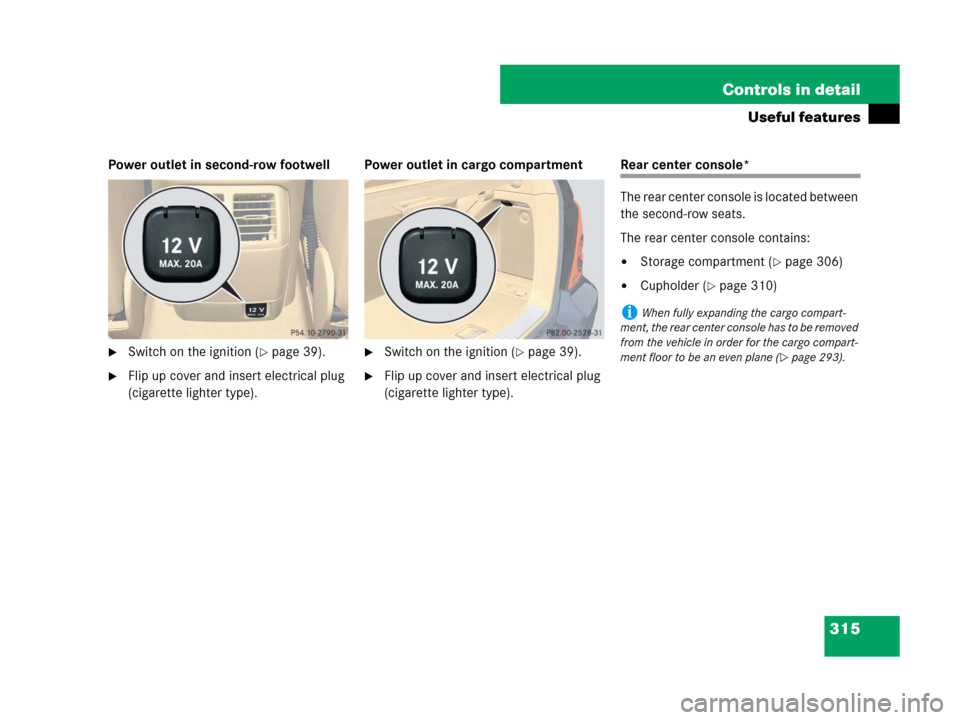
Power outletsPower outlets are located
�in the front passenger footwell
(
�page 314)
�in the second-row footwell
(
�page 315)
�on the right-hand side of the cargo
compartment (
�page 315)
Power outlet in front passenger
footwell
�Switch on the ignition (�page 39).
�Flip up cover and insert electrical plug
(cigarette lighter type).
!The lighter socket can accommodate 12V
DC electrical accessories (up to a maximum of
85 W) designed for use with the standard “ciga-
rette lighter” plug type. Keep in mind, however,
that connecting accessories to the lighter socket
(for example extensive connecting and discon-
necting, or using plugs that do not fit properly)
can damage the lighter socket. With the socket
damaged, the lighter may no longer be able to be
placed in the heating (pushed-in) position, or the
lighter may pop out too early with the lighter not
hot enough.
To help avoid damaging the cigarette lighter
socket, we recommend connecting 12V DC elec-
trical accessories designed for use with the stan-
dard “cigarette lighter” plug type to the
12V power outlets (
�page 314) in your vehicle
whenever possible.
!The cigarette lighter is not designed for use
with the electric air pump (
�page 499). Use a
power outlet (
�page 314) for electric air pump
operation.
iIf the engine is off, and the cigarette lighter
is being used extensively, the vehicle battery
may become discharged.
!If you use all power outlets in the vehicle,
make sure that the maximum current drawn
does not exceed 55 A.
iThe power outlets can be used to
accommodate 12V DC electrical accessories
(e.g. air pump, auxiliary lamps) up to a maximum
of 240 W.
If the engine is off and the power outlets are
being used extensively, the vehicle battery may
become discharged.
iYou can use the power outlets, except for
the power outlet in the front center console,
even if the ignition is switched off.
An emergency shut-off feature ensures that the
vehicle’s electrical voltage does not fall below a
minimum level. If the voltage drops to this mini-
mum level, the power outlets are automatically
switched off. This ensures that enough power
remains to start the engine.
Page 316 of 569
315 Controls in detail
Useful features
Power outlet in second-row footwell
�Switch on the ignition (�page 39).
�Flip up cover and insert electrical plug
(cigarette lighter type).Power outlet in cargo compartment
�Switch on the ignition (�page 39).
�Flip up cover and insert electrical plug
(cigarette lighter type).
Rear center console*
The rear center console is located between
the second-row seats.
The rear center console contains:
�Storage compartment (�page 306)
�Cupholder (�page 310)
iWhen fully expanding the cargo compart-
ment, the rear center console has to be removed
from the vehicle in order for the cargo compart-
ment floor to be an even plane (
�page 293).