2008 MERCEDES-BENZ CLS COUPE roof
[x] Cancel search: roofPage 103 of 329
Side windows
100
If a side window locks up again during closing
and has reopened again slightly:
X
Immediately after the window locks up, pull
the switch upwards until the window is fully
closed.
The side window is closed without the anti-
entrapment feature. Resetting the windows
Each side window must be reset if the battery
was disconnected or discharged.
X Make sure that the key is in position 2 in
the ignition lock.
X Pull the switch upwards until the window is
closed, and hold it in this position for
another second. Summer opening
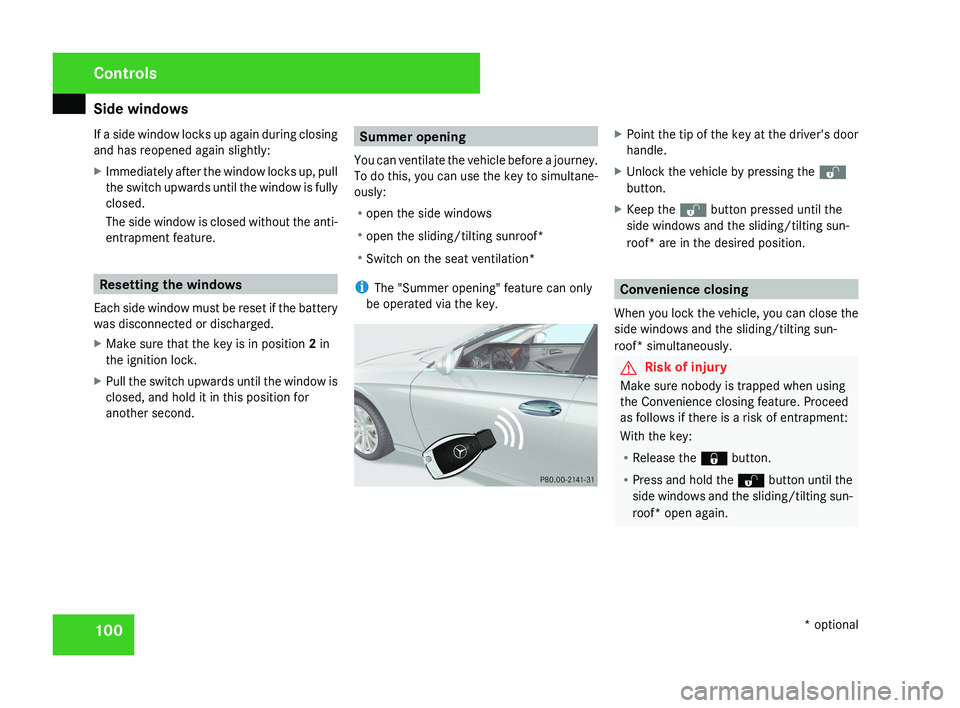
You can ventilate the vehicle before a journey.
To do this, you can use the key to simultane-
ously:
R open the side windows
R open the sliding/tilting sunroof*
R Switch on the seat ventilation*
i The "Summer opening" feature can only
be operated via the key.X Point the tip of the key at the driver's door
handle.
X Unlock the vehicle by pressing the k
button.
X Keep the k button pressed until the
side windows and the sliding/tilting sun-
roof* are in the desired position.
Convenience closing
When you lock the vehicle, you can close the
side windows and the sliding/tilting sun-
roof* simultaneously.
G Risk of injury
Make sure nobody is trapped when using
the Convenience closing feature. Proceed
as follows if there is a risk of entrapment:
With the key:
R Release the j button.
R Press and hold the k button until the
side windows and the sliding/tilting sun-
roof* open again.
Controls
* optional
219_AKB; 2; 4, en-GB
mkalafa,
2007-11-13T09:28:36+01:00 - Seite 100
Page 104 of 329
Driving and parking
101With KEYLESS GO*
R
Release the locking button on the door
handle.
R Pull the door handle immediately and
hold it.
The side windows and the sliding/tilting
sunroof* open.
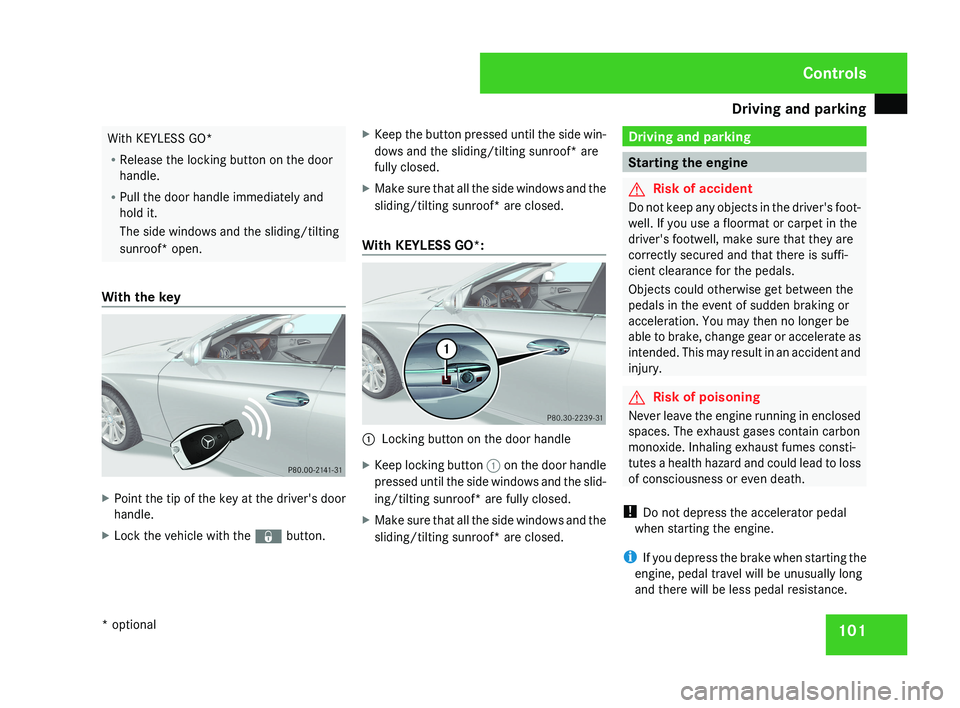
With the key X
Point the tip of the key at the driver's door
handle.
X Lock the vehicle with the j button.X
Keep the button pressed until the side win-
dows and the sliding/tilting sunroof* are
fully closed.
X Make sure that all the side windows and the
sliding/tilting sunroof* are closed.
With KEYLESS GO*: 1
Locking button on the door handle
X Keep locking button 1 on the door handle
pressed until the side windows and the slid-
ing/tilting sunroof* are fully closed.
X Make sure that all the side windows and the
sliding/tilting sunroof* are closed. Driving and parking
Starting the engine
G
Risk of accident
Do not keep any objects in the driver's foot-
well. If you use a floormat or carpet in the
driver's footwell, make sure that they are
correctly secured and that there is suffi-
cient clearance for the pedals.
Objects could otherwise get between the
pedals in the event of sudden braking or
acceleration. You may then no longer be
able to brake, change gear or accelerate as
intended. This may result in an accident and
injury. G
Risk of poisoning
Never leave the engine running in enclosed
spaces. The exhaust gases contain carbon
monoxide. Inhaling exhaust fumes consti-
tutes a health hazard and could lead to loss
of consciousness or even death.
! Do not depress the accelerator pedal
when starting the engine.
i If you depress the brake when starting the
engine, pedal travel will be unusually long
and there will be less pedal resistance. Controls
* optional
219_AKB; 2; 4, en-GB
mkalafa,
2007-11-13T09:28:36+01:00 - Seite 101
Page 152 of 329
Driving systems
149
Front sensors Centre Approximately 100 cm
Corners Approximately 60 cm
Rear sensors
Centre Approximately 120 cm
Corners Approximately 80 cm
!
Pay particular attention to objects above
or below the sensors when parking, such
as flower pots or trailer towbars. Parktronic
does not detect such objects when they are
in the immediate vicinity of the vehicle. You
could damage the vehicle or the objects.
Ultrasonic sources such as an automatic
car wash, a lorry's compressed-air brakes
or a pneumatic drill could cause Parktronic
to malfunction.
Minimum distance Centre Approximately 20 cm
Corners Approximately 15 cm If there is an obstacle within this range, all
warning displays light up and a tone sounds.
If the distance falls below the minimum clear-
ance, it may no longer be shown.
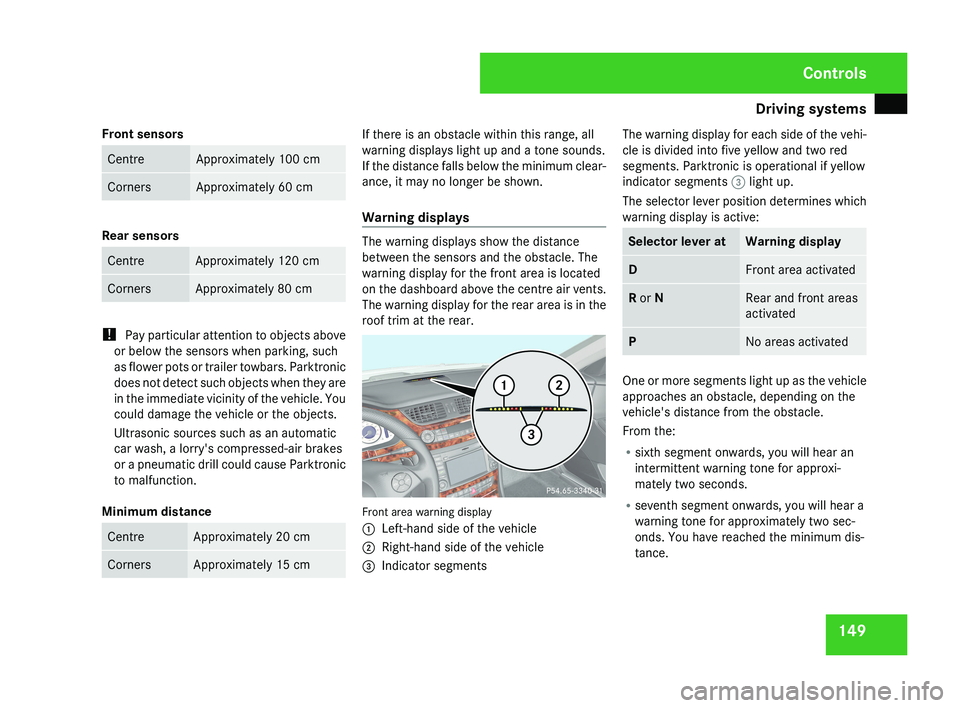
Warning displays
The warning displays show the distance
between the sensors and the obstacle. The
warning display for the front area is located
on the dashboard above the centre air vents.
The warning display for the rear area is in the
roof trim at the rear.
Front area warning display
1
Left-hand side of the vehicle
2 Right-hand side of the vehicle
3 Indicator segments The warning display for each side of the vehi-
cle is divided into five yellow and two red
segments. Parktronic is operational if yellow
indicator segments
3 light up.
The selector lever position determines which
warning display is active: Selector lever at Warning display
D Front area activated
R or N Rear and front areas
activated
P No areas activated
One or more segments light up as the vehicle
approaches an obstacle, depending on the
vehicle's distance from the obstacle.
From the:
R
sixth segment onwards, you will hear an
intermittent warning tone for approxi-
mately two seconds.
R seventh segment onwards, you will hear a
warning tone for approximately two sec-
onds. You have reached the minimum dis-
tance. Controls
219_AKB; 2; 4, en-GB
mkalafa,
2007-11-13T09:28:36+01:00 - Seite 149
Page 155 of 329
Air conditioning
152 General notes
2-zone Thermatic controls the temperature of
the vehicle interior and filters out undesirable
substances from the air.
4-zone Thermotronic* controls the tempera-
ture and the humidity of the vehicle interior
and filters out undesirable substances from
the air.
2-zone Thermatic/4-zone Thermotronic* is
only operational when the engine is running.
Optimum operation is only achieved when
you drive with the side windows and sliding/
tilting sunroof* closed. i
Ventilate the vehicle for a brief period
during warm weather, e.g. using the sum-
mer
opening feature (Y page 100). This will
speed up the cooling process and the
desired interior temperature will be
reached more quickly.
i The integrated filter filters out most par-
ticles of dust and completely filters out
pollen. A clogged filter reduces the amount
of air supplied to the vehicle interior. For
this reason, you should always observe the
interval for replacing the filter, which is specified in the Service Booklet. As it
depends
on environmental conditions, e.g.
heavy air pollution, the interval may be
shorter than stated in the Service Booklet. G
Risk of accident
Observe the settings recommended on the
following pages. The windows could other-
wise mist up. This may obstruct your view
of the traffic situation, thereby causing an
accident. Controls
* optional
219_AKB; 2; 4, en-GB
mkalafa,
2007-11-13T09:28:36+01:00 - Seite 152
Page 168 of 329
Air conditioning
165
X
To deactivate: press the , button.
The indicator lamp in the , button goes
out.
i Air-recirculation mode switches off auto-
matically:
R after approximately five minutes at out-
side temperatures below approximately
5 †
R after
approximately five minutes if the air
dehumidification is deactivated
R after approximately 30 minutes at out-
side temperatures above approximately
5 †
Air-recirculation mode with the conve-
nience opening/closing feature G
Risk of injury
Make sure that nobody can become trap-
ped
between the side window and the door
frame as the side windows are opened and
closed. Do not place objects or lean against
the side window when it is being opened or
closed. You or the objects could be drawn
in or become trapped between the side
window and the door frame as the window moves. If there is a risk of entrapment,
press the , button again. If necessary,
press
the switch that stops, opens or closes
the side window in the opposite direction.
Make sure that nobody can become trap-
ped when you are opening or closing the
sliding/tilting sunroof*. If there is a risk of
entrapment, press the , button again.
If necessary, press the switch to stop, open
or close the sliding/tilting sunroof* in the
opposite direction.
X Convenience closing: press and hold
the ,
button until the side windows and
the sliding/tilting sunroof* have closed.
The indicator lamp in the , button
comes on. Air-recirculation mode is activa-
ted.
X Convenience opening: press and hold
the ,
button until the side windows and
the sliding/tilting sunroof* have reached
their original position.
The indicator lamp in the , button goes
out. Air-recirculation mode is deactivated.
i If you open the side windows or the slid-
ing/tilting sunroof* manually after closing
using the convenience closing feature, it will remain in this position when opened
using the convenience opening feature. Switching the residual heat/auxiliary
ventilation on/off
It
is possible to make use of the residual heat
of the engine to continue heating the station-
ary vehicle for up to 30 minutes after the
engine has been switched off. The heating
time depends on the set interior temperature.
i The blower will run at a low speed regard-
less of the airflow setting.
i If you activate the "residual heat" function
at high temperatures, only the ventilation
will be activated. The blower runs at
medium speed.
X Make sure that the key is in position 0 in
the ignition lock or that it has been
removed.
X To switch on: press the T button.
REST appears in the display.
X To deactivate: press the T button.
REST is no longer shown in the display. Controls
* optional
219_AKB; 2; 4, en-GB
mkalafa,
2007-11-13T09:28:36+01:00 - Seite 165
Page 172 of 329
Sliding sunroof
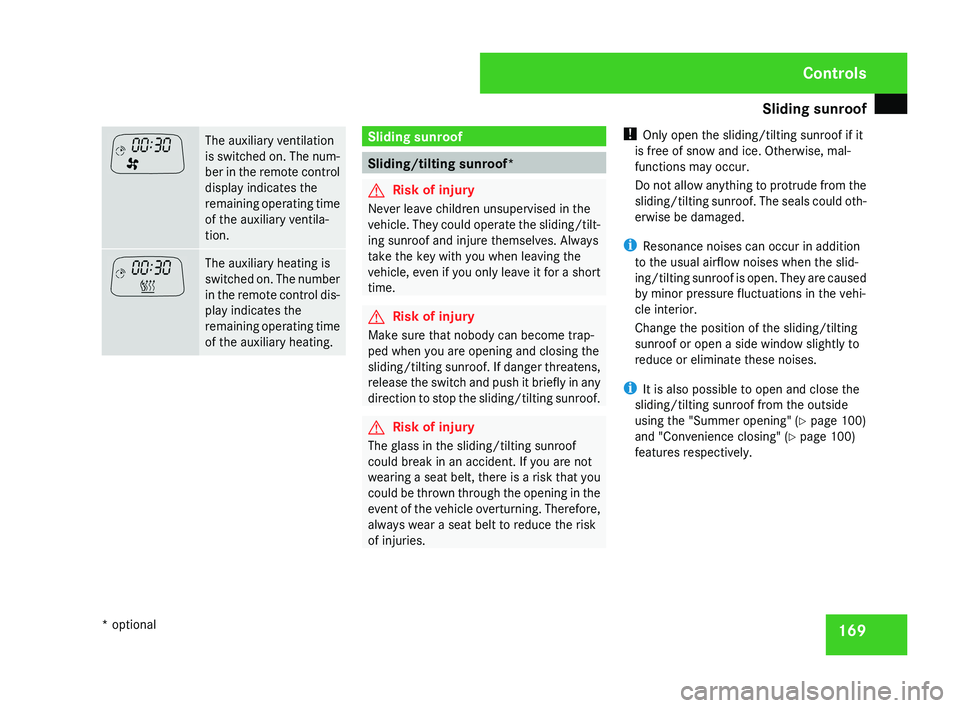
169The auxiliary ventilation
is switched on. The num-
ber in the remote control
display indicates the
remaining operating time
of the auxiliary ventila-
tion.
The auxiliary heating is
switched on. The number
in the remote control dis-
play indicates the
remaining operating time
of the auxiliary heating. Sliding sunroof
Sliding/tilting sunroof*
G
Risk of injury
Never leave children unsupervised in the
vehicle. They could operate the sliding/tilt-
ing sunroof and injure themselves. Always
take the key with you when leaving the
vehicle, even if you only leave it for a short
time. G
Risk of injury
Make sure that nobody can become trap-
ped when you are opening and closing the
sliding/tilting sunroof. If danger threatens,
release the switch and push it briefly in any
direction to stop the sliding/tilting sunroof. G
Risk of injury
The glass in the sliding/tilting sunroof
could break in an accident. If you are not
wearing a seat belt, there is a risk that you
could be thrown through the opening in the
event of the vehicle overturning. Therefore,
always wear a seat belt to reduce the risk
of injuries. !
Only open the sliding/tilting sunroof if it
is free of snow and ice. Otherwise, mal-
functions may occur.
Do not allow anything to protrude from the
sliding/tilting sunroof. The seals could oth-
erwise be damaged.
i Resonance noises can occur in addition
to the usual airflow noises when the slid-
ing/tilting sunroof is open. They are caused
by minor pressure fluctuations in the vehi-
cle interior.
Change the position of the sliding/tilting
sunroof or open a side window slightly to
reduce or eliminate these noises.
i It is also possible to open and close the
sliding/tilting sunroof from the outside
using the "Summer opening" ( Y page 100)
and "Convenience closing" ( Y page 100)
features respectively. Controls
* optional
219_AKB; 2; 4, en-GB
mkalafa,
2007-11-13T09:28:36+01:00 - Seite 169
Page 173 of 329
Sliding sunroof
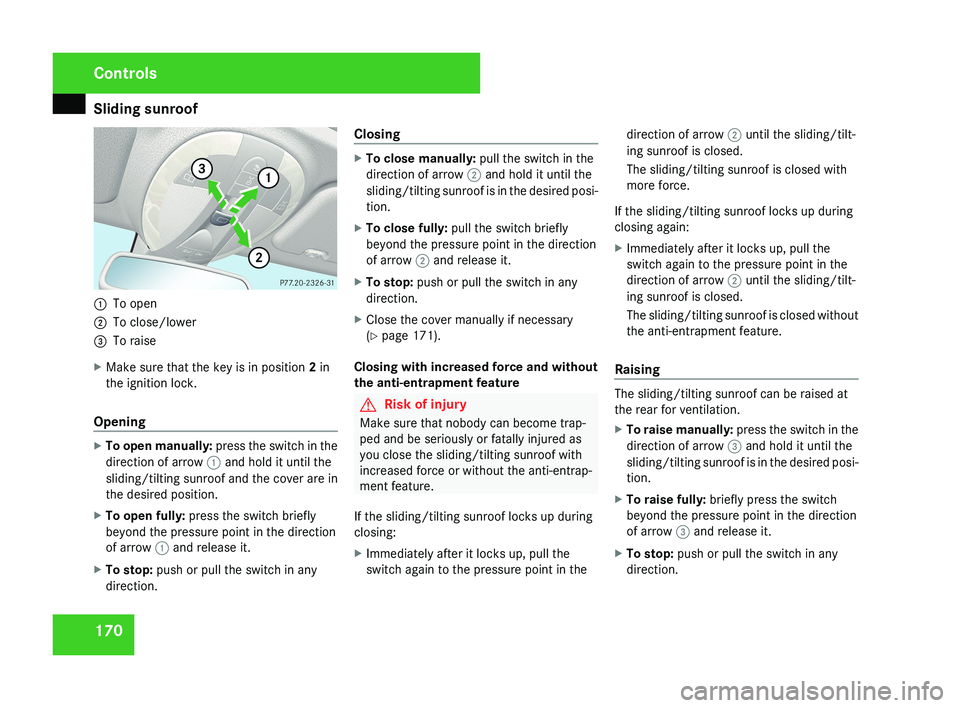
1701
To open
2 To close/lower
3 To raise
X Make sure that the key is in position 2 in
the ignition lock.
Opening
X To open manually: press the switch in the
direction of arrow 1 and hold it until the
sliding/tilting sunroof and the cover are in
the desired position.
X To open fully: press the switch briefly
beyond the pressure point in the direction
of arrow 1 and release it.
X To stop: push or pull the switch in any
direction. Closing
X
To close manually: pull the switch in the
direction of arrow 2 and hold it until the
sliding/tilting sunroof is in the desired posi-
tion.
X To close fully: pull the switch briefly
beyond the pressure point in the direction
of arrow 2 and release it.
X To stop: push or pull the switch in any
direction.
X Close the cover manually if necessary
(Y page 171).
Closing with increased force and without
the anti-entrapment feature
G Risk of injury
Make sure that nobody can become trap-
ped and be seriously or fatally injured as
you close the sliding/tilting sunroof with
increased force or without the anti-entrap-
ment feature.
If the sliding/tilting sunroof locks up during
closing:
X Immediately after it locks up, pull the
switch again to the pressure point in the direction of arrow 2 until the sliding/tilt-
ing sunroof is closed.
The sliding/tilting sunroof is closed with
more force.
If the sliding/tilting sunroof locks up during
closing again:
X Immediately after it locks up, pull the
switch again to the pressure point in the
direction of arrow 2 until the sliding/tilt-
ing sunroof is closed.
The sliding/tilting sunroof is closed without
the anti-entrapment feature.
RaisingThe sliding/tilting sunroof can be raised at
the rear for ventilation.
X To raise manually: press the switch in the
direction of arrow 3 and hold it until the
sliding/tilting sunroof is in the desired posi-
tion.
X To raise fully: briefly press the switch
beyond the pressure point in the direction
of arrow 3 and release it.
X To stop: push or pull the switch in any
direction.
Controls
219_AKB; 2; 4, en-GB
mkalafa,
2007-11-13T09:28:36+01:00 - Seite 170
Page 174 of 329

Sliding sunroof
171
Lowering and closing X
To lower manually: pull the switch in the
direction of arrow 2 and hold it until the
sliding/tilting
sunroof is in the desired posi-
tion.
X To lower fully: pull the switch briefly
beyond the pressure point in the direction
of arrow 2 and release it.
X To stop: push or pull the switch in any
direction.
Rain closing feature The sliding/tilting sunroof closes automati-
cally:
R
if it starts to rain
R at extreme outside temperatures
R after 12 hours
R if
there is a malfunction in the power supply
The rear of the sliding/tilting sunroof is then
raised in order to ventilate the interior of the
vehicle.
i The sliding/tilting sunroof is opened
slightly again if it is obstructed while being
closed by the rain closing feature. The rain
closing feature is then deactivated. i
The
sliding/tilting sunroof does not close
if:
R it is raised at the rear
R it is blocked
R no rain is falling on the windscreen (e.g.
because the vehicle is under a bridge or
in a carport)
Opening and closing the cover The cover functions as a sunblind. When you
open the sliding/tilting sunroof, the cover
moves back with it.
When the sliding/tilting sunroof is closed or
raised at the rear, you can open or close the
cover manually.
Resetting the sliding/tilting sunroof
Reset the sliding/tilting sunroof if it does not
move smoothly, or if the battery was discon-
nected or flat:
X
Remove the fuse for the sliding/tilting sun-
roof in the main fuse box (Y page 296).
X Reinsert the fuse.
X Make sure that the key is in position 2 in
the ignition lock. X
Press the switch in the direction of
arrow 3
and hold it until the sliding/tilting
sunroof is fully raised at the rear.
X Keep the switch pressed for an additional
second.
X Make sure that the sliding/tilting sunroof
can be opened or closed fully again
(Y page 170).
X If this is not the case, consult a qualified
specialist workshop. Controls
219_AKB; 2; 4, en-GB
mkalafa,
2007-11-13T09:28:36+01:00 - Seite 171