Page 286 of 769
285 Control systems
Instrument cluster control system
Telephone* (
�page 294)
Assistance* (
�page 298)
Service (
�page 299)
Settings (
�page 301)
Commands/submenusDialing a number from the
phone book
Displaying the distance graphic*,
DISTRONIC Plus*
Calling up vehicle malfunction,
warning and system status
messages stored in memory
Setting daytime running lamp
mode (USA only)
Redialing
Activating/deactivating
PRE-SAFE
® Brake* (vehicles with
DISTRONIC Plus* only)
Checking tire inflation pres-
sure
Switching additional
speedometer on or off
Answering a call
Switching on or off Rear View
Camera* automatically
Calling up maintenance service
display
Switching on or off radar
sensors*
Ending a call or rejecting an
incoming call
Switching on or off Blind Spot
Assist*
Checking engine oil level
(CL 600)
Page 287 of 769
286 Control systemsInstrument cluster control systemTrip menu
In the “Trip” menu, you can show an addi-
tional display for the speedometer and call
up or reset your vehicle’s statistical data.
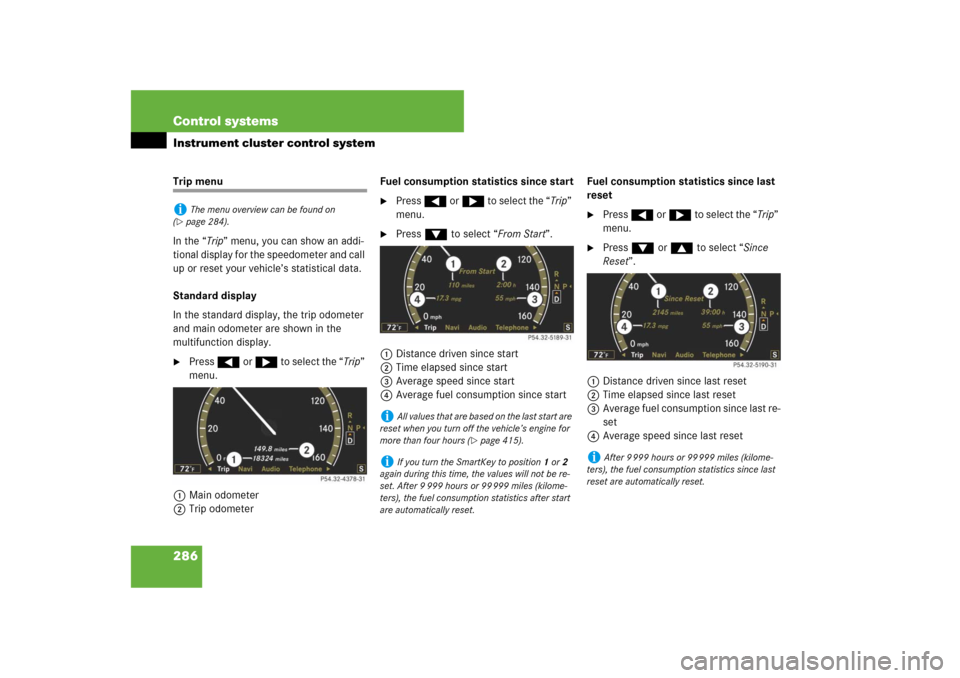
Standard display
In the standard display, the trip odometer
and main odometer are shown in the
multifunction display.�
Press ( or & to select the “Trip”
menu.
1Main odometer
2Trip odometerFuel consumption statistics since start
�
Press ( or & to select the “Trip”
menu.
�
Press % to select “From Start”.
1Distance driven since start
2Time elapsed since start
3Average speed since start
4Average fuel consumption since startFuel consumption statistics since last
reset
�
Press ( or & to select the “Trip”
menu.
�
Press % or $ to select “Since
Reset”.
1Distance driven since last reset
2Time elapsed since last reset
3Average fuel consumption since last re-
set
4Average speed since last reset
i
The menu overview can be found on
(
�page 284).
i
All values that are based on the last start are
reset when you turn off the vehicle’s engine for
more than four hours (
�page 415).
i
If you turn the SmartKey to position1 or2
again during this time, the values will not be re-
set. After 9 999 hours or 99 999 miles (kilome-
ters), the fuel consumption statistics after start
are automatically reset.
i
After 9 999 hours or 99 999 miles (kilome-
ters), the fuel consumption statistics since last
reset are automatically reset.
Page 288 of 769
287 Control systems
Instrument cluster control system
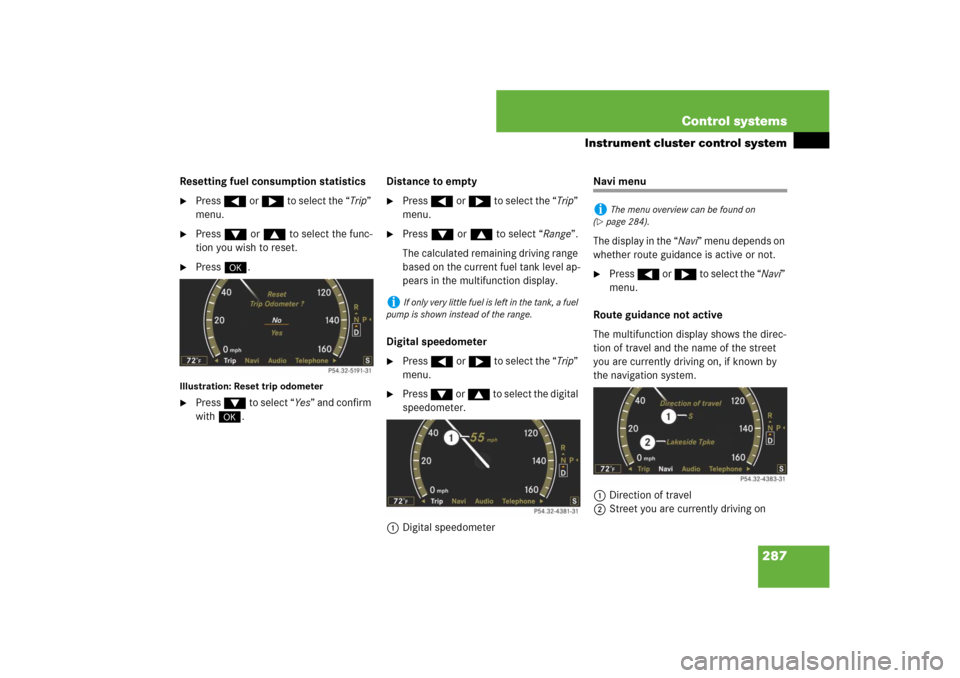
Resetting fuel consumption statistics�
Press ( or & to select the “Trip”
menu.
�
Press % or $ to select the func-
tion you wish to reset.
�
Press #.
Illustration: Reset trip odometer�
Press % to select “Yes” and confirm
with #.Distance to empty
�
Press ( or & to select the “Trip”
menu.
�
Press % or $ to select “Range”.
The calculated remaining driving range
based on the current fuel tank level ap-
pears in the multifunction display.
Digital speedometer
�
Press ( or & to select the “Trip”
menu.
�
Press % or $ to select the digital
speedometer.
1Digital speedometer
Navi menu
The display in the “Navi” menu depends on
whether route guidance is active or not.�
Press ( or & to select the “Navi”
menu.
Route guidance not active
The multifunction display shows the direc-
tion of travel and the name of the street
you are currently driving on, if known by
the navigation system.
1Direction of travel
2Street you are currently driving on
i
If only very little fuel is left in the tank, a fuel
pump is shown instead of the range.
i
The menu overview can be found on
(
�page 284).
Page 289 of 769
288 Control systemsInstrument cluster control systemRoute guidance active
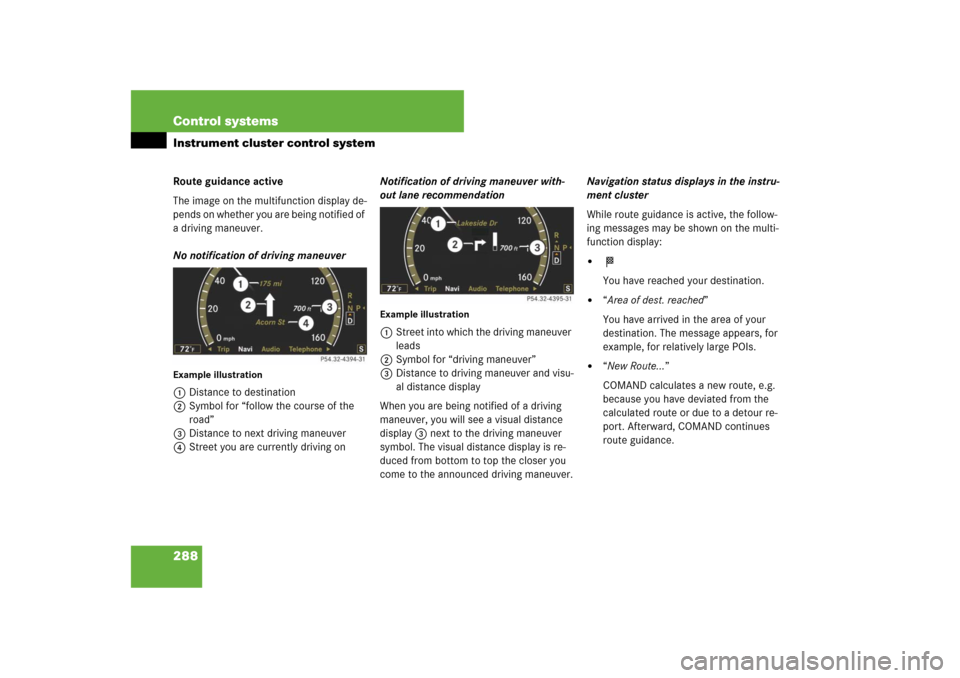
The image on the multifunction display de-
pends on whether you are being notified of
a driving maneuver.
No notification of driving maneuverExample illustration1Distance to destination
2Symbol for “follow the course of the
road”
3Distance to next driving maneuver
4Street you are currently driving onNotification of driving maneuver with-
out lane recommendation
Example illustration1Street into which the driving maneuver
leads
2Symbol for “driving maneuver”
3Distance to driving maneuver and visu-
al distance display
When you are being notified of a driving
maneuver, you will see a visual distance
display 3 next to the driving maneuver
symbol. The visual distance display is re-
duced from bottom to top the closer you
come to the announced driving maneuver.Navigation status displays in the instru-
ment cluster
While route guidance is active, the follow-
ing messages may be shown on the multi-
function display:
�
<
You have reached your destination.
�
“Area of dest. reached”
You have arrived in the area of your
destination. The message appears, for
example, for relatively large POIs.
�
“New Route…”
COMAND calculates a new route, e.g.
because you have deviated from the
calculated route or due to a detour re-
port. Afterward, COMAND continues
route guidance.
Page 290 of 769
289 Control systems
Instrument cluster control system
�
“Calculating Route”
COMAND is calculating a route. After-
ward, COMAND starts route guidance.
�
“Off Map”
The vehicle’s location is outside of the
digital map’s range. The vehicle is in an
off-map position (
�page 238).
�
“Off Mapped Road”
The vehicle is either on a road that has
not been digitized (
�page 238) or on
the side of a road, e.g. in a parking
space.
�
“No Route”
COMAND cannot calculate a route to
the selected destination.
�
“Direction of Dest.”
The vehicle has gone off the map dur-
ing route guidance (
�page 238).
Audio menu
The functions in the “Audio” menu operate
the audio equipment which you currently
have turned on.
If no audio equipment is currently turned
on, the message: “Audio OFF” is shown in
the multifunction display.
Selecting radio station�
Turn on COMAND and select “Radio”
(�page 98).
�
Press ( or & to select the
“Audio” menu.
�
Selecting a preset station: Briefly
press % or $.
�
Selecting a station using the search
function: Press and hold %
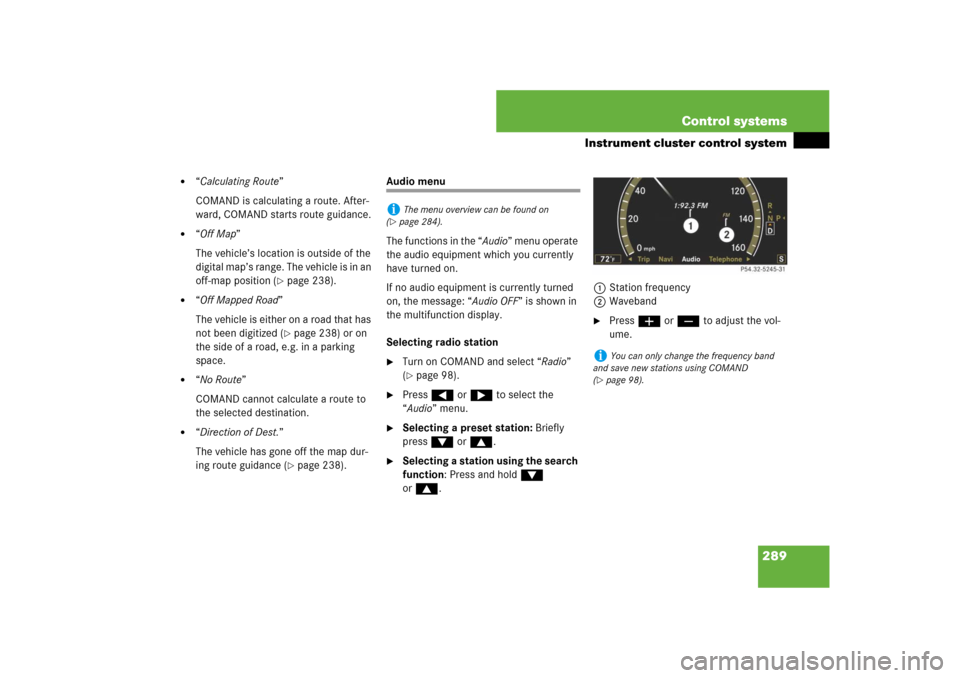
or$.1Station frequency
2Waveband
�
Press æ or ç to adjust the vol-
ume.
i
The menu overview can be found on
(
�page 284).
i
You can only change the frequency band
and save new stations using COMAND
(
�page 98).
Page 291 of 769
290 Control systemsInstrument cluster control systemSelecting satellite radio channel
The satellite radio is treated as a radio ap-
plication.�
Turn on COMAND and select
“Sat Radio” (
�page 104).
�
Press ( or & to select the
“Audio” menu.
�
Press % or $ to select a station.
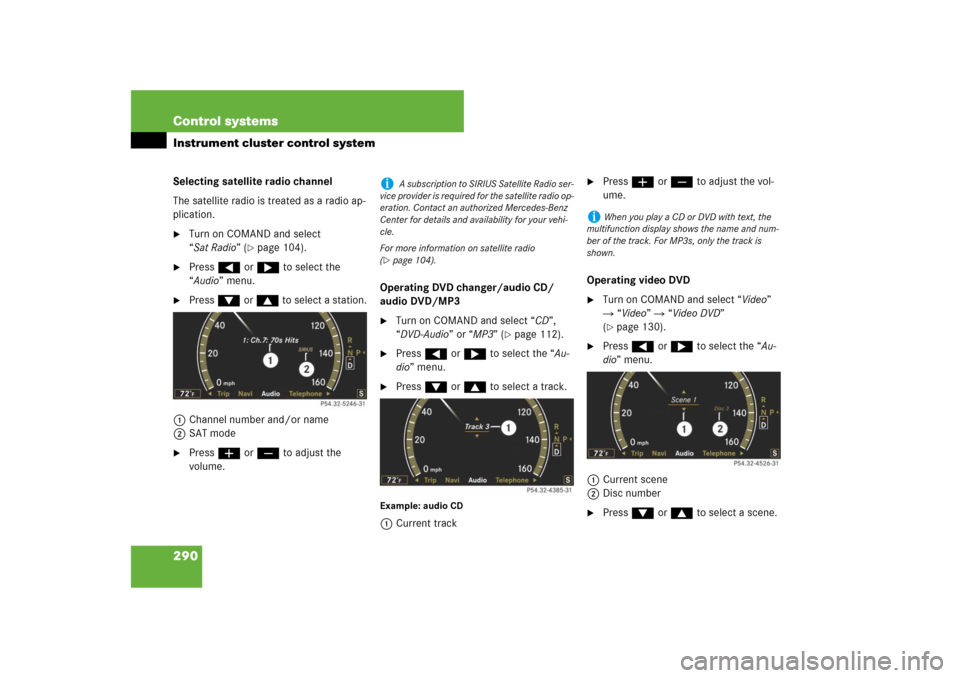
1Channel number and/or name
2SAT mode
�
Press æ or ç to adjust the
volume.Operating DVD changer/audio CD/
audio DVD/MP3
�
Turn on COMAND and select “CD”,
“DVD-Audio” or “MP3” (
�page 112).
�
Press ( or & to select the “Au-
dio” menu.
�
Press % or $ to select a track.
Example: audio CD1Current track
�
Press æ or ç to adjust the vol-
ume.
Operating video DVD
�
Turn on COMAND and select “Video”
� “Video” � “Video DVD”
(�page 130).
�
Press ( or & to select the “Au-
dio” menu.
1Current scene
2Disc number
�
Press % or $ to select a scene.
i
A subscription to SIRIUS Satellite Radio ser-
vice provider is required for the satellite radio op-
eration. Contact an authorized Mercedes-Benz
Center for details and availability for your vehi-
cle.
For more information on satellite radio
(
�page 104).
i
When you play a CD or DVD with text, the
multifunction display shows the name and num-
ber of the track. For MP3s, only the track is
shown.
Page 292 of 769
291 Control systems
Instrument cluster control system
AMG menu
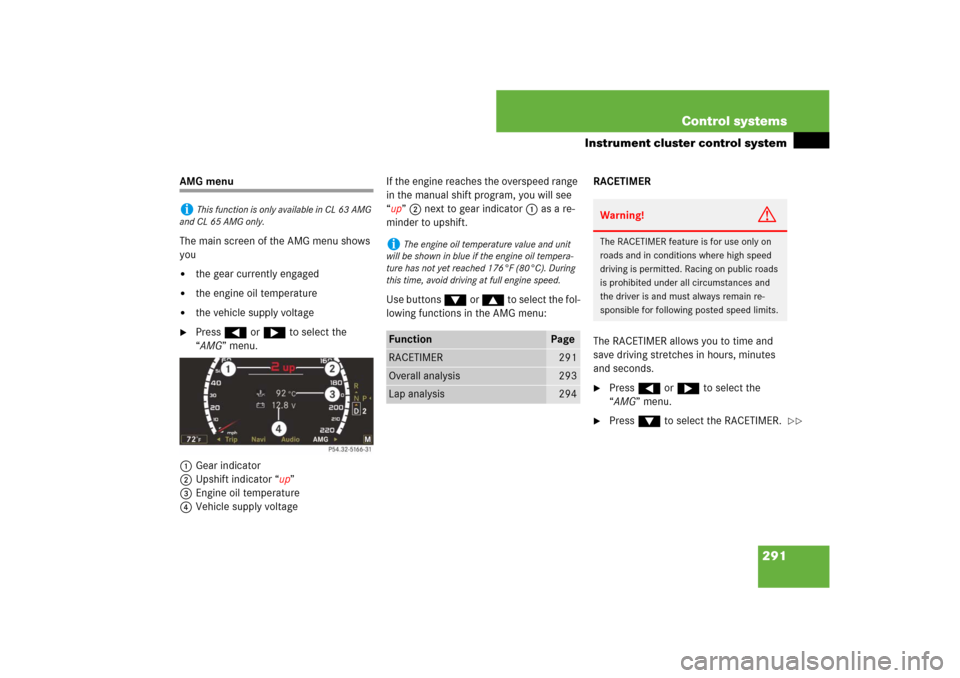
The main screen of the AMG menu shows
you �
the gear currently engaged
�
the engine oil temperature
�
the vehicle supply voltage
�
Press ( or & to select the
“AMG” menu.
1Gear indicator
2Upshift indicator “up”
3Engine oil temperature
4Vehicle supply voltageIf the engine reaches the overspeed range
in the manual shift program, you will see
“up” 2 next to gear indicator 1 as a re-
minder to upshift.
Use buttons % or $ to select the fol-
lowing functions in the AMG menu:RACETIMER
The RACETIMER allows you to time and
save driving stretches in hours, minutes
and seconds.
�
Press ( or & to select the
“AMG” menu.
�
Press % to select the RACETIMER.
i
This function is only available in CL 63 AMG
and CL 65 AMG only.
i
The engine oil temperature value and unit
will be shown in blue if the engine oil tempera-
ture has not yet reached 176°F (80°C). During
this time, avoid driving at full engine speed.
Function
Page
RACETIMER
291
Overall analysis
293
Lap analysis
294
Warning!
G
The RACETIMER feature is for use only on
roads and in conditions where high speed
driving is permitted. Racing on public roads
is prohibited under all circumstances and
the driver is and must always remain re-
sponsible for following posted speed limits.
��
Page 293 of 769
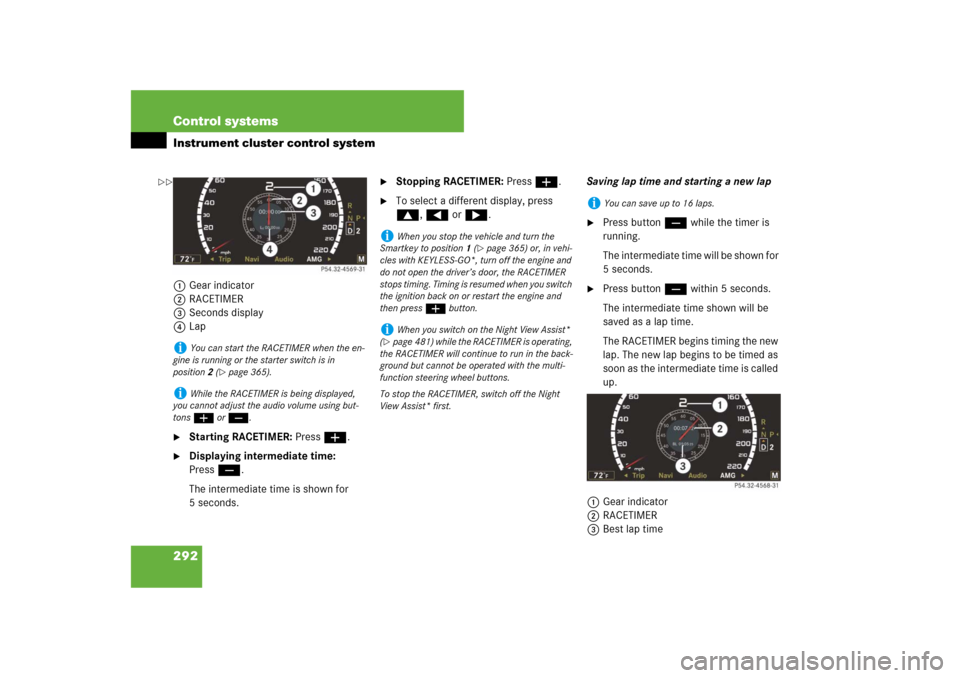
292 Control systemsInstrument cluster control system1Gear indicator
2RACETIMER
3Seconds display
4Lap�
Starting RACETIMER: Press æ.
�
Displaying intermediate time:
Pressç.
The intermediate time is shown for
5 seconds.
�
Stopping RACETIMER: Press æ.
�
To select a different display, press
$, ( or &.Saving lap time and starting a new lap
�
Press buttonç while the timer is
running.
The intermediate time will be shown for
5 seconds.
�
Press buttonç within 5 seconds.
The intermediate time shown will be
saved as a lap time.
The RACETIMER begins timing the new
lap. The new lap begins to be timed as
soon as the intermediate time is called
up.
1Gear indicator
2RACETIMER
3Best lap time
i
You can start the RACETIMER when the en-
gine is running or the starter switch is in
position2 (
�page 365).
i
While the RACETIMER is being displayed,
you cannot adjust the audio volume using but-
tons æ or ç.
i
When you stop the vehicle and turn the
Smartkey to position 1 (
�page 365) or, in vehi-
cles with KEYLESS-GO*, turn off the engine and
do not open the driver’s door, the RACETIMER
stops timing. Timing is resumed when you switch
the ignition back on or restart the engine and
then press æ button.
i
When you switch on the Night View Assist*
(
�page 481) while the RACETIMER is operating,
the RACETIMER will continue to run in the back-
ground but cannot be operated with the multi-
function steering wheel buttons.
To stop the RACETIMER, switch off the Night
View Assist* first.
i
You can save up to 16 laps.
��