Page 183 of 509
182 Controls in detail
Audio system
Instrument cluster multifunction
display
This section describes features and con-
trols via the audio control unit, display and
controller only.
Please refer to the “Instrument cluster
control system” section of this manual
(
�page 151) for function descriptions and
operation of the instrument cluster multi-
function display and multifunction steering
wheel buttons as they relate to audio func-
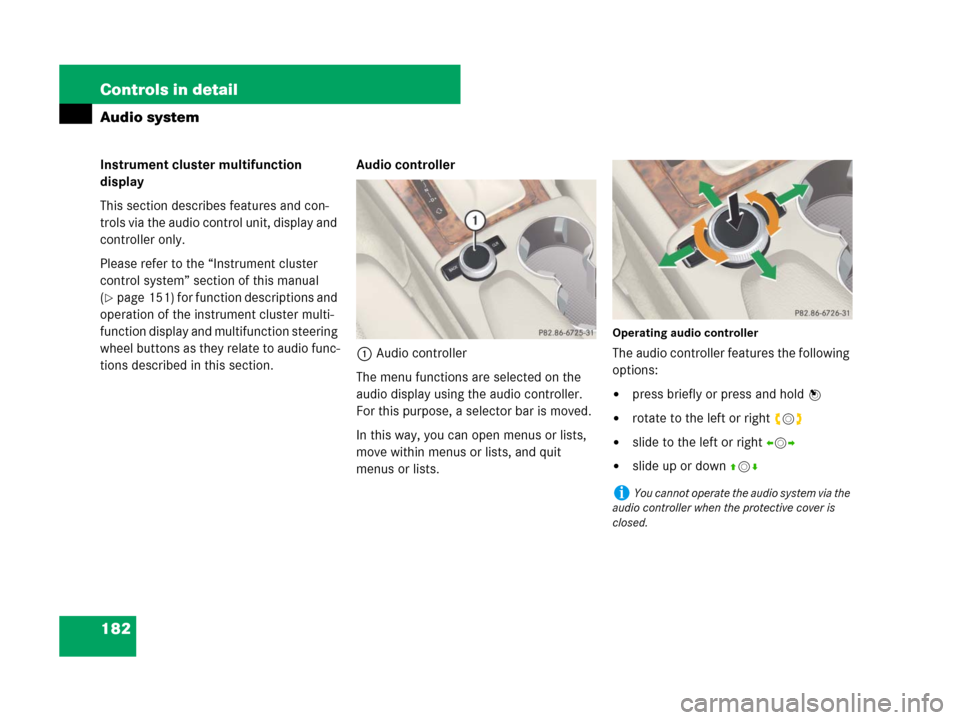
tions described in this section.Audio controller
1Audio controller
The menu functions are selected on the
audio display using the audio controller.
For this purpose, a selector bar is moved.
In this way, you can open menus or lists,
move within menus or lists, and quit
menus or lists.
Operating audio controller
The audio controller features the following
options:
�press briefly or press and hold n
�rotate to the left or right ymz
�slide to the left or right omp
�slide up or down qmr
iYou cannot operate the audio system via the
audio controller when the protective cover is
closed.
Page 186 of 509
185 Controls in detail
Audio system
Menu
The illustration below shows the structure
of the modes and their menus.Each mode has a basic menu. In the menu
line of the basic menu display are several
menu items listed.Each menu item in turn has several sub-
menu items.
ButtonMode/Basic menuMenuPage
bRadioRadio (FM/AM)194
Weather Band194
Sat Radio*200
Presets198
Sound189
éDiscCD/MP3208
Track list/folder list219
CD changer*214
Sound189
hTelephone*Telephone*222
Name233
Call lists236
êSystemSystem192
Language193
Page 187 of 509
186 Controls in detail
Audio system
Calling up an operating mode
�Press the respective button
(b,é,h,orê) on the
audio control unit.
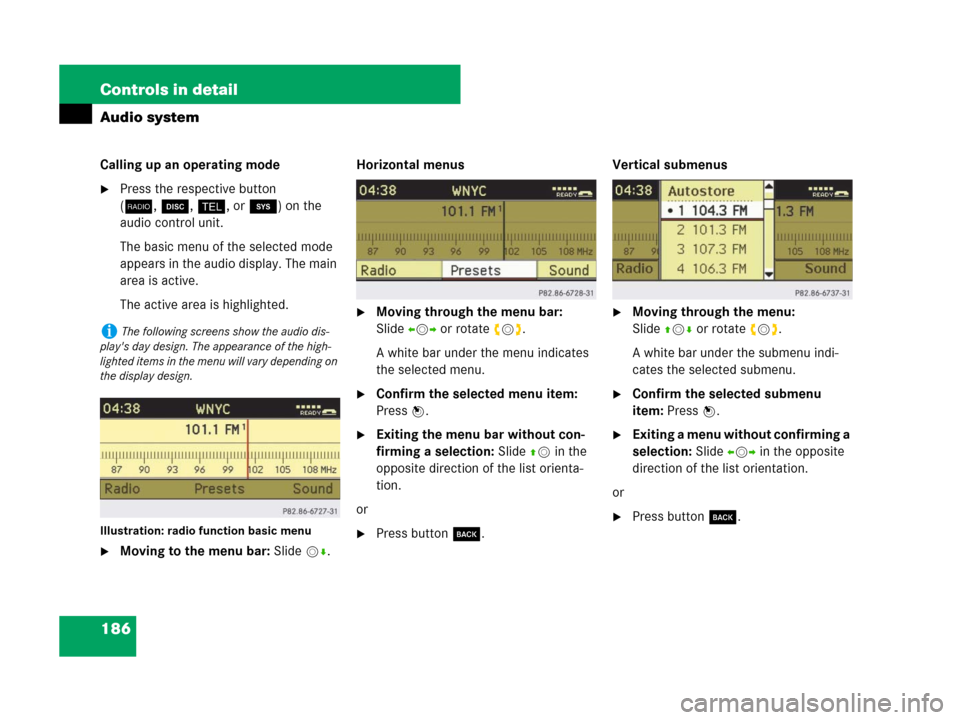
The basic menu of the selected mode
appears in the audio display. The main
area is active.
The active area is highlighted.
Illustration: radio function basic menu
�Moving to the menu bar: Slidemr.Horizontal menus
�Moving through the menu bar:
Slideomp or rotate ymz.
A white bar under the menu indicates
the selected menu.
�Confirm the selected menu item:
Press n.
�Exiting the menu bar without con-
firming a selection: Slide qmin the
opposite direction of the list orienta-
tion.
or
�Press buttoní.Vertical submenus
�Moving through the menu:
Slideqmr or rotate ymz.
A white bar under the submenu indi-
cates the selected submenu.
�Confirm the selected submenu
item: Press n.
�Exiting a menu without confirming a
selection: Slide ompin the opposite
direction of the list orientation.
or
�Press buttoní.
iThe following screens show the audio dis-
play's day design. The appearance of the high-
lighted items in the menu will vary depending on
the display design.
Page 189 of 509
188 Controls in detail
Audio system
Operation
In the following descriptions, an operation
step is described as in example below.
�b� Radio � Enter Frequency
is the short for
�Press buttonb on audio control
unit repeatedly until desired waveband
has been selected.
�Slidemr.
�Slideomor rotate ymz the audio con-
troller to select
Radio.
�Press the audio controller n.
The
Radio menu is selected and a list of
submenus appears.
�Slideqmor rotate ymz the audio con-
troller to select
Enter Frequency.
�Press the audio controller n.
The
Enter Frequency submenu is
selected and appears in the audio
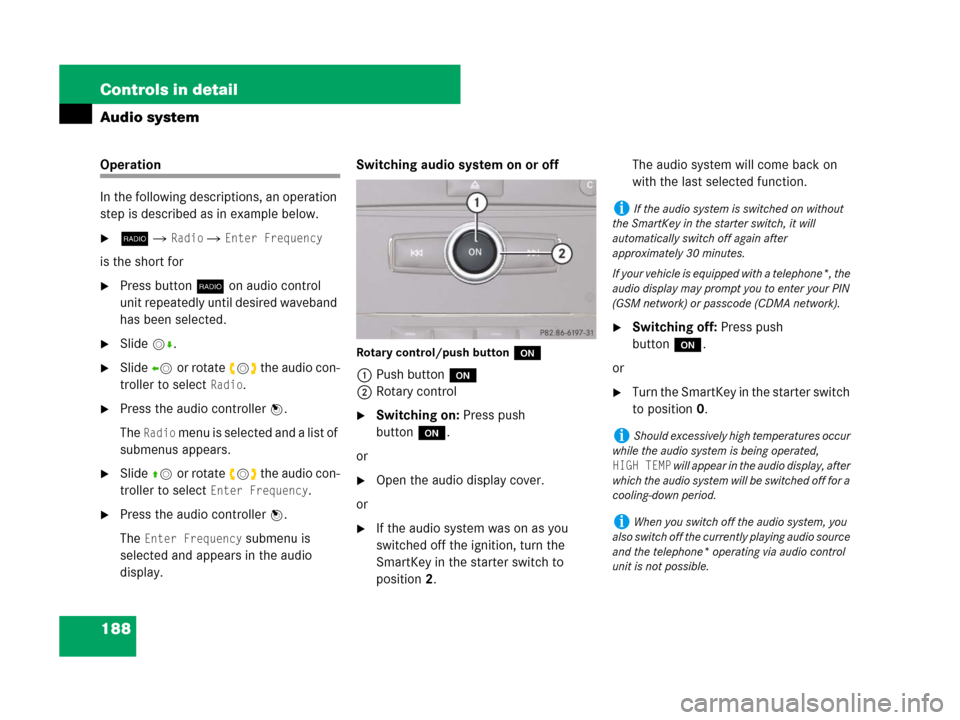
display.Switching audio system on or off
Rotary control/push buttono
1Push buttono
2Rotary control
�Switching on: Press push
buttono.
or
�Open the audio display cover.
or
�If the audio system was on as you
switched off the ignition, turn the
SmartKey in the starter switch to
position2.The audio system will come back on
with the last selected function.
�Switching off: Press push
buttono.
or
�Turn the SmartKey in the starter switch
to position0.
iIf the audio system is switched on without
the SmartKey in the starter switch, it will
automatically switch off again after
approximately 30 minutes.
If your vehicle is equipped with a telephone*, the
audio display may prompt you to enter your PIN
(GSM network) or passcode (CDMA network).
iShould excessively high temperatures occur
while the audio system is being operated,
HIGH TEMP will appear in the audio display, after
which the audio system will be switched off for a
cooling-down period.
iWhen you switch off the audio system, you
also switch off the currently playing audio source
and the telephone* operating via audio control
unit is not possible.
Page 190 of 509
189 Controls in detail
Audio system
Adjusting volume
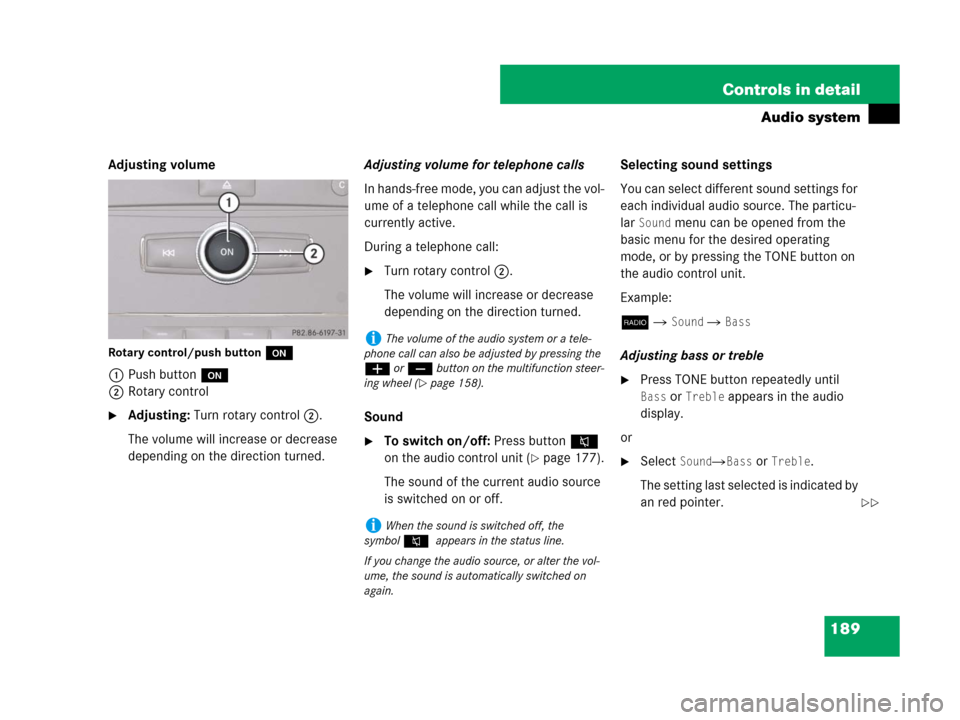
Rotary control/push buttono
1Push buttono
2Rotary control
�Adjusting: Turn rotary control2.
The volume will increase or decrease
depending on the direction turned.Adjusting volume for telephone calls
In hands-free mode, you can adjust the vol-
ume of a telephone call while the call is
currently active.
During a telephone call:
�Turn rotary control2.
The volume will increase or decrease
depending on the direction turned.
Sound
�To switch on/off: Press button F
on the audio control unit (
�page 177).
The sound of the current audio source
is switched on or off.Selecting sound settings
You can select different sound settings for
each individual audio source. The particu-
lar
Sound menu can be opened from the
basic menu for the desired operating
mode, or by pressing the TONE button on
the audio control unit.
Example:
b �
Sound � Bass
Adjusting bass or treble
�Press TONE button repeatedly until
Bass or Treble appears in the audio
display.
or
�Select Sound�Bass or Treble.
The setting last selected is indicated by
an red pointer.
iThe volume of the audio system or a tele-
phone call can also be adjusted by pressing the
æ or ç button on the multifunction steer-
ing wheel (
�page 158).
iWhen the sound is switched off, the
symbolF appears in the status line.
If you change the audio source, or alter the vol-
ume, the sound is automatically switched on
again.
��
Page 193 of 509
192 Controls in detail
Audio system
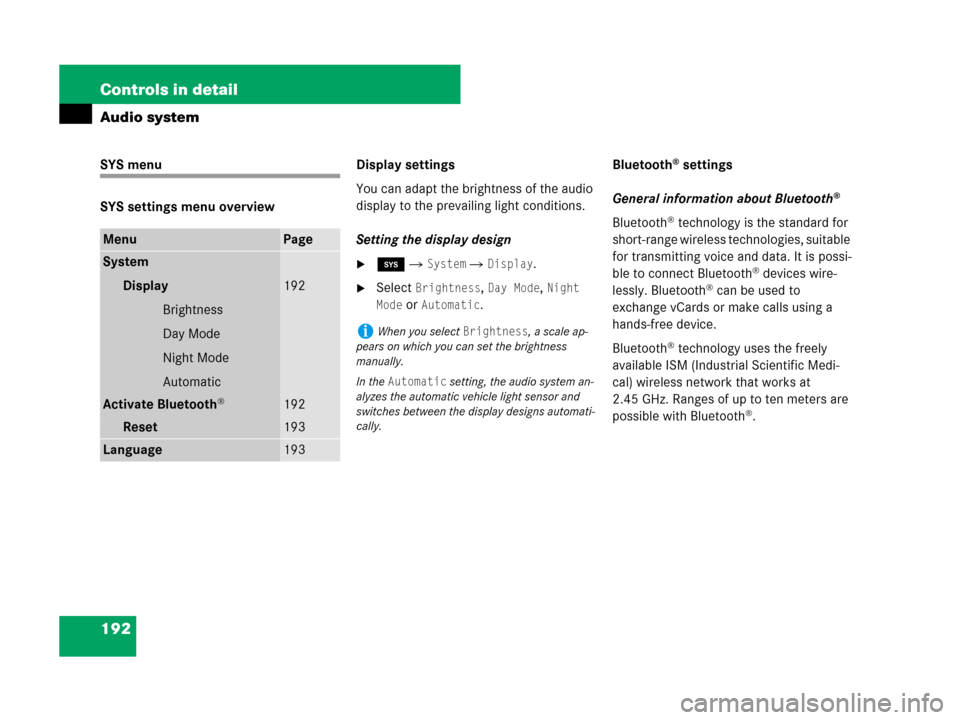
SYS menu
SYS settings menu overviewDisplay settings
You can adapt the brightness of the audio
display to the prevailing light conditions.
Setting the display design
�ê � System � Display.
�Select Brightness, Day Mode, Night
Mode
or Automatic.Bluetooth
® settings
General information about Bluetooth
®
Bluetooth® technology is the standard for
short-range wireless technologies, suitable
for transmitting voice and data. It is possi-
ble to connect Bluetooth
® devices wire-
lessly. Bluetooth® can be used to
exchange vCards or make calls using a
hands-free device.
Bluetooth
® technology uses the freely
available ISM (Industrial Scientific Medi-
cal) wireless network that works at
2.45 GHz. Ranges of up to ten meters are
possible with Bluetooth
®.
MenuPage
System
Display
Brightness
Day Mode
Night Mode
Automatic
192
Activate Bluetooth®192
Reset 193
Language193
iWhen you select Brightness, a scale ap-
pears on which you can set the brightness
manually.
In the
Automatic setting, the audio system an-
alyzes the automatic vehicle light sensor and
switches between the display designs automati-
cally.
Page 197 of 509
196 Controls in detail
Audio system
Switching to radio mode
�Press buttonb on audio control
unit.
The radio basic menu appears in the
audio display once you have switched
to radio mode. You will hear the
station/channel last tuned in the previ-
ously selected waveband, provided
that the station/channel can be re-
ceived.
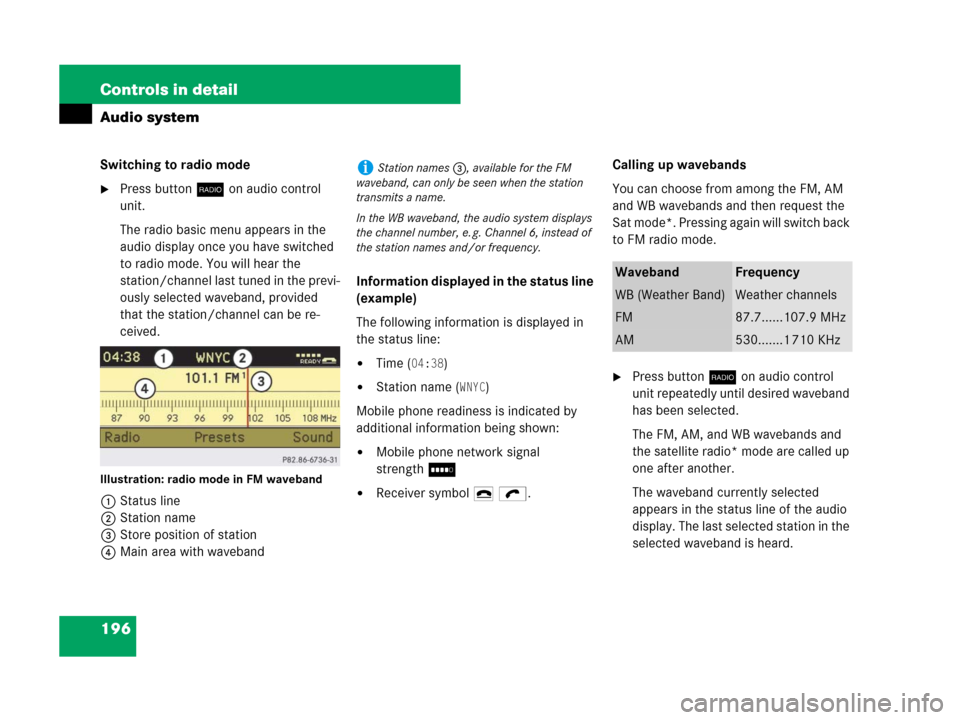
Illustration: radio mode in FM waveband
1Status line
2Station name
3Store position of station
4Main area with wavebandInformation displayed in the status line
(example)
The following information is displayed in
the status line:
�Time (04:38)
�Station name (WNYC)
Mobile phone readiness is indicated by
additional information being shown:
�Mobile phone network signal
strengthI
�Receiver symbol 4 ö.Calling up wavebands
You can choose from among the FM, AM
and WB wavebands and then request the
Sat mode*. Pressing again will switch back
to FM radio mode.
�Press buttonb on audio control
unit repeatedly until desired waveband
has been selected.
The FM, AM, and WB wavebands and
the satellite radio* mode are called up
one after another.
The waveband currently selected
appears in the status line of the audio
display. The last selected station in the
selected waveband is heard.
iStation names 3, available for the FM
waveband, can only be seen when the station
transmits a name.
In the WB waveband, the audio system displays
the channel number, e. g. Channel 6, instead of
the station names and/or frequency.
WavebandFrequency
WB (Weather Band)Weather channels
FM87.7......107.9 MHz
AM530.......1 710 KHz
Page 199 of 509
198 Controls in detail
Audio system
Tuning to a station by entering the fre-
quency manually
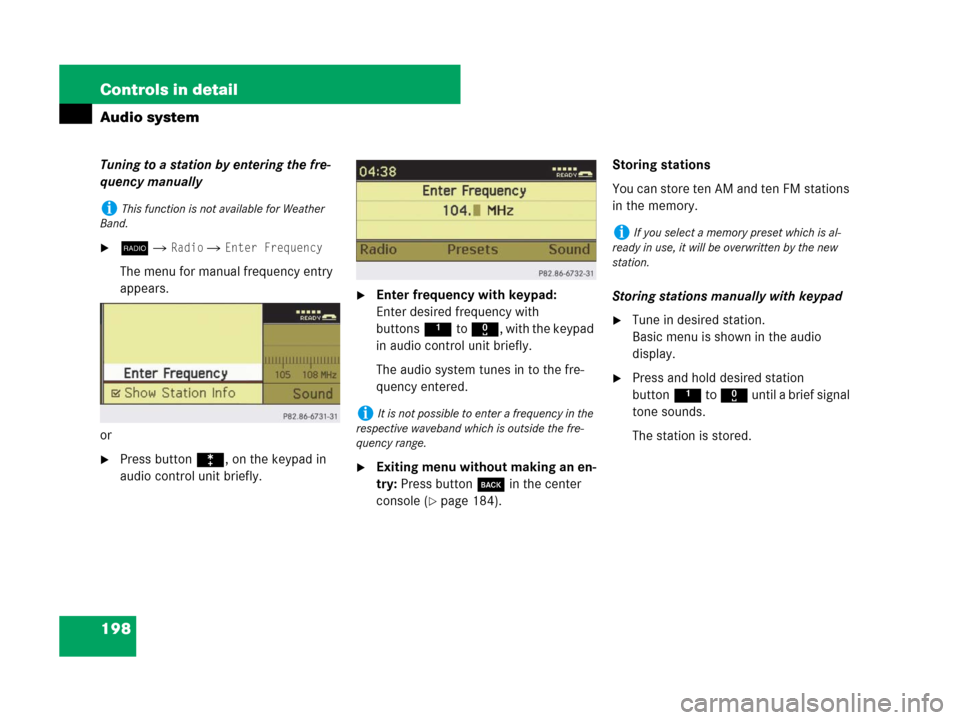
�b� Radio � Enter Frequency
The menu for manual frequency entry
appears.
or
�Press buttonó, on the keypad in
audio control unit briefly.
�Enter frequency with keypad:
Enter desired frequency with
buttons1to R, with the keypad
in audio control unit briefly.
The audio system tunes in to the fre-
quency entered.
�Exiting menu without making an en-
try: Press button í in the center
console (
�page 184).Storing stations
You can store ten AM and ten FM stations
in the memory.
Storing stations manually with keypad
�Tune in desired station.
Basic menu is shown in the audio
display.
�Press and hold desired station
button1 to R until a brief signal
tone sounds.
The station is stored.
iThis function is not available for Weather
Band.
iIt is not possible to enter a frequency in the
respective waveband which is outside the fre-
quency range.
iIf you select a memory preset which is al-
ready in use, it will be overwritten by the new
station.