Page 166 of 509

165 Controls in detail
Control system
�Press ( or & to select the
Service menu.
If conditions have occurred causing status
messages to be recorded, the number of
messages appears in the multifunction
display:
1Number of messages
�Press % or $ to select the mes-
sage.
�Press # to confirm.
The stored messages will now be
displayed in the order in which they
have occurred.
�Use % or $ to scroll through the
messages.Checking tire inflation pressure
For information about checking tire infla-
tion pressure (
�page 339).
Activating Run Flat Indicator
(Canada only)
For information about activating Run Flat
Indicator (
�page 342).
Calling up the maintenance service
indicator display
For information about calling up the main-
tenance service indicator display
(
�page 362).
Settings menu
In the
Settings menu there are two
functions:
�The function Reset to factory
settings
, with which you can reset all
the settings to the original factory
settings.
�A collection of submenus with which
you can make individual settings for
your vehicle.
iSee the “Practical hints” section for mal-
function and warning messages (
�page 387).
iIf you turn the SmartKey in the starter
switch to position0 and then back to position2,
all messages will be deleted from the message
memory.
Page 167 of 509
166 Controls in detail
Control system
Resetting all settings
You can reset most of the functions of the
submenus to the factory settings.
�Press ( or & to select the
Settings menu.
�Press % or $ to select the
Factory settings function.
�Press #.
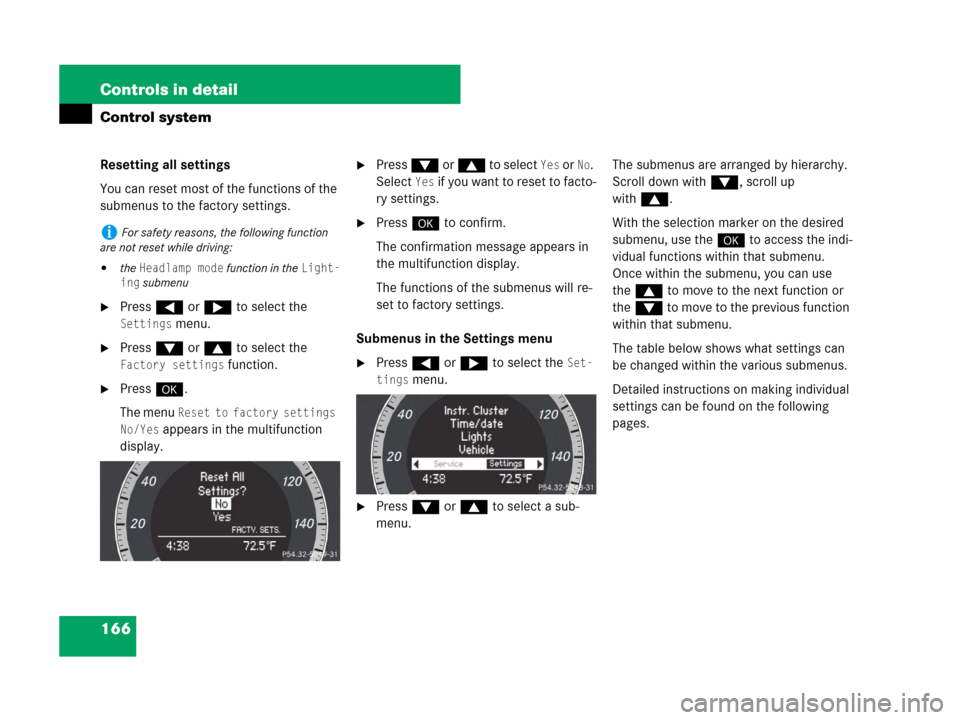
The menu
Reset to factory settings
No/Yes
appears in the multifunction
display.
�Press % or $ to select Yes or No.
Select
Yes if you want to reset to facto-
ry settings.
�Press # to confirm.
The confirmation message appears in
the multifunction display.
The functions of the submenus will re-
set to factory settings.
Submenus in the Settings menu
�Press ( or & to select the Set-
tings
menu.
�Press % or $ to select a sub-
menu.The submenus are arranged by hierarchy.
Scroll down with%, scroll up
with$.
With the selection marker on the desired
submenu, use the# to access the indi-
vidual functions within that submenu.
Once within the submenu, you can use
the$ to move to the next function or
the% to move to the previous function
within that submenu.
The table below shows what settings can
be changed within the various submenus.
Detailed instructions on making individual
settings can be found on the following
pages.
iFor safety reasons, the following function
are not reset while driving:
�the Headlamp mode function in the Light-
ing
submenu
Page 169 of 509
168 Controls in detail
Control system
Instrument cluster submenu
Access the
Instr. Cluster submenu via
the
Settings menu. Use the Instr. Clus-
ter
submenu to change the instrument
cluster display settings.
The following functions are available:
Select speedometer display mode
�Press % or $ to select the
Instr. Cluster submenu.
�Press #.
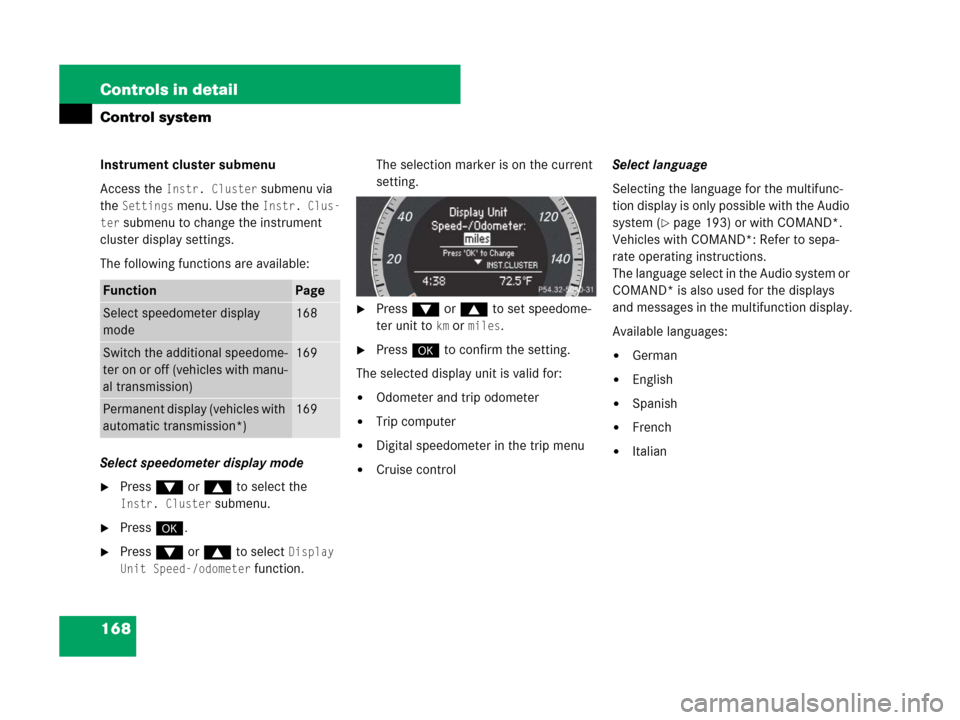
�Press % or $ to select Display
Unit Speed-/odometer
function.The selection marker is on the current
setting.
�Press % or $ to set speedome-
ter unit to
km ormiles.
�Press # to confirm the setting.
The selected display unit is valid for:
�Odometer and trip odometer
�Trip computer
�Digital speedometer in the trip menu
�Cruise controlSelect language
Selecting the language for the multifunc-
tion display is only possible with the Audio
system (
�page 193) or with COMAND*.
Vehicles with COMAND*: Refer to sepa-
rate operating instructions.
The language select in the Audio system or
COMAND* is also used for the displays
and messages in the multifunction display.
Available languages:
�German
�English
�Spanish
�French
�Italian
FunctionPage
Select speedometer display
mode168
Switch the additional speedome-
ter on or off (vehicles with manu-
al transmission)169
Permanent display (vehicles with
automatic transmission*)169
Page 170 of 509
169 Controls in detail
Control system
Showing or hiding additional
speedometer (vehicles with manual
transmission)
You can have an additional digital speed-
ometer shown on the multifunction dis-
play. The speed is shown in the unit of
kilometers/hour (USA) or miles/hour
(Canada).
�Press % or $ to select the
Instr. Cluster submenu.
�Press #.
�Press % or $ to select the Addi-
tional Speedometer
function.
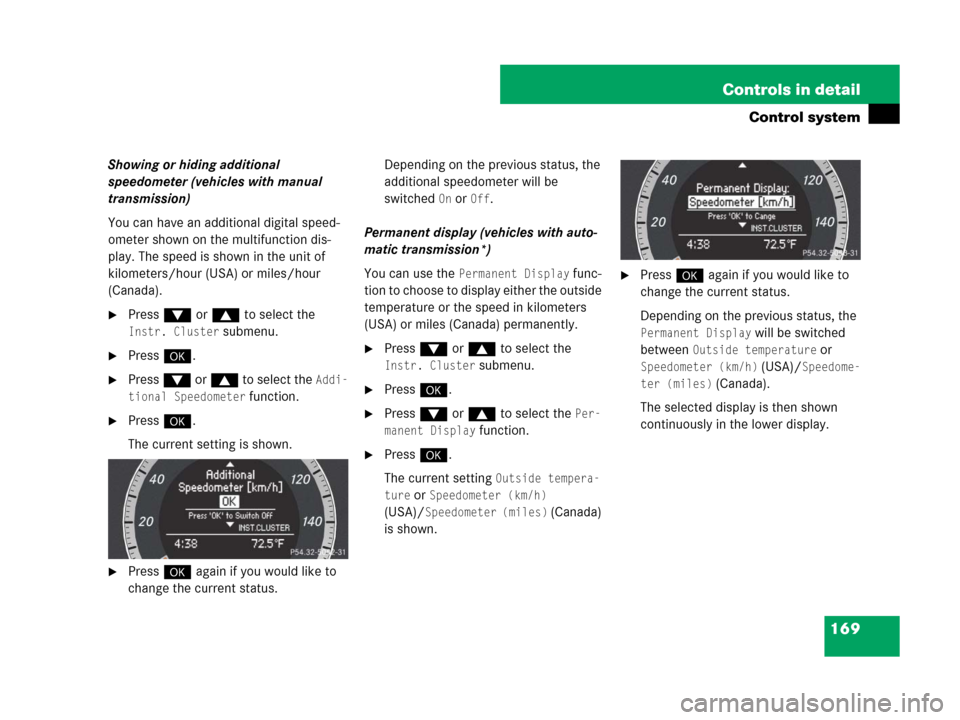
�Press #.
The current setting is shown.
�Press # again if you would like to
change the current status.Depending on the previous status, the
additional speedometer will be
switched
On orOff.
Permanent display (vehicles with auto-
matic transmission*)
You can use the
Permanent Display func-
tion to choose to display either the outside
temperature or the speed in kilometers
(USA) or miles (Canada) permanently.
�Press % or $ to select the
Instr. Cluster submenu.
�Press #.
�Press % or $ to select the Per-
manent Display
function.
�Press #.
The current setting
Outside tempera-
ture
orSpeedometer (km/h)
(USA)/
Speedometer (miles) (Canada)
is shown.
�Press # again if you would like to
change the current status.
Depending on the previous status, the
Permanent Display will be switched
between
Outside temperature or
Speedometer (km/h) (USA)/Speedome-
ter (miles)
(Canada).
The selected display is then shown
continuously in the lower display.
Page 171 of 509

170 Controls in detail
Control system
Time/date submenu
Access the
Time/date submenu via the
Settings menu. Use the Time/Date
submenu to change the instrument cluster
display settings.
The following functions are available:Set the time
This function is not available if your vehicle
is equipped with the COMAND* system
and navigation module*.
�Press % or $ to select the
Instr. Cluster submenu.
�Press #.
�Press % or $ to select the
Time/date function.
�Press #.
�Press % or $ to select the Time
function.
�Press #.
The current time appears in the multi-
function display.
�To set a new time press # again.
�Press button ( or & to select
the setting you wish to change: hours
or minutes.
�Press button % or $ to change
the setting which is highlighted.
�Press # to store the entry.
Set the date
This function is not available if your vehicle
is equipped with the COMAND* system
and navigation module*.
�Press % or $ to select the
Instr. Cluster submenu.
�Press #.
�Press % or $ to select the
Time/date function.
�Press #.
FunctionPage
Set the time (hours)170
Set the time (minutes)170
Set the date (month)170
Set the date (day)170
Set the date (year)170
iVehicles with COMAND*:
For information on setting the time, refer to the
separate COMAND operating instructions.
iVehicles with COMAND*:
For information on setting the date, refer to the
separate COMAND operating instructions.
Page 172 of 509

171 Controls in detail
Control system
�Press % or $ to select the date
function.
�Press #.
The current date appears in the multi-
function display.
�To set a new date press # again.
�Press button ( or & to select
the setting you wish to change: month,
day or minutes.
�Press button % or $ to change
the setting which is highlighted.
�Press # to store the entry.Lighting submenu
Access the
Lights submenu via the
Settings menu. Use the Lights submenu
to change the lamp and lighting settings on
your vehicle.
The following functions are available:Setting daytime running lamp mode
(USA only)
�Press % or $ to select the
Lights submenu.
�Press #.
�Press % or $ to select the Day-
time Running Lamps
feature.
�Press #.
The current setting
Enabled
or
Disabled is shown.
�Press # again if you would like to
change the current status.
FunctionPage
Setting daytime running lamp
mode (USA only)171
Setting locator lighting172
Setting interior lighting delayed
shut-off173
iThis function is not available in countries
where the daytime running lamp mode is manda-
tory and therefore in a constant mode.
��
Page 173 of 509
172 Controls in detail
Control system
Depending on the previous status, the
daytime running lamps feature will be
Enabled orDisabled.
With
Daytime Running Lamps mode En-
abled
selected and the exterior lamp
switch at position M or *, the low
beam headlamps are switched on when
the engine is running.
In low ambient light conditions the follow-
ing lamps will switch on additionally:
�Parking lamps
�Tail lamps
�License plate lamps
�Side marker lamps
also illuminates the instrument cluster.
For more information on the daytime run-
ning lamp mode (
�page 110).Setting locator lighting
�Press % or $ to select the
Lights submenu.
�Press #.
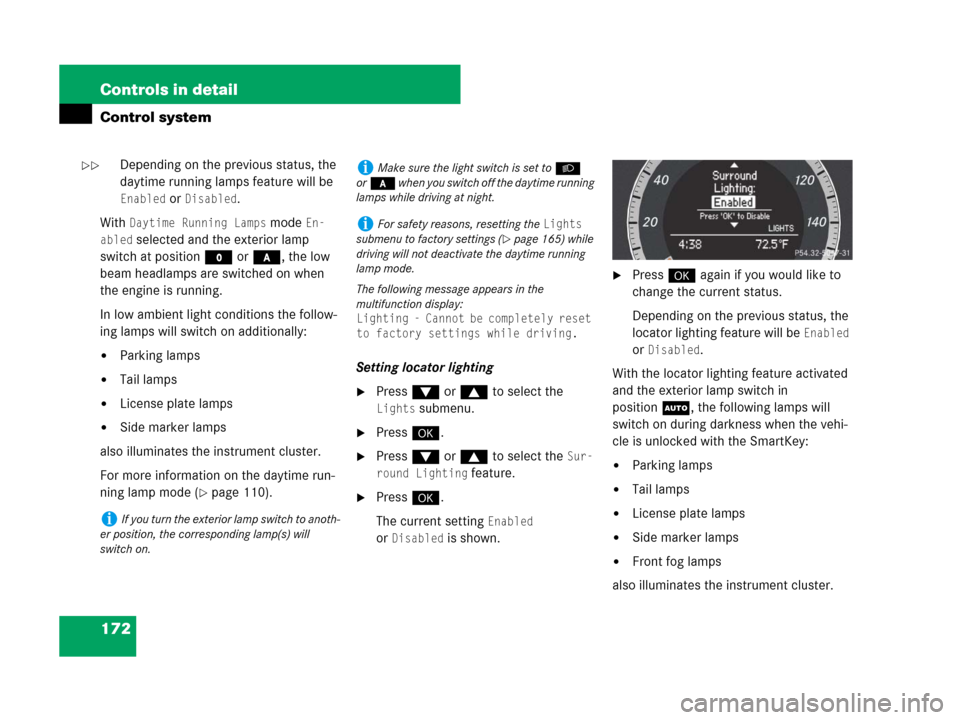
�Press % or $ to select the Sur-
round Lighting
feature.
�Press #.
The current setting
Enabled
or
Disabled is shown.
�Press # again if you would like to
change the current status.
Depending on the previous status, the
locator lighting feature will be
Enabled
or
Disabled.
With the locator lighting feature activated
and the exterior lamp switch in
positionU, the following lamps will
switch on during darkness when the vehi-
cle is unlocked with the SmartKey:
�Parking lamps
�Tail lamps
�License plate lamps
�Side marker lamps
�Front fog lamps
also illuminates the instrument cluster.
iIf you turn the exterior lamp switch to anoth-
er position, the corresponding lamp(s) will
switch on.
iMake sure the light switch is set toB
or* when you switch off the daytime running
lamps while driving at night.
iFor safety reasons, resetting the Lights
submenu to factory settings (
�page 165) while
driving will not deactivate the daytime running
lamp mode.
The following message appears in the
multifunction display:
Lighting - Cannot be completely reset
to factory settings while driving.
��
Page 182 of 509
181 Controls in detail
Audio system
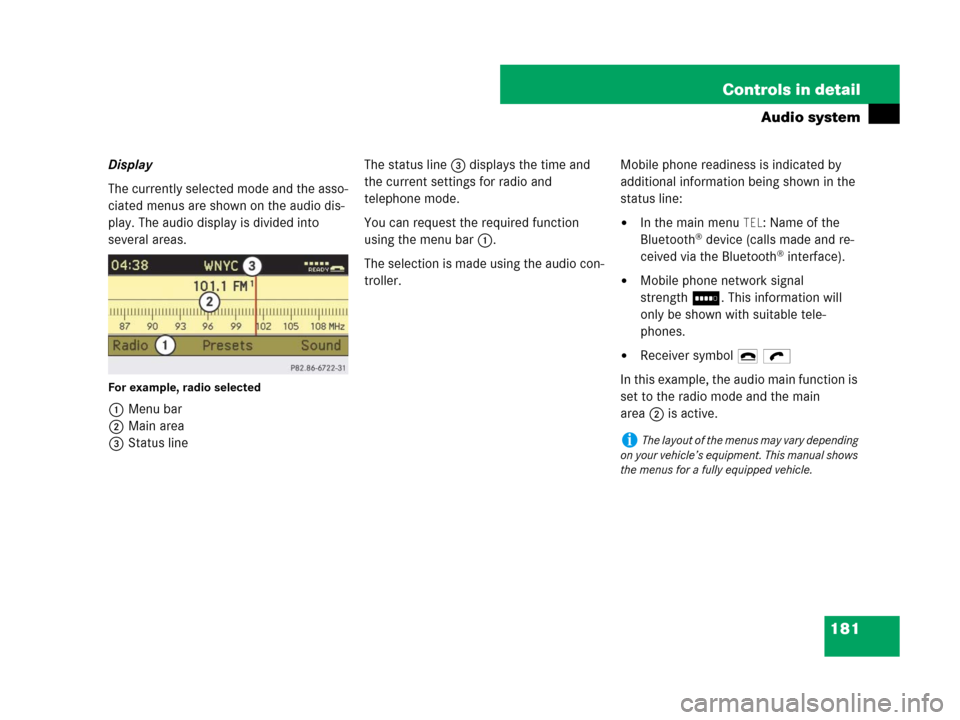
Display
The currently selected mode and the asso-
ciated menus are shown on the audio dis-
play. The audio display is divided into
several areas.
For example, radio selected
1Menu bar
2Main area
3Status lineThe status line3 displays the time and
the current settings for radio and
telephone mode.
You can request the required function
using the menu bar1.
The selection is made using the audio con-
troller.Mobile phone readiness is indicated by
additional information being shown in the
status line:
�In the main menu TEL: Name of the
Bluetooth® device (calls made and re-
ceived via the Bluetooth® interface).
�Mobile phone network signal
strengthI. This information will
only be shown with suitable tele-
phones.
�Receiver symbol 4 ö
In this example, the audio main function is
set to the radio mode and the main
area2 is active.
iThe layout of the menus may vary depending
on your vehicle’s equipment. This manual shows
the menus for a fully equipped vehicle.