Page 151 of 225
150 Navigation
Route guidance
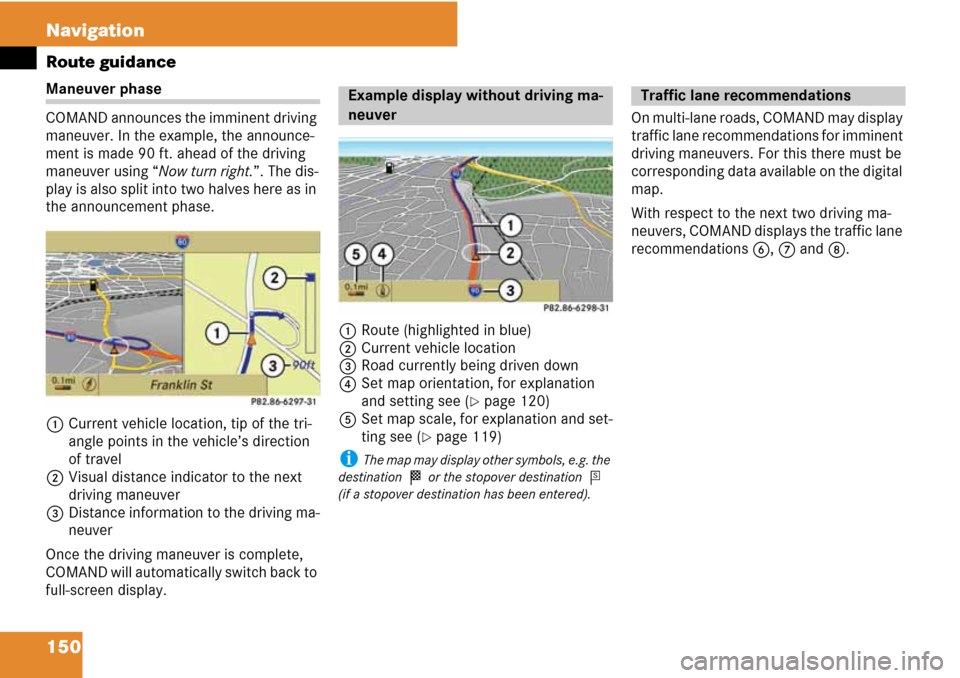
Maneuver phase
COMAND announces the imminent driving
maneuver. In the example, the announce-
ment is made 90 ft. ahead of the driving
maneuver using “Now turn right.”. The dis-
play is also split into two halves here as in
the announcement phase.
1Current vehicle location, tip of the tri-
angle points in the vehicle’s direction
of travel
2Visual distance indicator to the next
driving maneuver
3Distance information to the driving ma-
neuver
Once the driving maneuver is complete,
COMAND will automatically switch back to
full-screen display.1Route (highlighted in blue)
2Current vehicle location
3Road currently being driven down
4Set map orientation, for explanation
and setting see (
�page 120)
5Set map scale, for explanation and set-
ting see (
�page 119)
i The map may display other symbols, e.g. the
destination
< or the stopover destination =
(if a stopover destination has been entered).
On multi-lane roads, COMAND may display
traffic lane recommendations for imminent
driving maneuvers. For this there must be
corresponding data available on the digital
map.
With respect to the next two driving ma-
neuvers, COMAND displays the traffic lane
recommendations 6, 7 and 8.
Example display without driving ma-
neuverTraffic lane recommendations
Page 155 of 225
154 Navigation
Route guidance
The message “The driving instructions
have been muted” appears briefly.
�To switch navigation announce-
ments back on again manually: Se-
lect “Navi”
K 6.
or
�In the map display with the menu sys-
tem displayed (
�page 119) select
6.
or
�Start new route calculation
(
�page 135).
or
�If you switch COMAND on again or
start the engine.
�To set the volume of the announce-
ments: Set the volume during an auto-
matic announcement Setting the
volume (
�page 35).
or
�Call up an announcement manually us-
ing “Navi”
K 6 and set the volume
(
�page 35).
�In the map display with the menu sys-
tem displayed (
�page 119) select
“Destination”
K “Cancel Route
Guidance”.
�In the map display with the menu sys-
tem displayed (
�page 119) select
“Destination”
K “Continue Route
Guidance”.
COMAND calculates the route.
i The Detour function blocks a route segment
ahead. You can set the length of the block.
COMAND calculates a detour route if possible.
�In the map display with the menu sys-
tem displayed (
�page 119) select
“Route”
K “Detour”.
�To set length of block: Select
“Longer” or “Shorter” repeatedly until
the required length is set.The blocked segment is highlighted in
red/white on the map. Shown at the
top of the display is the length of the
blocked segment and the route seg-
ment to which the block goes.
�To cancel the function: Select “Back”.
�To start route calculation: Select
“Start”, see also (
�page 135).
�To change a block: Select “Navi” K
“Route”
K “Detour” K “Change”.
i If a block already exists, the message “De-
tour Already Set” is displayed. You can then
change or delete this.
�Then set length of block.
�To delete block: Select “Navi” K
“Route”
K “Detour” K “Delete”.
i If a block already exists, the message “De-
tour Already Set” is displayed. You can then
change or delete this.
Cancelling route guidance
Resuming route guidance after
cancelling
Detour function
Page 164 of 225
163 System settings
Opening System menu .............. 164
Menu overview ........................... 164
Display settings .......................... 164
Time settings .............................. 165
Read-out settings ....................... 166
Voice control settings ............... 167
Bluetooth
® settings ................... 169
Reset ............................................ 171
Setting the system language .... 171
Tele Aid* ...................................... 172
Page 165 of 225
164 System settings
System settings
�Press the function button Z.
or
�Select “System” in the menu bar with
main functions.
Adjusting brightness
�Select “System” K “System Settings”
K “Display” K “Brightness”.
1Brightness bar
�To adjust brightness: Rotate ymz or
slide qmr.
The brightness bar moves up or down.
�To confirm selection: Press n or
slide om.
System settings
Opening System menu
Menu overview
System settingsLanguage
Display
Time
Text reader speed
Voice control
Bluetooth
Reset (resets
COMAND to
factory settings)
i Use this function
to delete your person-
al data, e.g. before
selling your vehicle.
Setting language
Display settings
Page 166 of 225
165 System settings
System settings
Setting the display design
�Select “System” K “System Settings”
K “Display”.
�Select “Day Mode” or “Night Mode” or
“Automatic”.
The dotRin front of the list entry indi-
cates the current selection.
i In the “Automatic” setting, COMAND evalu-
ates the automatic vehicle light sensor and auto-
matically switches over the display design.
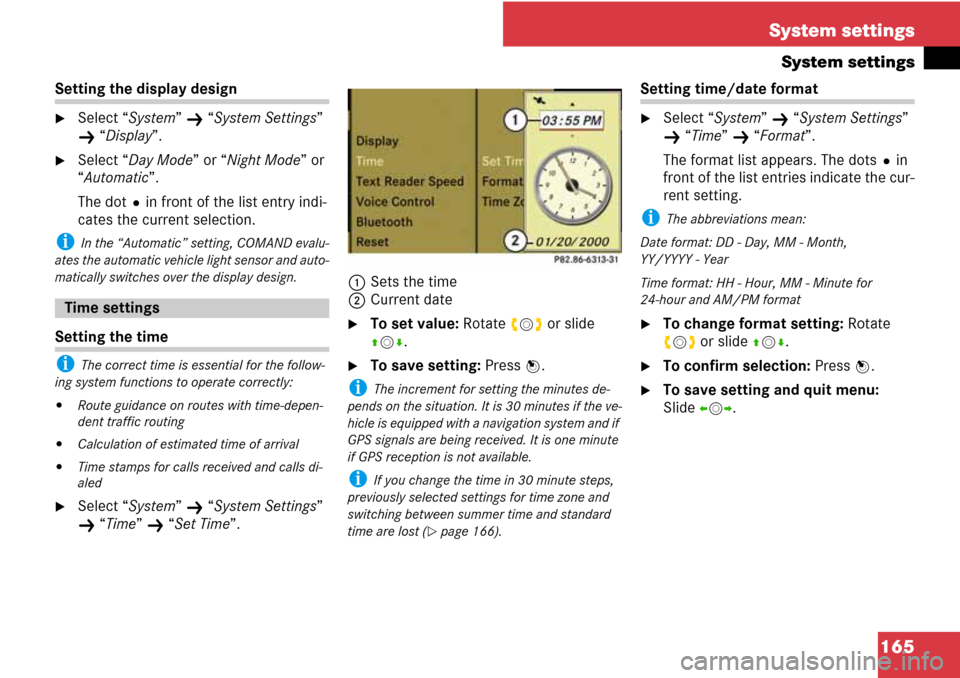
Setting the time
i The correct time is essential for the follow-
ing system functions to operate correctly:
�Route guidance on routes with time-depen-
dent traffic routing
�Calculation of estimated time of arrival
�Time stamps for calls received and calls di-
aled
�Select “System” K “System Settings”
K “Time” K “Set Time”.1Sets the time
2Current date
�To set value: Rotate ymz or slide
qmr.
�To save setting: Press n.
i The increment for setting the minutes de-
pends on the situation. It is 30 minutes if the ve-
hicle is equipped with a navigation system and if
GPS signals are being received. It is one minute
if GPS reception is not available.
i If you change the time in 30 minute steps,
previously selected settings for time zone and
switching between summer time and standard
time are lost (
�page 166).
Setting time/date format
�Select “System” K “System Settings”
K “Time” K “Format”.
The format list appears. The dotsRin
front of the list entries indicate the cur-
rent setting.
i The abbreviations mean:
Date format: DD - Day, MM - Month,
YY/YYYY - Year
Time format: HH - Hour, MM - Minute for
24-hour and AM/PM format
�To change format setting: Rotate
ymz or slide qmr.
�To confirm selection: Press n.
�To save setting and quit menu:
Slide omp.
Time settings
Page 167 of 225
166 System settings
System settings
Setting time zone and switching be-
tween daylight saving time and stan-
dard time
i The correct time zone and daylight saving/
standard time settings are essential for the fol-
lowing system functions to operate correctly:
�Route guidance on routes with time-depen-
dent traffic routing
�Calculation of estimated time of arrival
�Time stamps for calls received and calls di-
aled
�To set time zone: Select “System” K
“System Settings”
K “Time” K “Time
Zone”.
A time zone list appears.
�Rotate ymz or slide qmr to select the
appropriate time zone.
�To switch between Daylight Saving
and standard time: Select “Daylight
Saving Time” (Summer) or “Standard Ti-
me” (Winter).
The dotRin front of a list entry indi-
cates the current setting.
�To save setting and exit menu:
Slide omp.
Setting reading speed
You can use this feature to adjust the read-
out speed of the address book via voice
control.
�Select “System” K “System Settings”
K “Text Reader Speed”.
The list of possible speeds appears.
The dotRin front of the list entry indi-
cates the current setting.
�Select the desired speed.
The new setting is stored.
Read-out settings
Page 168 of 225
167 System settings
System settings
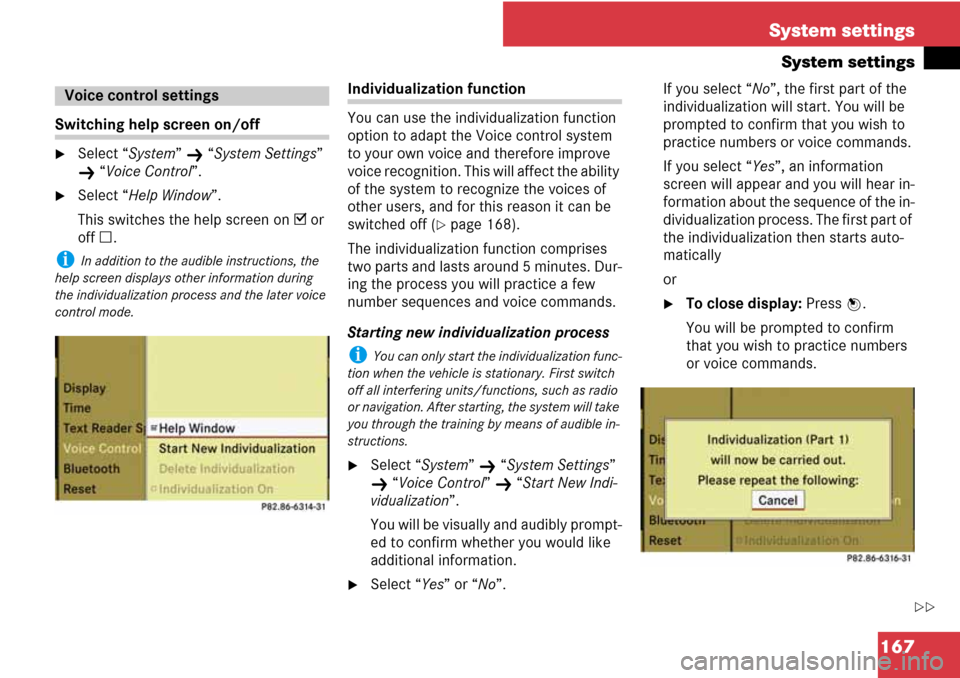
Switching help screen on/off
�Select “System” K “System Settings”
K “Voice Control”.
�Select “Help Window”.
This switches the help screen on D or
off C.
i In addition to the audible instructions, the
help screen displays other information during
the individualization process and the later voice
control mode.
Individualization function
You can use the individualization function
option to adapt the Voice control system
to your own voice and therefore improve
voice recognition. This will affect the ability
of the system to recognize the voices of
other users, and for this reason it can be
switched off (
�page 168).
The individualization function comprises
two parts and lasts around 5 minutes. Dur-
ing the process you will practice a few
number sequences and voice commands.
Starting new individualization process
i You can only start the individualization func-
tion when the vehicle is stationary. First switch
off all interfering units/functions, such as radio
or navigation. After starting, the system will take
you through the training by means of audible in-
structions.
�Select “System” K “System Settings”
K “Voice Control” K “Start New Indi-
vidualization”.
You will be visually and audibly prompt-
ed to confirm whether you would like
additional information.
�Select “Yes” or “No”.If you select “No”, the first part of the
individualization will start. You will be
prompted to confirm that you wish to
practice numbers or voice commands.
If you select “Yes”, an information
screen will appear and you will hear in-
formation about the sequence of the in-
dividualization process. The first part of
the individualization then starts auto-
matically
or
�To close display: Press n.
You will be prompted to confirm
that you wish to practice numbers
or voice commands.
Voice control settings
��
Page 169 of 225
168 System settings
System settings
Once the first part is over, you will be
prompted to confirm that you wish to
start the second part.
�Select “Yes” or “No”.
If you select “No”, the individualization
is cancelled. The data from the first
part is saved automatically.
If you select “Yes”, the second part of
the individualization will start.
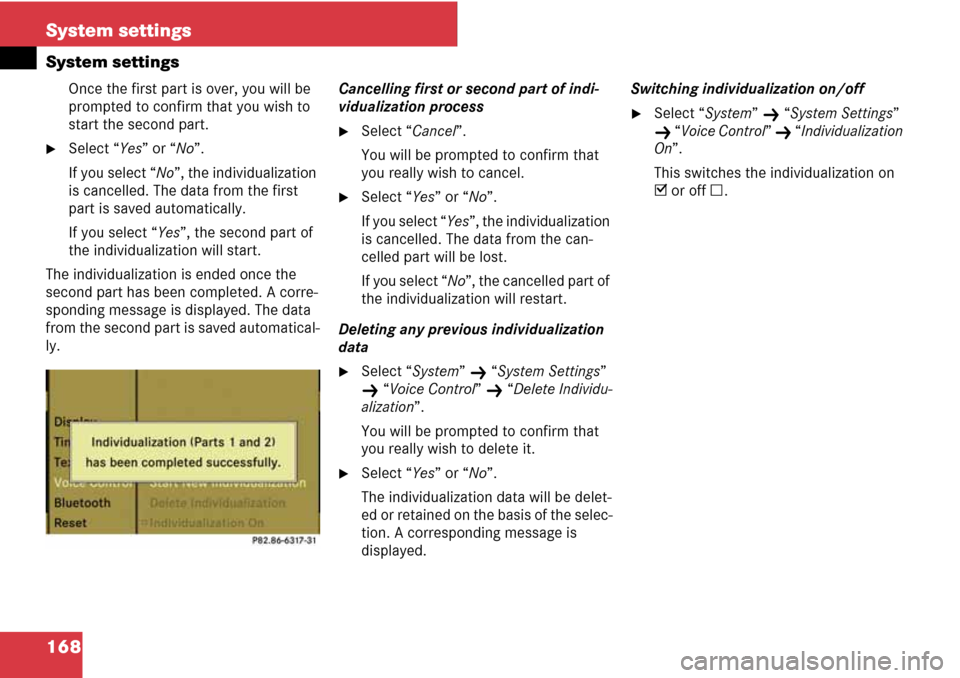
The individualization is ended once the
second part has been completed. A corre-
sponding message is displayed. The data
from the second part is saved automatical-
ly.Cancelling first or second part of indi-
vidualization process
�Select “Cancel”.
You will be prompted to confirm that
you really wish to cancel.
�Select “Yes” or “No”.
If you select “Yes”, the individualization
is cancelled. The data from the can-
celled part will be lost.
If you select “No”, the cancelled part of
the individualization will restart.
Deleting any previous individualization
data
�Select “System” K “System Settings”
K “Voice Control” K “Delete Individu-
alization”.
You will be prompted to confirm that
you really wish to delete it.
�Select “Yes” or “No”.
The individualization data will be delet-
ed or retained on the basis of the selec-
tion. A corresponding message is
displayed.Switching individualization on/off
�Select “System” K “System Settings”
K “Voice Control” K “Individualization
On”.
This switches the individualization on
D or off C.