2008 Lexus GX470 start stop button
[x] Cancel search: start stop buttonPage 56 of 312
DESTINATION SEARCH
55
D
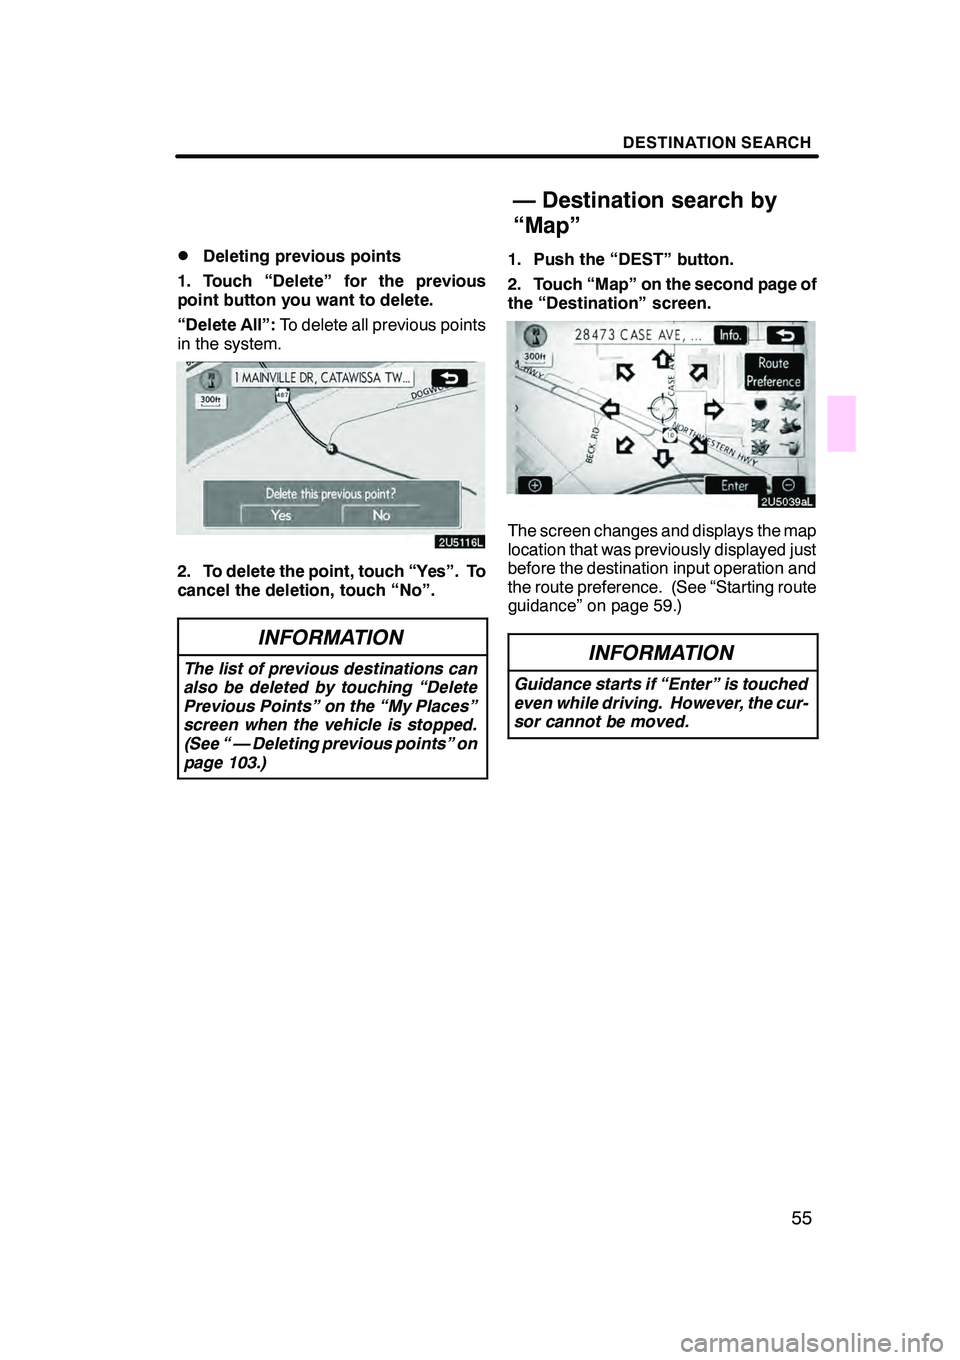
Deleting previous points
1. Touch “Delete” for the previous
point button you want to delete.
“Delete All”: To delete all previous points
in the system.
2. To delete the point, touch “Yes”. To
cancel the deletion, touch “No”.
INFORMATION
The list of previous destinations can
also be deleted by touching “Delete
Previous Points” on the “My Places”
screen when the vehicle is stopped.
(See “ — Deleting previous points” on
page 103.)
1. Push the “DEST” button.
2. Touch “Map” on the second page of
the “Destination” screen.
The screen changes and displays the map
location that was previously displayed just
before the destination input operation and
the route preference. (See “Starting route
guidance” on page 59.)
INFORMATION
Guidance starts if “Enter” is touched
even while driving. However, the cur-
sor cannot be moved.
GX470_Navi_U (OM60D58U) 07/06/16
— Destination search by
“Map”
Page 60 of 312
DESTINATION SEARCH
59
5. If more than one destination is set,
touch “OK” after deleting the destina-
tions.
The system searches for the guidance
route again, and displays the entire route.
INFORMATION
Set destinations can also be deleted
by touching “Route”. (See “ — Delet-
ing destinations”on page 71.)
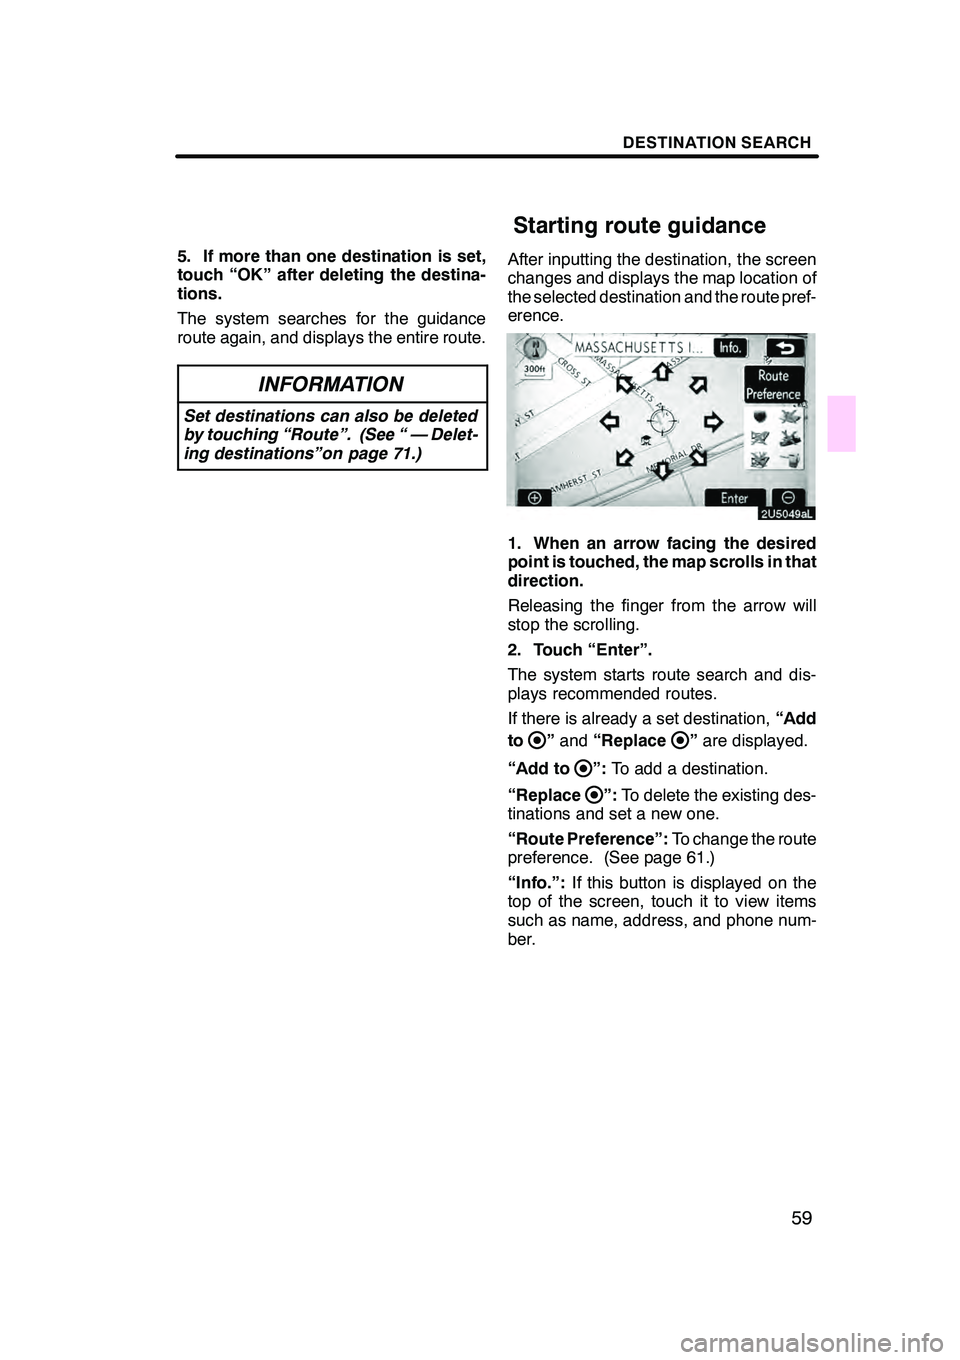
After inputting the destination, the screen
changes and displays the map location of
the selected destination and the route pref-
erence.
1. When an arrow facing the desired
point is touched, the map scrolls in that
direction.
Releasing the finger from the arrow will
stop the scrolling.
2. Touch “Enter”.
The system starts route search and dis-
plays recommended routes.
If there is already a set destination,“Add
to
” and “Replace”are displayed.
“Add to
”: To add a destination.
“Replace
”: To delete the existing des-
tinations and set a new one.
“Route Preference”: To change the route
preference. (See page 61.)
“Info.”: If this button is displayed on the
top of the screen, touch it to view items
such as name, address, and phone num-
ber.
GX470_Navi_U (OM60D58U) 07/06/16
Starting route guidance
Page 205 of 312
AUDIO/VIDEO SYSTEM
204
D
Playing a cassette tape
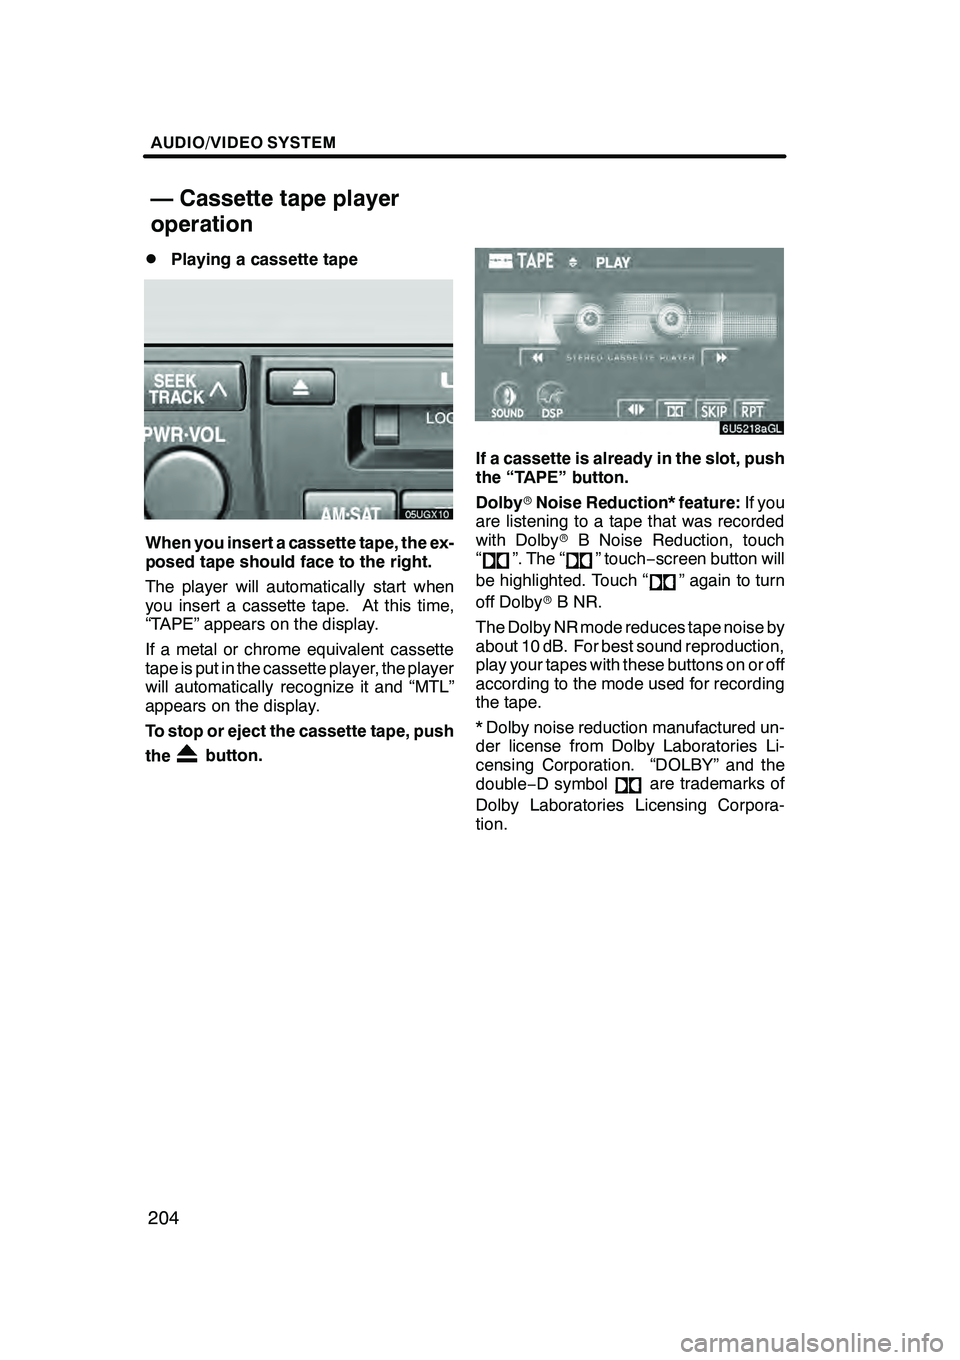
When you insert a cassette tape, the ex-
posed tape should face to the right.
The player will automatically start when
you insert a cassette tape. At this time,
“TAPE” appears on the display.
If a metal or chrome equivalent cassette
tape is put in the cassette player, the player
will automatically recognize it and “MTL”
appears on the display.
To stop or eject the cassette tape, push
the
button.
If a cassette is already in the slot, push
the “TAPE” button.
Dolby
rNoise Reduction* feature: If you
are listening to a tape that was recorded
with Dolby rB Noise Reduction, touch
“
”. The “” touch −screen button will
be highlighted. Touch “
” again to turn
off Dolby rB NR.
The Dolby NR mode reduces tape noise by
about 10 dB. For best sound reproduction,
play your tapes with these buttons on or off
according to the mode used for recording
the tape.
* Dolby noise reduction manufactured un-
der license from Dolby Laboratories Li-
censing Corporation. “DOLBY” and the
double −D symbol
are trademarks of
Dolby Laboratories Licensing Corpora-
tion.
GX470_Navi_U (OM60D58U) 07/06/16
— Cassette tape player
operation
Page 224 of 312
AUDIO/VIDEO SYSTEM
223
D
Description of DVD controls
TOP PAGE OF DVD VIDEO CONTROLS
“Menu” and “Top Menu”: If you touch ei-
ther button, the menu screen for DVD vid-
eo appears. (For the operation, see the
manual that come with the DVD video disc
provided separately.)
: The menu control key appears on
the screen. (See page 224.)
: Touching this will pause the video
screen.
: Touching this will fast reverse.
: Touching this will stop the DVD
video disc.
: Touching this will resume normal
play after stop or pause.
: Touch this button to fast forward
during the playback. During pause, touch
this button briefly to advance frame by
frame, or touch and hold it to play slowly.
SECOND PAGE OF DVD VIDEO
CONTROLS
“Setup”: The initial setup screen appears.
(See page 229.)
“Search”: The title search screen ap-
pears. (See page 224.)
“Return”: Touching this will display the
predetermined scene and start playing
from there.
“AUDIO”: The audio changing screen ap-
pears. (See page 227.)
“Subtitle”: The subtitle changing screen
appears. (See page 227.)
“Angle”: The angle selection screen ap-
pears. (See page 228.) TOP PAGE OF DVD AUDIO CONTROLS
“Top Menu”:
If you touch this button, the
menu screen for DVD audio appears. (For
operation, refer to the DVD audio disc
manual that is provided separately.)
“AUDIO”: The audio changing screen ap-
pears. (See page 228.)
: The menu control key appears on
the screen. (See page 224.)
: Touch this button to pause the
disc.
: Touching this will fast reverse.
:Touching this will stop the disc.
:Touching this will resume normal
play after stop or pause.
: Touch this button to fast forward
during the playback. During pause, touch
this button briefly to advance frame by
frame, or touch and hold it to play slowly.
SECOND PAGE OF DVD AUDIO
CONTROLS
“Setup”: The initial setup screen ap-
pears. (See page 229.)
“Select Number”: The track or number
search screen appears. (See page 225.)
“Search”: The group search screen ap-
pears. (See page 225.)
“Return”: Touching this will display the
predetermined scene and start playing
from there.
“Prev. Still”: Touch this button to reverse
the still pictures. (See page 226.)
“Next Still”: Touch this button to forward
the still pictures. (See page 226.)
“Subtitle”: The subtitle changing screen
appears. (See page 227.)
“Angle”: The angle selection screen ap-
pears. (See page 228.)
GX470_Navi_U (OM60D58U) 07/06/16
Page 249 of 312
AUDIO/VIDEO SYSTEM
248
D
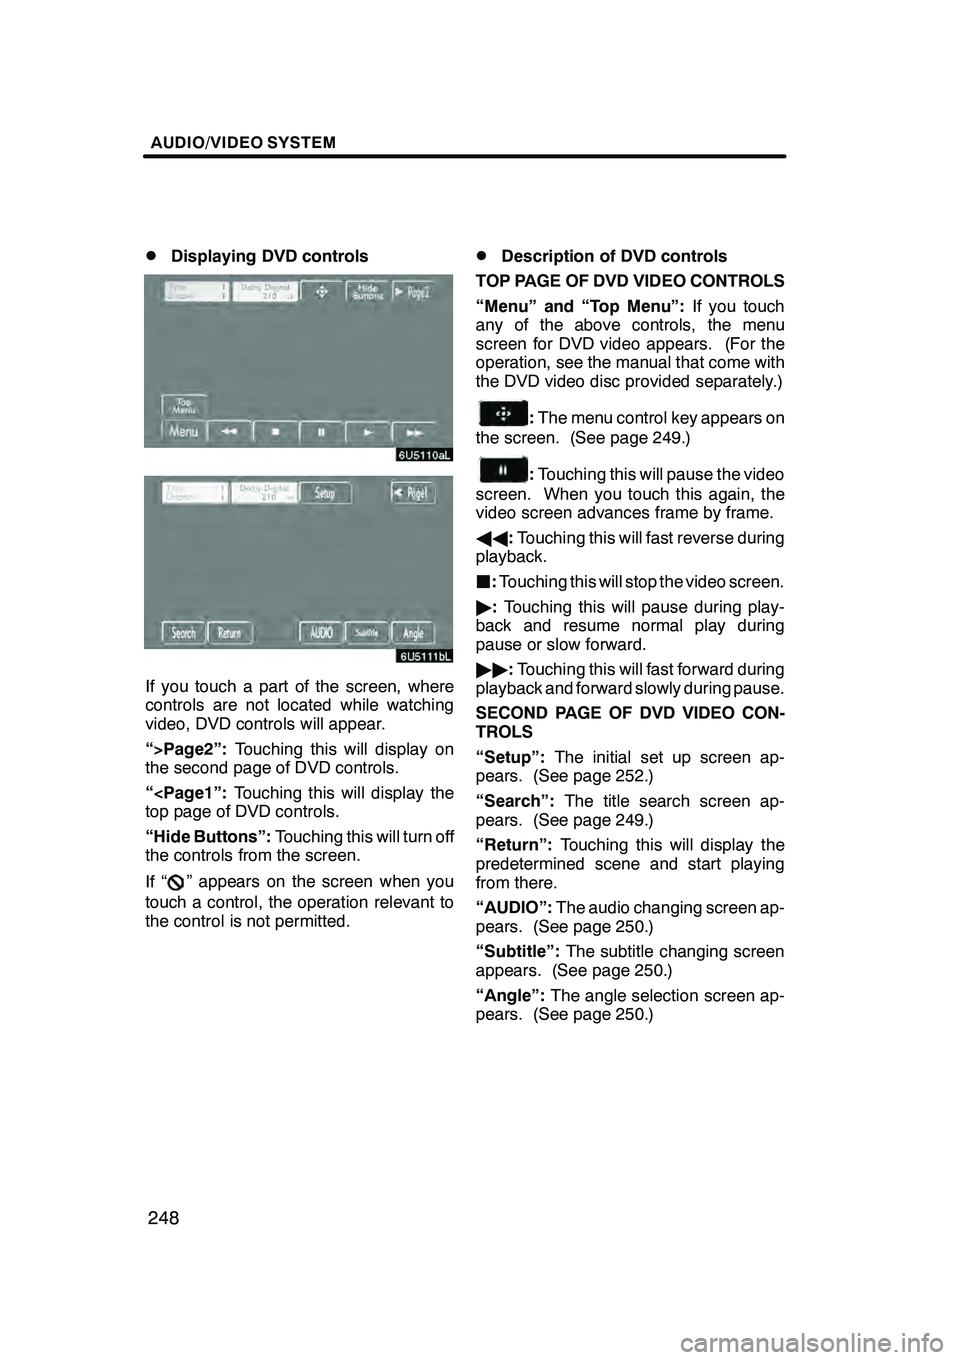
Displaying DVD controls
If you touch a part of the screen, where
controls are not located while watching
video, DVD controls will appear.
“>Page2”:
Touching this will display on
the second page of DVD controls.
“
“Hide Buttons”: Touching this will turn off
the controls from the screen.
If “
” appears on the screen when you
touch a control, the operation relevant to
the control is not permitted.
DDescription of DVD controls
TOP PAGE OF DVD VIDEO CONTROLS
“Menu” and “Top Menu”: If you touch
any of the above controls, the menu
screen for DVD video appears. (For the
operation, see the manual that come with
the DVD video disc provided separately.)
: The menu control key appears on
the screen. (See page 249.)
: Touching this will pause the video
screen. When you touch this again, the
video screen advances frame by frame.
AA :Touching this will fast reverse during
playback.
J :Touching this will stop the video screen.
" :Touching this will pause during play-
back and resume normal play during
pause or slow forward.
"" :Touching this will fast forward during
playback and forward slowly during pause.
SECOND PAGE OF DVD VIDEO CON-
TROLS
“Setup”: The initial set up screen ap-
pears. (See page 252.)
“Search”: The title search screen ap-
pears. (See page 249.)
“Return”: Touching this will display the
predetermined scene and start playing
from there.
“AUDIO”: The audio changing screen ap-
pears. (See page 250.)
“Subtitle”: The subtitle changing screen
appears. (See page 250.)
“Angle”: The angle selection screen ap-
pears. (See page 250.)
GX470_Navi_U (OM60D58U) 07/06/16
Page 262 of 312

AUDIO/VIDEO SYSTEM
261
1Volume control switch
Push “+”side to increase the volume. The
volume continues to increase while the
switch is being pressed.
Push “−”side to decrease the volume.
The volume continues to decrease while
the switch is being pressed.
2“”“” switches (Seek, search
track)
Radio
To select a preset station:
Quickly push and release the “
”or “”
switch. Do this again to select the next pre-
set station.
To seek a station:
Push and hold the “
”or “”switch until
you hear a beep. Do this again to find the
next station. If you push either the “
”or
“” switch in seek mode, the seek mode
will cancel.
Cassette tape player
To skip to a different track in either direc-
tion:
Quickly push and release the “
”or “”
switch. “FF 1” or “REW 1” will appear on
the display.
Next, push the “
”or “”switch until the
track you want to listen to is set. If you
push the switch ten times, the skip function
will turn off. (You can skip up to nine tracks
at a time.)
When counting the number of the tracks
you want to rewind, remember to count the
current track as well. For example, if you
want to rewind to a song that is two before
the song you are listening to, push the “
”
button three times.
If you push the switch further than you
wanted to, push the other side of the
switch. The track number will be increased
or reduced. The track number you select is not valid if
it is higher than the number of the tracks re-
maining on the current side of the cassette.
DWhen the tape reaches to the begin-
ning, the player will automatically start
playing that side.
DAfter the tape reaches to the end, the
player will automatically reverse and
start playing the other side.
There must be at least 3 seconds of blank
space between tracks for the switch to
work correctly. In addition, the feature may
not work well with some spoken, live, or
classical recordings.
To fast −forward or rewind:
Push and hold the “
”switch to fast −for-
ward a cassette tape. “FF” will appear on
the display. Push and hold the “
”switch
to rewind a tape. “REW” will appear on the
display.
To stop the tape while it is fast −forwarding,
push the “
”switch . To stop the tape
while it is rewinding, push the “”switch.
If a tape rewinds completely, the cassette
tape player will stop and then play that
same side. If a tape fast− forwards com-
pletely, the cassette will play the other side
of the tape using the auto −reverse feature.
DVD changer, or DVD player
Use this button to skip up or down to a dif-
ferent track, file or chapter in either direc-
tion.
To select a desired track, file or chapter:
Quickly push and release the “
”or “”
switch until the track, file or chapter you
want to play is set. If you want to return to
the beginning of the current track, file or
chapter, push the “
”switch once, quick-
ly.
To select a desired disc:
Push and hold the “
”or “”switch until
you hear a beep to change to the next or
the previous disc. Repeat this operation
until you reach the disc you want to listen
to.
GX470_Navi_U (OM60D80U) 08/01/11