Page 185 of 312

AUDIO/VIDEO SYSTEM
184
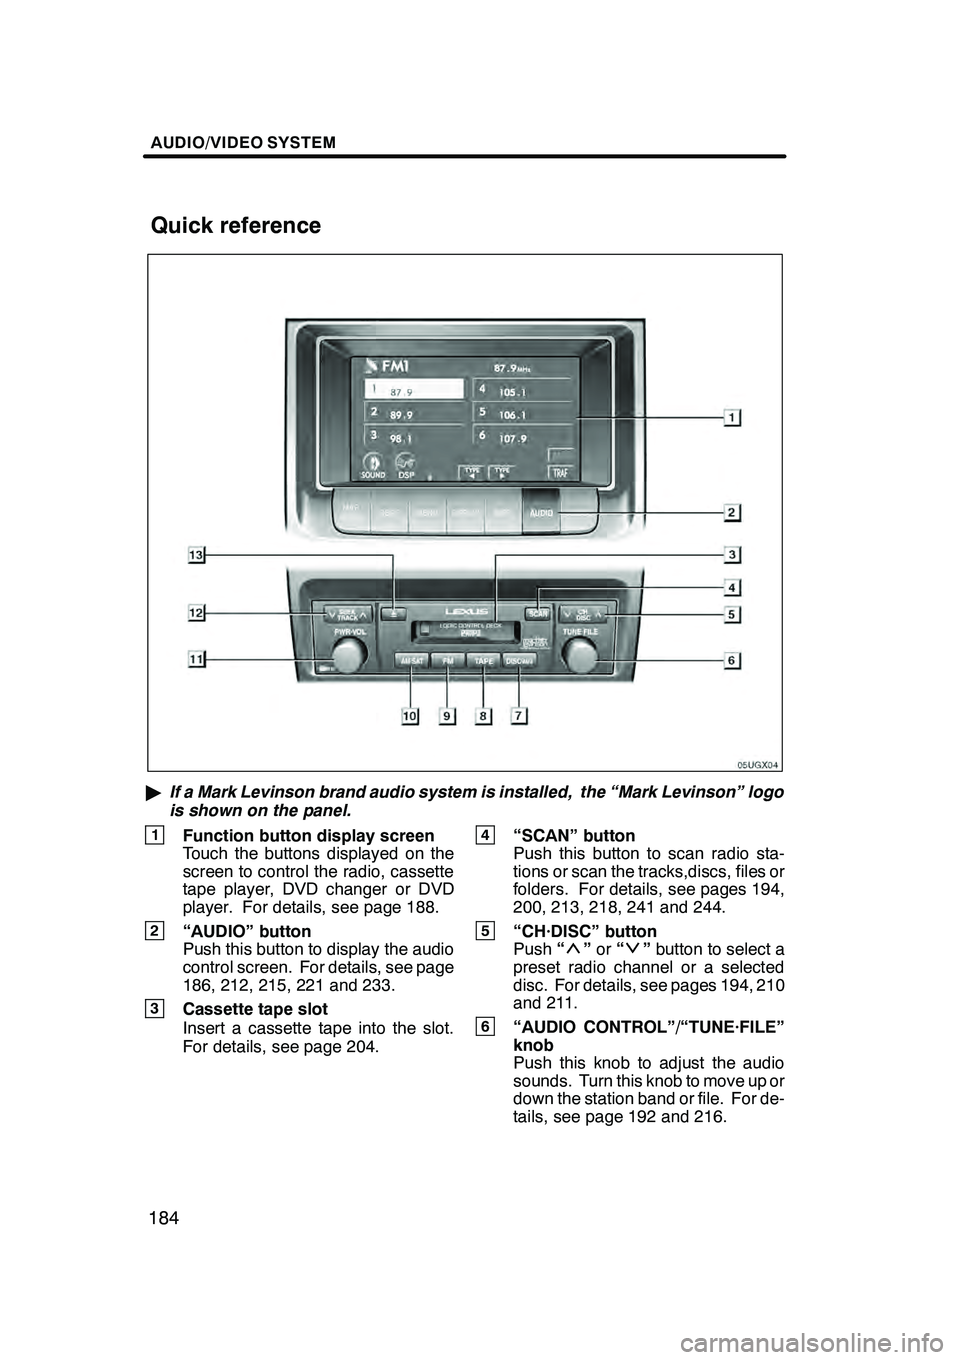
"If a Mark Levinson brand audio system is installed, the “Mark Levinson” logo
is shown on the panel.
1Function button display screen
Touch the buttons displayed on the
screen to control the radio, cassette
tape player, DVD changer or DVD
player. For details, see page 188.
2“AUDIO” button
Push this button to display the audio
control screen. For details, see page
186, 212, 215, 221 and 233.
3Cassette tape slot
Insert a cassette tape into the slot.
For details, see page 204.
4“SCAN” button
Push this button to scan radio sta-
tions or scan the tracks,discs, files or
folders. For details, see pages 194,
200, 213, 218, 241 and 244.
5“CH·DISC” button
Push “”or “”button to select a
preset radio channel or a selected
disc. For details, see pages 194, 210
and 211.
6“AUDIO CONTROL”/“TUNE·FILE”
knob
Push this knob to adjust the audio
sounds. Turn this knob to move up or
down the station band or file. For de-
tails, see page 192 and 216.
GX470_Navi_U (OM60D58U) 07/06/16
Quick reference
Page 187 of 312

AUDIO/VIDEO SYSTEM
186
CAUTION
For vehicles sold in U.S.A. and
Canada:
DPart 15 of the FCC Rules
FCC Warning:
Any unauthorized changes or
modifications to this equipment
will void the user’s authority to op-
erate this device.
DLaser products
DDo not take this unit apart or at-
tempt to make any changes
yourself. This is an intricate unit
that uses a laser pickup to re-
trieve information from the sur-
face of compact discs. The laser
is carefully shielded so that its
rays remain inside the cabinet.
Therefore, never try to disas-
semble the player or alter any of
its parts since you may be ex-
posed to laser rays and danger-
ous voltages.
DThis product utilizes a laser. Use
of controls or adjustments or
performance of procedures oth-
er than those specified herein
may result in hazardous radi-
ation exposure.
DTurning the system on and off
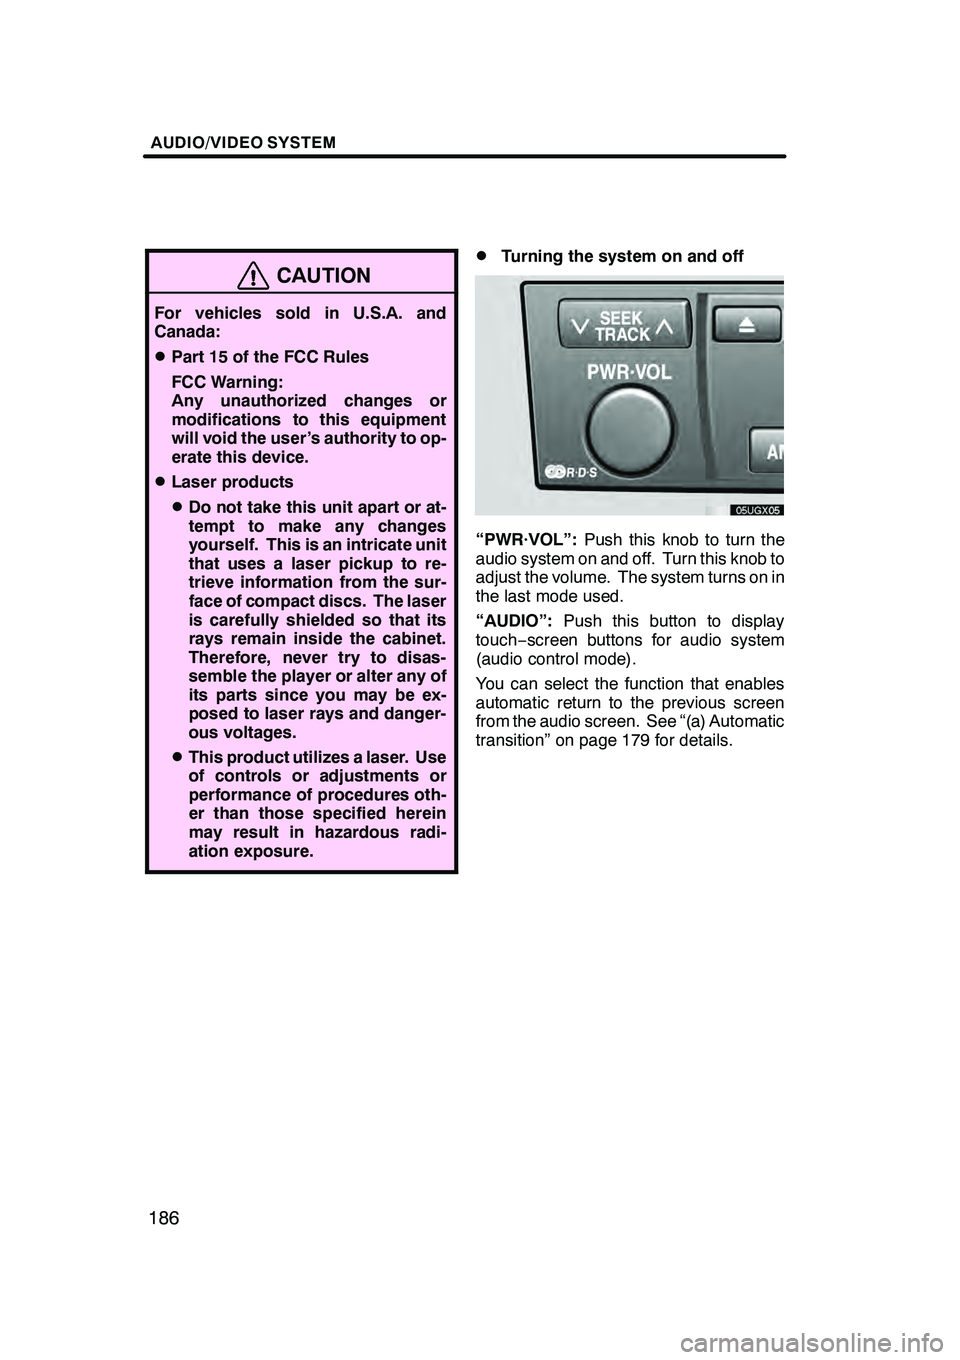
“PWR·VOL”:Push this knob to turn the
audio system on and off. Turn this knob to
adjust the volume. The system turns on in
the last mode used.
“AUDIO”: Push this button to display
touch− screen buttons for audio system
(audio control mode).
You can select the function that enables
automatic return to the previous screen
from the audio screen. See “(a) Automatic
transition” on page 179 for details.
GX470_Navi_U (OM60D58U) 07/06/16
Page 188 of 312
AUDIO/VIDEO SYSTEM
187
D
Switching between functions
Push “AM·SAT”, “FM”, “TAPE” or
“DISC·AUX” button to turn on the de-
sired mode. The selected mode turns
on immediately.
Push these buttons if you want to switch
from one mode to another.
If the tape or disc is not set, the cassette
tape player, DVD changer or DVD player
does not turn on.
You can turn off each player by ejecting the
cassette tape or disc. If the audio system
was previously off, then the entire audio
system will be turned off when you eject
the cassette tape or disc. If another func-
tion was previously playing, it will come on
again.
GX470_Navi_U (OM60D58U) 07/06/16
Page 189 of 312
AUDIO/VIDEO SYSTEM
188
The buttons for radio, cassette tape player,
DVD changer and DVD player operation
are displayed on the function button dis-
play screen when the audio control mode
is selected.
Touch them lightly and directly on the
screen.
The selected button is highlighted.
INFORMATION
DIf the system does not respond to
a touch of a touch− screen button,
move your finger away from the
screen and then touch it again.
D You cannot operate dimmed
touch− screen buttons.
D Wipe off fingerprints on the sur-
face of the display using a glass
cleaning cloth.
GX470_Navi_U (OM60D58U) 07/06/16
Page 193 of 312
AUDIO/VIDEO SYSTEM
192
D
Your DVD player
(with rear seat entertainment sys-
tem)
The sound of the rear seat entertainment
system can be enjoyed by pushing the
“DISC” button.DListening to the radio
Push these buttons to choose either an
AM or FM station.
“AM”, “FM1” or “FM2” appears on the
screen.
If your vehicle is equipped with a satellite
radio broadcast system, when you push
the“AM·SAT” button, “AM”, “SAT1”,
“SAT2”, “SAT3” station appears on the dis-
play. For details about satellite radio
broadcast, see “— Radio operation (XM r
Satellite Radio broadcast)” on page 197.
GX470_Navi_U (OM60D58U) 07/06/16
— Radio operation
Page 194 of 312

AUDIO/VIDEO SYSTEM
193
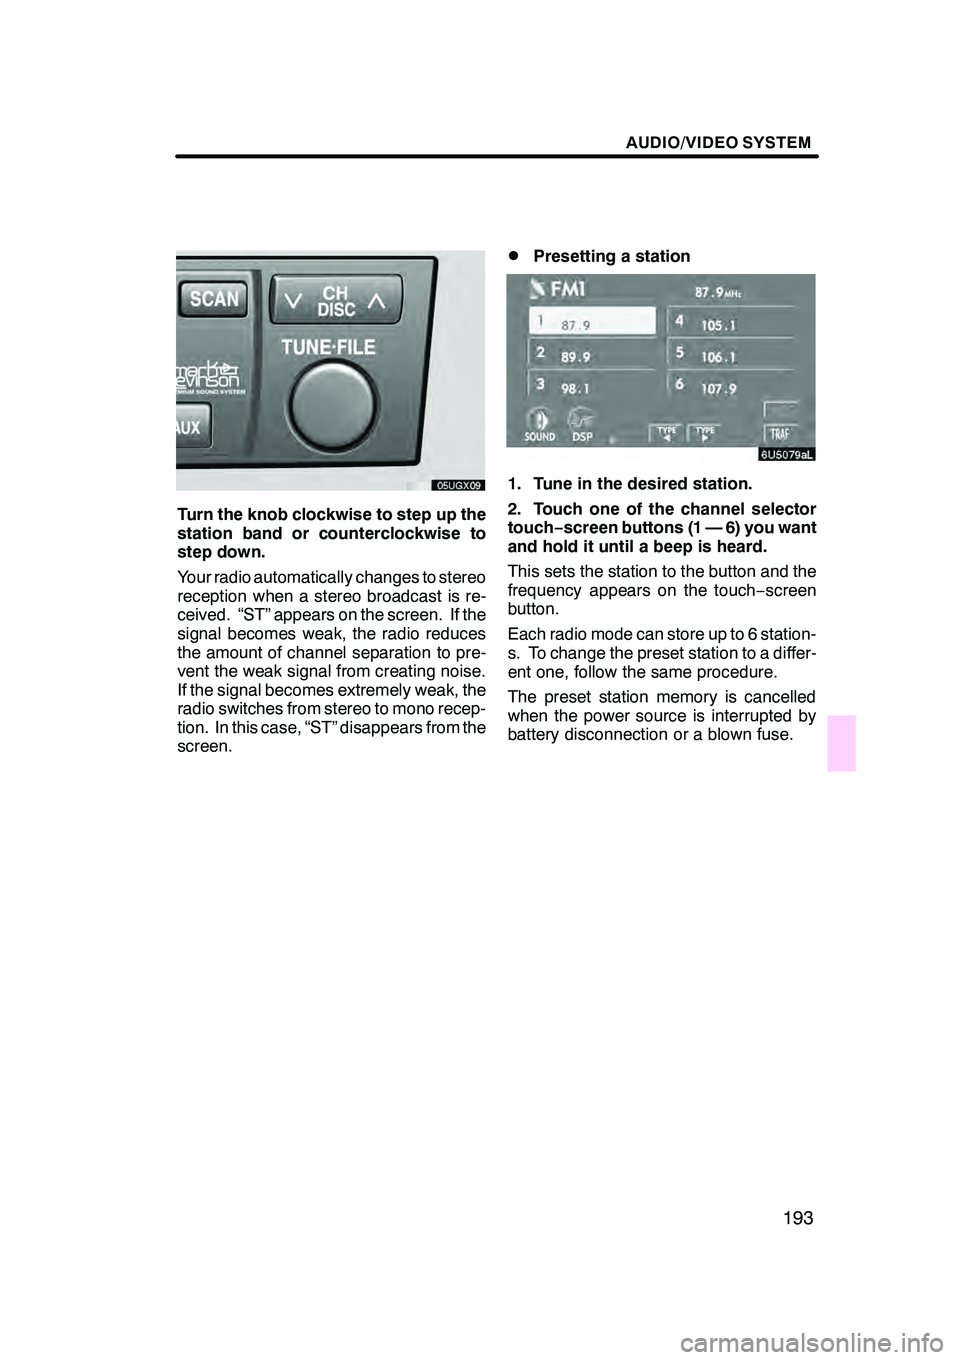
Turn the knob clockwise to step up the
station band or counterclockwise to
step down.
Your radio automatically changes to stereo
reception when a stereo broadcast is re-
ceived. “ST” appears on the screen. If the
signal becomes weak, the radio reduces
the amount of channel separation to pre-
vent the weak signal from creating noise.
If the signal becomes extremely weak, the
radio switches from stereo to mono recep-
tion. In this case, “ST” disappears from the
screen.
DPresetting a station
1. Tune in the desired station.
2. Touch one of the channel selector
touch−screen buttons (1 — 6) you want
and hold it until a beep is heard.
This sets the station to the button and the
frequency appears on the touch −screen
button.
Each radio mode can store up to 6 station-
s. To change the preset station to a differ-
ent one, follow the same procedure.
The preset station memory is cancelled
when the power source is interrupted by
battery disconnection or a blown fuse.
GX470_Navi_U (OM60D58U) 07/06/16
Page 200 of 312
AUDIO/VIDEO SYSTEM
199
D
Channel category
Touch either
“TYPEA”or “TYPE "”to go
to the next or previous category.
DPresetting a channel
1. Tune in the desired channel.
2. Touch one of the channel selector
touch− screen buttons (1 — 6) and hold
it until a beep is heard.
This sets the channel to the button and the
name and number of the channel appears
on the touch− screen button.
Each SAT mode can store up to 6 stations.
To change the preset channel to a different
one, follow the same procedure.
The preset channel memory is cancelled
when the power source is interrupted by
battery disconnection or a blown fuse.
GX470_Navi_U (OM60D58U) 07/06/16
Page 205 of 312

AUDIO/VIDEO SYSTEM
204
D
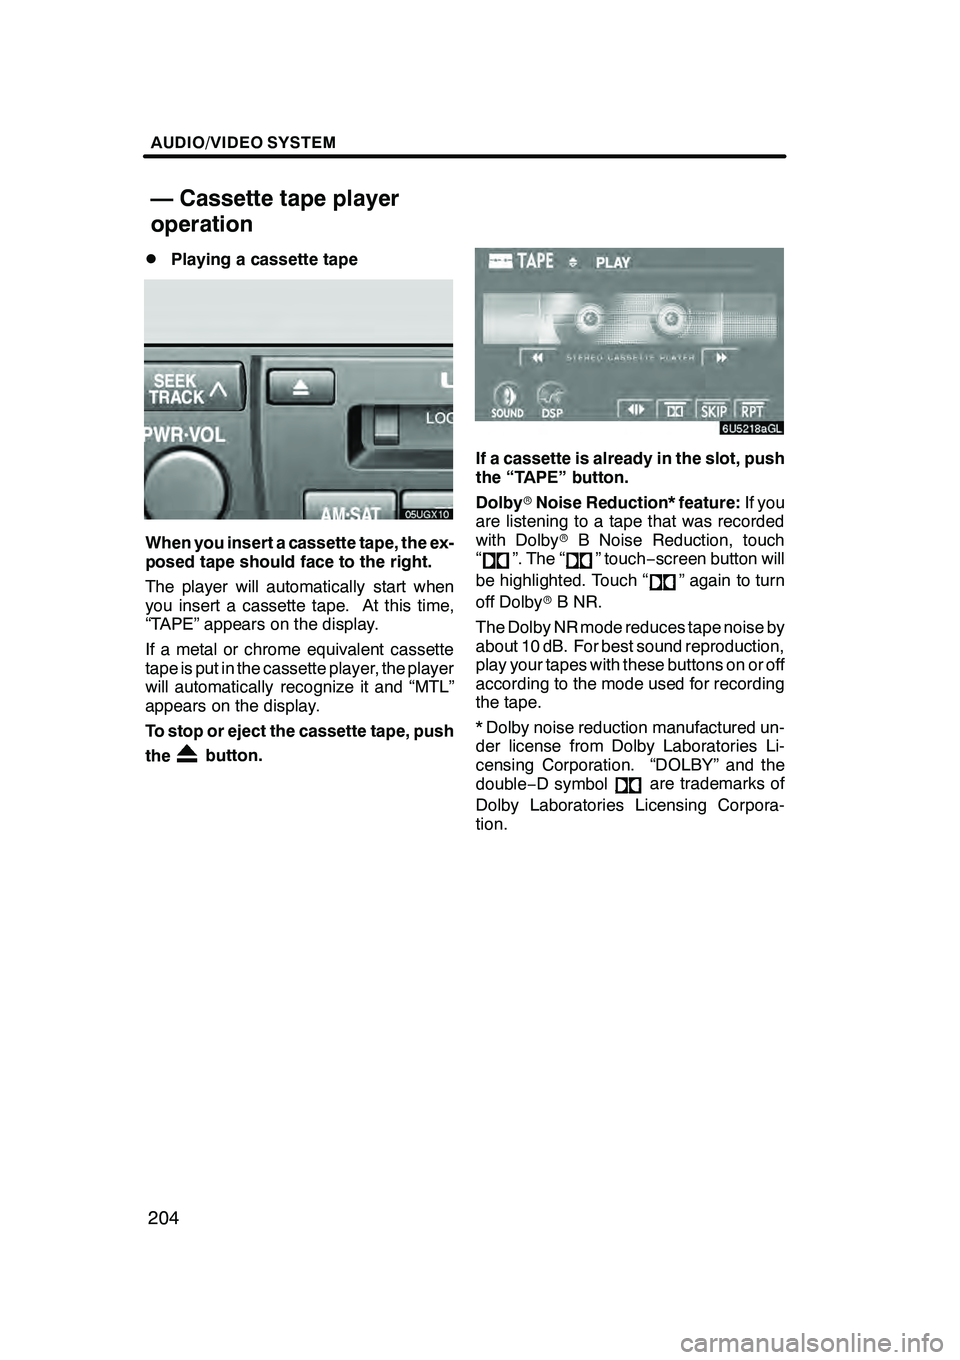
Playing a cassette tape
When you insert a cassette tape, the ex-
posed tape should face to the right.
The player will automatically start when
you insert a cassette tape. At this time,
“TAPE” appears on the display.
If a metal or chrome equivalent cassette
tape is put in the cassette player, the player
will automatically recognize it and “MTL”
appears on the display.
To stop or eject the cassette tape, push
the
button.
If a cassette is already in the slot, push
the “TAPE” button.
Dolby
rNoise Reduction* feature: If you
are listening to a tape that was recorded
with Dolby rB Noise Reduction, touch
“
”. The “” touch −screen button will
be highlighted. Touch “
” again to turn
off Dolby rB NR.
The Dolby NR mode reduces tape noise by
about 10 dB. For best sound reproduction,
play your tapes with these buttons on or off
according to the mode used for recording
the tape.
* Dolby noise reduction manufactured un-
der license from Dolby Laboratories Li-
censing Corporation. “DOLBY” and the
double −D symbol
are trademarks of
Dolby Laboratories Licensing Corpora-
tion.
GX470_Navi_U (OM60D58U) 07/06/16
— Cassette tape player
operation