2008 KIA Sedona clock reset
[x] Cancel search: clock resetPage 45 of 339
Features of your vehicle
36 3
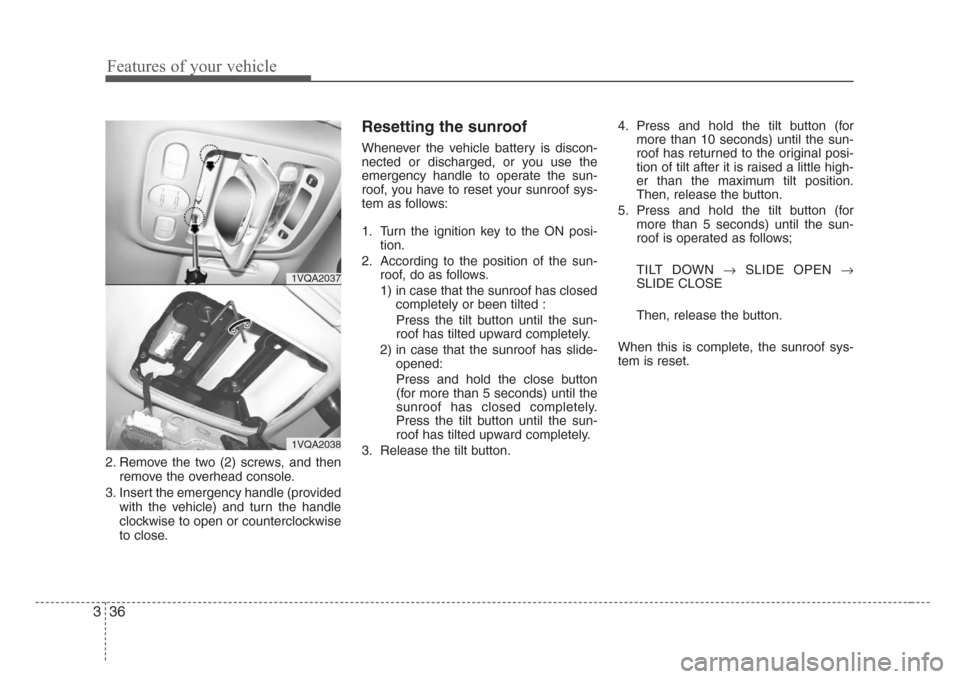
2. Remove the two (2) screws, and then
remove the overhead console.
3. Insert the emergency handle (provided
with the vehicle) and turn the handle
clockwise to open or counterclockwise
to close.
Resetting the sunroof
Whenever the vehicle battery is discon-
nected or discharged, or you use the
emergency handle to operate the sun-
roof, you have to reset your sunroof sys-
tem as follows:
1. Turn the ignition key to the ON posi-
tion.
2. According to the position of the sun-
roof, do as follows.
1) in case that the sunroof has closed
completely or been tilted :
Press the tilt button until the sun-
roof has tilted upward completely.
2) in case that the sunroof has slide-
opened:
Press and hold the close button
(for more than 5 seconds) until the
sunroof has closed completely.
Press the tilt button until the sun-
roof has tilted upward completely.
3. Release the tilt button.4. Press and hold the tilt button (for
more than 10 seconds) until the sun-
roof has returned to the original posi-
tion of tilt after it is raised a little high-
er than the maximum tilt position.
Then, release the button.
5. Press and hold the tilt button (for
more than 5 seconds) until the sun-
roof is operated as follows;
TILT DOWN →SLIDE OPEN →
SLIDE CLOSE
Then, release the button.
When this is complete, the sunroof sys-
tem is reset.
1VQA2037
1VQA2038
Page 185 of 339

Features of your vehicle
176 3
(1) : It can be used when the ignition
switch is in ACC or ON position.
(2), (3) : It can be used regardless of the
ignition switch position.
Power outlet
The power outlets are designed to pro-
vide power for mobile telephones or
other devices designed to operate with
vehicle electrical systems. The devices
should draw less than 10 amps with the
engine running.
Digital clock
Whenever the battery terminals, related
fuses are disconnected, you must reset
the time.
When the ignition switch is in the ACC or
ON position, the clock buttons operate as
follows:
CAUTION
• Use power outlet only when the
engine is running and remove the
accessory plug after use. Using
the accessory plug for prolonged
periods of time with the engine
off could cause the battery to dis-
charge.
• Only use 12V electric accessories
which are less than 10A in elec-
tric capacity.
• Adjust the air-conditioner or
heater to the lowest operating
level when using the power outlet.
• Close the cover when not in use.
• Some electronic devices can
cause electronic interference
when plugged into a vehicle’s
power outlet. These devices may
cause excessive audio static and
malfunctions in other electronic
systems or devices used in your
vehicle.
OVQ038092N
Page 198 of 339
3189
Features of your vehicle
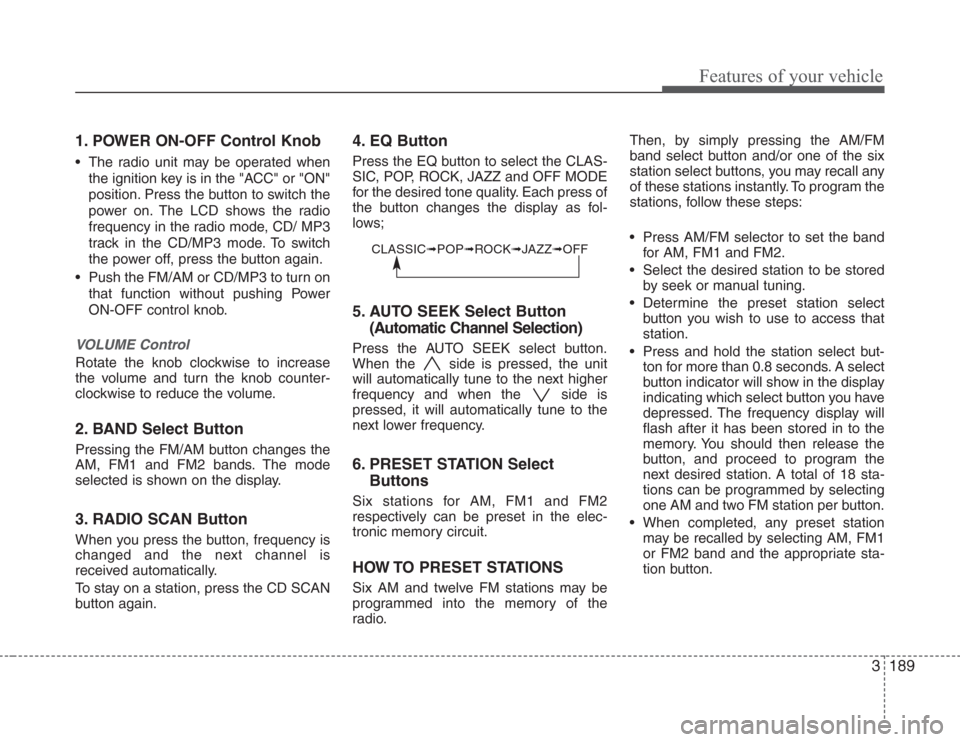
1. POWER ON-OFF Control Knob
• The radio unit may be operated when
the ignition key is in the "ACC" or "ON"
position. Press the button to switch the
power on. The LCD shows the radio
frequency in the radio mode, CD/ MP3
track in the CD/MP3 mode. To switch
the power off, press the button again.
• Push the FM/AM or CD/MP3 to turn on
that function without pushing Power
ON-OFF control knob.
VOLUME Control
Rotate the knob clockwise to increase
the volume and turn the knob counter-
clockwise to reduce the volume.
2. BAND Select Button
Pressing the FM/AM button changes the
AM, FM1 and FM2 bands. The mode
selected is shown on the display.
3. RADIO SCAN Button
When you press the button, frequency is
changed and the next channel is
received automatically.
To stay on a station, press the CD SCAN
button again.
4. EQ Button
Press the EQ button to select the CLAS-
SIC, POP, ROCK, JAZZ and OFF MODE
for the desired tone quality. Each press of
the button changes the display as fol-
lows;
5. AUTO SEEK Select Button
(Automatic Channel Selection)
Press the AUTO SEEK select button.
When the side is pressed, the unit
will automatically tune to the next higher
frequency and when the side is
pressed, it will automatically tune to the
next lower frequency.
6. PRESET STATION Select
Buttons
Six stations for AM, FM1 and FM2
respectively can be preset in the elec-
tronic memory circuit.
HOW TO PRESET STATIONS
Six AM and twelve FM stations may be
programmed into the memory of the
radio.Then, by simply pressing the AM/FM
band select button and/or one of the six
station select buttons, you may recall any
of these stations instantly. To program the
stations, follow these steps:
• Press AM/FM selector to set the band
for AM, FM1 and FM2.
• Select the desired station to be stored
by seek or manual tuning.
• Determine the preset station select
button you wish to use to access that
station.
• Press and hold the station select but-
ton for more than 0.8 seconds. A select
button indicator will show in the display
indicating which select button you have
depressed. The frequency display will
flash after it has been stored in to the
memory. You should then release the
button, and proceed to program the
next desired station. A total of 18 sta-
tions can be programmed by selecting
one AM and two FM station per button.
• When completed, any preset station
may be recalled by selecting AM, FM1
or FM2 band and the appropriate sta-
tion button.
CLASSIC➟POP➟ROCK➟JAZZ➟OFF
Page 203 of 339
Features of your vehicle
194 3
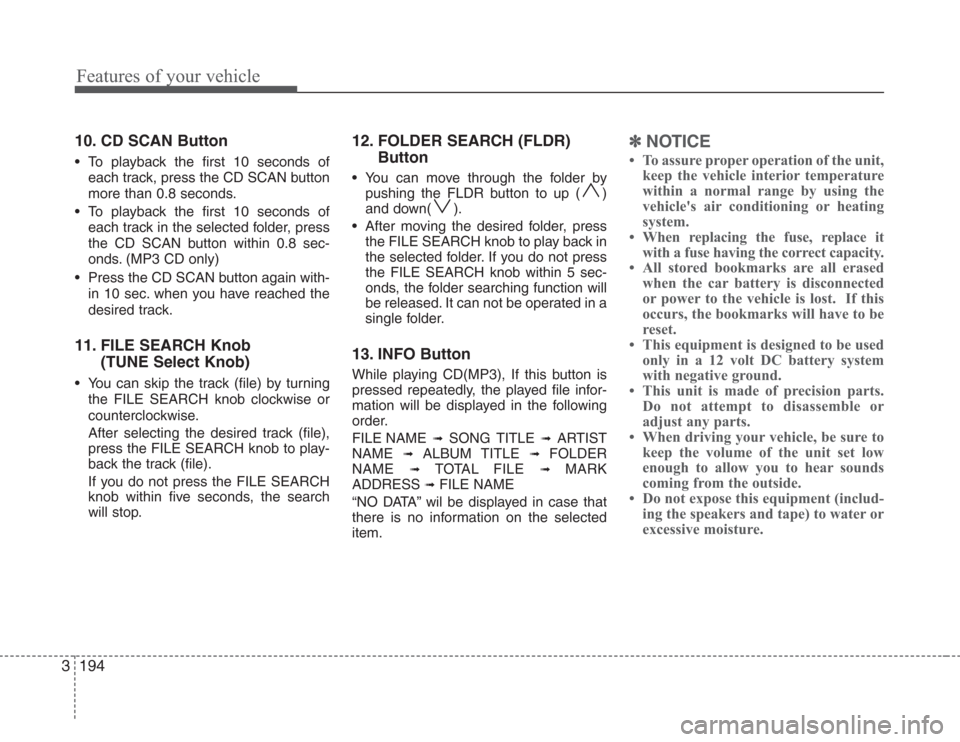
10. CD SCAN Button
• To playback the first 10 seconds of
each track, press the CD SCAN button
more than 0.8 seconds.
• To playback the first 10 seconds of
each track in the selected folder, press
the CD SCAN button within 0.8 sec-
onds. (MP3 CD only)
• Press the CD SCAN button again with-
in 10 sec. when you have reached the
desired track.
11. FILE SEARCH Knob
(TUNE Select Knob)
• You can skip the track (file) by turning
the FILE SEARCH knob clockwise or
counterclockwise.
After selecting the desired track (file),
press the FILE SEARCH knob to play-
back the track (file).
If you do not press the FILE SEARCH
knob within five seconds, the search
will stop.
12. FOLDER SEARCH (FLDR)
Button
• You can move through the folder by
pushing the FLDR button to up ( )
and down( ).
• After moving the desired folder, press
the FILE SEARCH knob to play back in
the selected folder. If you do not press
the FILE SEARCH knob within 5 sec-
onds, the folder searching function will
be released. It can not be operated in a
single folder.
13. INFO Button
While playing CD(MP3), If this button is
pressed repeatedly, the played file infor-
mation will be displayed in the following
order.
FILE NAME
➟ SONG TITLE ➟ ARTIST
NAME
➟ ALBUM TITLE ➟ FOLDER
NAME
➟ TOTAL FILE ➟ MARK
ADDRESS
➟ FILE NAME
“NO DATA” wil be displayed in case that
there is no information on the selected
item.
✽
NOTICE
• To assure proper operation of the unit,
keep the vehicle interior temperature
within a normal range by using the
vehicle's air conditioning or heating
system.
• When replacing the fuse, replace it
with a fuse having the correct capacity.
• All stored bookmarks are all erased
when the car battery is disconnected
or power to the vehicle is lost. If this
occurs, the bookmarks will have to be
reset.
• This equipment is designed to be used
only in a 12 volt DC battery system
with negative ground.
• This unit is made of precision parts.
Do not attempt to disassemble or
adjust any parts.
• When driving your vehicle, be sure to
keep the volume of the unit set low
enough to allow you to hear sounds
coming from the outside.
• Do not expose this equipment (includ-
ing the speakers and tape) to water or
excessive moisture.
Page 206 of 339
3197
Features of your vehicle
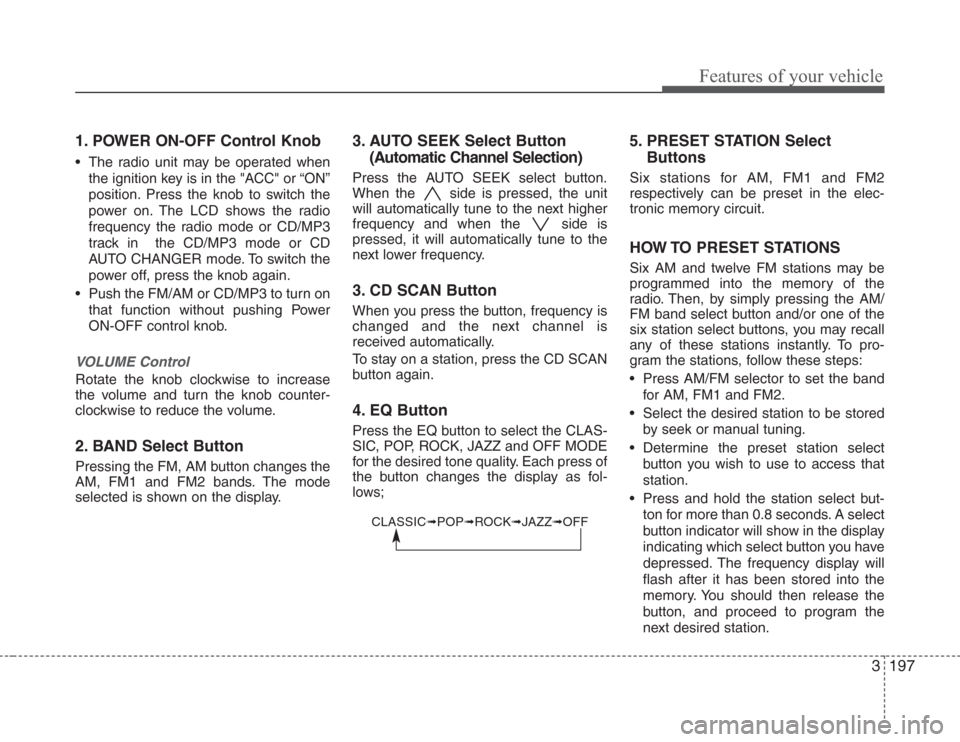
1. POWER ON-OFF Control Knob
• The radio unit may be operated when
the ignition key is in the "ACC" or “ON”
position. Press the knob to switch the
power on. The LCD shows the radio
frequency the radio mode or CD/MP3
track in the CD/MP3 mode or CD
AUTO CHANGER mode. To switch the
power off, press the knob again.
• Push the FM/AM or CD/MP3 to turn on
that function without pushing Power
ON-OFF control knob.
VOLUME Control
Rotate the knob clockwise to increase
the volume and turn the knob counter-
clockwise to reduce the volume.
2. BAND Select Button
Pressing the FM, AM button changes the
AM, FM1 and FM2 bands. The mode
selected is shown on the display.
3. AUTO SEEK Select Button
(Automatic Channel Selection)
Press the AUTO SEEK select button.
When the side is pressed, the unit
will automatically tune to the next higher
frequency and when the side is
pressed, it will automatically tune to the
next lower frequency.
3. CD SCAN Button
When you press the button, frequency is
changed and the next channel is
received automatically.
To stay on a station, press the CD SCAN
button again.
4. EQ Button
Press the EQ button to select the CLAS-
SIC, POP, ROCK, JAZZ and OFF MODE
for the desired tone quality. Each press of
the button changes the display as fol-
lows;
5. PRESET STATION Select
Buttons
Six stations for AM, FM1 and FM2
respectively can be preset in the elec-
tronic memory circuit.
HOW TO PRESET STATIONS
Six AM and twelve FM stations may be
programmed into the memory of the
radio. Then, by simply pressing the AM/
FM band select button and/or one of the
six station select buttons, you may recall
any of these stations instantly. To pro-
gram the stations, follow these steps:
• Press AM/FM selector to set the band
for AM, FM1 and FM2.
• Select the desired station to be stored
by seek or manual tuning.
• Determine the preset station select
button you wish to use to access that
station.
• Press and hold the station select but-
ton for more than 0.8 seconds. A select
button indicator will show in the display
indicating which select button you have
depressed. The frequency display will
flash after it has been stored into the
memory. You should then release the
button, and proceed to program the
next desired station.
CLASSIC➟POP➟ROCK➟JAZZ➟OFF
Page 207 of 339
Features of your vehicle
198 3
A total of 18 stations can be pro-
grammed by selecting one AM and two
FM station per button.
• When completed, any preset station
may be recalled by selecting AM, FM1
or FM2 band and the appropriate sta-
tion button.
7 . AUDIO CONTROL / TUNE Select
Button
7 -1. AUDIO
Pressing the changes the BASS, MID-
RANGE, TREBLE, FADER and BAL-
ANCE and SURROUND mode.
The mode selected is shown on the dis-
play.
After selecting each mode, rotate the
Audio control knob clockwise or counter-
clockwise.
BASS Control
To increase the BASS, rotate the knob
clockwise, while to decrease the BASS,
rotate the knob counterclockwise.
MID-RANGE Control
To increase the MID-RANGE, rotate the
knob clockwise, while to decrease the
MID-RANGE, rotate the knob counter-
clockwise.
TREBLE Control
To increase the TREBLE, rotate the knob
clockwise, while to decrease the TRE-
BLE, rotate the knob counterclockwise.
FADER Control
Turn the control knob clockwise to empha-
size rear speaker sound (front speaker
sound will be attenuated). When the con-
trol knob is turned counterclockwise, front
speaker sound will be emphasized (rear
speaker sound will be attenuated).
BALANCE Control
Rotate the knob clockwise to emphasize
right speaker sound (left speaker sound
will be attenuated). When the control
knob is turned counter clockwise, left
speaker sound will be emphasized (right
speaker sound will be attenuated).
SURROUND Control
(if equipped with RSE)
To turn on the SURROUND, rotate the
knob clockwise, while to turn off the
SURROUND, rotate the knob counter-
clockwise. The surround sound is not
consistent when cycling from radio to CD
or DVD. Therefore, the SURROUND
ON/OFF control should be selected,
whenever you change to other audio
modes (AM/FM, CD, AUX).
7 -2. TUNE Select Knob
Rotate the knob clockwise to increase
the frequency and turn the knob counter-
clockwise to reduce the frequency.
✽
NOTICE
• Do not place beverages close to the
audio system. The audio system mech-
anism may be damaged if you spill
them.
• Do not strike or allow anything to
impact the audio system, damage to
the system mechanisms could occur.
Page 212 of 339
3203
Features of your vehicle
12. DISC UP/DOWN Button
• By pressing "DISC "/"DISC "
while CD changer is playing you can
move backward or forward to the next
disc and playback automatically
begins.
• If any of the slots do not contain a CD,
your car audio will skip the empty slot
and play only those that contain a CD.
When switching CD’s, the LCD dis-
plays the selected CD’s number.
13. FILE SEARCH Knob
(TUNE Select Knob)
• You can skip the track (file) by turning
the FILE SEARCH knob clockwise or
counterclockwise.
After selecting the desired track (file),
press the FILE SEARCH knob to play-
back the track (file).
If you do not press the FILE SEARCH
knob within five seconds, the search
will stop.
14. FOLDER SEARCH (FLDR)
Button
• You can move through the folder by
pushing the FLDR button to up ( )
and down( ).
• After moving the desired folder, press
the FILE SEARCH knob to play back in
the selected folder. If you do not press
the FILE SEARCH knob within 5 sec-
onds, the folder searching function will
be released. It can not be operated in a
single folder.
15. INFO Button
While playing CD(MP3), If this button is
pressed repeatedly, the played file infor-
mation will be displayed in the following
order.
FILE NAME
➟ SONG TITLE ➟ ARTIST
NAME
➟ ALBUM TITLE ➟ FOLDER
NAME
➟ TOTAL FILE ➟ MARK
ADDRESS
➟ FILE NAME
“NO DATA” wil be displayed in case that
there is no information on the selected
item.
✽
NOTICE
• To assure proper operation of the unit,
keep the vehicle interior temperature
within a normal range by using the
vehicle's air conditioning or heating
system.
• When replacing the fuse, replace it
with a fuse having the correct capaci-
ty.
• Stored bookmarks are all erased when
the car battery is disconnected or
power to the vehicle is lost. If this
occurs, the bookmarks will have to be
reset.
• This equipment is designed to be used
only in a 12 volt DC battery system
with negative ground.
• This unit is made of precision parts.
Do not attempt to disassemble or
adjust any parts.
• When driving your vehicle, be sure to
keep the volume of the unit set low
enough to allow you to hear sounds
coming from the outside.
• Do not expose this equipment (includ-
ing the speakers and tape) to water or
excessive moisture.
Page 313 of 339
Maintenance
28 6
OVQ066018N
Shunt connector
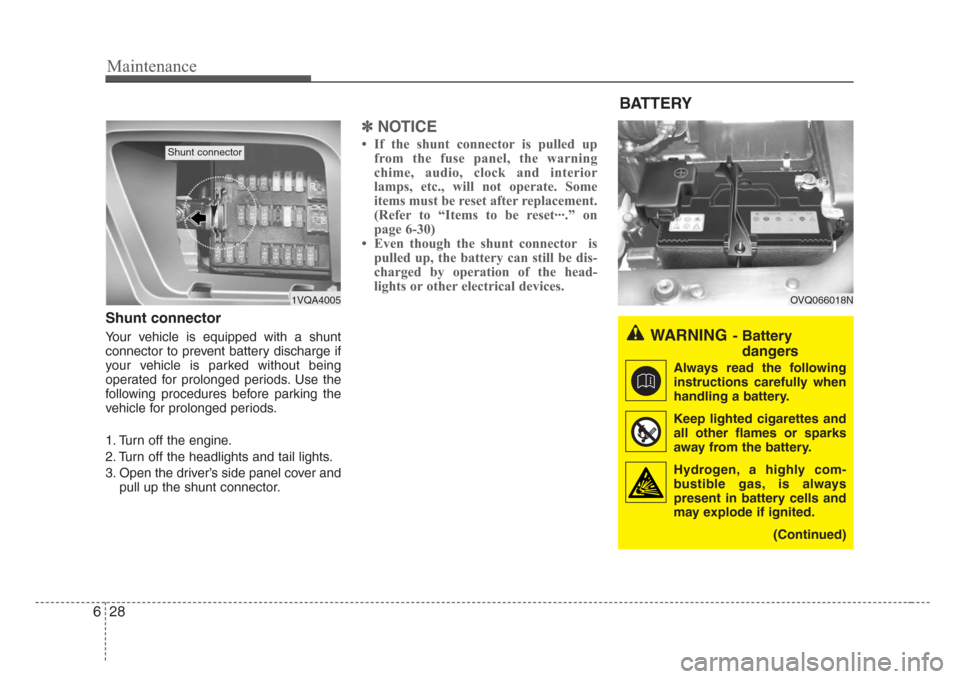
Your vehicle is equipped with a shunt
connector to prevent battery discharge if
your vehicle is parked without being
operated for prolonged periods. Use the
following procedures before parking the
vehicle for prolonged periods.
1. Turn off the engine.
2. Turn off the headlights and tail lights.
3. Open the driver’s side panel cover and
pull up the shunt connector.
✽
NOTICE
• If the shunt connector is pulled up
from the fuse panel, the warning
chime, audio, clock and interior
lamps, etc., will not operate. Some
items must be reset after replacement.
(Refer to “Items to be reset···.” on
page 6-30)
• Even though the shunt connector is
pulled up, the battery can still be dis-
charged by operation of the head-
lights or other electrical devices.
1VQA4005
Shunt connector
BATTERY
WARNING- Battery
dangers
Always read the following
instructions carefully when
handling a battery.
Keep lighted cigarettes and
all other flames or sparks
away from the battery.
Hydrogen, a highly com-
bustible gas, is always
present in battery cells and
may explode if ignited.
(Continued)