2008 KIA Sedona ECO mode
[x] Cancel search: ECO modePage 155 of 339

Features of your vehicle
146 3
Air conditioning system operation tips
• If the vehicle has been parked in direct
sunlight during hot weather, open the
windows for a short time to let the hot
air inside the vehicle escape.
• To help reduce moisture inside of win-
dows on rainy humid days, decrease
the humidity inside the vehicle by oper-
ating the air conditioning system.
• During air conditioning system opera-
tion, you may occasionally notice a
slight change in engine speed as the
air conditioning compressor cycles on.
This is a normal system operation
characteristics.
• Use the air conditioning system every
month if only for a few minutes to
ensure maximum system perfor-
mance.
• When using the air conditioning sys-
tem, you may notice clear water drip-
ping (or even puddling) on the ground
under the passenger side of the vehi-
cle. This is a normal system operation
characteristics.
• Operating the air conditioning system
in the recirculated air position does
provide maximum cooling, however,
continual operation in this mode may
cause the air inside the vehicle to
become stale.Checking the amount of air con-
ditioner refrigerant and compres-
sor lubricant
When the amount of refrigerant is low,
the performance of the air conditioning is
reduced. Overfilling also has a bad influ-
ence on the air conditioning system.
Therefore, if abnormal operation is
found, have the system inspected by an
authorized Kia dealer.
CAUTION
• When using the air conditioning
system, monitor the temperature
gauge closely while driving up
hills or in heavy traffic when out-
side temperatures are high. Air
conditioning system operation
may cause engine overheating.
Continue to use the blower fan
but turn the air conditioning sys-
tem off if the temperature gauge
indicates engine overheating.
• When opening the windows in
humid weather air conditioning
may create water droplets inside
the vehicle. Since excessive
water droplets may cause dam-
age to electrical equipment, air
conditioning should only be run
with the windows closed.
CAUTION
The air conditioning system should
be serviced by an authorized Kia
dealer. Improper service may cause
serious injury.
CAUTION
When the performance of the air
conditioning system is reduced it is
important that the correct type and
amount of oil and refrigerant is
used. Otherwise, damage to the
compressor and abnormal system
operation may occur.
Page 159 of 339
Features of your vehicle
150 3
Adjusting the driver and passenger side
temperature equally
1. Press the DUAL button again to deac-
tivate DUAL mode. The passenger
side temperature will be set to the
same as the driver side temperature.
2. Press the left temperature control but-
ton. The driver and passenger side
temperature will be adjusted equally.
Temperature conversion
If the battery has been discharged or dis-
connected, the temperature mode dis-
play will reset to Fahrenheit.
This is normal condition. You can switch
the temperature mode between
Fahrenheit to Centigrade as follows;
While depressing the AUTO button,
depress the OFF button for 3 seconds or
more. The display will change from
Fahrenheit to Centigrade, or from
Centigrade to Fahrenheit.
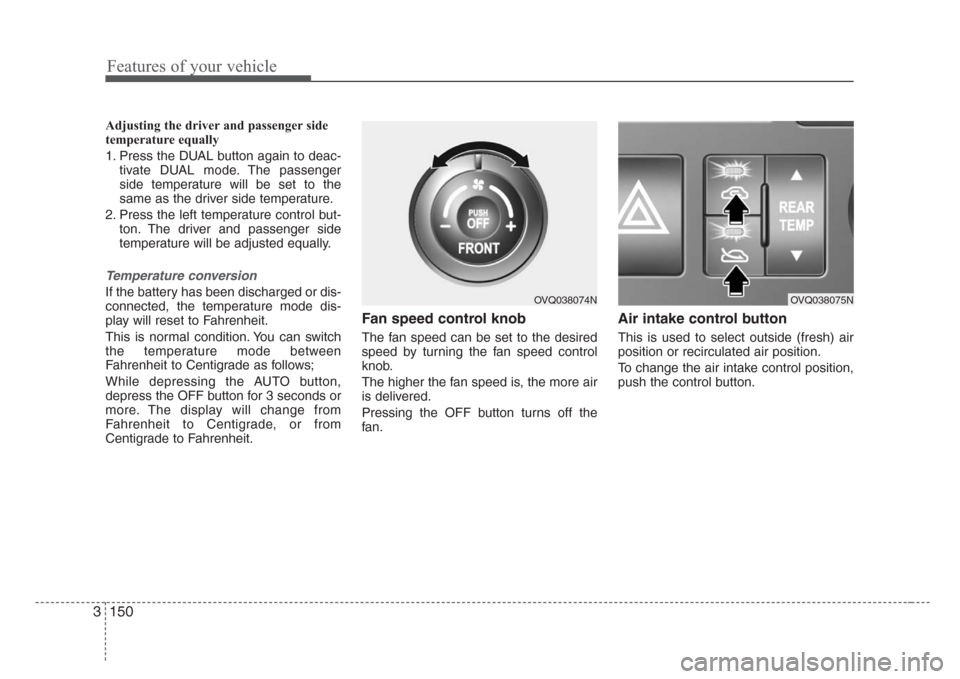
Fan speed control knob
The fan speed can be set to the desired
speed by turning the fan speed control
knob.
The higher the fan speed is, the more air
is delivered.
Pressing the OFF button turns off the
fan.
Air intake control button
This is used to select outside (fresh) air
position or recirculated air position.
To change the air intake control position,
push the control button.
OVQ038074NOVQ038075N
Page 167 of 339
Features of your vehicle
158 3
Air conditioning
All Kia Air Conditioning Systems are
filled with environmentally friendly
R-134a refrigerant which is not damag-
ing to the ozone layer.
1. Start the engine. Push the air condi-
tioning button.
2. Set the mode to the position.
3. Set the air intake control to the outside
air or recirculated air position.
4. Set the temperature control to the
desired position.
5. Set the fan speed control to the
desired speed.
6. Adjust the fan speed control and tem-
perature control to maintain maximum
comfort.
• When maximum cooling is desired, set
the temperature control to the minimum
LO (17°C/62°F) and set the air intake
to the recirculated air position, then set
the fan speed control to the highest
speed.Air conditioning system operation tips
• If the vehicle has been parked in direct
sunlight during hot weather, open the
windows for a short time to let the hot
air inside the vehicle escape.
• To help reduce moisture inside of win-
dows on rainy humid days, decrease
the humidity inside the vehicle by oper-
ating the air conditioning system.
• During air conditioning system opera-
tion, you may occasionally notice a
slight change in engine speed as the
air conditioning compressor cycles on.
This is a normal system operation
characteristics.
• Use the air conditioning system every
month if only for a few minutes to
ensure maximum system perfor-
mance.
• When using the air conditioning sys-
tem, you may notice clear water drip-
ping (or even puddling) on the ground
under the passenger side of the vehi-
cle. This is a normal system operation
characteristics.
• Operating the air conditioning system
in the recirculated air position does
provide maximum cooling, however,
continual operation in this mode may
cause the air inside the vehicle to
become stale.CAUTION
• When using the air conditioning
system, monitor the temperature
gauge closely while driving up
hills or in heavy traffic when out-
side temperatures are high. Air
conditioning system operation
may cause engine overheating.
Continue to use the blower fan
but turn the air conditioning sys-
tem off if the temperature gauge
indicates engine overheating.
• When opening the windows in
humid weather air conditioning
may create water droplets inside
the vehicle. Since excessive
water droplets may cause dam-
age to electrical equipment, air
conditioning should only be run
with the windows closed.
Page 171 of 339
Features of your vehicle
162 3
Defogging logic
Manual climate control system
To reduce the probability of fogging up
the inside of the windshield, the air intake
control is set to the outside (fresh) air
position automatically if any of following
occur.
• The mode is selected to the , or
while the system is activated.
• The ignition switch is turned on while
the mode is selected to the , or
.
• The ignition switch is turned off.
• The fan is off.
• The fan begins to be operated.
Press the air intake control button to
select the recirculated air position while
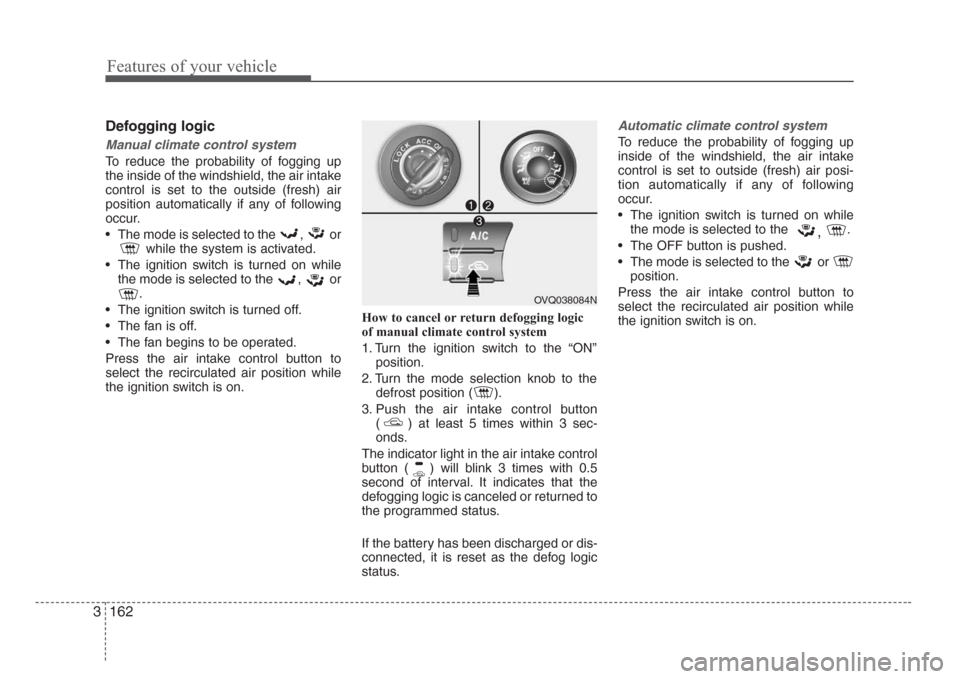
the ignition switch is on.How to cancel or return defogging logic
of manual climate control system
1. Turn the ignition switch to the “ON”
position.
2. Turn the mode selection knob to the
defrost position ( ).
3. Push the air intake control button
( ) at least 5 times within 3 sec-
onds.
The indicator light in the air intake control
button ( ) will blink 3 times with 0.5
second of interval. It indicates that the
defogging logic is canceled or returned to
the programmed status.
If the battery has been discharged or dis-
connected, it is reset as the defog logic
status.
Automatic climate control system
To reduce the probability of fogging up
inside of the windshield, the air intake
control is set to outside (fresh) air posi-
tion automatically if any of following
occur.
• The ignition switch is turned on while
the mode is selected to the
,.
• The OFF button is pushed.
• The mode is selected to the or
position.
Press the air intake control button to
select the recirculated air position while
the ignition switch is on.
OVQ038084N
Page 174 of 339

3 165
Features of your vehicle
Your new mirror comes with an integrat-
ed HomeLink Universal Transceiver,
which allows you to program the mirror to
activate your garage door(s), estate gate,
home lighting, etc. The mirror actually
learns the codes from your various exist-
ing transmitters.
Programming
Your vehicle may require the ignition
switch to be turned to the ACC position
for programming and/or operation of
HomeLink. It is also recommended that a
new battery be replaced in the hand-held
transmitter of the device being pro-
grammed to HomeLink for quicker train-
ing and accurate transmission of the
radio-frequency.
Follow these steps to train your
HomeLink mirror:
HOMELINK® WIRELESS CONTROL SYSTEM (IF EQUIPPED)
WARNING
• When programming the
HomeLink® Wireless Control
System, you may be operating a
garage door or gate operator.
Make sure that people and objects
are out of the way of the moving
door or gate to prevent potential
harm or damage.
(Continued)
(Continued)
• Do not use HomeLink with any
garage door opener that lacks the
safety stop and reverse feature as
required by federal safety stan-
dards. (This includes any garage
door opener model manufactured
before April 1, 1982.) A garage
door opener which cannot detect
an object, signaling the door to
stop and reverse, does not meet
current federal safety standards.
Using a garage door opener with-
out these features increases risk
of serious injury or death. For
more information, call 1-800-355-
3515 or on the internet at
www.homelink.com.
• Retain the original transmitter for
future programming procedures
(i.e., new vehicle purchase). It is
also suggested that upon the sale
of the vehicle, the programmed
HomeLink buttons be erased for
security purposes (follow step 1
in the “Programming” portion of
this text).
OVQ036305N Glare detection sensor
Indicator light
Homelink buttons
Page 176 of 339
3 167
Features of your vehicle
Rolling code programming
To train a garage door opener (or other
rolling code equipped devices) with the
rolling code feature, follow these instruc-
tions after completing the “Programming”
portion of this text. (A second person
may make the following training proce-
dures quicker & easier.)
4. Locate the “learn” or “smart” button on
the device’s motor head unit. Exact
location and color of the button may
vary by product brand. If there is diffi-
culty locating the “learn” or “smart” but-
ton, reference the device’s owner’s
manual or contact HomeLink at 1-800-
355-3515 or on the internet at
www.homelink.com.
5. Press and release the “learn” or
“smart” button on the device’s motor
head unit. You have 30 seconds to
complete step number 6.
6. Return to the vehicle and firmly press
and release the programmed
HomeLink button up to three times.
The rolling code equipped device
should now recognize the HomeLink
signal and activate when the
HomeLink button is pressed. The
remaining two buttons may now be
programmed if this has not previously
been done. Refer to the
“Programming” portion of this text.
Operating HomeLink
To operate, simply press the pro-
grammed HomeLink button. Activation
will now occur for the trained product
(garage door, security system, entry door
lock, estate gate, or home or office light-
ing). For convenience, the hand-held
transmitter of the device may also be
used at any time. The HomeLink
Wireless Controls System (once pro-
grammed) or the original hand-held
transmitter may be used to activate the
device (e.g. garage door, entry door lock,
etc.). In the event that there are still pro-
gramming difficulties, contact HomeLink
at 1-800-355-3515 or on the internet at
www.homelink.com.
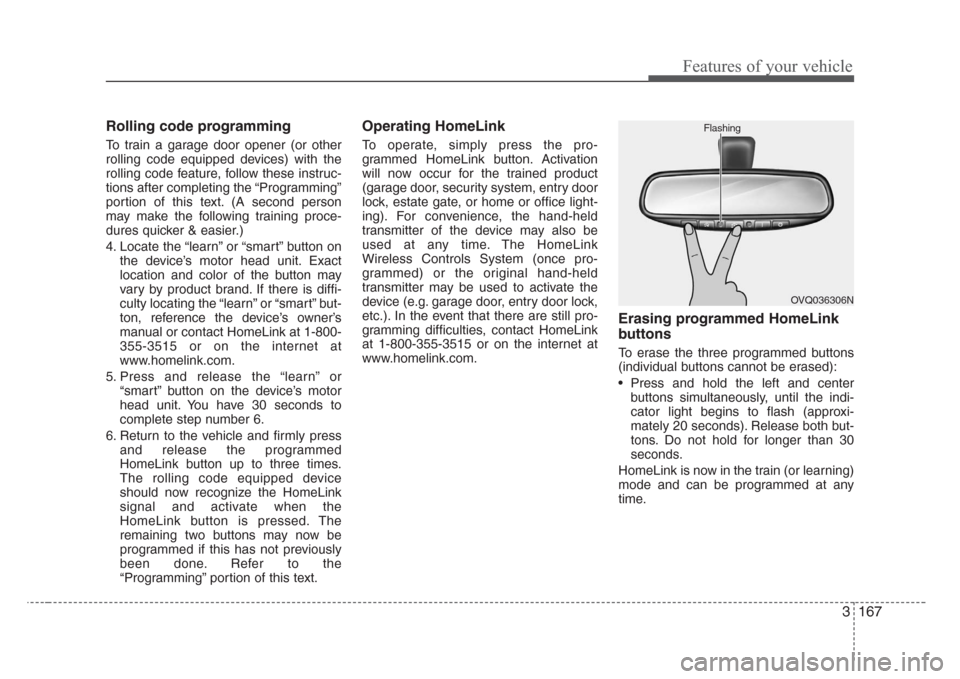
Erasing programmed HomeLink
buttons
To erase the three programmed buttons
(individual buttons cannot be erased):
• Press and hold the left and center
buttons simultaneously, until the indi-
cator light begins to flash (approxi-
mately 20 seconds). Release both but-
tons. Do not hold for longer than 30
seconds.
HomeLink is now in the train (or learning)
mode and can be programmed at any
time.
OVQ036306N Flashing
Page 177 of 339
Features of your vehicle
168 3
Reprogramming a single
HomeLink button
To program a device to HomeLink using
a HomeLink button previously trained,
follow these steps:
1. Press and hold the desired HomeLink
button. Do NOT release until step 4
has been completed.
2. When the indicator light begins to flash
slowly (after 20 seconds), position the
hand-held transmitter 1 to 3 inches
away from the HomeLink surface.
3. Press and hold the hand-held trans-
mitter button (or press and “cycle” - as
described in “Canadian Programming”
above).
4. The HomeLink indicator light will flash,
first slowly and then rapidly. When the
indicator light begins to flash rapidly,
release both buttons.
The previous device has now been
erased and the new device can be acti-
vated by pushing the HomeLink button
that has just been programmed. This pro-
cedure will not affect any other pro-
grammed HomeLink buttons.
Gate operator programming &
canadian programming
During programming, your hand-held
transmitter may automatically stop trans-
mitting. Continue to press and hold the
HomeLink button (note steps 2 through 4
in the “Programming” portion of this text)
while you press and re-press (“cycle”)
your handheld transmitter every two sec-
onds until the frequency signal has been
learned. The indicator light will flash
slowly and then rapidly after several sec-
onds upon successful training.
Accessories
If you would like additional information on
the HomeLink Wireless Control System,
HomeLink compatible products, or to
purchase other accessories such as the
HomeLink® Lighting Package, please
contact HomeLink at 1-800-355-3515 or
on the internet at www.homelink.com.
This device complies with Industry
Canada Standard RSS-210.Operation
is subject to the following two conditions:
1. This device may not cause interfer-
ence, and
2. This device must accept any interfer-
ence, including interference that may
cause undesired operation of the
device.
CAUTION
If programming a garage door
opener or gate, it is advised to
unplug the device during the
“cycling” process to prevent possi-
ble motor burn-up.
WARNING
Changes or modifications not
expressly approved by the party
responsible for compliance could
void the user’s authority to operate
the equipment.
IC: 4112104541A Gentex
MODEL/FCC ID: NZLSTDHL3
Page 193 of 339
Features of your vehicle
184 3
5. RADIO SCAN Button
When you Press the button, frequency is
changed and the next channel is
received automatically.
To stay on a station, press the CD SCAN
button again.
6. EQ Button
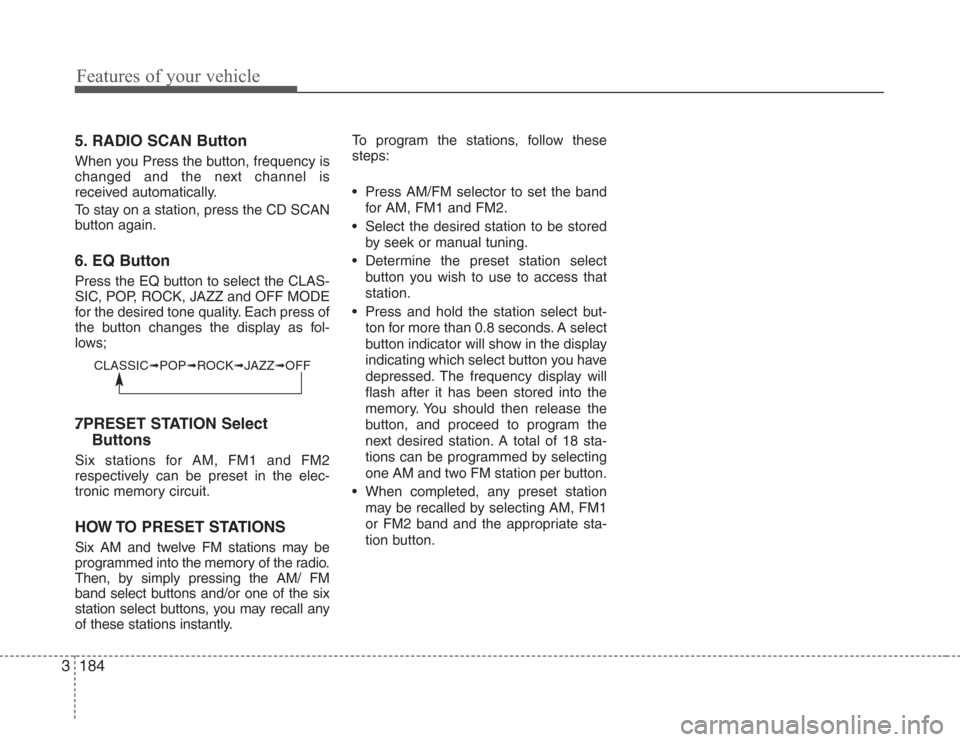
Press the EQ button to select the CLAS-
SIC, POP, ROCK, JAZZ and OFF MODE
for the desired tone quality. Each press of
the button changes the display as fol-
lows;
7 . PRESET STATION Select
Buttons
Six stations for AM, FM1 and FM2
respectively can be preset in the elec-
tronic memory circuit.
HOW TO PRESET STATIONS
Six AM and twelve FM stations may be
programmed into the memory of the radio.
Then, by simply pressing the AM/ FM
band select buttons and/or one of the six
station select buttons, you may recall any
of these stations instantly.To program the stations, follow these
steps:
• Press AM/FM selector to set the band
for AM, FM1 and FM2.
• Select the desired station to be stored
by seek or manual tuning.
• Determine the preset station select
button you wish to use to access that
station.
• Press and hold the station select but-
ton for more than 0.8 seconds. A select
button indicator will show in the display
indicating which select button you have
depressed. The frequency display will
flash after it has been stored into the
memory. You should then release the
button, and proceed to program the
next desired station. A total of 18 sta-
tions can be programmed by selecting
one AM and two FM station per button.
• When completed, any preset station
may be recalled by selecting AM, FM1
or FM2 band and the appropriate sta-
tion button.
CLASSIC➟POP➟ROCK➟JAZZ➟OFF