2008 KIA Sedona ECO mode
[x] Cancel search: ECO modePage 217 of 339
Features of your vehicle
208 3
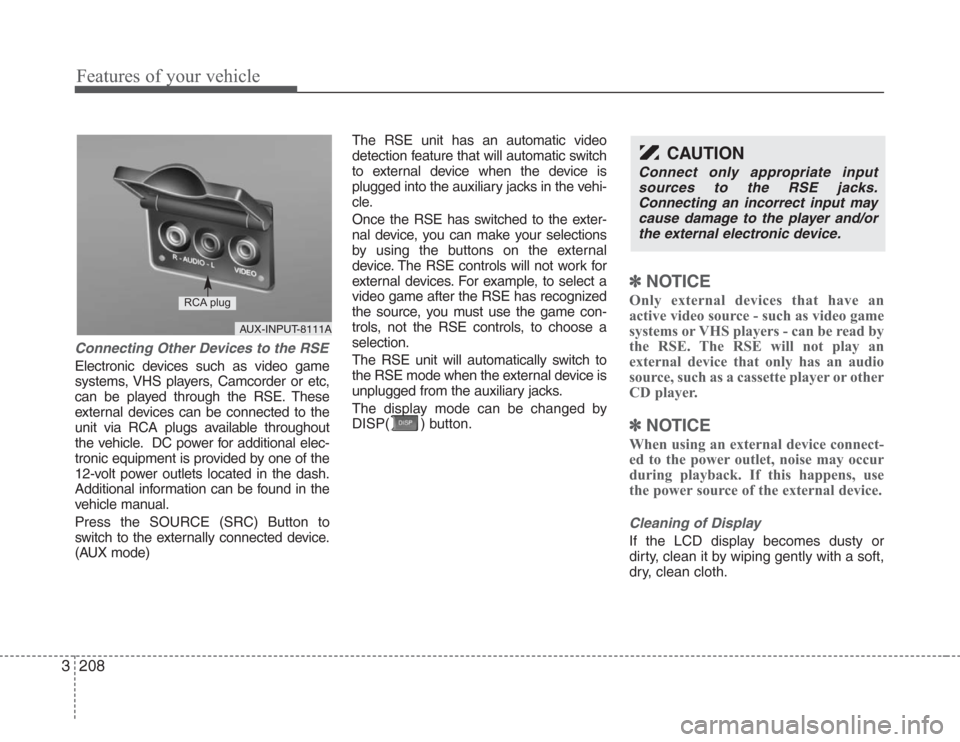
Connecting Other Devices to the RSE
Electronic devices such as video game
systems, VHS players, Camcorder or etc,
can be played through the RSE. These
external devices can be connected to the
unit via RCA plugs available throughout
the vehicle. DC power for additional elec-
tronic equipment is provided by one of the
12-volt power outlets located in the dash.
Additional information can be found in the
vehicle manual.
Press the SOURCE (SRC) Button to
switch to the externally connected device.
(AUX mode)The RSE unit has an automatic video
detection feature that will automatic switch
to external device when the device is
plugged into the auxiliary jacks in the vehi-
cle.
Once the RSE has switched to the exter-
nal device, you can make your selections
by using the buttons on the external
device. The RSE controls will not work for
external devices. For example, to select a
video game after the RSE has recognized
the source, you must use the game con-
trols, not the RSE controls, to choose a
selection.
The RSE unit will automatically switch to
the RSE mode when the external device is
unplugged from the auxiliary jacks.
The display mode can be changed by
DISP( ) button.
✽
NOTICE
Only external devices that have an
active video source - such as video game
systems or VHS players - can be read by
the RSE. The RSE will not play an
external device that only has an audio
source, such as a cassette player or other
CD player.
✽
NOTICE
When using an external device connect-
ed to the power outlet, noise may occur
during playback. If this happens, use
the power source of the external device.
Cleaning of Display
If the LCD display becomes dusty or
dirty, clean it by wiping gently with a soft,
dry, clean cloth.
CAUTION
Connect only appropriate input
sources to the RSE jacks.
Connecting an incorrect input may
cause damage to the player and/or
the external electronic device.
AUX-INPUT-8111A
RCA plug
Page 218 of 339

3209
Features of your vehicle
Using the DVD player
Disc compatibility
Your RSE player accepts and plays all
DVDs in 4:3 (normal) and 16:9 (wide
screen) video formats. With DVDs that
offer multiple formats, the default format
is 16:9 and will stay that way unless the
user changes the format. (See “Display”
to learn how to adjust the format.)
✽
NOTICE
• The DVD player has the capability to
play DVD-Video, DVD-R, DVD-RW,
CD-DA, CD-R, CD-RW and Video-
CD.
• The DVD player has the capability to
play CD-DA, DVD, VCD, PCM,
Dolby Digital and DTS formats.
• Please refer to the appendix for the
error messages.
Loading a Disc
Insert the disc part way into the load slot.
The player will automatically grip the disc
and pull it in the rest of the way. The player
will display “reading” on the screen and
show the “Kia Motors” logo before begin-
ning the DVD.The player is only capable of reading the
bottom side of a disc. When inserting a
single-sided disc, the label side should be
up. When inserting a two-sided disc, the
desired play side should be down.
✽
NOTICE
• Because there is no universal standard
for DVD programming, your disc may
behave differently than below. Some
DVDs may present warning messages
about unauthorized duplication, some
will go directly to a menu and others
may start playing the movie immedi-
ately.
• When the vehicle's ignition is active,
the loading of any playable disc will
cause the player to initialize and auto-
matically play the disc. If a disc was
playing prior to the ignition being
turned off, it will not automatically
replay once the ignition is turned on
again. Instead, it will go into standby
mode. Press the SRC or
PLAY/PAUSE( ) button to “wake
up” the unit and resume disc play.
Disc Protection
The player has an Auto-Reload Disc
Protection feature to protect discs from
accidental damage. If an ejected disc is
not removed within 25 seconds after being
ejected, it will be pulled back into the play-
er. The disc will not begin playing. Disc can
be played by the SRC or
PLAY/PAUSE( ) buttons.
DVD Controls
You can control your DVD by using the
buttons on the unit's control panel or by
using the remote control. Instructions for
the controls listed below are the same
whether you are using the control panel
or the remote control. However, there are
functions that are only available from the
remote control. These buttons and their
functionality are discussed in the
“REMOTE CONTROL” section begin-
ning.
Page 220 of 339
3211
Features of your vehicle
✽
NOTICE
The RSE will enter standby mode when
the vehicle ignition is turned off and
back on. Press the SRC or
PLAY/PAUSE( ) button to “wake
up” the unit and resume disc play.
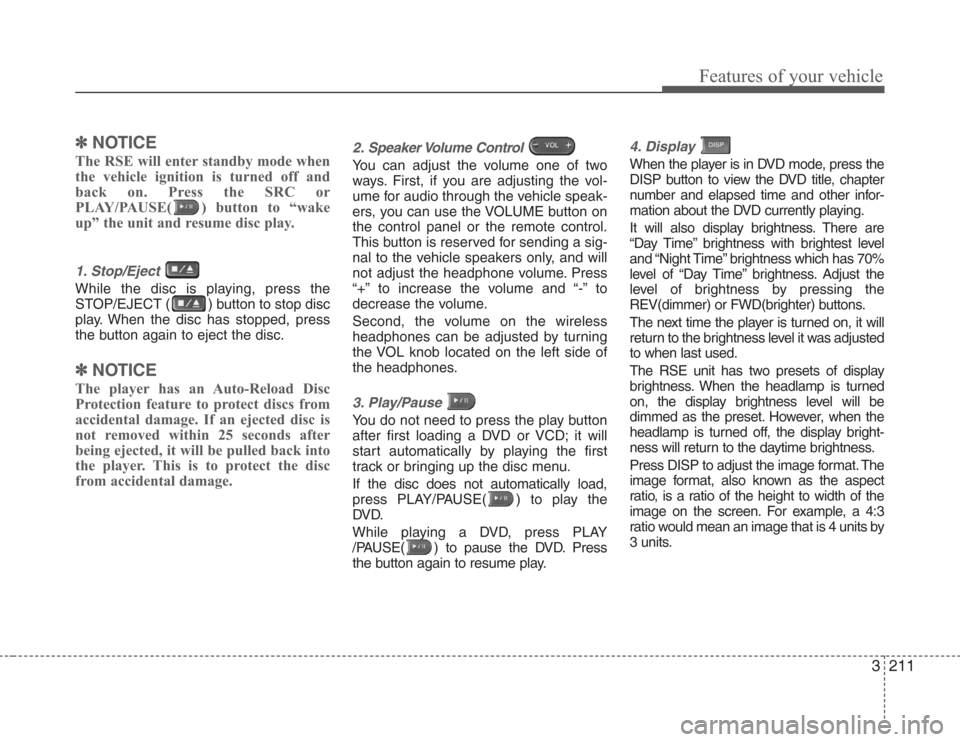
1. Stop/Eject
While the disc is playing, press the
STOP/EJECT ( ) button to stop disc
play. When the disc has stopped, press
the button again to eject the disc.
✽
NOTICE
The player has an Auto-Reload Disc
Protection feature to protect discs from
accidental damage. If an ejected disc is
not removed within 25 seconds after
being ejected, it will be pulled back into
the player. This is to protect the disc
from accidental damage.
2. Speaker Volume Control
You can adjust the volume one of two
ways. First, if you are adjusting the vol-
ume for audio through the vehicle speak-
ers, you can use the VOLUME button on
the control panel or the remote control.
This button is reserved for sending a sig-
nal to the vehicle speakers only, and will
not adjust the headphone volume. Press
“+” to increase the volume and “-” to
decrease the volume.
Second, the volume on the wireless
headphones can be adjusted by turning
the VOL knob located on the left side of
the headphones.
3. Play/Pause
You do not need to press the play button
after first loading a DVD or VCD; it will
start automatically by playing the first
track or bringing up the disc menu.
If the disc does not automatically load,
press PLAY/PAUSE( ) to play the
DV D.
While playing a DVD, press PLAY
/PAUSE( ) to pause the DVD. Press
the button again to resume play.
4. Display
When the player is in DVD mode, press the
DISP button to view the DVD title, chapter
number and elapsed time and other infor-
mation about the DVD currently playing.
It will also display brightness. There are
“Day Time” brightness with brightest level
and “Night Time” brightness which has 70%
level of “Day Time” brightness. Adjust the
level of brightness by pressing the
REV(dimmer) or FWD(brighter) buttons.
The next time the player is turned on, it will
return to the brightness level it was adjusted
to when last used.
The RSE unit has two presets of display
brightness. When the headlamp is turned
on, the display brightness level will be
dimmed as the preset. However, when the
headlamp is turned off, the display bright-
ness will return to the daytime brightness.
Press DISP to adjust the image format. The
image format, also known as the aspect
ratio, is a ratio of the height to width of the
image on the screen. For example, a 4:3
ratio would mean an image that is 4 units by
3 units.
Page 224 of 339
3215
Features of your vehicle
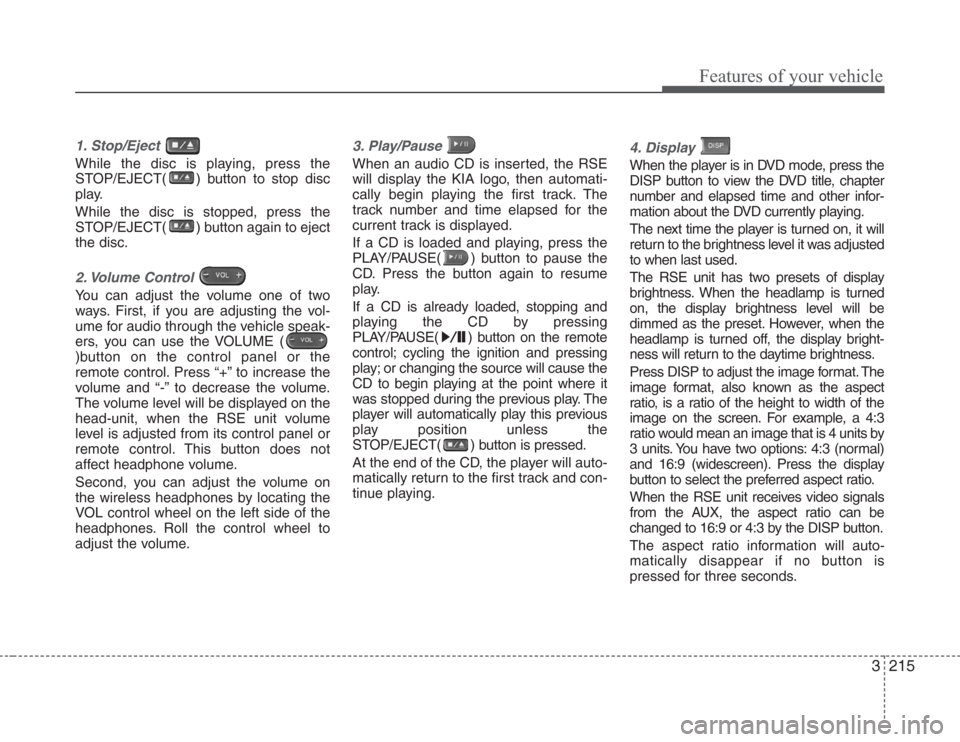
1. Stop/Eject
While the disc is playing, press the
STOP/EJECT( ) button to stop disc
play.
While the disc is stopped, press the
STOP/EJECT( ) button again to eject
the disc.
2. Volume Control
You can adjust the volume one of two
ways. First, if you are adjusting the vol-
ume for audio through the vehicle speak-
ers, you can use the VOLUME (
)button on the control panel or the
remote control. Press “+” to increase the
volume and “-” to decrease the volume.
The volume level will be displayed on the
head-unit, when the RSE unit volume
level is adjusted from its control panel or
remote control. This button does not
affect headphone volume.
Second, you can adjust the volume on
the wireless headphones by locating the
VOL control wheel on the left side of the
headphones. Roll the control wheel to
adjust the volume.
3. Play/Pause
When an audio CD is inserted, the RSE
will display the KIA logo, then automati-
cally begin playing the first track. The
track number and time elapsed for the
current track is displayed.
If a CD is loaded and playing, press the
PLAY/PAUSE( ) button to pause the
CD. Press the button again to resume
play.
If a CD is already loaded, stopping and
playing the CD by pressing
PLAY/PAUSE( ) button on the remote
control; cycling the ignition and pressing
play; or changing the source will cause the
CD to begin playing at the point where it
was stopped during the previous play. The
player will automatically play this previous
play position unless the
STOP/EJECT( ) button is pressed.
At the end of the CD, the player will auto-
matically return to the first track and con-
tinue playing.
4. Display
When the player is in DVD mode, press the
DISP button to view the DVD title, chapter
number and elapsed time and other infor-
mation about the DVD currently playing.
The next time the player is turned on, it will
return to the brightness level it was adjusted
to when last used.
The RSE unit has two presets of display
brightness. When the headlamp is turned
on, the display brightness level will be
dimmed as the preset. However, when the
headlamp is turned off, the display bright-
ness will return to the daytime brightness.
Press DISP to adjust the image format. The
image format, also known as the aspect
ratio, is a ratio of the height to width of the
image on the screen. For example, a 4:3
ratio would mean an image that is 4 units by
3 units. You have two options: 4:3 (normal)
and 16:9 (widescreen). Press the display
button to select the preferred aspect ratio.
When the RSE unit receives video signals
from the AUX, the aspect ratio can be
changed to 16:9 or 4:3 by the DISP button.
The aspect ratio information will auto-
matically disappear if no button is
pressed for three seconds.
Page 225 of 339
Features of your vehicle
216 3
5. Forward
There are two CD fast forward speeds.
Press and hold the FWD button for up to
2 seconds and the player will fast forward
at 3 times the normal speed. Hold the
button for more than 2 seconds and the
player will fast forward at about 10 times
the normal speed. When the holding but-
ton is released, the RSE unit will auto-
matically return to a play mode.
6. Reverse
There are two fast reverse speeds. The
RSE unit will fast reverse at 3 times the
normal speed, if the REV button is
pressed. Hold the button for more than 2
seconds and the RSE unit will fast
reverse at about 10 times the normal
speed. When the button is released, the
RSE unit will automatically return to a
play mode.
7 . Next Track
Press the NEXT button to skip to the
beginning of the next track. The next
track number is displayed on the screen.
Press and hold the NEXT button for 2
seconds or more to move quickly through
the tracks.
8 . Previous Track
Press the PREV button to skip to the
beginning of the current track.
Press the PREV button during the first 8
seconds of the current track to skip to the
beginning of the previous track.
Press the PREV button during the first 8
seconds of the first track to skip to the
beginning of the last track on the CD.
Press and hold the PREV button for 2
seconds or more to move quickly through
the tracks.
Page 227 of 339
Features of your vehicle
218 3
Using the Remote Control
In addition to having all the buttons and
functionality listed in the DVD and CD
Controls section, the remote control has
several other buttons that offer additional
functions. It is an infrared remote control,
and must be pointed at the face of the
RSE at a 45° angle for best results. It
requires a CR2025 battery (included).
The remote control has the following
additional buttons:
✽
NOTICE
The RSE system is always “awake”
when the vehicle's ignition is turned on
or when the vehicle is in “accessory
power mode.”
1. Stop
Pressing this button once will stop DVD
or CD play. To eject a disc, you must use
the eject button on the control panel.
2. Speaker Volume “+” and “-”
These buttons control the volume of the
audio of a DVD or CD through the vehicle
speakers, not the volume from head-
phones. Press “+” to turn the volume up
and “-” to turn the volume down.
3. Play/Pause
When an audio CD(VCD/DVD) is insert-
ed, the RSE will display the KIA logo,
then automatically begin playing the first
track. The track number and time elapsed
for the current track is displayed.
If a CD(VCD/DVD) is loaded and playing,
press the PLAY/PAUSE( ) button to
pause the CD(VCD/DVD). Press the but-
ton again to resume play.
If a CD(VCD/DVD) is already loaded, stop-
ping and playing the CD(VCD/ DVD) by
pressing PLAY/PAUSE( ) button on
the remote control; cycling the ignition and
pressing play; or changing the source will
cause the CD(VCD/DVD) to begin playing
at the point where it was stopped during
the previous play. The player will automati-
cally play this previous play position unless
the STOP/EJECT( ) button is pressed.
At the end of the CD(VCD/DVD), the
player will automatically return to the first
track and continue playing.
4. Display
When the player is in DVD mode, press the
DISP button to view the DVD title, chapter
number and elapsed time and other infor-
mation about the DVD currently playing.It will also display brightness. There are
“Day Time” brightness with brightest level
and “Night Time” brightness which has 70%
level of “Day Time” brightness. Adjust the
level of brightness by pressing the
REV(dimmer) or FWD(brighter) buttons.
The next time the player is turned on, it will
return to the brightness level it was adjusted
to when last used.
The RSE unit has two presets of display
brightness. When the headlamp is turned
on, the display brightness level will be
dimmed as the preset. However, when the
headlamp is turned off, the display bright-
ness will return to the daytime brightness.
Press DISP to adjust the image format. The
image format, also known as the aspect
ratio, is a ratio of the height to width of the
image on the screen. For example, a 4:3
ratio would mean an image that is 4 units by
3 units. You have two options: 4:3 (normal)
and 16:9 (widescreen). Press the display
button to select the preferred aspect ratio.
When the RSE unit receives video signals
from the AUX, the aspect ratio can be
changed to 16:9 or 4:3 by the DISP button.
The aspect ratio information will auto-
matically disappear if no button is
pressed for three seconds.
Page 230 of 339
3221
Features of your vehicle
15. Slow Play
There are 3 slow forward and 3 slow
reverse speeds available when viewing
DVDs. To review a DVD in slow motion,
first press the PLAY/PAUSE ( ) button
to pause the DVD, then press either REV
or FWD ((�W) or (�X) on the remote con-
trol) to select slow playback in either
reverse or forward.
Pressing either the REV or FWD ((�W) or
(�X) on the remote control) button once
changes the player to 1/8 of normal
speed. Press the button again to return to
pause mode.
Press and hold either button for more
than 2 seconds but less than 4 seconds
and the player will switch to 1/4 of the
normal speed. Hold either button for
more than 4 seconds and the player will
switch to 1/2 of the normal speed.From the remote control for DVD, you can
immediately switch to 1/8 forward or
backward speed with the (,) but-
tons. Press either button again to return
to normal play.
While using the Slow Play feature, the
current play speed is displayed on the
screen.
Press PLAY again to resume normal
play.
16. On/Off
This button will only turn off the DVD or
CD and display, not the system itself. The
system will remain on standby.
Page 241 of 339
49
Driving your vehicle
Moving up a steep grade from a
standing start
To move up a steep grade from a stand-
ing start, depress the brake pedal, shift
the shift lever to D (Drive). Select the
appropriate gear depending on load
weight and steepness of the grade, and
release the parking brake. Depress the
accelerator gradually while releasing the
service brakes.
When accelerating from a stop on a
steep hill, the vehicle may have a ten-
dency to roll backwards. Shifting the
shift lever into 2 (Second Gear) while
in Sports mode will help prevent the
vehicle from rolling backwards.
Shift lock system
For your safety, the automatic transaxle
has a shift lock system which prevents
shifting the transaxle out of P (Park)
unless the brake pedal is depressed.
To shift the transaxle out of P (Park):
1. Depress and hold the brake pedal.
2. Start the engine or turn the ignition to
the ON position.
3. Depress the lock release button and
move the shift lever.
If the brake pedal is repeatedly
depressed and released with the shift
lever in the P (Park) position, a chattering
noise near the shift lever may be heard.
This is a normal condition.
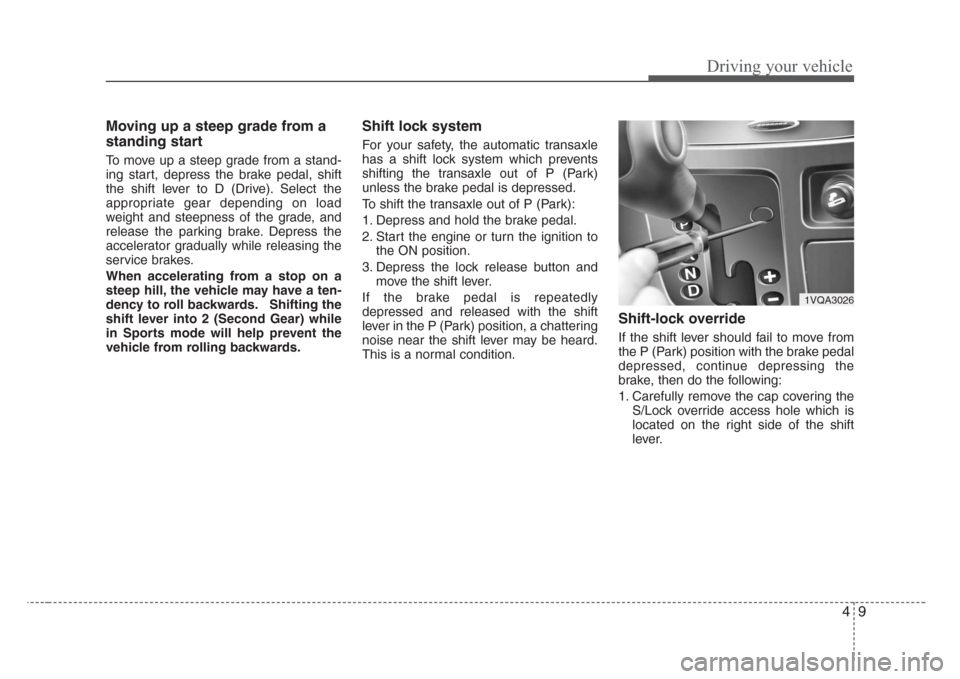
Shift-lock override
If the shift lever should fail to move from
the P (Park) position with the brake pedal
depressed, continue depressing the
brake, then do the following:
1. Carefully remove the cap covering the
S/Lock override access hole which is
located on the right side of the shift
lever.
1VQA3026