2008 KIA Sedona warning
[x] Cancel search: warningPage 221 of 339
Features of your vehicle
212 3
You have two options: 4:3 (normal) and 16:9
(widescreen). Press the display button to
select the preferred aspect ratio.
When the RSE unit receives video signals
from the AUX, the aspect ratio can be
changed to 16:9 or 4:3 by the DISP button.
The aspect ratio information will auto-
matically disappear if no button is
pressed for three seconds.
5. Forward
There are three DVD and VCD fast for-
ward speeds. Press and hold the FWD
button for up to 2 seconds and the player
will fast forward at 4 times the normal
speed (8 times for VCDs). Hold the but-
ton for more than 2 seconds but less than
4 seconds and the player will fast forward
at about 8 times the normal speed (20
times for VCDs). Hold the button for more
than 4 seconds and the fast forward will
increase to about 32 times the normal
speed for both DVDs and VCDs. Press
the FWD button again to stop fast for-
warding and return to normal speed play.
6. Reverse
There are three DVD and VCD fast
reverse speeds. Press and hold the REV
button for up to 2 seconds and the player
will reverse through the DVD at 4 times
the normal speed (8 times for VCDs).
Hold the button for more than 2 seconds
but less than 4 seconds and the player
will reverse at about 8 times the normal
speed (20 times for VCDs). Hold the but-
ton for more than 4 seconds and the
reverse will increase to 32 times the nor-
mal speed for both DVDs and VCDs.
Press the REV button again to stop
reversing and return to normal speed
play.
7 . Next Chapter
While a DVD is playing, press the NEXT
button to skip to the next chapter. The
current chapter number is shown on the
screen. Press and hold the NEXT button
to move quickly through the chapters.
✽
NOTICE
Depending on the DVD, if NEXT is
pressed during the last chapter on a
DVD, a red circle with a “Invalid
icon[�:
]” may be displayed, indicating
an invalid button press.
8 . Previous Chapter
Press the PREV button to skip to the
beginning of the previous chapter. Press
and hold the PREV button to move quick-
ly through the chapters.
Depending on your DVD, if the PREV
button is pressed during the first 8 sec-
onds of the first chapter, the player will
skip to the beginning of the last chapter
of the DVD.
9 . Enter
A momentary press shall initiate a select
or enter function of a selected menu
item.
10. Menu
DVDs may contain special programming
or features that are accessed by using the
menu. To use the menu with a DVD that is
playing, press the MENU button once to
display the DVD disc menu. Press the but-
ton a second time to exit the menu and
return to the DVD program.
The menu is not available during disc ini-
tialization, the beginning credits or any
copyright FBI warnings.
Page 228 of 339
3219
Features of your vehicle
5. Forward
There are three DVD and VCD fast for-
ward speeds. Press and hold the FWD
button for up to 2 seconds and the player
will fast forward at 4 times the normal
speed (8 times for VCDs). Hold the but-
ton for more than 2 seconds but less than
4 seconds and the player will fast forward
at about 8 times the normal speed (20
times for VCDs). Hold the button for more
than 4 seconds and the fast forward will
increase to about 32 times the normal
speed for both DVDs and VCDs. Press
the FWD button again to stop fast for-
warding and return to normal speed play.
6. Reverse
There are three DVD and VCD fast
reverse speeds. Press and hold the REV
button for up to 2 seconds and the player
will reverse through the DVD at 4 times
the normal speed (8 times for VCDs).
Hold the button for more than 2 seconds
but less than 4 seconds and the player
will reverse at about 8 times the normal
speed (20 times for VCDs). Hold the but-
ton for more than 4 seconds and the
reverse will increase to 32 times the nor-
mal speed for both DVDs and VCDs.
Press the REV button again to stop
reversing and return to normal speed
play.
7 .Next
While a DVD is playing, press the NEXT
button to skip to the next chapter. The
current chapter number is shown on the
screen. Press and hold the NEXT button
to move quickly through the chapters.
✽
NOTICE
Depending on the DVD, if NEXT is
pressed during the last chapter on a
DVD, a red circle with a “Invalid
icon[�:
]” may be displayed, indicating
an invalid button press.
8 . Previous
Press the PREV button to skip to the
beginning of the previous chapter. Press
and hold the PREV button to move quick-
ly through the chapters.
Depending on your DVD, if the PREV
button is pressed during the first 8 sec-
onds of the first chapter, the player will
skip to the beginning of the last chapter
of the DVD.
9 . Enter
A momentary press shall initiate a select
or enter function of a selected menu
item.
10. Menu
DVDs may contain special programming
or features that are accessed by using the
menu. To use the menu with a DVD that is
playing, press the MENU button once to
display the DVD disc menu. Press the but-
ton a second time to exit the menu and
return to the DVD program.
The menu is not available during disc ini-
tialization, the beginning credits or any
copyright FBI warnings.
When viewing a menu, pressing the
MENU button again will automatically
return to the movie at the point it was
being viewed. You can also select “play” or
any other option by using the NEXT,
PREV, FWD and REV buttons.
Press the NEXT button to move the cursor
up and the PREV button to move the cur-
sor down the menu.
Press the FWD button to move the cursor
to the right, and the REV button to move
the cursor to the left.
Page 234 of 339
Driving your vehicle
2 4
Before entering vehicle:
• Be sure that all windows, outside mir-
ror(s), and outside lights are clean.
• Check the condition of the tires.
• Check under the vehicle for any sign of
leaks.
• Be sure there are no obstacles behind
you if you intend to back up.
Necessary inspections
Fluid levels, such as engine oil, engine
coolant, brake fluid, and washer fluid
should be checked on a regular basis,
with the exact interval depending on the
fluid. Further details are provided in
Section 6, Maintenance.
Before starting
• Close and lock all doors.
• Position the seat so that all controls are
easily reached.
• Adjust the inside and outside rearview
mirrors.
• Be sure that all lights work.
• Check all gauges.
• Check the operation of warning lights
when the ignition switch is turned to
the ON position.
• Release the parking brake and make
sure the brake warning light goes out.
For safe operation, be sure you are famil-
iar with your vehicle and its equipment.
BEFORE DRIVING
WARNING- Driving under
the influence of alcohol or
drugs
Drinking and driving is dangerous.
Drunk driving is the number one
contributor to the highway death
toll each year. Even a small amount
of alcohol will affect your reflexes,
perceptions and judgement. Driving
while under the influence of drugs
is as dangerous or more dangerous
than driving drunk.
You are much more likely to have a
serious accident if you drink or take
drugs and drive.
If you are drinking or taking drugs,
don’t drive. Do not ride with a driv-
er who has been drinking or taking
drugs. Choose a designated driver
or call a cab.
Page 235 of 339
43
Driving your vehicle
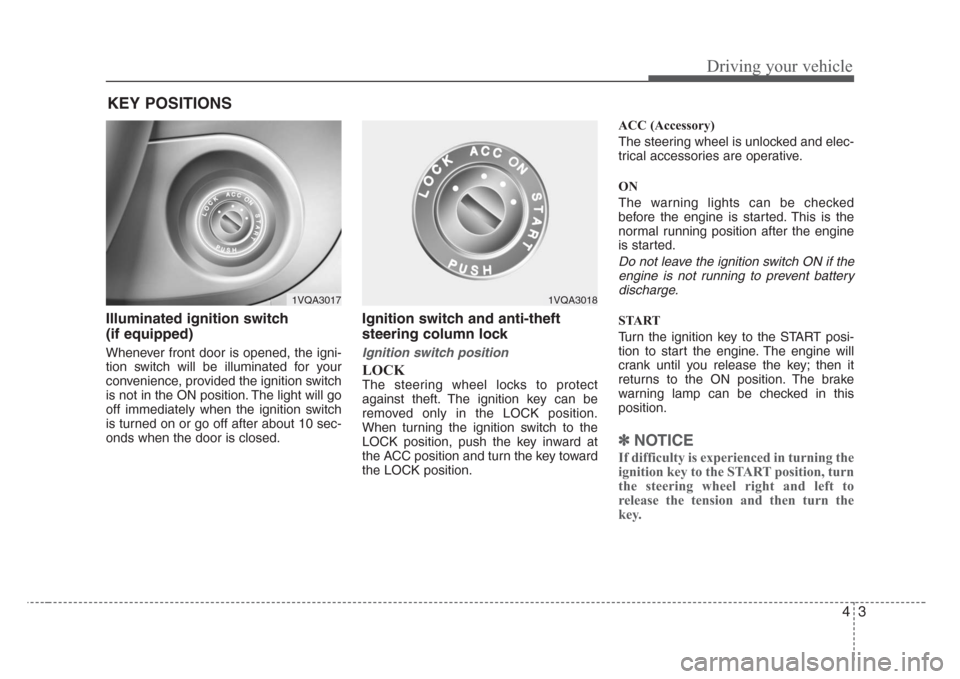
Illuminated ignition switch
(if equipped)
Whenever front door is opened, the igni-
tion switch will be illuminated for your
convenience, provided the ignition switch
is not in the ON position. The light will go
off immediately when the ignition switch
is turned on or go off after about 10 sec-
onds when the door is closed.
Ignition switch and anti-theft
steering column lock
Ignition switch position
LOCK
The steering wheel locks to protect
against theft. The ignition key can be
removed only in the LOCK position.
When turning the ignition switch to the
LOCK position, push the key inward at
the ACC position and turn the key toward
the LOCK position.ACC (Accessory)
The steering wheel is unlocked and elec-
trical accessories are operative.
ON
The warning lights can be checked
before the engine is started. This is the
normal running position after the engine
is started.
Do not leave the ignition switch ON if the
engine is not running to prevent battery
discharge.
START
Turn the ignition key to the START posi-
tion to start the engine. The engine will
crank until you release the key; then it
returns to the ON position. The brake
warning lamp can be checked in this
position.
✽
NOTICE
If difficulty is experienced in turning the
ignition key to the START position, turn
the steering wheel right and left to
release the tension and then turn the
key.
KEY POSITIONS
1VQA30171VQA3018
Page 236 of 339
Driving your vehicle
4 4
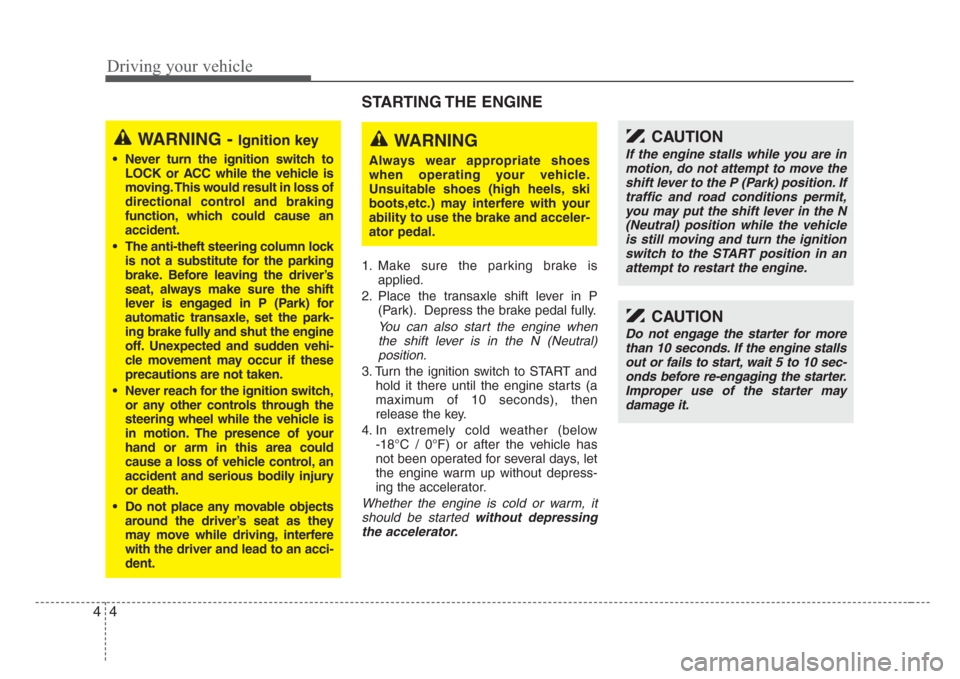
STARTING THE ENGINE
1. Make sure the parking brake is
applied.
2. Place the transaxle shift lever in P
(Park). Depress the brake pedal fully.
You can also start the engine when
the shift lever is in the N (Neutral)
position.
3. Turn the ignition switch to START and
hold it there until the engine starts (a
maximum of 10 seconds), then
release the key.
4. In extremely cold weather (below
-18°C / 0°F) or after the vehicle has
not been operated for several days, let
the engine warm up without depress-
ing the accelerator.
Whether the engine is cold or warm, it
should be started without depressing
the accelerator.
WARNING - Ignition key
• Never turn the ignition switch to
LOCK or ACC while the vehicle is
moving. This would result in loss of
directional control and braking
function, which could cause an
accident.
• The anti-theft steering column lock
is not a substitute for the parking
brake. Before leaving the driver’s
seat, always make sure the shift
lever is engaged in P (Park) for
automatic transaxle, set the park-
ing brake fully and shut the engine
off. Unexpected and sudden vehi-
cle movement may occur if these
precautions are not taken.
• Never reach for the ignition switch,
or any other controls through the
steering wheel while the vehicle is
in motion. The presence of your
hand or arm in this area could
cause a loss of vehicle control, an
accident and serious bodily injury
or death.
• Do not place any movable objects
around the driver’s seat as they
may move while driving, interfere
with the driver and lead to an acci-
dent.
CAUTION
If the engine stalls while you are in
motion, do not attempt to move the
shift lever to the P (Park) position. If
traffic and road conditions permit,
you may put the shift lever in the N
(Neutral) position while the vehicle
is still moving and turn the ignition
switch to the START position in an
attempt to restart the engine.
CAUTION
Do not engage the starter for more
than 10 seconds. If the engine stalls
out or fails to start, wait 5 to 10 sec-
onds before re-engaging the starter.
Improper use of the starter may
damage it.
WARNING
Always wear appropriate shoes
when operating your vehicle.
Unsuitable shoes (high heels, ski
boots,etc.) may interfere with your
ability to use the brake and acceler-
ator pedal.
Page 238 of 339
Driving your vehicle
6 4
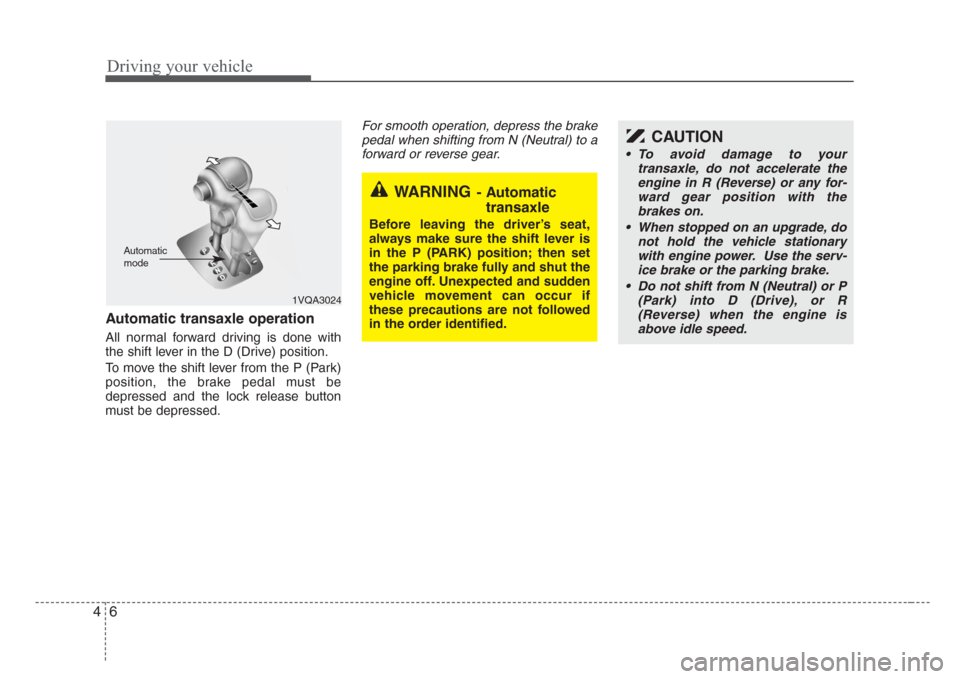
Automatic transaxle operation
All normal forward driving is done with
the shift lever in the D (Drive) position.
To move the shift lever from the P (Park)
position, the brake pedal must be
depressed and the lock release button
must be depressed.
For smooth operation, depress the brake
pedal when shifting from N (Neutral) to a
forward or reverse gear.
WARNING- Automatic
transaxle
Before leaving the driver’s seat,
always make sure the shift lever is
in the P (PARK) position; then set
the parking brake fully and shut the
engine off. Unexpected and sudden
vehicle movement can occur if
these precautions are not followed
in the order identified.
1VQA3024
Automatic
mode
CAUTION
• To avoid damage to your
transaxle, do not accelerate the
engine in R (Reverse) or any for-
ward gear position with the
brakes on.
• When stopped on an upgrade, do
not hold the vehicle stationary
with engine power. Use the serv-
ice brake or the parking brake.
• Do not shift from N (Neutral) or P
(Park) into D (Drive), or R
(Reverse) when the engine is
above idle speed.
Page 239 of 339
47
Driving your vehicle
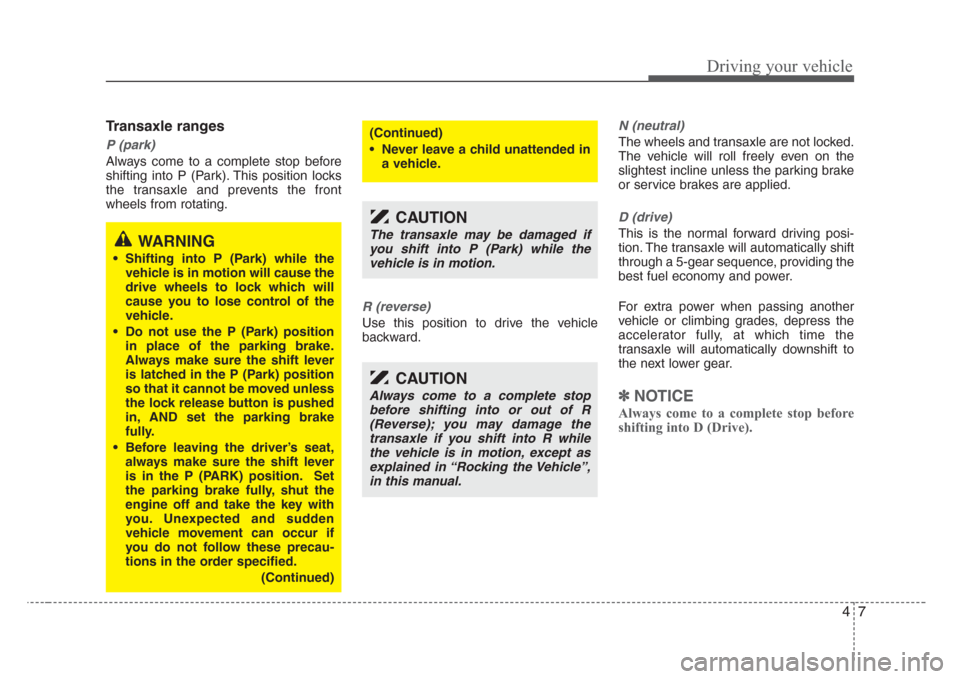
Transaxle ranges
P (park)
Always come to a complete stop before
shifting into P (Park). This position locks
the transaxle and prevents the front
wheels from rotating.
R (reverse)
Use this position to drive the vehicle
backward.
N (neutral)
The wheels and transaxle are not locked.
The vehicle will roll freely even on the
slightest incline unless the parking brake
or service brakes are applied.
D (drive)
This is the normal forward driving posi-
tion. The transaxle will automatically shift
through a 5-gear sequence, providing the
best fuel economy and power.
For extra power when passing another
vehicle or climbing grades, depress the
accelerator fully, at which time the
transaxle will automatically downshift to
the next lower gear.
✽
NOTICE
Always come to a complete stop before
shifting into D (Drive).
(Continued)
• Never leave a child unattended in
a vehicle.
CAUTION
The transaxle may be damaged if
you shift into P (Park) while the
vehicle is in motion.
CAUTION
Always come to a complete stop
before shifting into or out of R
(Reverse); you may damage the
transaxle if you shift into R while
the vehicle is in motion, except as
explained in “Rocking the Vehicle”,
in this manual.
WARNING
• Shifting into P (Park) while the
vehicle is in motion will cause the
drive wheels to lock which will
cause you to lose control of the
vehicle.
• Do not use the P (Park) position
in place of the parking brake.
Always make sure the shift lever
is latched in the P (Park) position
so that it cannot be moved unless
the lock release button is pushed
in, AND set the parking brake
fully.
• Before leaving the driver’s seat,
always make sure the shift lever
is in the P (PARK) position. Set
the parking brake fully, shut the
engine off and take the key with
you. Unexpected and sudden
vehicle movement can occur if
you do not follow these precau-
tions in the order specified.
(Continued)
Page 243 of 339
411
Driving your vehicle
The cruise control system allows you to
program the vehicle to maintain a con-
stant speed without resting your foot on
the accelerator pedal.
This system is designed to function
above approximately 40 km/h (24 mph).
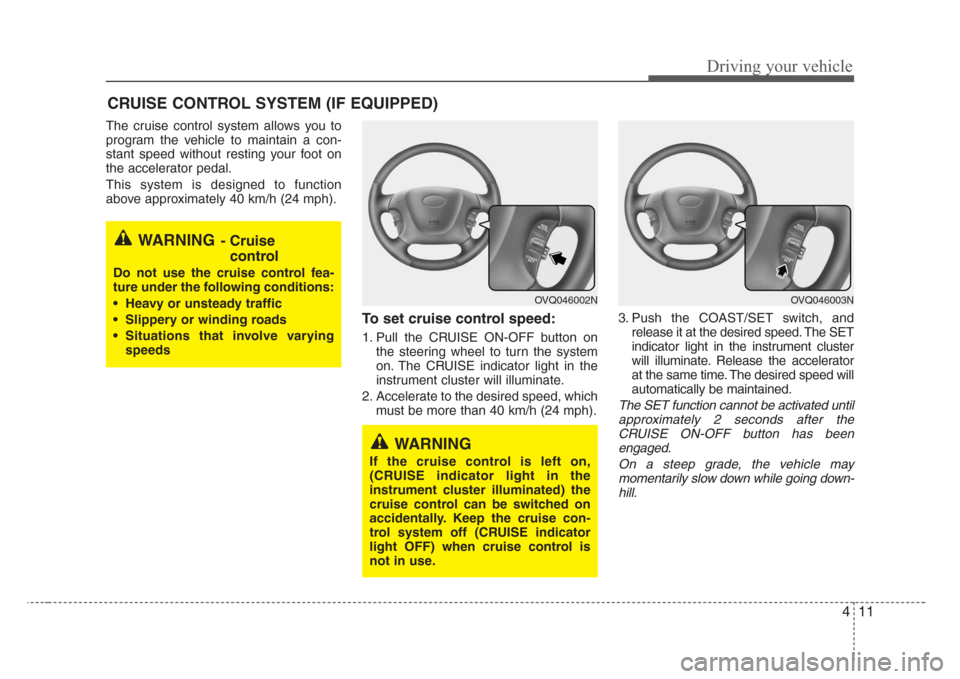
To set cruise control speed:
1. Pull the CRUISE ON-OFF button on
the steering wheel to turn the system
on. The CRUISE indicator light in the
instrument cluster will illuminate.
2. Accelerate to the desired speed, which
must be more than 40 km/h (24 mph).3. Push the COAST/SET switch, and
release it at the desired speed. The SET
indicator light in the instrument cluster
will illuminate. Release the accelerator
at the same time. The desired speed will
automatically be maintained.
The SET function cannot be activated until
approximately 2 seconds after the
CRUISE ON-OFF button has been
engaged.
On a steep grade, the vehicle may
momentarily slow down while going down-
hill.
CRUISE CONTROL SYSTEM (IF EQUIPPED)
WARNING- Cruise
control
Do not use the cruise control fea-
ture under the following conditions:
• Heavy or unsteady traffic
• Slippery or winding roads
• Situations that involve varying
speeds
WARNING
If the cruise control is left on,
(CRUISE indicator light in the
instrument cluster illuminated) the
cruise control can be switched on
accidentally. Keep the cruise con-
trol system off (CRUISE indicator
light OFF) when cruise control is
not in use.
OVQ046003NOVQ046002N