Page 149 of 283

Driving your vehicle
184
Tilt steering (if equipped)
A tilt steering wheel allows you to adjust
the steering wheel before you drive.You
can also raise it to the highest level to
give your legs more room when you exit
and enter the vehicle.
The steering wheel should be positioned
so that it is comfortable for you to drive,
while permitting you to see the instru-
ment panel warning lights and gauges.
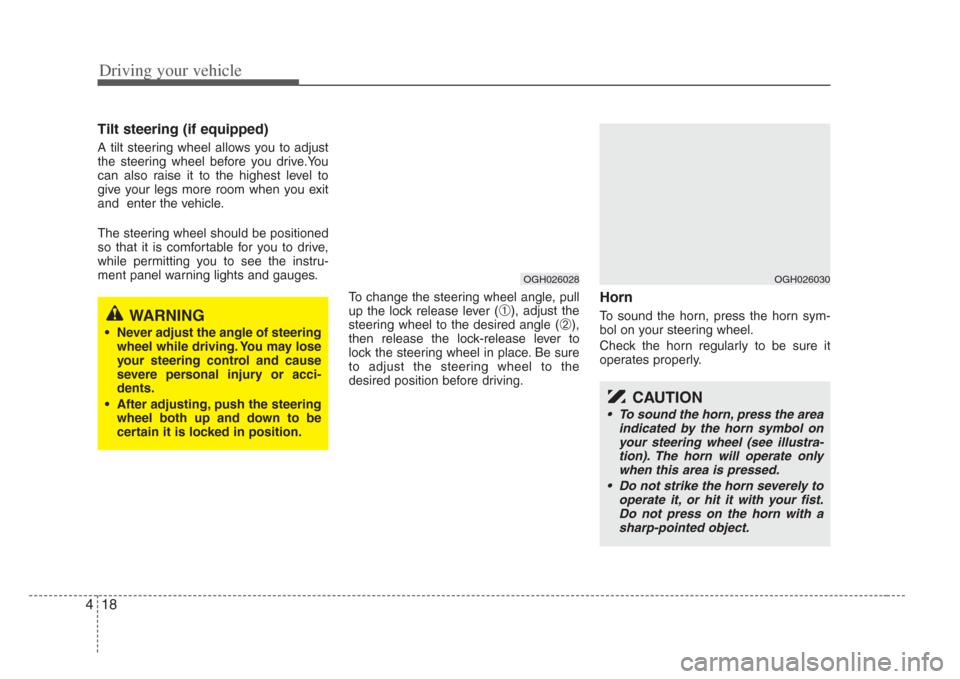
To change the steering wheel angle, pull
up the lock release lever (
➀), adjust the
steering wheel to the desired angle (
➁),
then release the lock-release lever to
lock the steering wheel in place. Be sure
to adjust the steering wheel to the
desired position before driving.
Horn
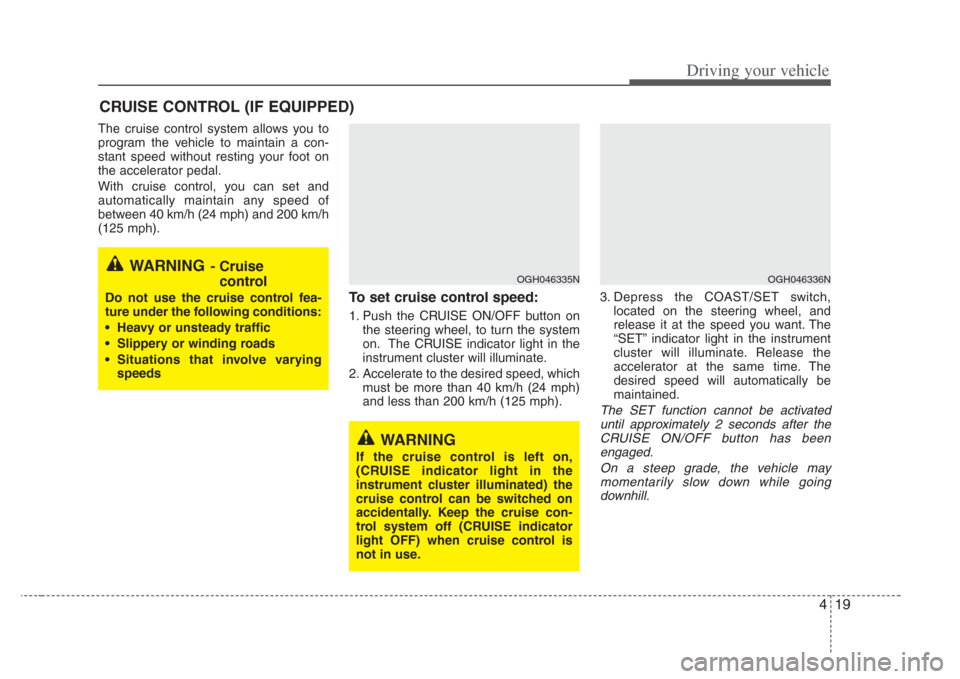
To sound the horn, press the horn sym-
bol on your steering wheel.
Check the horn regularly to be sure it
operates properly.WARNING
• Never adjust the angle of steering wheel while driving. You may lo se
your steering control and cause
severe per sonal injury or acci-
dents.
• After adjusting, push the steering wheel both up and down to be
certain it is locked in po sition.
OGH026028OGH026030
CAUTION
•To sound the horn, press the area
indicated by the horn symbol on
your steering wheel (see illustra-
tion). The horn will operate only when this area is pressed.
• Do not strike the horn severely to
operate it, or hit it with your fist. Do not press on the horn with asharp-pointed object.
Page 150 of 283

419
Driving your vehicle
The cruise control system allows you to
program the vehicle to maintain a con-
stant speed without resting your foot on
the accelerator pedal.
With cruise control, you can set and
automatically maintain any speed of
between 40 km/h (24 mph) and 200 km/h
(125 mph).
To set cruise control speed:
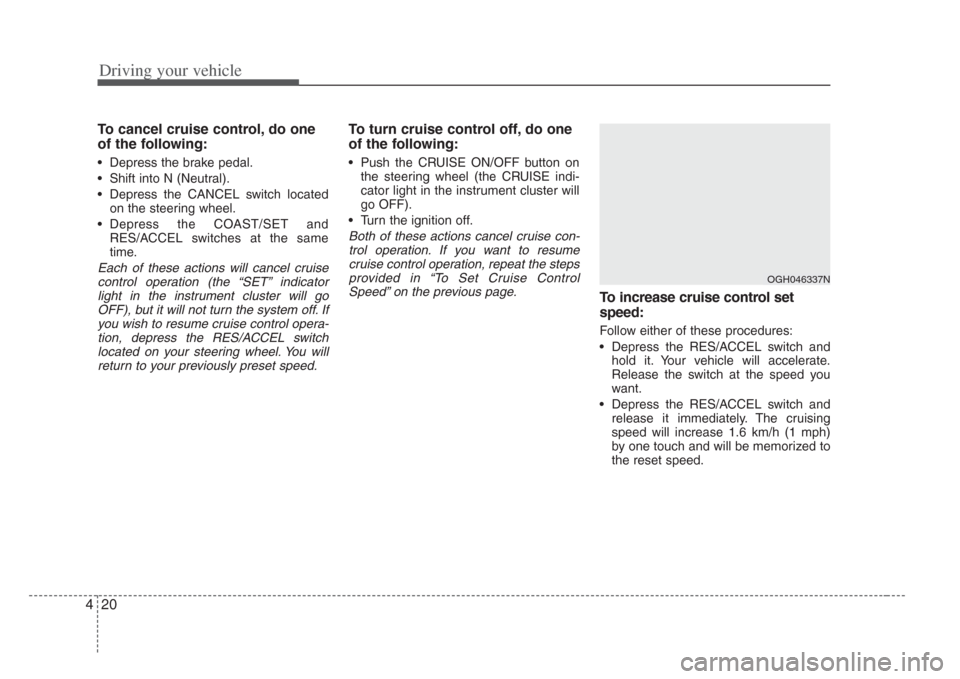
1. Push the CRUISE ON/OFF button on
the steering wheel, to turn the system
on. The CRUISE indicator light in the
instrument cluster will illuminate.
2. Accelerate to the desired speed, which must be more than 40 km/h (24 mph)
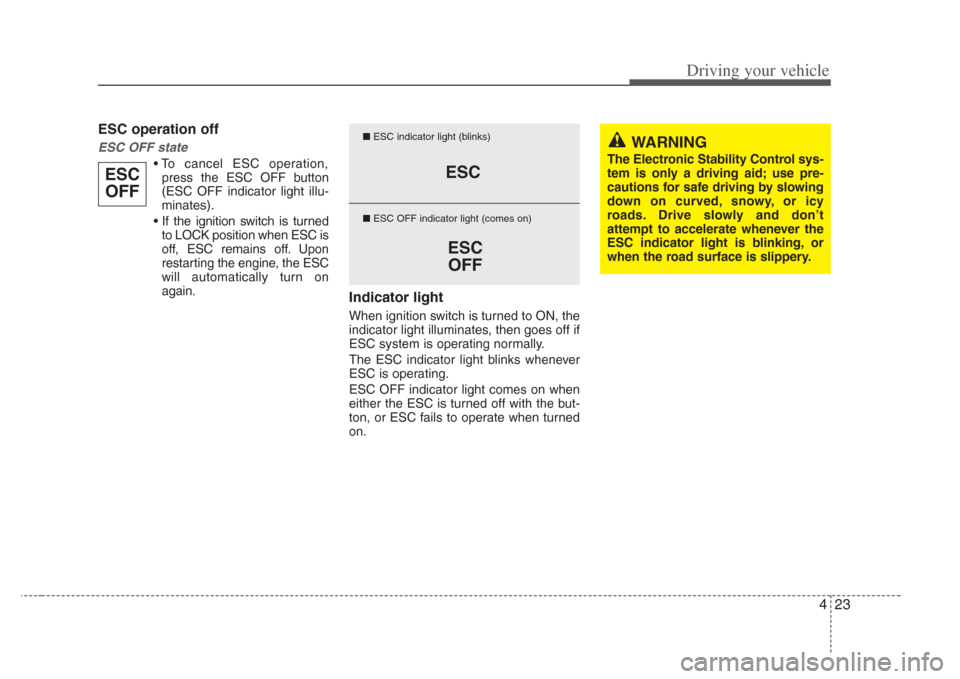
and less than 200 km/h (125 mph). 3. Depress the COAST/SET switch,
located on the steering wheel, and
release it at the speed you want. The
“SET” indicator light in the instrument
cluster will illuminate. Release the
accelerator at the same time. The
desired speed will automatically be
maintained.
The SET function cannot be activateduntil approximately 2 seconds after theCRUISE ON/OFF button has been engaged.
On a steep grade, the vehicle maymomentarily slow down while goingdownhill.
CRUISE CONTROL (IF EQUIPPED)
WARNING- Cruise control
Do not use the cruise control fea-
ture under the following condition s:
• Heavy or unsteady traffic
• Slippery or winding road s
• Situations that involve varying
speeds
WARNING
If the cruis e control is left on,
(CRUISE indicator light in the
instrument cluster illuminated) the
cruise control can be switched on
accidentally. Keep the cruise con-
trol system off (CRUISE indicator
light OFF) when crui se control is
not in use.
OGH046335NOGH046336N
Page 151 of 283

Driving your vehicle
204
To cancel cruise control, do one
of the following:
• Depress the brake pedal.
• Shift into N (Neutral).
• Depress the CANCEL switch locatedon the steering wheel.
• Depress the COAST/SET and RES/ACCEL switches at the same
time.
Each of these actions will cancel cruisecontrol operation (the “SET” indicator light in the instrument cluster will goOFF), but it will not turn the system off. Ifyou wish to resume cruise control opera-tion, depress the RES/ACCEL switch located on your steering wheel. You willreturn to your previously preset speed.
To turn crui se control off, do one
of the following:
• Push the CRUISE ON/OFF button on
the steering wheel (the CRUISE indi-
cator light in the instrument cluster will
go OFF).
• Turn the ignition off.
Both of these actions cancel cruise con- trol operation. If you want to resumecruise control operation, repeat the stepsprovided in “To Set Cruise ControlSpeed” on the previous page.
To increas e cruise control s et
s peed:
Follow either of these procedures:
• Depress the RES/ACCEL switch and
hold it. Your vehicle will accelerate.
Release the switch at the speed you
want.
• Depress the RES/ACCEL switch and release it immediately. The cruising
speed will increase 1.6 km/h (1 mph)
by one touch and will be memorized to
the reset speed.
OGH046337N
Page 153 of 283

Driving your vehicle
224
The Electronic Stability Control (ESC)
monitors information from various vehicle
sensors and then compares the driver's
commands with the actual behavior of
the vehicle. If an unstable condition is
created by the driver - a sudden evasive
movement for example - ESC intervenes
within fractions of a second via the
engine computer and brake system and
attempts to stabilize the vehicle.
ESC operation
ESC ON condition
• When the ignition is turnedON, ESC and ESC OFF indi-
cator lights illuminate for
approximately 3 seconds,
then ESC is turned on.
• Press the ESC OFF button to turn ESC off. (ESC OFF indi-
cator will illuminate). To turn
the ESC on, press the ESC
OFF button (ESC OFF indica-
tor light will go off).
• When starting the engine, you may hear a slight ticking
sound. This is the ESC per-
forming an automatic system
self-check and does not indi-
cate a problem.
When operating
When the ESC is in operation,
ESC indicator light blinks.
• When the Electronic StabilityControl is operating properly,
you can feel a slight pulsation
in the vehicle. This is only the
effect of brake control and
indicates nothing unusual.
• When moving out of the mud or slippery road, pressing the
accelerator pedal may not
cause the engine rpm (revo-
lutions per minute) to
increase.
ELECTRONIC STABILITY CONTROL (IF EQUIPPED)
-ESC
OGH036003N
Page 154 of 283

423
Driving your vehicle
ESC operation off
ESC OFF state
• To cancel ESC operation,press the ESC OFF button
(ESC OFF indicator light illu-
minates).
• If the ignition switch is turned to LOCK position when ESC is
off, ESC remains off. Upon
restarting the engine, the ESC
will automatically turn on
again.
Indicator light
When ignition switch is turned to ON, the
indicator light illuminates, then goes off if
ESC system is operating normally.
The ESC indicator light blinks whenever
ESC is operating.
ESC OFF indicator light comes on when
either the ESC is turned off with the but-
ton, or ESC fails to operate when turned
on.
ESCOFFESC
ESCOFF
■ ESC indicator light (blinks)
■ ESC OFF indicator light (comes on)WARNING
The Electronic Stability Control s ys-
tem is only a driving aid; us e pre-
cautions for safe driving by s lowing
down on curved, snowy, or icy
roads . Drive slowly and don’t
attempt to accelerate whenever the
ESC indicator light is blinking, or
when the road s urface is s lippery.
Page 155 of 283
Driving your vehicle
244
ESC OFF usage
When driving
• It’s a good idea to keep the ESC turnedon for daily driving whenever possible.
• To turn ESC off while driving, press the ESC OFF button while driving on a flat
road surface.
Never press ESC OFF button while ESC
is operating (ESC indicator light blinks).
If ESC is turned off while ESC is operat-
ing, the vehicle may slip out of control.
✽ NOTICE
When measuring the vehicle speed
with a Chassis dynamo-meter, make
sure the ESC is turned off (ESC OFF
light illuminated). If the ESC is left
on, it may prevent the vehicle speed
from increasing, and cause a false
diagnosis of a faulty speedometer.
Turning the ESC off does not affect ABS or brake system operation. WARNING
Never press the ESC OFF button
while ESC is operating.
If the ESC is turned off while ESC is
operating, the vehicle may slip out
of control.
To turn ESC off while driving, pre ss
the ESC OFF button while driving
on a flat road surface.
Page 156 of 283
425
Driving your vehicle
INSTRUMENT CLUSTER
OGH027034C
1. Tachometer
2. Turn signal indicators
3. Speedometer
4. Engine temperature gauge
5. Warning and indicator lights
6. Odometer / Tripmeter
7. Shift position indicator
8. Fuel gauge
Page 157 of 283

Driving your vehicle
264
Speedometer
The speedometer indicates the forward
speed of the vehicle.
Odometer/Tripmeter
You can choose the odometer, tripmeter
A and tripmeter B by pressing the trip-
meter mode button (TRIP A/B).
Odometer
The odometer indicates the total dis-
tance the vehicle has been driven.
Tripmeter
TRIP A: Tripmeter A
TRIP B: Tripmeter B
The tripmeter indicates the distance of
individual trips selected by the driver.
Tripmeter A and B can be reset to 0 by
pressing the RESET button for 1 second
or more, and then releasing.
Tachometer
The tachometer indicates the approxi-
mate number of engine revolutions per
minute (rpm).
Use the tachometer to select the correct
shift points and to prevent lugging and/or
over-revving the engine.
The tachometer pointer may move slight-
ly when the ignition switch is in ACC or
ON position with the engine OFF. This
movement is normal and will not affect
the accuracy of the tachometer once the
engine is running.
Engine temperature gauge
This gauge shows the temperature of the
engine coolant when the ignition switch
is ON.
Do not continue driving with an overheat-
ed engine. If your vehicle overheats, refer
to “Overheating” in the Index.
GAUGES
CAUTION
Do not operate the engine withinthe tachometer's RED ZONE.
This may cause severe engine dam-
age.
CAUTION
If the gauge pointer move s beyond
the normal range area toward the “H” position, it indicates overheat- ing that may damage the engine.