Page 336 of 490

In addition, the ªTire Pressure Monitoring Telltale Lightº
will turn OFF and the graphic in the EVIC will display a
new pressure value instead of dashes (- -), as long as no
tire pressure is below the low-pressure warning limit in
any of the four active road tires. The vehicle may need to
be driven for up to 10 minutes above 15 mph (24 km/h)
in order for the TPMS to receive this information.
General Information
This device complies with part 15 of the FCC rules and
RSS 210 of Industry Canada. Operation is subject to the
following conditions:
²This device may not cause harmful interference.
²This device must accept any interference received,
including interference that may cause undesired op-
eration.The tire pressure sensors are covered under one of the
following licenses:
United States.....................KR5S120123
Canada........................2671-S120123
FUEL REQUIREMENTS
3.7/4.7L Engines (If Equipped)
All engines (except 5.7L engines) are de-
signed to meet all emissions regulations
and provide excellent fuel economy and
performance when using high quality un-
leaded ªregularº gasoline having an oc-
tane rating of 87. The use of premium
gasoline is not recommended. Under normal conditions,
the use of premium gasoline will not provide a benefit
over high quality regular gasolines, and in some circum-
stances may result in poorer performance.
336 STARTING AND OPERATING
Page 349 of 490

tongue weight, and cargo. The label also specifies maxi-
mum capacities of front and rear axle systems (GAWR).
Total load must be limited, so GVWR, and front and rear
GAWR are not exceeded.
Payload
The payload of a vehicle is defined as the allowable load
weight a truck can carry, including the weight of the
driver, all passengers, options and cargo.
Gross Axle Weight Rating (GAWR)
The GAWR is the maximum permissible load on the front
and rear axles. The load must be distributed in the cargo
area so that the GAWR of each axle is not exceeded.
Each axle GAWR is determined by the components in the
system with the lowest load carrying capacity (axle,
springs, tires, or wheels). Heavier axles or suspension
components sometimes specified by purchasers for in-
creased durability does not necessarily increase the vehi-
cle's GVWR.
Tire Size
The tire size on the Label represents the actual tire size on
your vehicle. Replacement tires must be equal to the load
capacity of this tire size.
Rim Size
This is the rim size that is appropriate for the tire size
listed.
Inflation Pressure
This is the cold tire inflation pressure for your vehicle for
all loading conditions up to full GAWR.
Curb Weight
The curb weight of a vehicle is defined as the total weight
of the vehicle with all fluids, including vehicle fuel, at full
capacity conditions, and with no occupants or cargo
loaded into the vehicle. The front and rear curb weight
values are determined by weighing your vehicle on a
commercial scale before any occupants or cargo are
added.
STARTING AND OPERATING 349
5
Page 359 of 490

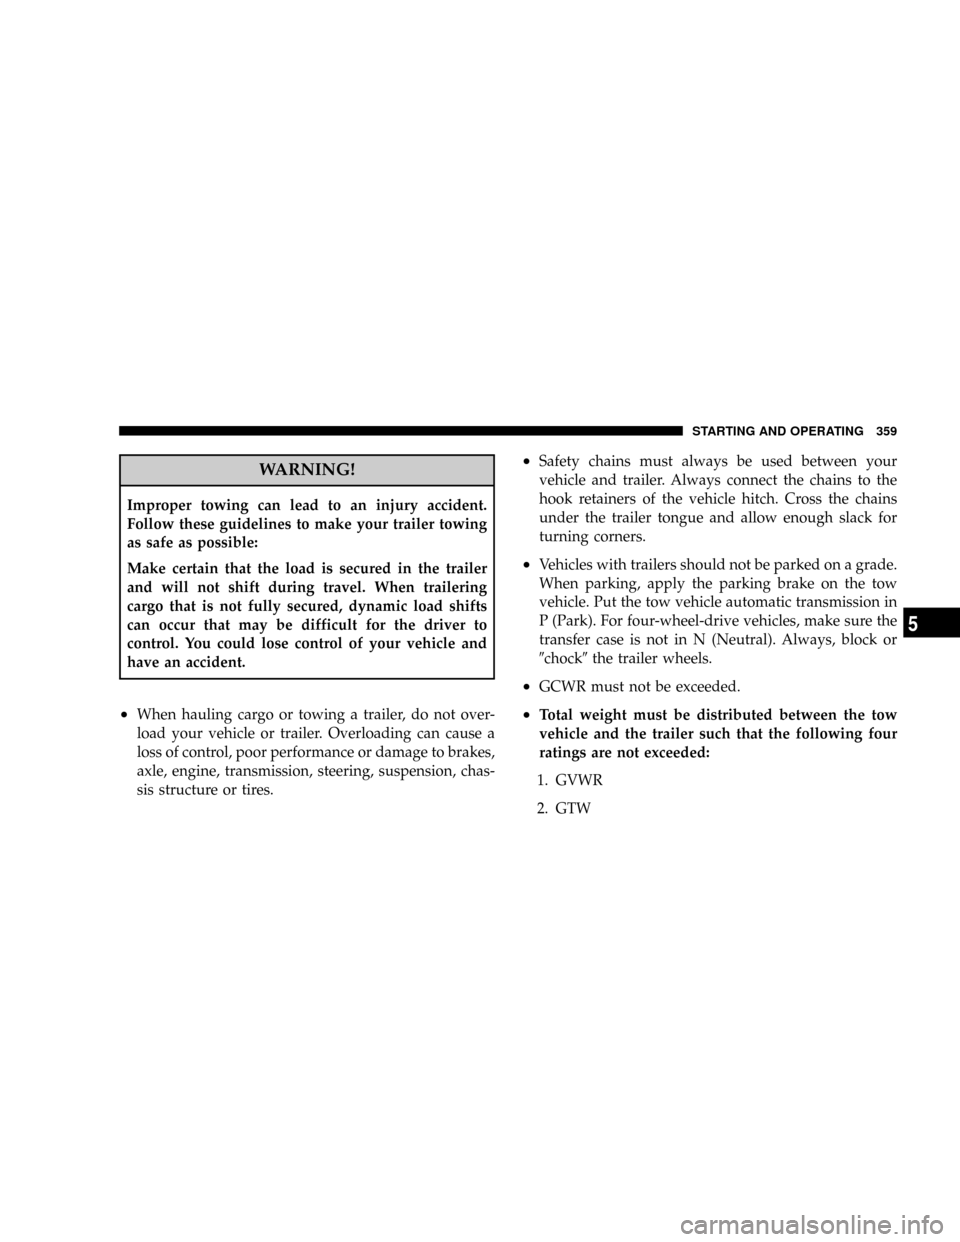
WARNING!
Improper towing can lead to an injury accident.
Follow these guidelines to make your trailer towing
as safe as possible:
Make certain that the load is secured in the trailer
and will not shift during travel. When trailering
cargo that is not fully secured, dynamic load shifts
can occur that may be difficult for the driver to
control. You could lose control of your vehicle and
have an accident.
²When hauling cargo or towing a trailer, do not over-
load your vehicle or trailer. Overloading can cause a
loss of control, poor performance or damage to brakes,
axle, engine, transmission, steering, suspension, chas-
sis structure or tires.
²Safety chains must always be used between your
vehicle and trailer. Always connect the chains to the
hook retainers of the vehicle hitch. Cross the chains
under the trailer tongue and allow enough slack for
turning corners.
²Vehicles with trailers should not be parked on a grade.
When parking, apply the parking brake on the tow
vehicle. Put the tow vehicle automatic transmission in
P (Park). For four-wheel-drive vehicles, make sure the
transfer case is not in N (Neutral). Always, block or
9chock9the trailer wheels.
²GCWR must not be exceeded.
²Total weight must be distributed between the tow
vehicle and the trailer such that the following four
ratings are not exceeded:
1. GVWR
2. GTW
STARTING AND OPERATING 359
5
Page 360 of 490

3. GAWR
4. Tongue weight rating for the trailer hitch utilized
(This requirement may limit the ability to always
achieve the 10% to 15% range of tongue weight as a
percentage of total trailer weight).
Towing Requirements Ð Tires
þ
Do not attempt to tow a trailer while using a compact
spare tire.
þProper tire inflation pressures are essential to the safe
and satisfactory operation of your vehicle. Refer to the
ªTires±General Informationº section of this manual for
proper tire inflation procedures.
þAlso, check the trailer tires for proper tire inflation
pressures before trailer usage.
þCheck for signs of tire wear or visible tire damage
before towing a trailer. Refer to the ªTires±General
Informationº section of this manual for the proper
inspection procedure.
þWhen replacing tires, refer to the ªTires±General Infor-
mationº section of this manual for proper tire replace-
ment procedures. Replacing tires with a higher load
carrying capacity will not increase the vehicle's GVWR
and GAWR limits.
Towing Requirements Ð Trailer Brakes
þ
Donotinterconnect the hydraulic brake system or
vacuum system of your vehicle with that of the trailer.
This could cause inadequate braking and possible
personal injury.
360 STARTING AND OPERATING
Page 372 of 490
JACKING AND TIRE CHANGING
WARNING!
²Getting under a jacked-up vehicle is dangerous.
The vehicle could slip off the jack and fall on you.
You could be crushed. Never get any part of your
body under a vehicle that is on a jack. If you need
to get under a raised vehicle, take it to a service
center where it can be raised on a lift.
²The jack is designed to use as a tool for changing
tires only. The jack should not be used to lift the
vehicle for service purposes. The vehicle should
be jacked on a firm level surface only. Avoid ice or
slippery areas.
Jack Location
The scissor-type jack and tire changing tools are located
in the passenger side compartment behind the second
row seat.
Jack Storage Location
372 WHAT TO DO IN EMERGENCIES
Page 420 of 490

CAUTION!
Be aware that if the fluid temperature is below 50ÉF
(10ÉC) it may not register on the dipstick. Do not add
fluid until the temperature is elevated enough to
produce an accurate reading.
7. Check for leaks. Release parking brake.
To prevent dirt and water from entering the transmission
after checking or replenishing fluid, make certain that the
dipstick cap is properly reseated. It is normal for the
dipstick cap to spring back slightly from its fully seated
position, as long as its seal remains engaged in the
dipstick tube.
Maintenance After Off-Road Driving
After extended operation in mud, sand or water, or
similar dirty conditions, have your brake discs, brake
linings, and axle joints inspected and cleaned as soon as
possible. This will prevent any abrasive material from
causing excessive wear or unpredictable braking action.
After driving off-road, completely inspect the underbody
of your vehicle. Check tires, body structure, steering,
suspension and exhaust system for damage. Check
threaded fasteners for looseness, particularly on the
chassis, drivetrain components, steering and suspension.
Retighten, if required, to torque values specified in the
Service Manual. Also check for accumulations of vegeta-
tion or brush that could become a fire hazard, or conceal
damage to fuel lines, brake hoses, axle pinion seals, and
propeller shafts.
420 MAINTAINING YOUR VEHICLE
Page 447 of 490

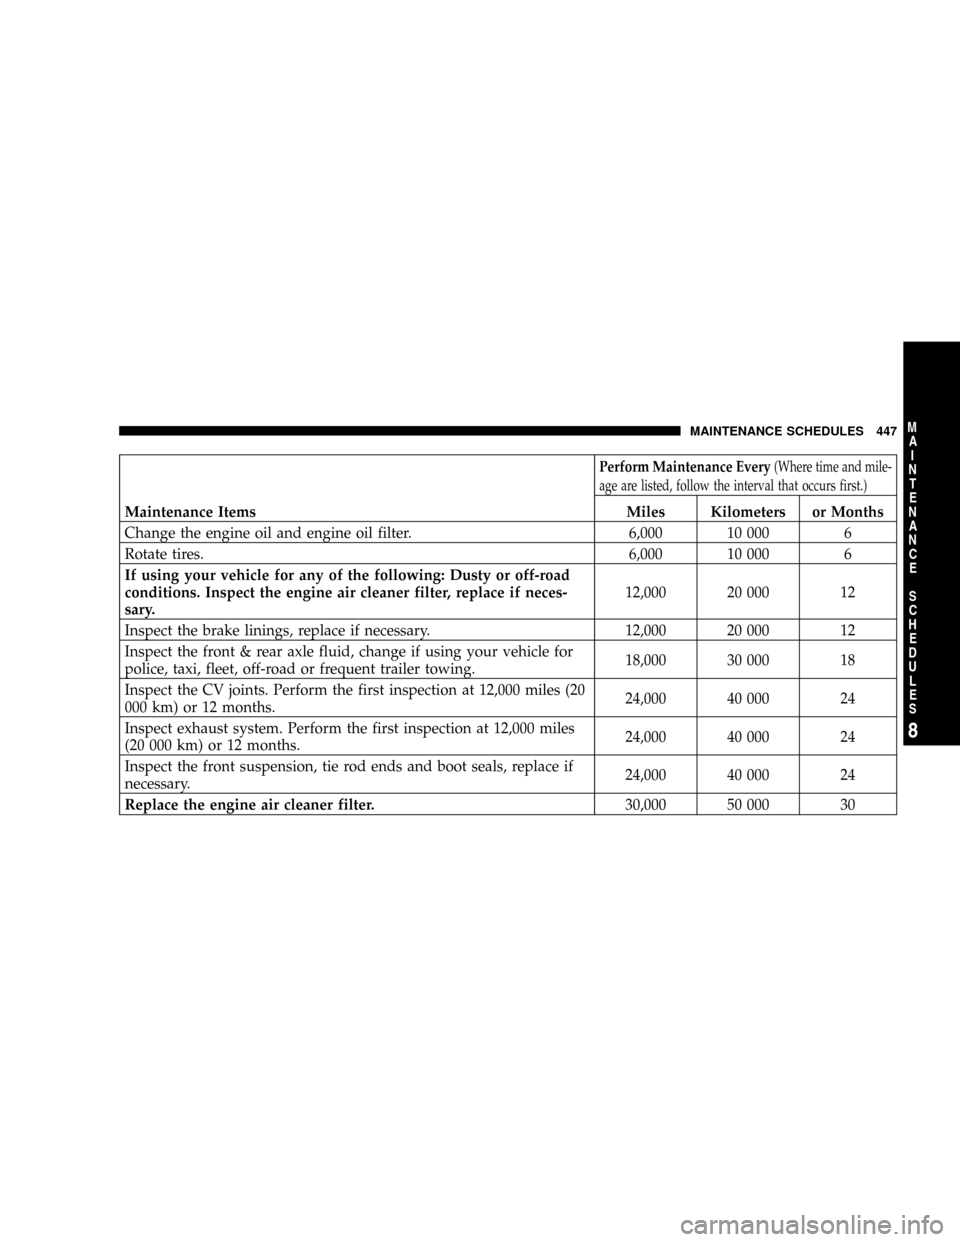
Perform Maintenance Every(Where time and mile-
age are listed, follow the interval that occurs first.)
Maintenance Items Miles Kilometers or Months
Change the engine oil and engine oil filter. 6,000 10 000 6
Rotate tires. 6,000 10 000 6
If using your vehicle for any of the following: Dusty or off-road
conditions. Inspect the engine air cleaner filter, replace if neces-
sary.12,000 20 000 12
Inspect the brake linings, replace if necessary. 12,000 20 000 12
Inspect the front & rear axle fluid, change if using your vehicle for
police, taxi, fleet, off-road or frequent trailer towing.18,000 30 000 18
Inspect the CV joints. Perform the first inspection at 12,000 miles (20
000 km) or 12 months.24,000 40 000 24
Inspect exhaust system. Perform the first inspection at 12,000 miles
(20 000 km) or 12 months.24,000 40 000 24
Inspect the front suspension, tie rod ends and boot seals, replace if
necessary.24,000 40 000 24
Replace the engine air cleaner filter.30,000 50 000 30
MAINTENANCE SCHEDULES 447
8
M
A
I
N
T
E
N
A
N
C
E
S
C
H
E
D
U
L
E
S
Page 453 of 490
Miles 6,250 12,500 18,750 25,000 31,250
(Kilometers) (10 000) (20 000) (30 000) (40 000) (50 000)
Change the engine oil and engine oil filter. X X X X X
Rotate the tires. X X X
Check spare tire for proper pressure and correct
stowage.X X XXX
Inspect the engine air filter element. Replace as
necessary.XXX
Replace the engine air filter element.XX
Replace the fuel filter/water separator unit. X
Inspect the brake linings. X X
Drain the transfer case and refill.X
Drain and refill the front and rear axles. X X
SCHEDULE ªBº Ð DIESEL ENGINE 453
8
M
A
I
N
T
E
N
A
N
C
E
S
C
H
E
D
U
L
E
S