Page 2707 of 4083

MWI-62
< ECU DIAGNOSIS >
COMBINATION METER
DTC Index
INFOID:0000000001691312
Function Specifications
Speedometer
Zero indication.
Tachometer
Fuel gauge
Engine coolant temperature gauge
Engine oil pressure gauge
Voltage gauge
A/T oil temperature gauge
Illumination control
Meter illumination Change to nighttime mode when communication is lost.
Segment LCD Odometer
Freeze current indication.
A/T position Display turns off.
Buzzer Buzzer turns off.
Warning lamp/indicator lamp ABS warning lamp
Lamp turns on when communication is lost.
Brake warning lamp
VDC OFF indicator lamp
SLIP indicator lamp
A/T CHECK warning lamp
Lamp turns off when communication is lost.
Oil pressure/coolant temperature
warning lamp
Light indicator
Malfunction indicator lamp
Master warning lamp
Air bag warning lamp
High beam indicator
Turn signal indicator lamp
CRUISE indicator lamp
Driver and passenger seat belt warn-
ing lamp
Lamp turns off when disconnected.
Charge warning lamp
Security indicator lamp
4WD indicator lamp
AT P i n d i c a t o r l a m p
CK SUSP warning lamp
Low tire pressure warning lamp
Lamp will flash every second for 1 minute and then stay on con-
tinuously thereafter.
CONSULT-III display
MalfunctionReference
page
CAN COMM CIRC
[U1000] Malfunction is detected in CAN communication.
CAUTION:
Even when there is no malfunction on CAN communication system, malfunction may be
misinterpreted when battery has low voltage (when maintaining 7 - 8 V for about 2 sec-
onds) or 10A fuse [No. 19, located in
the fuse block (J/B)] is disconnected. MWI-28
VEHICLE SPEED
CIRC
[B2205]Malfunction is detected when an erroneous speed signal is input.
CAUTION:
Even when there is no malfunction on speed signal system, malfunction may be misin-
terpreted when battery has lo
w voltage (when maintaining 7 - 8 V for about 2 seconds). MWI-29
Revision: March 2010
2008 QX56
Page 2708 of 4083
MWI
COMBINATION METERMWI-63
< ECU DIAGNOSIS >
C
DE
F
G H
I
J
K L
M B A
O P
NOTE:
“TIME” indicates the following.
• 0: Indicates that a malfunction is detected at present.
• 1-63: Indicates that a malfunction was detected in the past. (Displays number of ignition switch OFF → ON
cycles after malfunction is detected. Self-di agnosis result is erased when “63” is exceeded.)
Revision: March 2010 2008 QX56
Page 2715 of 4083

MWI-70
< SYMPTOM DIAGNOSIS >
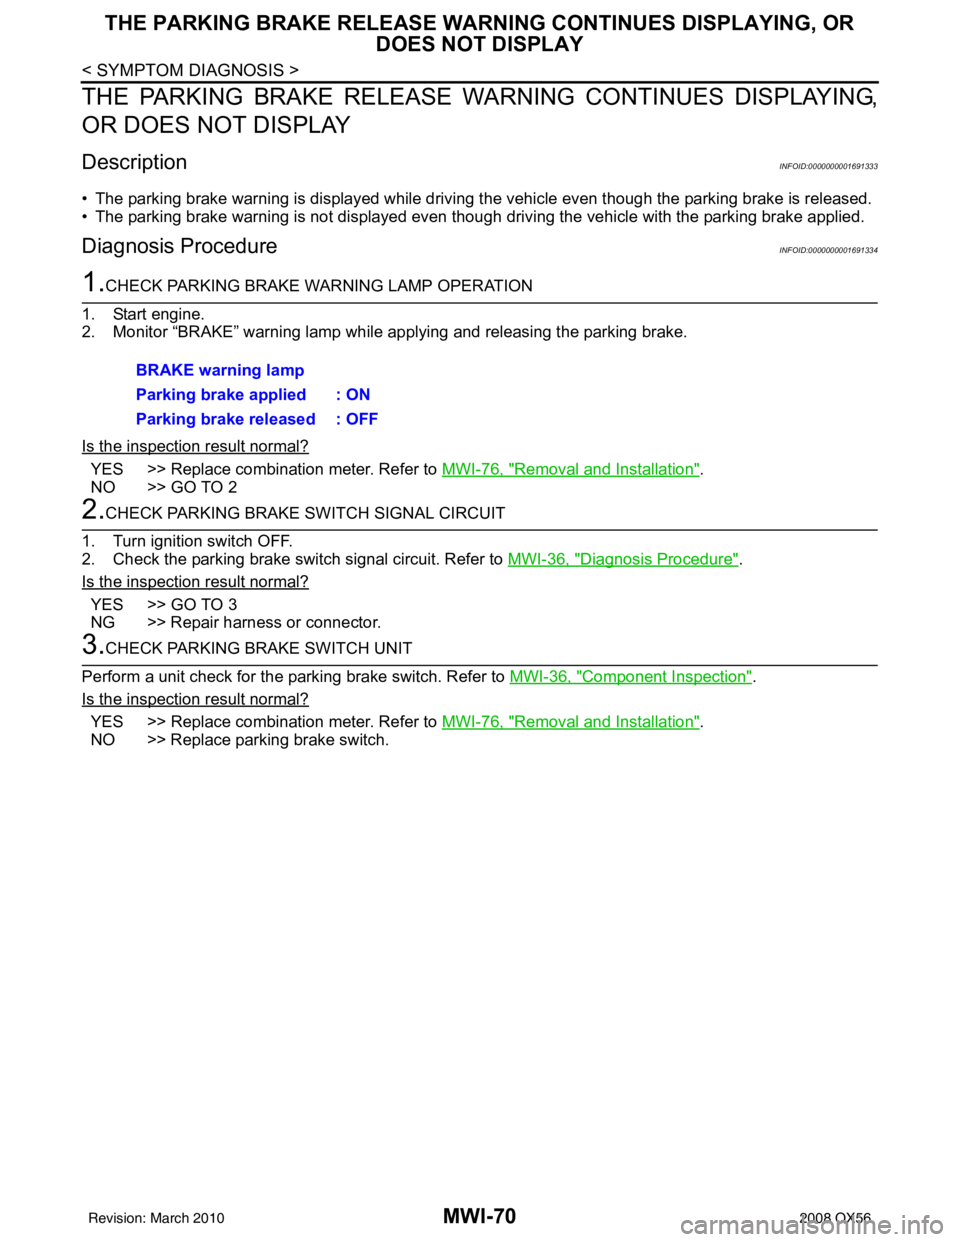
THE PARKING BRAKE RELEASE WARNING CONTINUES DISPLAYING, OR DOES NOT DISPLAY
THE PARKING BRAKE RELEASE WARNING CONTINUES DISPLAYING,
OR DOES NOT DISPLAY
DescriptionINFOID:0000000001691333
• The parking brake warning is displayed while drivi ng the vehicle even though the parking brake is released.
• The parking brake warning is not displayed even though driving the vehicle with the parking brake applied.
Diagnosis ProcedureINFOID:0000000001691334
1.CHECK PARKING BRAKE WARNING LAMP OPERATION
1. Start engine.
2. Monitor “BRAKE” warning lamp while applying and releasing the parking brake.
Is the inspection result normal?
YES >> Replace combination meter. Refer to MWI-76, "Removal and Installation".
NO >> GO TO 2
2.CHECK PARKING BRAKE SWITCH SIGNAL CIRCUIT
1. Turn ignition switch OFF.
2. Check the parking brake switch signal circuit. Refer to MWI-36, "
Diagnosis Procedure".
Is the inspection result normal?
YES >> GO TO 3
NG >> Repair harness or connector.
3.CHECK PARKING BRAKE SWITCH UNIT
Perform a unit check for the parking brake switch. Refer to MWI-36, "
Component Inspection".
Is the inspection result normal?
YES >> Replace combination meter. Refer to MWI-76, "Removal and Installation".
NO >> Replace parking brake switch. BRAKE warning lamp
Parking brake applied : ON
Parking brake released : OFF
Revision: March 2010
2008 QX56
Page 2716 of 4083
MWI
THE LOW WASHER FLUID WARNING CONTINUES DISPLAYING, OR DOES
NOT DISPLAY
MWI-71
< SYMPTOM DIAGNOSIS >
C
DE
F
G H
I
J
K L
M B A
O P
THE LOW WASHER FLUID WARNING CONTINUES DISPLAYING, OR
DOES NOT DISPLAY
DescriptionINFOID:0000000001691335
• The warning is still displayed even after washer fluid is added.
• The warning is not displayed even though the washer tank is empty.
Diagnosis ProcedureINFOID:0000000001691336
1.CHECK WASHER FLUID LEVEL SWITCH SIGNAL CIRCUIT
Check the washer fluid level switch signal circuit. Refer to MWI-37, "
Diagnosis Procedure".
Is the inspection result normal?
YES >> GO TO 2
NO >> Repair harness or connector.
2.CHECK WASHER FLUID LEVEL SWITCH UNIT
Perform a unit check for the washer fluid level switch. Refer to MWI-37, "
Component Inspection".
Is the inspection result normal?
YES >> Replace combination meter. Refer to MWI-76, "Removal and Installation".
NO >> Replace washer level switch.
Revision: March 2010 2008 QX56
Page 2717 of 4083

MWI-72
< SYMPTOM DIAGNOSIS >
THE DOOR OPEN WARNING CONTINUES DISPLAYING, OR DOES NOT DIS-
PLAY
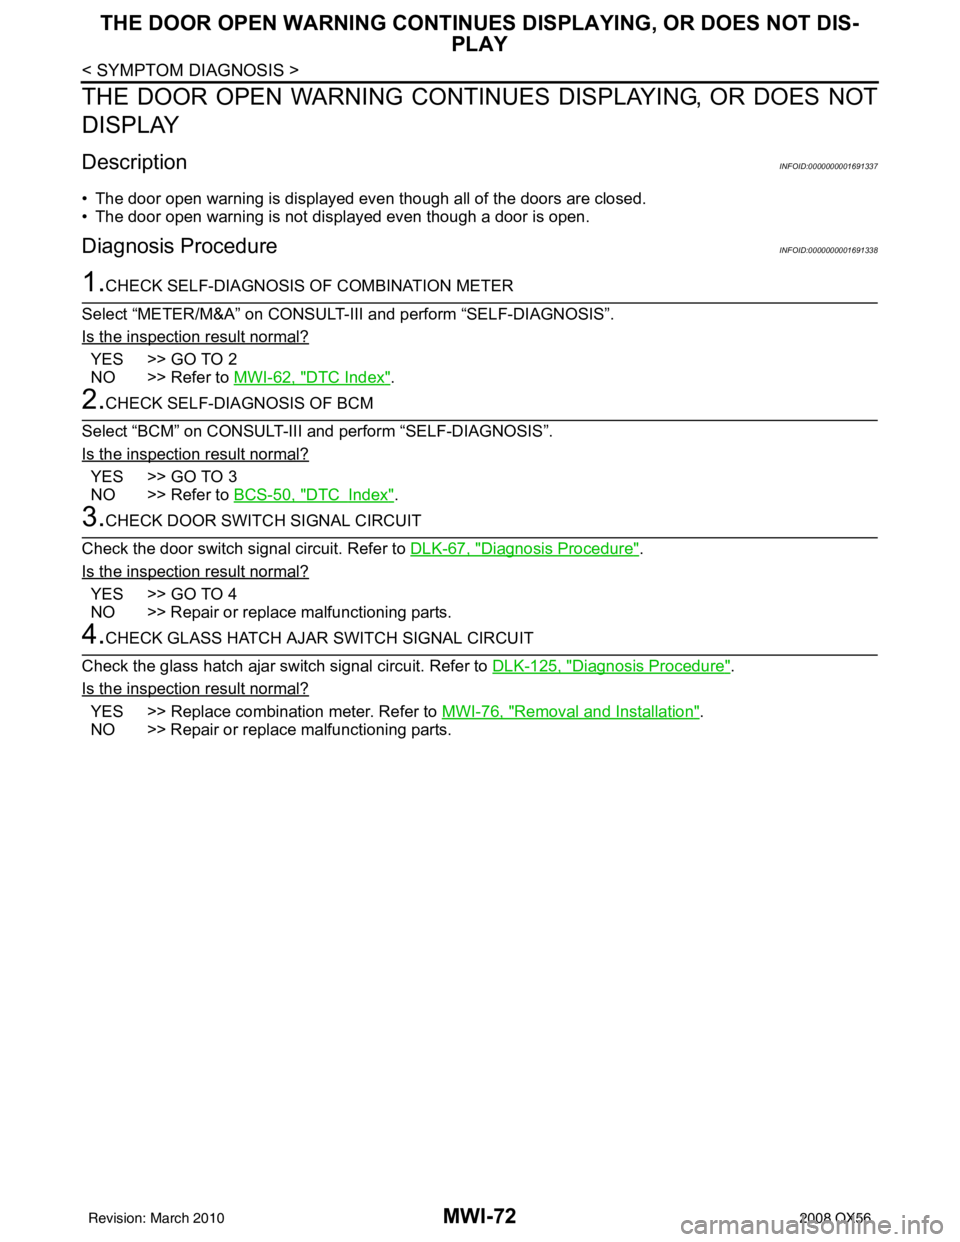
THE DOOR OPEN WARNING CONTIN UES DISPLAYING, OR DOES NOT
DISPLAY
DescriptionINFOID:0000000001691337
• The door open warning is displayed even though all of the doors are closed.
• The door open warning is not displayed even though a door is open.
Diagnosis ProcedureINFOID:0000000001691338
1.CHECK SELF-DIAGNOSIS OF COMBINATION METER
Select “METER/M&A” on CONSULT-II I and perform “SELF-DIAGNOSIS”.
Is the inspection result normal?
YES >> GO TO 2
NO >> Refer to MWI-62, "
DTC Index".
2.CHECK SELF-DIAGNOSIS OF BCM
Select “BCM” on CONSULT-III and perform “SELF-DIAGNOSIS”.
Is the inspection result normal?
YES >> GO TO 3
NO >> Refer to BCS-50, "
DTCIndex".
3.CHECK DOOR SWITCH SIGNAL CIRCUIT
Check the door switch signal circuit. Refer to DLK-67, "
Diagnosis Procedure".
Is the inspection result normal?
YES >> GO TO 4
NO >> Repair or replace malfunctioning parts.
4.CHECK GLASS HATCH AJAR SWITCH SIGNAL CIRCUIT
Check the glass hatch ajar switch signal circuit. Refer to DLK-125, "
Diagnosis Procedure".
Is the inspection result normal?
YES >> Replace combination meter. Refer to MWI-76, "Removal and Installation".
NO >> Repair or replace malfunctioning parts.
Revision: March 2010 2008 QX56
Page 2718 of 4083

MWI
NORMAL OPERATING CONDITIONMWI-73
< SYMPTOM DIAGNOSIS >
C
DE
F
G H
I
J
K L
M B A
O P
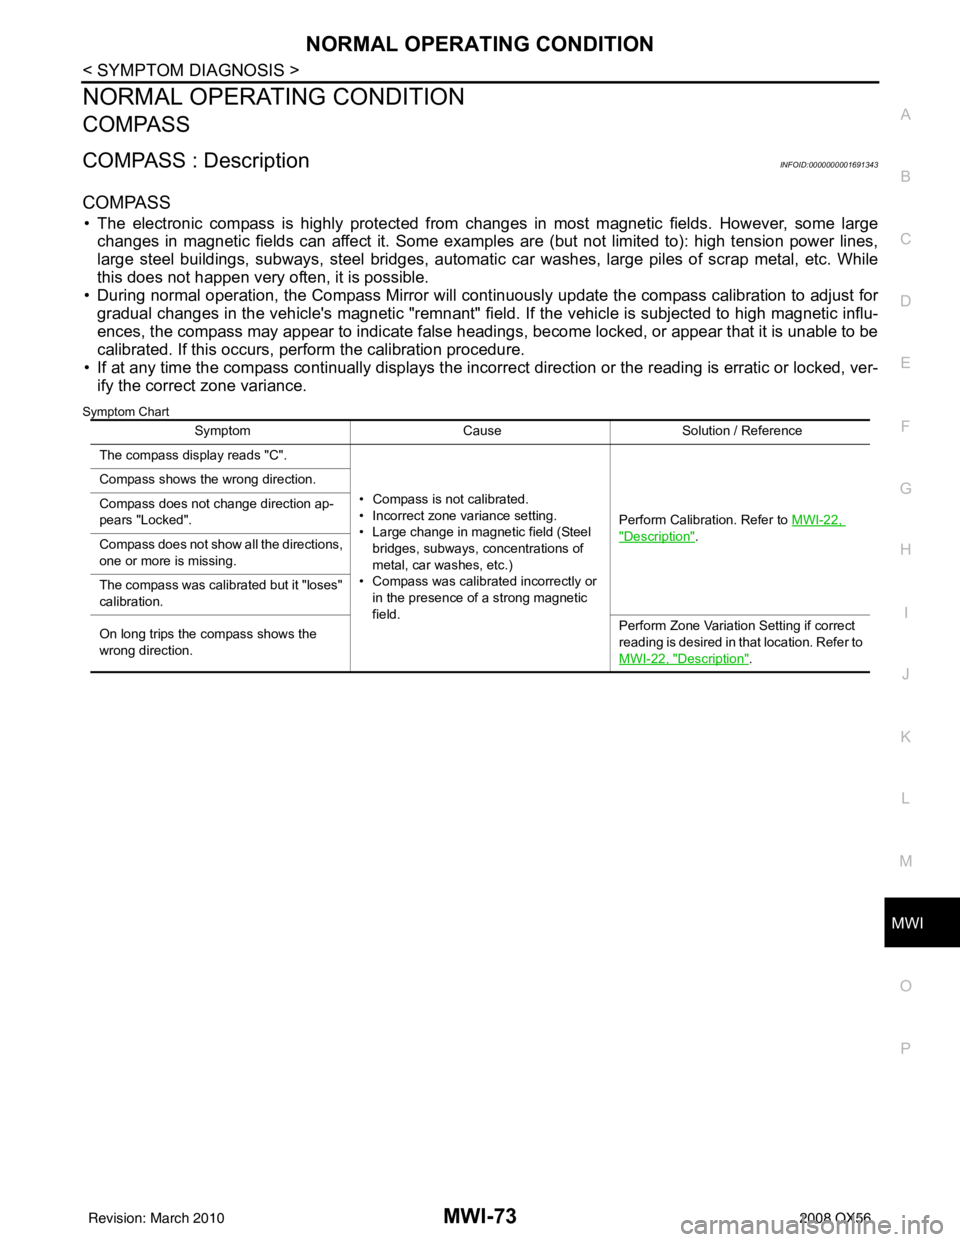
NORMAL OPERATING CONDITION
COMPASS
COMPASS : DescriptionINFOID:0000000001691343
COMPASS
• The electronic compass is highly protected from changes in most magnetic fields. However, some large changes in magnetic fields can affect it. Some exampl es are (but not limited to): high tension power lines,
large steel buildings, subways, steel bridges, automatic car washes, large piles of scrap metal, etc. While
this does not happen very often, it is possible.
• During normal operation, the Compass Mirror will cont inuously update the compass calibration to adjust for
gradual changes in the vehicle's magnetic "remnant" field. If the vehicle is subjected to high magnetic influ-
ences, the compass may appear to indicate false headings , become locked, or appear that it is unable to be
calibrated. If this occurs, perform the calibration procedure.
• If at any time the compass continually displays the incorrect direction or the reading is erratic or locked, ver-
ify the correct zone variance.
Symptom Chart
Symptom CauseSolution / Reference
The compass display reads "C".
• Compass is not calibrated.
• Incorrect zone variance setting.
• Large change in magnetic field (Steel bridges, subways, concentrations of
metal, car washes, etc.)
• Compass was calibrated incorrectly or
in the presence of a strong magnetic
field. Perform Calibration. Refer to
MWI-22,
"Description".
Compass shows the wrong direction.
Compass does not change direction ap-
pears "Locked".
Compass does not show all the directions,
one or more is missing.
The compass was calibrated but it "loses"
calibration.
On long trips the compass shows the
wrong direction.
Perform Zone Variatio
n Setting if correct
reading is desired in that location. Refer to
MWI-22, "
Description".
Revision: March 2010 2008 QX56
Page 2736 of 4083
![INFINITI QX56 2008 Factory Service Manual PCS
DIAGNOSIS AND REPAIR WORKFLOWPCS-3
< BASIC INSPECTION > [IPDM E/R]
C
D
E
F
G H
I
J
K L
B A
O P
N
1. GET INFORMATION FOR SYMPTOM
Get the detailed information from the customer about the symptom (th INFINITI QX56 2008 Factory Service Manual PCS
DIAGNOSIS AND REPAIR WORKFLOWPCS-3
< BASIC INSPECTION > [IPDM E/R]
C
D
E
F
G H
I
J
K L
B A
O P
N
1. GET INFORMATION FOR SYMPTOM
Get the detailed information from the customer about the symptom (th](/manual-img/42/57030/w960_57030-2735.png)
PCS
DIAGNOSIS AND REPAIR WORKFLOWPCS-3
< BASIC INSPECTION > [IPDM E/R]
C
D
E
F
G H
I
J
K L
B A
O P
N
1. GET INFORMATION FOR SYMPTOM
Get the detailed information from the customer about the symptom (the condition and the environment when
the incident/malfunction occurred).
>> GO TO 2
2. CHECK DTC
1. Check DTC.
2. Perform the following procedure if DTC is displayed.
- Record DTC and freeze frame data.
- Erase DTC.
- Study the relationship between the cause detected by DTC and the symptom described by the customer.
3. Check related service bulletins for information.
Is any symptom described and any DTC detected?
Symptom is described, DTC is displayed>>GO TO 3
Symptom is described, DTC is not displayed>>GO TO 4
Symptom is not described, DTC is displayed>>GO TO 5
3. CONFIRM THE SYMPTOM
Confirm the symptom described by the customer.
Connect CONSULT-III to the vehicle in “DATA MONI TOR” mode and check real time diagnosis results.
Verify relationship between the symptom and the condition when the symptom is detected.
>> GO TO 5
4. CONFIRM THE SYMPTOM
Confirm the symptom described by the customer.
Connect CONSULT-III to the vehicle in “DATA MONI TOR” mode and check real time diagnosis results.
Verify relationship between the symptom and the condition when the symptom is detected.
>> GO TO 6
5. PERFORM DTC CONFIRMATION PROCEDURE
Perform DTC Confirmation Procedure for the display ed DTC, and then check that DTC is detected again.
At this time, always connect CONSULT-III to the vehicle, and check diagnostic results in real time.
NOTE:
• Freeze frame data is useful if the DTC is not detected.
• Perform Component Function Check if DTC Confirmation Procedure is not included in Service Manual. This simplified check procedure is an effective alternat ive though DTC cannot be detected during this check.
If the result of Component Function Check is NG, it is the same as the detection of DTC by DTC Confirma-
tion Procedure.
Is DTC detected?
YES >> GO TO 8
NO >> Refer to GI-38, "
Intermittent Incident".
6. PERFORM BASIC INSPECTION
Perform a basic inspection of the IPDM E/R.
Inspection End>>GO TO 7
7. DETECT MALFUNCTIONING SYSTEM BY SYMPTOM
Detect malfunctioning system according to PCS-6, "
System Description" based on the confirmed symptom in
step 4, and determine the trouble diagnosis or der based on possible causes and symptom.
>> GO TO 8
8. DETECT MALFUNCTIONING PART BY DIAGNOSTIC PROCEDURE
Revision: March 2010 2008 QX56
Page 2737 of 4083
![INFINITI QX56 2008 Factory Service Manual PCS-4
< BASIC INSPECTION >[IPDM E/R]
DIAGNOSIS AND REPAIR WORKFLOW
Inspect according to Diagnostic Procedure of the system.
NOTE:
The Diagnostic Procedure described based on open circuit inspection. A INFINITI QX56 2008 Factory Service Manual PCS-4
< BASIC INSPECTION >[IPDM E/R]
DIAGNOSIS AND REPAIR WORKFLOW
Inspect according to Diagnostic Procedure of the system.
NOTE:
The Diagnostic Procedure described based on open circuit inspection. A](/manual-img/42/57030/w960_57030-2736.png)
PCS-4
< BASIC INSPECTION >[IPDM E/R]
DIAGNOSIS AND REPAIR WORKFLOW
Inspect according to Diagnostic Procedure of the system.
NOTE:
The Diagnostic Procedure described based on open circuit inspection. A short circuit inspection is also
required for the circuit check in the Diagnostic Procedure.
Is malfunctioning part detected?
YES >> GO TO 9
NO >> Check voltage of related BCM terminals using CONSULT-III.
9. REPAIR OR REPLACE THE MALFUNCTIONING PART
1. Repair or replace the malfunctioning part.
2. Reconnect parts or connectors disconnected during Diagnostic Procedure again after repair and replace- ment.
3. Check DTC. If DTC is displayed, erase it.
>> GO TO 10
10. FINAL CHECK
When DTC was detected in step 2, perform DTC Confirmation Procedure or Component Function Check
again, and then check that the malfunction have been fully repaired.
When symptom was described from the customer, refer to confirmed symptom in step 3 or 4 and check that
the symptom is not detected.
Is the inspection result normal?
YES >> Inspection End.
NO (DTC is detected)>>GO TO 8
NO (Symptom remains)>>GO TO 6
Revision: March 2010 2008 QX56