2008 INFINITI QX56 air condition
[x] Cancel search: air conditionPage 1878 of 4083
CYLINDER HEADEM-75
< ON-VEHICLE REPAIR >
C
DE
F
G H
I
J
K L
M A
EM
NP
O
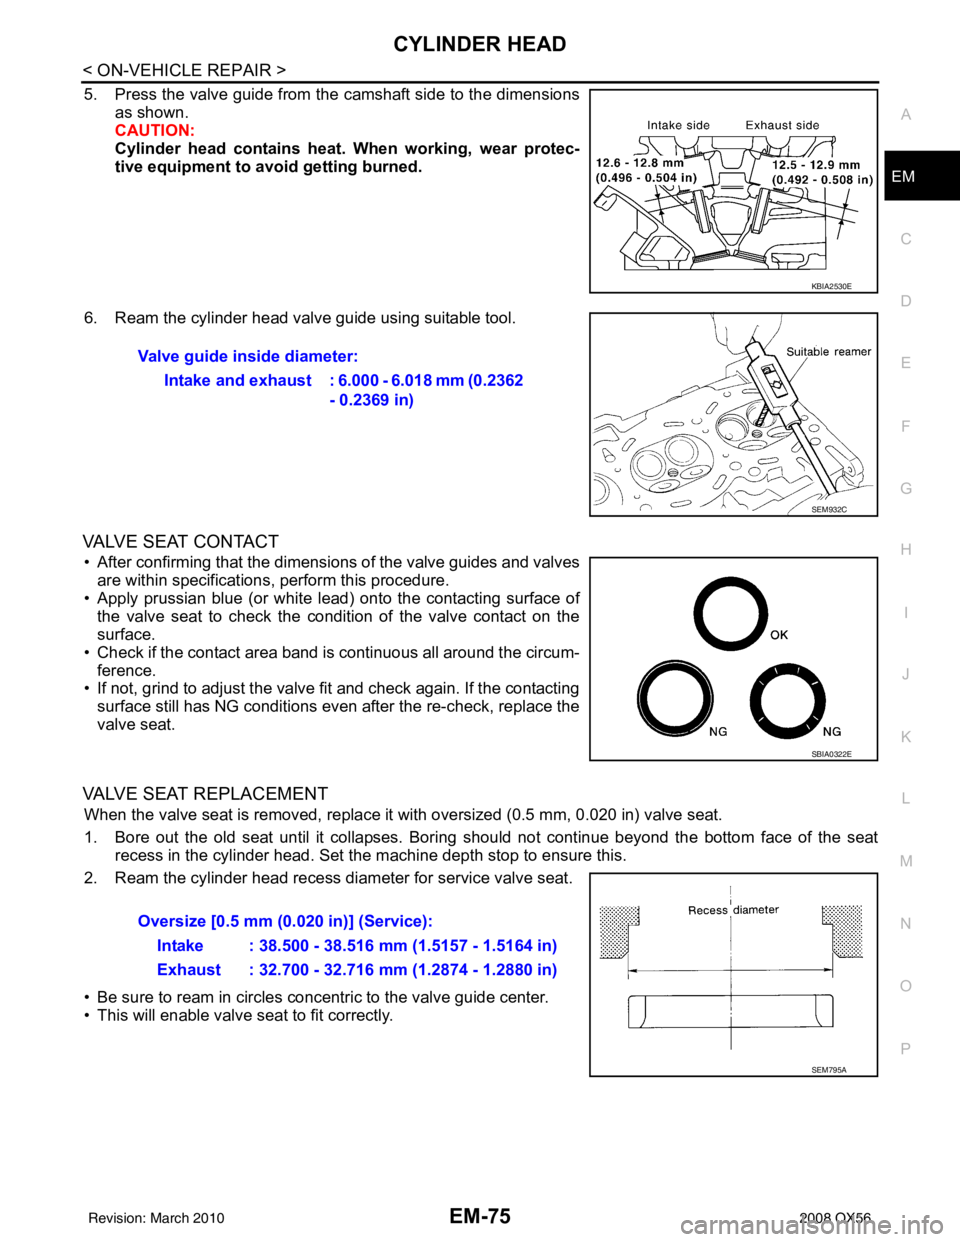
5. Press the valve guide from the camshaft side to the dimensions
as shown.
CAUTION:
Cylinder head contains heat . When working, wear protec-
tive equipment to avo id getting burned.
6. Ream the cylinder head valve guide using suitable tool.
VALVE SEAT CONTACT
• After confirming that the dimensions of the valve guides and valves are within specifications, perform this procedure.
• Apply prussian blue (or white lead) onto the contacting surface of the valve seat to check the condition of the valve contact on the
surface.
• Check if the contact area band is continuous all around the circum- ference.
• If not, grind to adjust the valve fi t and check again. If the contacting
surface still has NG conditions even after the re-check, replace the
valve seat.
VALVE SEAT REPLACEMENT
When the valve seat is removed, replace it with oversized (0.5 mm, 0.020 in) valve seat.
1. Bore out the old seat until it collapses. Boring should not continue beyond the bottom face of the seat recess in the cylinder head. Set the machine depth stop to ensure this.
2. Ream the cylinder head recess diameter for service valve seat.
• Be sure to ream in circles concentric to the valve guide center.
• This will enable valve seat to fit correctly.
KBIA2530E
Valve guide inside diameter:
Intake and exhaust : 6.000 - 6.018 mm (0.2362 - 0.2369 in)
SEM932C
SBIA0322E
Oversize [0.5 mm (0.020 in)] (Service):
Intake : 38.500 - 38.516 mm (1.5157 - 1.5164 in)
Exhaust : 32.700 - 32.716 mm (1.2874 - 1.2880 in)
SEM795A
Revision: March 2010 2008 QX56
Page 1904 of 4083
HOW TO SELECT PISTON AND BEARINGEM-101
< DISASSEMBLY AND ASSEMBLY >
C
DE
F
G H
I
J
K L
M A
EM
NP
O
HOW TO SELECT PISTON AND BEARING
How to Select Piston and BearingINFOID:0000000001538834
DESCRIPTION
*For the service parts, the grade for fitting cannot be selected between a piston pin and a connecting rod.
(Only 0 grade is available.) The information at the sh
ipment from the plant is described as a reference.
• The identification grade stamped on each part is the grade for the dimension measured in new condition.
This grade cannot apply to reused parts.
• For reused or repaired parts, measure the dimens ion accurately. Determine the grade by comparing the
measurement with the values of each selection table.
• For details of the measurement method of each part , the reuse standards, and the selection method of the
selective fitting parts, follow the applicable procedures.
HOW TO SELECT PISTON
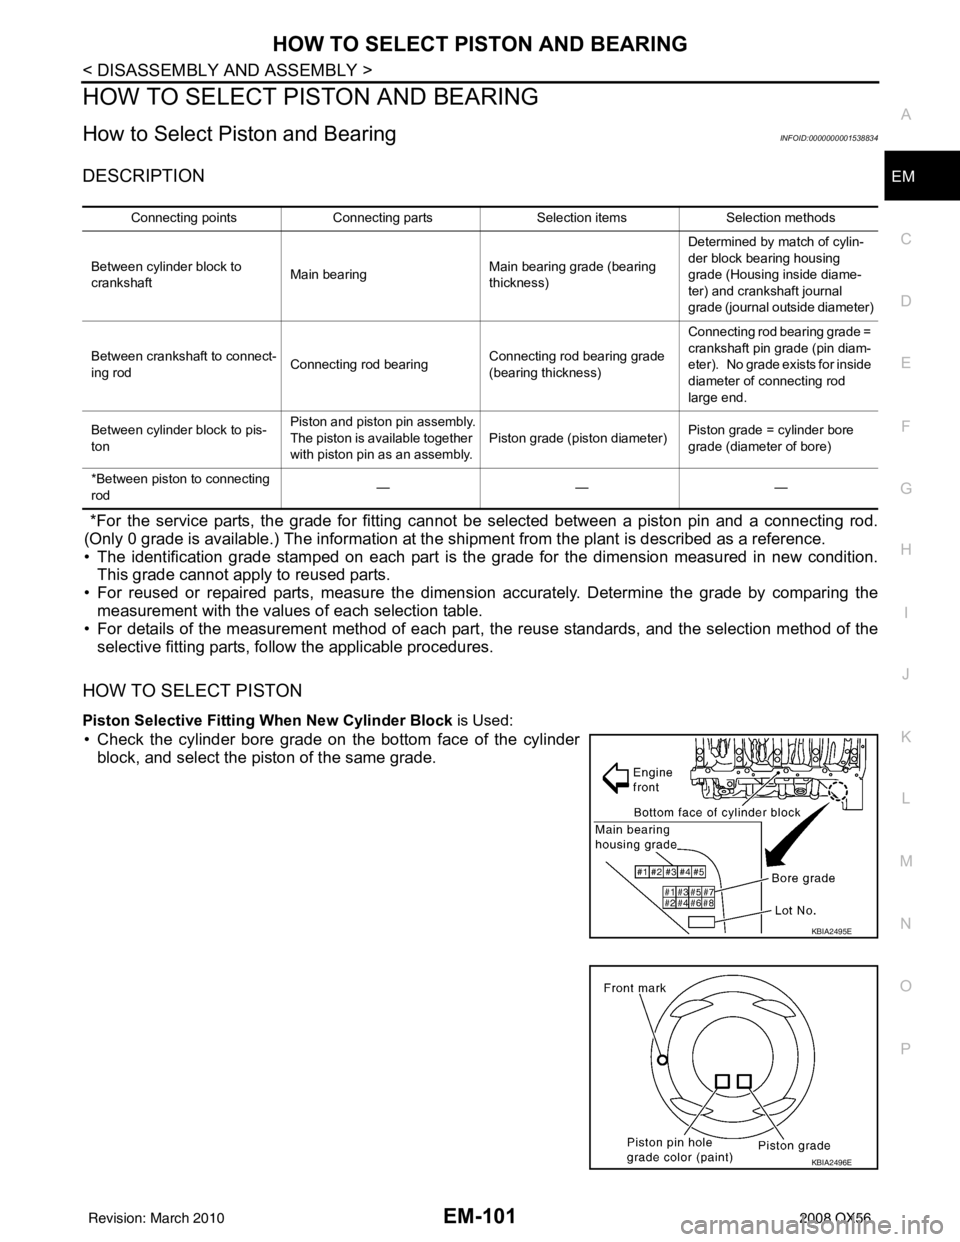
Piston Selective Fitting When New Cylinder Block is Used:
• Check the cylinder bore grade on the bottom face of the cylinder
block, and select the piston of the same grade.
Connecting points Connecting parts Selection itemsSelection methods
Between cylinder block to
crankshaft Main bearing Main bearing grade (bearing
thickness)Determined by match of cylin-
der block bearing housing
grade (Housing inside diame-
ter) and crankshaft journal
grade (journal outside diameter)
Between crankshaft to connect-
ing rod Connecting rod bearing Connecting rod bearing grade
(bearing thickness)Connecting rod bearing grade =
crankshaft pin grade (pin diam-
eter). No grade exists for inside
diameter of connecting rod
large end.
Between cylinder block to pis-
ton Piston and piston pin assembly.
The piston is available together
with piston pin as an assembly.
Piston grade (piston diameter)
Piston grade = cylinder bore
grade (diameter of bore)
*Between piston to connecting
rod ———
KBIA2495E
KBIA2496E
Revision: March 2010
2008 QX56
Page 1930 of 4083

EXL-2
HEADLAMP (HI) CIRCUIT ................................28
Description ........................................................... ...28
Component Function Check ...................................28
Diagnosis Procedure ..............................................28
HEADLAMP (LO) CIRCUIT ...............................30
Description ........................................................... ...30
Component Function Check ...................................30
Diagnosis Procedure ..............................................30
FRONT FOG LAMP CIRCUIT ...........................32
Description ........................................................... ...32
Component Function Check ...................................32
Diagnosis Procedure ..............................................32
PARKING LAMP CIRCUIT ................................34
Description ........................................................... ...34
Component Function Check ...................................34
Diagnosis Procedure ..............................................34
TURN SIGNAL LAMP CIRCUIT ........................37
Description ........................................................... ...37
Component Function Check ...................................37
Diagnosis Procedure ..............................................37
OPTICAL SENSOR ...........................................40
Description ..............................................................40
Component Function Check ...................................40
Diagnosis Procedure ..............................................40
HEADLAMP AIMING SWITCH ..........................42
Description ........................................................... ...42
Diagnosis Procedure ..............................................42
HEADLAMP .......................................................43
Wiring Diagram .................................................... ...43
DAYTIME LIGHT SYSTEM ................................47
Wiring Diagram .................................................... ...47
AUTO LIGHT SYSTEM ......................................54
Wiring Diagram .................................................... ...54
HEADLAMP AIMING SYSTEM (MANUAL) ......61
Wiring Diagram .................................................... ...61
FRONT FOG LAMP SYSTEM ...........................65
Wiring Diagram .................................................... ...65
TURN SIGNAL AND HAZARD WARNING
LAMP SYSTEM .............................................. ...
68
Wiring Diagram .................................................... ...68
PARKING, LICENSE PLATE AND TAIL
LAMPS SYSTEM ............................................ ...
75
Wiring Diagram .................................................... ...75
STOP LAMP ......................................................81
Wiring Diagram .................................................... ...81
BACK-UP LAMP ................................................85
Wiring Diagram .................................................... ...85
TRAILER TOW ..................................................90
Wiring Diagram .................................................... ...90
ECU DIAGNOSIS .......................................99
BCM (BODY CONTROL MODULE) ............... ...99
Description ........................................................... ...99
IPDM E/R (INTELLIGENT POWER DISTRI-
BUTION MODULE ENGINE ROOM) ................
100
Description ........................................................... .100
SYMPTOM DIAGNOSIS ...........................101
EXTERIOR LIGHTING SYSTEM SYMPTOMS ..101
Symptom Table .................................................... .101
NORMAL OPERATING CONDITION ...............103
Description ........................................................... .103
BOTH SIDE HEADLAMPS DO NOT SWITCH
TO HIGH BEAM ................................................
104
Description ........................................................... .104
Diagnosis Procedure .............................................104
BOTH SIDE HEADLAMPS (LO) ARE NOT
TURNED ON .....................................................
105
Description ............................................................105
Diagnosis Procedure .............................................105
PARKING, LICENSE PLATE AND TAIL
LAMPS ARE NOT TURNED ON ......................
106
Description ........................................................... .106
Diagnosis Procedure .............................................106
BOTH SIDE FRONT FOG LAMPS ARE NOT
TURNED ON .....................................................
107
Description ............................................................107
Diagnosis Procedure .............................................107
PRECAUTION ...........................................108
PRECAUTIONS .............................................. ..108
Precaution for Supplemental Restraint System
(SRS) "AIR BAG" and "SEAT BELT PRE-TEN-
SIONER" .............................................................. .
108
Precaution Necessary for Steering Wheel Rota-
tion After Battery Disconnect ................................
108
ON-VEHICLE REPAIR ..............................110
ADJUSTMENT AND INSPECTION ................ ..110
HEADLAMP ............................................................ .110
HEADLAMP : Aiming Adjustment .........................110
FRONT FOG LAMP ................................................ .111
FRONT FOG LAMP : Aiming Adjustment .............111
REMOVAL AND INSTALLATION .............113
HEADLAMP .................................................... ..113
Revision: March 2010 2008 QX56
Page 1968 of 4083
EXL-40
< COMPONENT DIAGNOSIS >
OPTICAL SENSOR
OPTICAL SENSOR
DescriptionINFOID:0000000001547140
The optical sensor converts the outside brightness (lux) to voltage and transmits the optical sensor signal to
the BCM.
Component Function CheckINFOID:0000000001547141
1.CHECK OPTICAL SENSOR SIGNAL BY CONSULT-III
CONSULT-III
1. Turn the ignition switch ON.
2. Select "OPTICAL SENSOR" of BCM (HEAD LAMP) DATA MONITOR item.
3. Turn the lighting switch to AUTO.
4. With the optical sensor illuminating, check the monitor status.
*: Illuminates the optical sensor. The value may be less than the standard value if brightness is weak.
Is the item status normal?
YES >> Optical sensor is normal.
NO >> Refer to EXL-40, "
Diagnosis Procedure".
Diagnosis ProcedureINFOID:0000000001547142
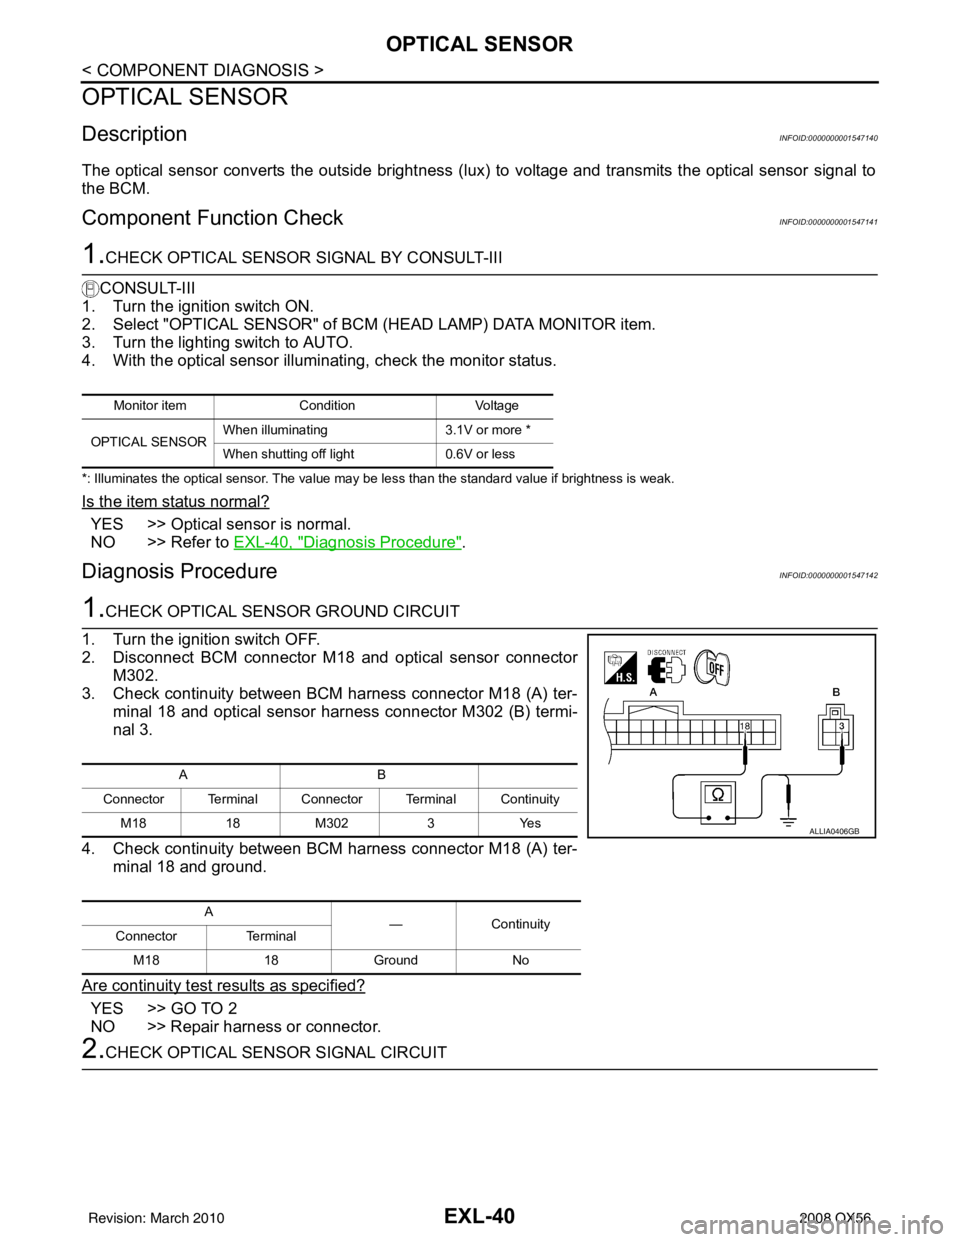
1.CHECK OPTICAL SENSOR GROUND CIRCUIT
1. Turn the ignition switch OFF.
2. Disconnect BCM connector M18 and optical sensor connector M302.
3. Check continuity between BCM harness connector M18 (A) ter-
minal 18 and optical sensor harness connector M302 (B) termi-
nal 3.
4. Check continuity between BCM harness connector M18 (A) ter- minal 18 and ground.
Are continuity test results as specified?
YES >> GO TO 2
NO >> Repair harness or connector.
2.CHECK OPTICAL SENSOR SIGNAL CIRCUIT
Monitor item ConditionVoltage
OPTICAL SENSOR When illuminating
3.1V or more *
When shutting off light 0.6V or less
AB
Connector Terminal Connector Terminal Continuity M18 18M302 3Yes
A —Continuity
Connector Terminal
M18 18Ground No
ALLIA0406GB
Revision: March 2010 2008 QX56
Page 2032 of 4083
EXL-104
< SYMPTOM DIAGNOSIS >
BOTH SIDE HEADLAMPS DO NOT SWITCH TO HIGH BEAM
BOTH SIDE HEADLAMPS DO NOT SWITCH TO HIGH BEAM
DescriptionINFOID:0000000001547155
The headlamps (both sides) do not switch to high beam when the lighting switch is in the HI or PASS setting.
Diagnosis ProcedureINFOID:0000000001547156
1.COMBINATION SWITCH INSPECTION
Check the combination switch. Refer to BCS-36, "
Diagnosis Procedure".
Is the combination switch normal?
YES >> GO TO 2
NO >> Repair or replace the malfunctioning part.
2.CHECK HEADLAMP (HI) REQUEST SIGNAL INPUT
CONSULT-III DATA MONITOR
1. Select "HL HI REQ" of IPDM E/R DATA MONITOR item.
2. With operating the lighting switch, check the monitor status.
Is the item status normal?
YES >> GO TO 3
NO >> Replace BCM. Refer to BCS-55, "
Removal and Installation" .
3.HEADLAMP (HI) CIRCUIT INSPECTION
Check the headlamp (HI) circuit. Refer to EXL-28, "
Description".
Is the headlamp (HI) circuit normal?
YES >> Replace IPDM E/R. Refer to PCS-34, "Removal and Installation of IPDM E/R" .
NO >> Repair or replace the malfunctioning part.
Monitor item ConditionMonitor status
HL HI REQ Lighting switch
(2ND) HI or PASS
ON
Except for HI or
PASS OFF
Revision: March 2010
2008 QX56
Page 2033 of 4083
BOTH SIDE HEADLAMPS (LO) ARE NOT TURNED ONEXL-105
< SYMPTOM DIAGNOSIS >
C
DE
F
G H
I
J
K
M A
B
EXL
N
O P
BOTH SIDE HEADLAMPS (L O) ARE NOT TURNED ON
DescriptionINFOID:0000000001547157
The headlamps (both sides) do not turn ON in any lighting switch setting.
Diagnosis ProcedureINFOID:0000000001547158
1.CHECK COMBINATION SWITCH
Check the combination switch. Refer to BCS-36, "
Diagnosis Procedure".
Is the combination switch normal?
YES >> GO TO 2
NO >> Repair or replace the malfunctioning part.
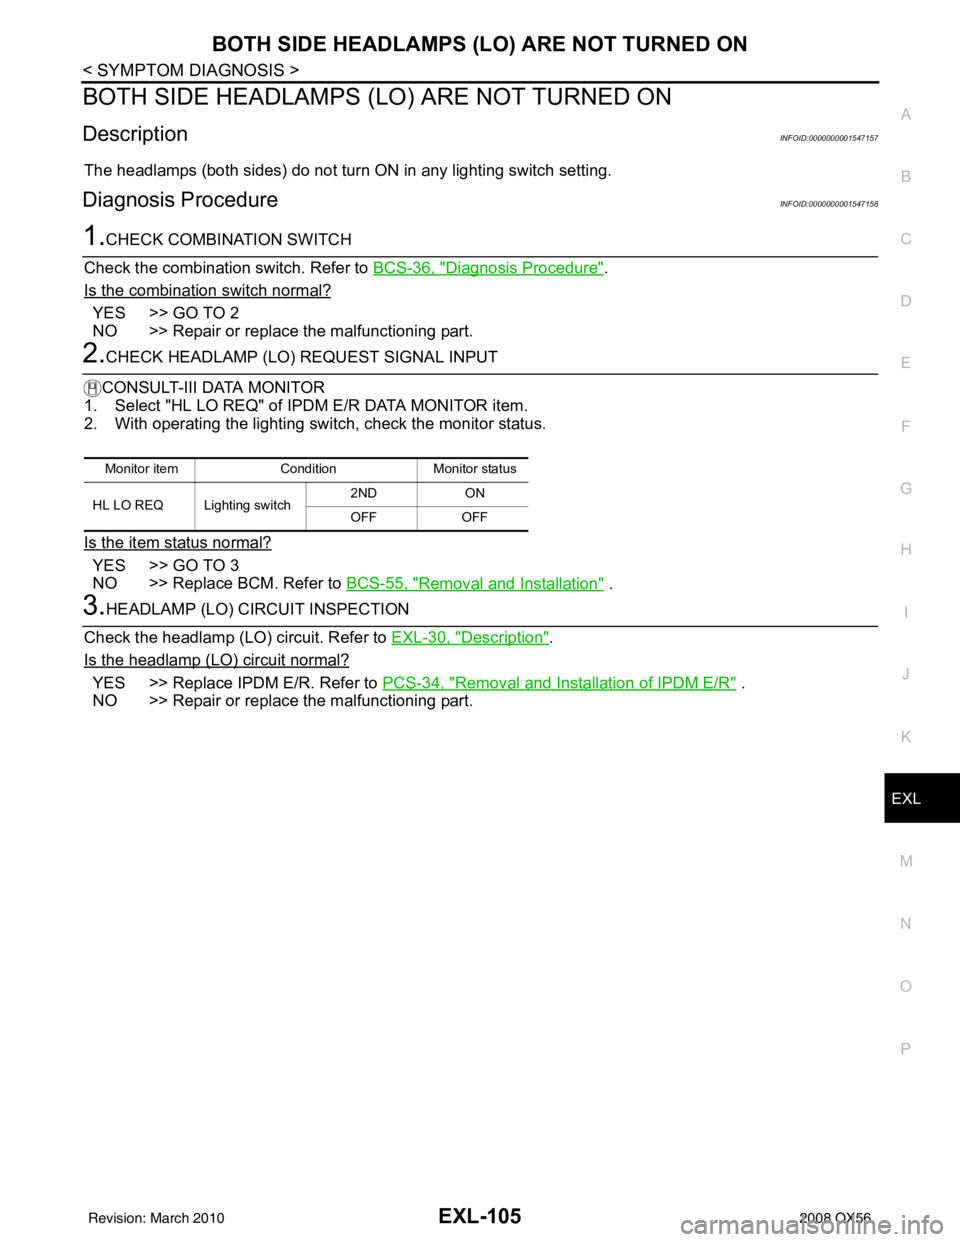
2.CHECK HEADLAMP (LO) REQUEST SIGNAL INPUT
CONSULT-III DATA MONITOR
1. Select "HL LO REQ" of IP DM E/R DATA MONITOR item.
2. With operating the lighting switch, check the monitor status.
Is the item status normal?
YES >> GO TO 3
NO >> Replace BCM. Refer to BCS-55, "
Removal and Installation" .
3.HEADLAMP (LO) CIRCUIT INSPECTION
Check the headlamp (LO) circuit. Refer to EXL-30, "
Description".
Is the headlamp (LO) circuit normal?
YES >> Replace IPDM E/R. Refer to PCS-34, "Removal and Installation of IPDM E/R" .
NO >> Repair or replace the malfunctioning part.
Monitor item ConditionMonitor status
HL LO REQ Lighting switch 2ND
ON
OFF OFF
Revision: March 2010 2008 QX56
Page 2034 of 4083
EXL-106
< SYMPTOM DIAGNOSIS >
PARKING, LICENSE PLATE AND TAIL LAMPS ARE NOT TURNED ON
PARKING, LICENSE PLATE AND TAIL LAMPS ARE NOT TURNED ON
DescriptionINFOID:0000000001547159
The parking, license plate and tail lamps do not turn ON in with any lighting switch setting.
Diagnosis ProcedureINFOID:0000000001547160
1.COMBINATION SWITCH INSPECTION
Check the combination switch. Refer to BCS-36, "
Diagnosis Procedure".
Is the combination switch normal?
YES >> GO TO 2
NO >> Repair or replace the malfunctioning part.
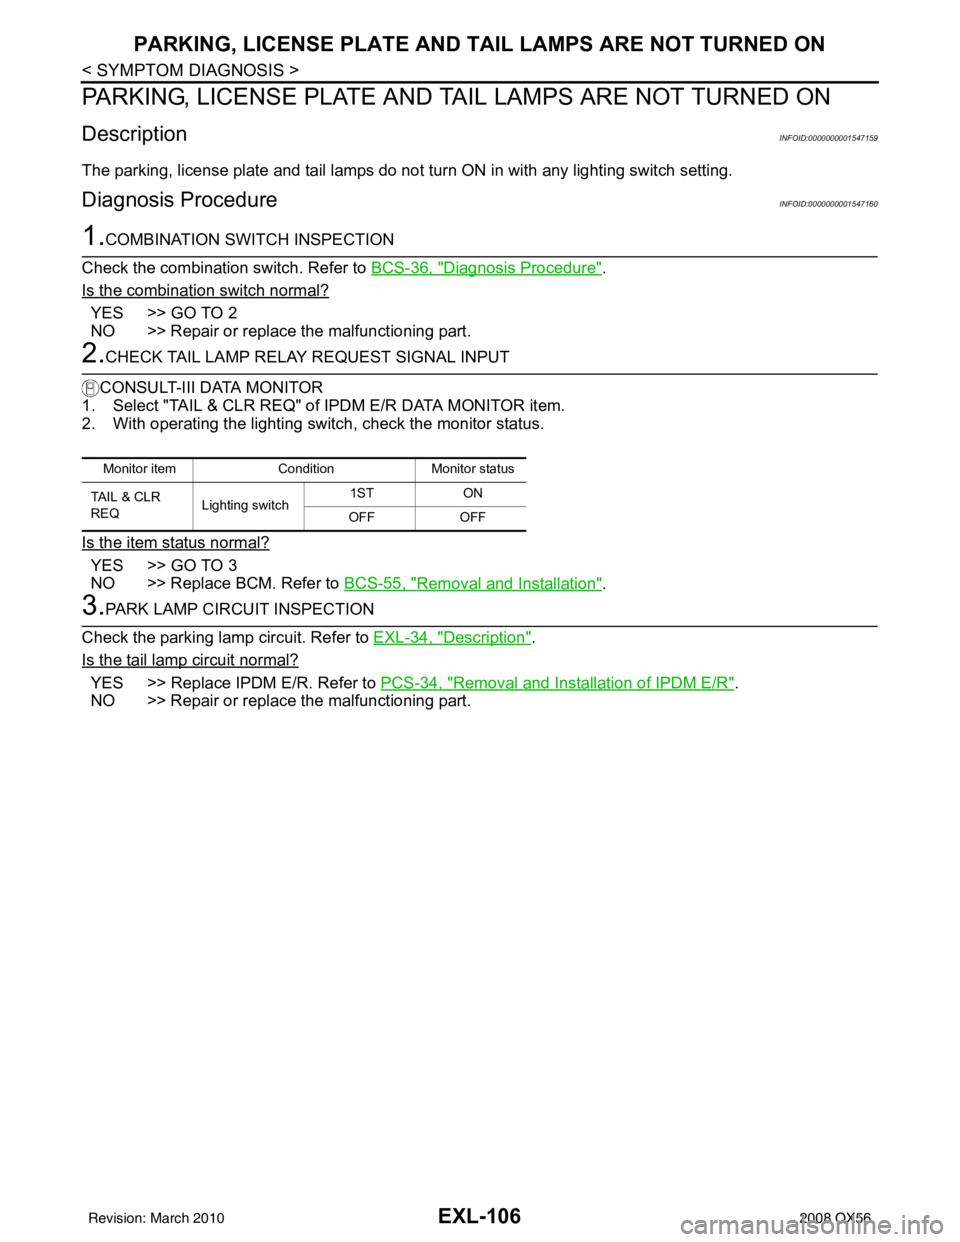
2.CHECK TAIL LAMP RELAY REQUEST SIGNAL INPUT
CONSULT-III DATA MONITOR
1. Select "TAIL & CLR REQ" of IPDM E/R DATA MONITOR item.
2. With operating the lighting switch, check the monitor status.
Is the item status normal?
YES >> GO TO 3
NO >> Replace BCM. Refer to BCS-55, "
Removal and Installation".
3.PARK LAMP CIRCUIT INSPECTION
Check the parking lamp circuit. Refer to EXL-34, "
Description".
Is the tail lamp circuit normal?
YES >> Replace IPDM E/R. Refer to PCS-34, "Removal and Installation of IPDM E/R".
NO >> Repair or replace the malfunctioning part.
Monitor item ConditionMonitor status
TAIL & CLR
REQ Lighting switch 1ST
ON
OFF OFF
Revision: March 2010 2008 QX56
Page 2035 of 4083
BOTH SIDE FRONT FOG LAMPS ARE NOT TURNED ONEXL-107
< SYMPTOM DIAGNOSIS >
C
DE
F
G H
I
J
K
M A
B
EXL
N
O P
BOTH SIDE FRONT FOG LA MPS ARE NOT TURNED ON
DescriptionINFOID:0000000001547161
The front fog lamps do not turn ON in any setting.
Diagnosis ProcedureINFOID:0000000001547162
1.COMBINATION SWITCH INSPECTION
Check the combination switch. Refer to BCS-36, "
Diagnosis Procedure".
Is the combination switch normal?
YES >> GO TO 2
NO >> Repair or replace the malfunctioning part.
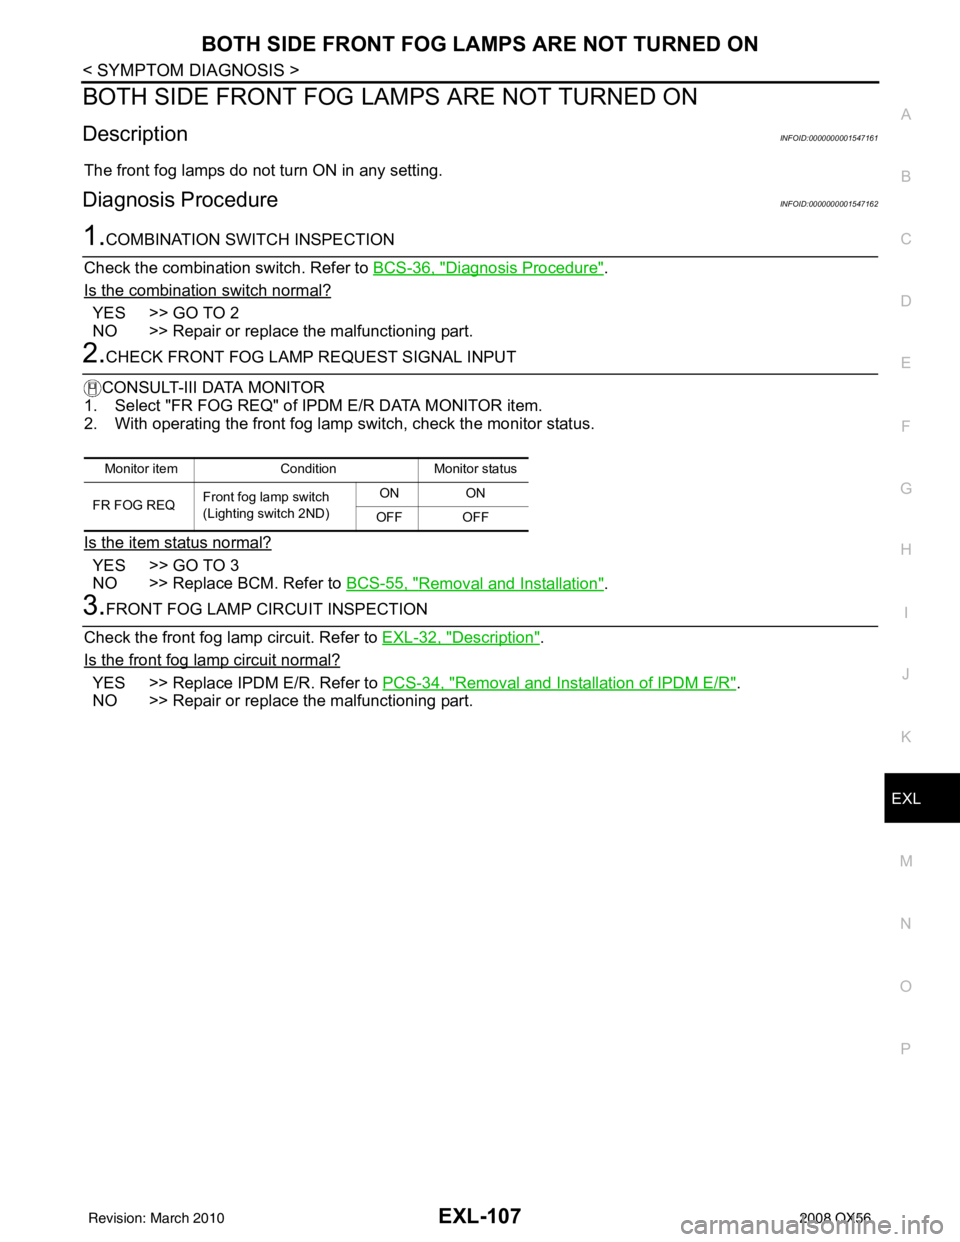
2.CHECK FRONT FOG LAMP REQUEST SIGNAL INPUT
CONSULT-III DATA MONITOR
1. Select "FR FOG REQ" of IP DM E/R DATA MONITOR item.
2. With operating the front fog lamp switch, check the monitor status.
Is the item status normal?
YES >> GO TO 3
NO >> Replace BCM. Refer to BCS-55, "
Removal and Installation".
3.FRONT FOG LAMP CIRCUIT INSPECTION
Check the front fog lamp circuit. Refer to EXL-32, "
Description".
Is the front fog lamp circuit normal?
YES >> Replace IPDM E/R. Refer to PCS-34, "Removal and Installation of IPDM E/R".
NO >> Repair or replace the malfunctioning part.
Monitor item ConditionMonitor status
FR FOG REQ Front fog lamp switch
(Lighting switch 2ND) ON ON
OFF OFF
Revision: March 2010 2008 QX56