2008 Hyundai Santa Fe lower
[x] Cancel search: lowerPage 42 of 355
1FEATURES OF YOUR HYUNDAI30
!
OCM052307
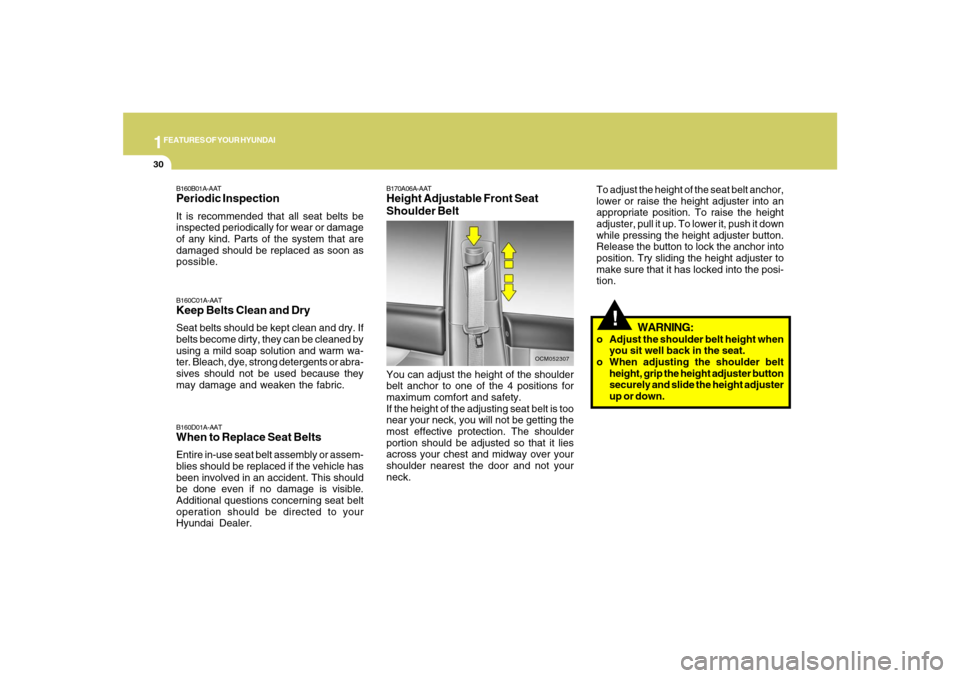
B170A06A-AATHeight Adjustable Front Seat
Shoulder BeltYou can adjust the height of the shoulder
belt anchor to one of the 4 positions for
maximum comfort and safety.
If the height of the adjusting seat belt is too
near your neck, you will not be getting the
most effective protection. The shoulder
portion should be adjusted so that it lies
across your chest and midway over your
shoulder nearest the door and not your
neck.To adjust the height of the seat belt anchor,
lower or raise the height adjuster into an
appropriate position. To raise the height
adjuster, pull it up. To lower it, push it down
while pressing the height adjuster button.
Release the button to lock the anchor into
position. Try sliding the height adjuster to
make sure that it has locked into the posi-
tion.
B160C01A-AATKeep Belts Clean and DrySeat belts should be kept clean and dry. If
belts become dirty, they can be cleaned by
using a mild soap solution and warm wa-
ter. Bleach, dye, strong detergents or abra-
sives should not be used because they
may damage and weaken the fabric.B160D01A-AATWhen to Replace Seat BeltsEntire in-use seat belt assembly or assem-
blies should be replaced if the vehicle has
been involved in an accident. This should
be done even if no damage is visible.
Additional questions concerning seat belt
operation should be directed to your
Hyundai Dealer.B160B01A-AATPeriodic InspectionIt is recommended that all seat belts be
inspected periodically for wear or damage
of any kind. Parts of the system that are
damaged should be replaced as soon as
possible.
WARNING:
o Adjust the shoulder belt height when
you sit well back in the seat.
o When adjusting the shoulder belt
height, grip the height adjuster button
securely and slide the height adjuster
up or down.
Page 49 of 355
1
FEATURES OF YOUR HYUNDAI
37
!
WARNING:
o Never mount more than one child re-
straint to a single tether or to a single
lower anchorage point. The increased
load caused by multiple seats may
cause the tethers or anchorage points
to break, causing serious injury or
death.
!
WARNING:
o A child can be seriously injured or
killed in a collision if the child restraint
is not properly anchored. Always
follow the child seat manufacturer’s
instructions for installation and use.
o Never install a child restraint using
the lower anchors at the center posi-
tion of the rear seat. In a crash, the
LATCH anchors may break if a car
seat is improperly placed in the cen-
ter position resulting in serious or
fatal injuries. Only place a LATCH or
LATCH-compatible child seat in the
left or right out-board rear seating
positions (as shown) to the appropri-
ate LATCH anchors provided.
B230D03CM-AATSecuring the Child Restraint Seat
with the "LATCH" systemSome child seat manufacturers make safety
seats that are labeled as LATCH or LATCH-
compatible child seats. These seats in-
clude two rigid or webbing mounted at-
tachments that connect to two lower an-
chors at specific seating positions in your
vehicle. This type of child seat eliminates
the need to use seat belts to attach the child
seat; the tether strap must also be attached
to the proper tether anchor point. For infor-
mation on using tether straps, refer to “In-
stalling a Child Restraint Seat with the
“Tether Anchorage” system”.
OCM051007L
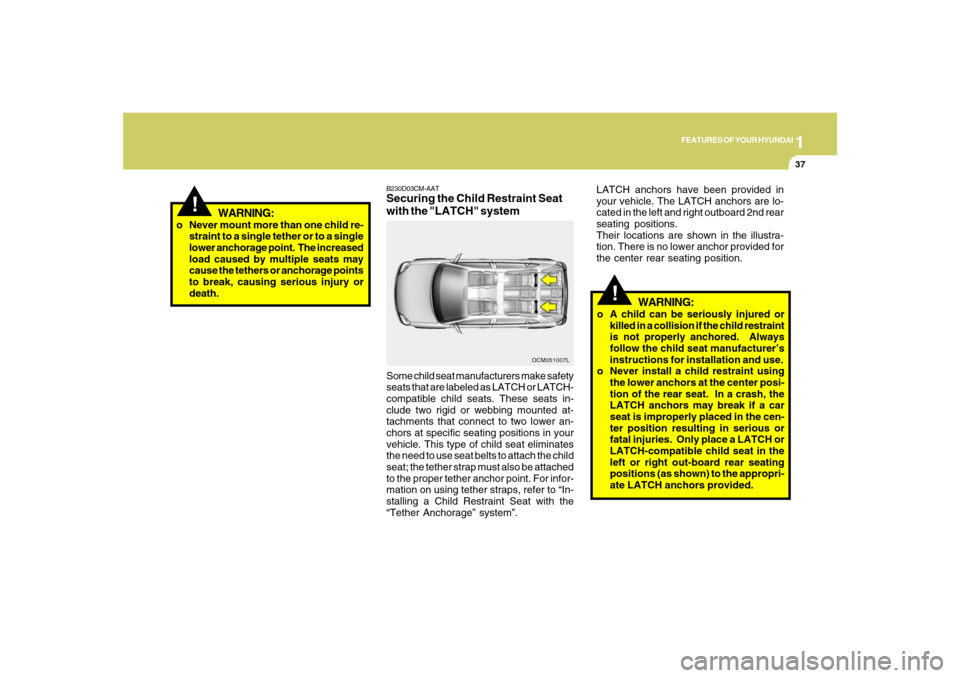
LATCH anchors have been provided in
your vehicle. The LATCH anchors are lo-
cated in the left and right outboard 2nd rear
seating positions.
Their locations are shown in the illustra-
tion. There is no lower anchor provided for
the center rear seating position.
Page 50 of 355
1FEATURES OF YOUR HYUNDAI38
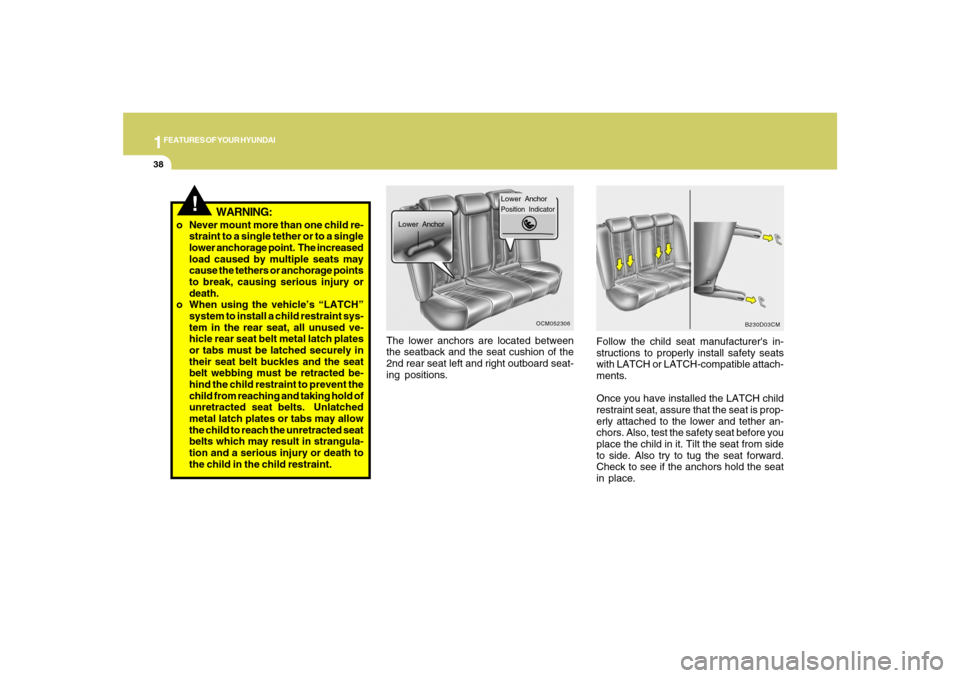
The lower anchors are located between
the seatback and the seat cushion of the
2nd rear seat left and right outboard seat-
ing positions.Follow the child seat manufacturer's in-
structions to properly install safety seats
with LATCH or LATCH-compatible attach-
ments.
Once you have installed the LATCH child
restraint seat, assure that the seat is prop-
erly attached to the lower and tether an-
chors. Also, test the safety seat before you
place the child in it. Tilt the seat from side
to side. Also try to tug the seat forward.
Check to see if the anchors hold the seat
in place.
Lower AnchorPosition Indicator
Lower Anchor
OCM052306
B230D03CM
!
o Never mount more than one child re-
straint to a single tether or to a single
lower anchorage point. The increased
load caused by multiple seats may
cause the tethers or anchorage points
to break, causing serious injury or
death.
o When using the vehicle’s “LATCH”
system to install a child restraint sys-
tem in the rear seat, all unused ve-
hicle rear seat belt metal latch plates
or tabs must be latched securely in
their seat belt buckles and the seat
belt webbing must be retracted be-
hind the child restraint to prevent the
child from reaching and taking hold of
unretracted seat belts. Unlatched
metal latch plates or tabs may allow
the child to reach the unretracted seat
belts which may result in strangula-
tion and a serious injury or death to
the child in the child restraint.
WARNING:
Page 79 of 355
1
FEATURES OF YOUR HYUNDAI
67
The brake fluid level warning light indi-
cates that the brake fluid level in the brake
master cylinder is low and hydraulic brake
fluid conforming to DOT 3 or DOT 4 speci-
fications should be added. After adding
fluid, if no other trouble is found, the car
should be immediately and carefully driven
to a Hyundai dealer for inspection. If further
trouble is experienced, the vehicle should
not be driven at all but taken to a dealer by
a professional towing service.
Your Hyundai is equipped with dual-di-
agonal braking systems. This means you
still have braking on two wheels even if
one of the dual systems should malfunc-
tion. With only one of the dual systems
working, more than normal pedal travel
and greater pedal pressure are required to
stop the car. Also, the car will not stop in as
short a distance with only half of the brake
system working. If the brakes malfunction
while you are driving, shift to a lower gear
for additional engine braking and stop the
car as soon as it is safe to do so.
B260J02TG-AAT
Charging System Warning
Light
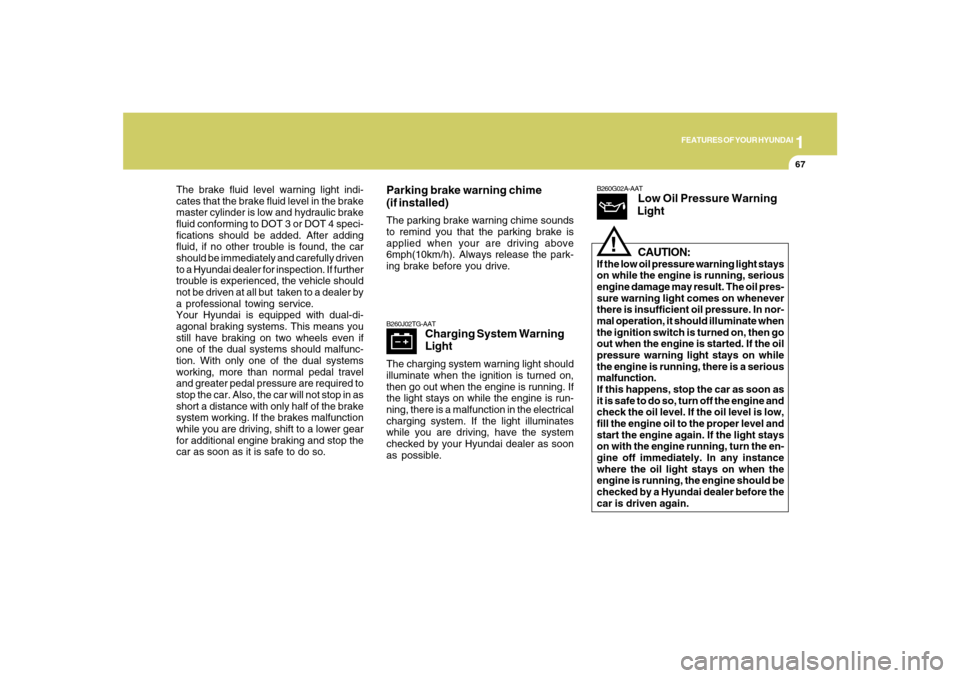
The charging system warning light should
illuminate when the ignition is turned on,
then go out when the engine is running. If
the light stays on while the engine is run-
ning, there is a malfunction in the electrical
charging system. If the light illuminates
while you are driving, have the system
checked by your Hyundai dealer as soon
as possible.Parking brake warning chime
(if installed)The parking brake warning chime sounds
to remind you that the parking brake is
applied when your are driving above
6mph(10km/h). Always release the park-
ing brake before you drive.
B260G02A-AAT
Low Oil Pressure Warning
Light
CAUTION:
If the low oil pressure warning light stays
on while the engine is running, serious
engine damage may result. The oil pres-
sure warning light comes on whenever
there is insufficient oil pressure. In nor-
mal operation, it should illuminate when
the ignition switch is turned on, then go
out when the engine is started. If the oil
pressure warning light stays on while
the engine is running, there is a serious
malfunction.
If this happens, stop the car as soon as
it is safe to do so, turn off the engine and
check the oil level. If the oil level is low,
fill the engine oil to the proper level and
start the engine again. If the light stays
on with the engine running, turn the en-
gine off immediately. In any instance
where the oil light stays on when the
engine is running, the engine should be
checked by a Hyundai dealer before the
car is driven again.
!
Page 120 of 355
1FEATURES OF YOUR HYUNDAI
108
!
WARNING:
The transceiver has been tested and
complies with FCC and Industry Canada
rules. Changes or modifications not ex-
pressly approved by the party respon-
sible for compliance could void the user's
authority to operate the device.
NVS
® is a registered trademark and Z-
Nav™ is a trademark of the Gentex Corpo-
ration, Zeeland, Michigan. HomeLink
® is
a registered trademark owned by Johnson
Controls, Incorporated, Milwaukee, Wis-
consin.
FCC ID: NZLZTVHL3
IC: 4112A-ZTVHL3This device complies with Part 15 FCC
Rules. Operation is subject to the following
two conditions: (1) this device may not
cause harmful interference, and (2) this
device must accept any interference re-
ceived, including interference that may
cause undesired operation.
PARKING BRAKEB530A02CM-AAT
OCM053002
Type A
Type B
OCM053007
Type A
Type B
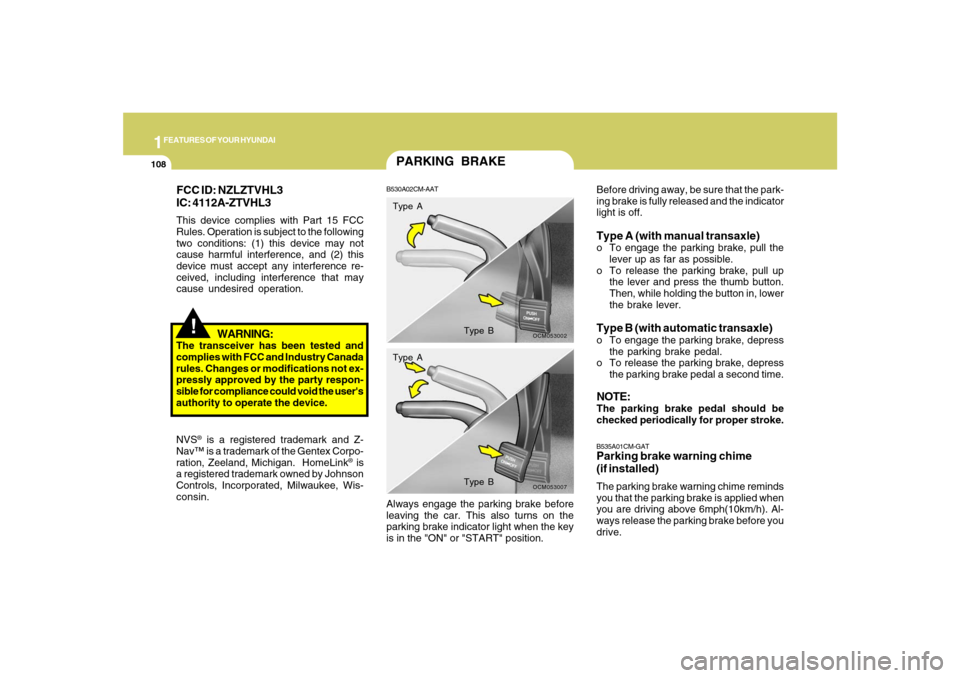
Before driving away, be sure that the park-
ing brake is fully released and the indicator
light is off.Type A (with manual transaxle)o To engage the parking brake, pull the
lever up as far as possible.
o To release the parking brake, pull up
the lever and press the thumb button.
Then, while holding the button in, lower
the brake lever.Type B (with automatic transaxle)o To engage the parking brake, depress
the parking brake pedal.
o To release the parking brake, depress
the parking brake pedal a second time.NOTE:The parking brake pedal should be
checked periodically for proper stroke.B535A01CM-GATParking brake warning chime
(if installed)The parking brake warning chime reminds
you that the parking brake is applied when
you are driving above 6mph(10km/h). Al-
ways release the parking brake before you
drive. Always engage the parking brake before
leaving the car. This also turns on the
parking brake indicator light when the key
is in the "ON" or "START" position.
Page 121 of 355
1
FEATURES OF YOUR HYUNDAI
109
!
!TAIL GATEB540A01CM-AAT
WARNING:
The tail gate should always be kept com-
pletely closed while the vehicle is in
motion. If it is left open or ajar, poisonous
exhaust gases may enter the car result-
ing in serious illness or death to the
occupants. See additional warnings con-
cerning exhaust gases on page 2-2.
o The tail gate is opened by pulling the
outside handle up, raising the tail gate
manually.
o To close, lower the tail gate, then press
down on it until it is closed. To be sure
the tail gate is fully closed, always try to
pull it up again without using the outside
handle.
WARNING:
o Whenever leaving vehicle or parking
always set the parking brake as far as
possible and fully engage the vehicle's
transaxle into the park position. Ve-
hicles not fully engaged in park with
the parking brake set are at risk for
moving inadvertently and injuring
yourself or others.
o To prevent unintentional movement
when stopped and leaving the vehicle,
do not use the gearshift lever in place
of the parking brake. Set the parking
brake AND make sure the gearshift
lever is securely positioned in 1st
(First) gear or R (Reverse) for manual
transaxle equipped vehicles and in P
(Park) for automatic transaxle
equipped vehicles.
o Never allow a person who is unfamil-
iar with the vehicle or children to touch
the parking brake. If the parking brake
is released unintentionally, serious
injury may occur.
LUGGAGE COMPARTMENT
OCM052123L
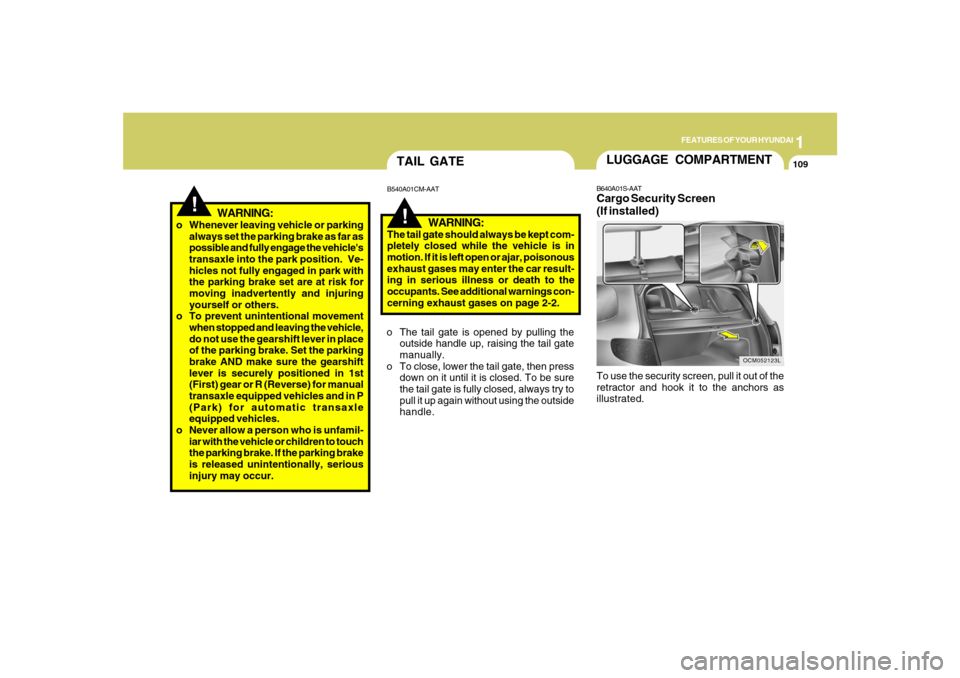
B640A01S-AATCargo Security Screen
(If installed)To use the security screen, pull it out of the
retractor and hook it to the anchors as
illustrated.
Page 124 of 355
1FEATURES OF YOUR HYUNDAI
112
HIGH-MOUNTED REAR
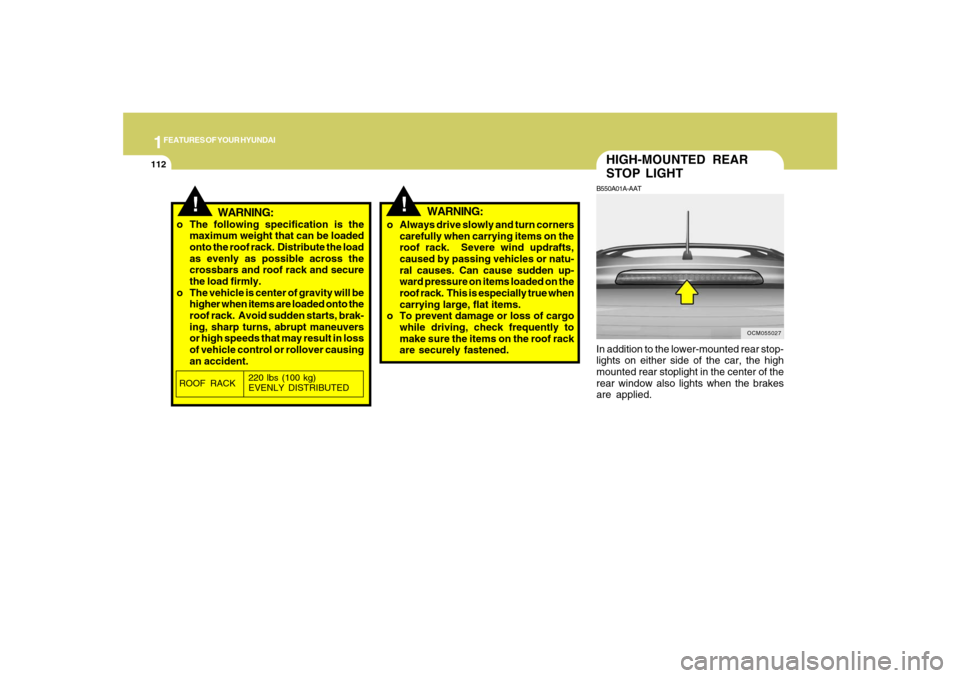
STOP LIGHTB550A01A-AATIn addition to the lower-mounted rear stop-
lights on either side of the car, the high
mounted rear stoplight in the center of the
rear window also lights when the brakes
are applied.
OCM055027
!
!
WARNING:
o The following specification is the
maximum weight that can be loaded
onto the roof rack. Distribute the load
as evenly as possible across the
crossbars and roof rack and secure
the load firmly.
o The vehicle is center of gravity will be
higher when items are loaded onto the
roof rack. Avoid sudden starts, brak-
ing, sharp turns, abrupt maneuvers
or high speeds that may result in loss
of vehicle control or rollover causing
an accident.o Always drive slowly and turn corners
carefully when carrying items on the
roof rack. Severe wind updrafts,
caused by passing vehicles or natu-
ral causes. Can cause sudden up-
ward pressure on items loaded on the
roof rack. This is especially true when
carrying large, flat items.
o To prevent damage or loss of cargo
while driving, check frequently to
make sure the items on the roof rack
are securely fastened.ROOF RACK220 lbs (100 kg)
EVENLY DISTRIBUTED
WARNING:
Page 130 of 355
1FEATURES OF YOUR HYUNDAI
118
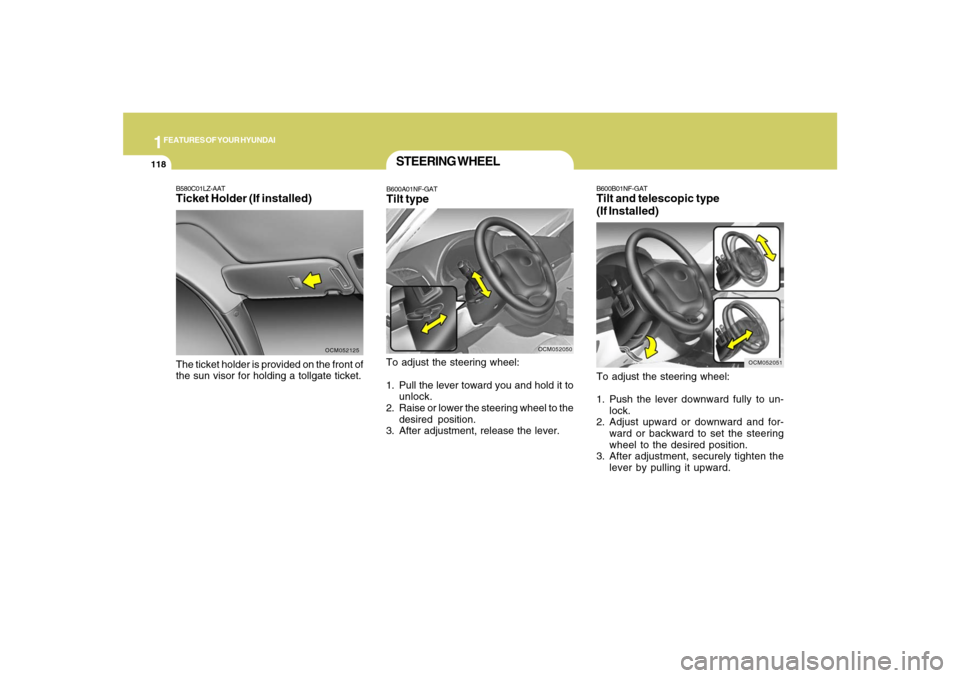
B600B01NF-GATTilt and telescopic type
(If Installed)To adjust the steering wheel:
1. Push the lever downward fully to un-
lock.
2. Adjust upward or downward and for-
ward or backward to set the steering
wheel to the desired position.
3. After adjustment, securely tighten the
lever by pulling it upward.
OCM052051
B580C01LZ-AATTicket Holder (If installed)The ticket holder is provided on the front of
the sun visor for holding a tollgate ticket.
OCM052125
STEERING WHEELB600A01NF-GATTilt typeTo adjust the steering wheel:
1. Pull the lever toward you and hold it to
unlock.
2. Raise or lower the steering wheel to the
desired position.
3. After adjustment, release the lever.
OCM052050