2008 GMC SAVANA tow
[x] Cancel search: towPage 128 of 402

AUTO (Automatic):Turn the control to this position
to automatically turn on the headlamps at normal
brightness, together with the following:
•Parking Lamps
•Instrument Panel Lights
•Taillamps
•License Plate Lamps
;(Parking Lamps):Turn the control to this position
to turn on the parking lamps together with the
following:
•Instrument Panel Lights
•Taillamps
•License Plate Lamps
2(Headlamps):Turn the control to this position to
turn on the headlamps together with the following lamps
listed below.
•Parking Lamps
•Instrument Panel Lights
•Taillamps
•License Plate LampsWhen the headlamps are turned on while the vehicle is
on, the headlamps will turn off automatically 10 minutes
after the ignition is turned off. When the headlamps are
turned on while the vehicle is off, the headlamps will
continue to stay on. To prevent the battery from being
drained, turn the control to the off position.
A warning chime sounds if the driver’s door is opened
while the ignition switch is off and the headlamps are on.
To change the headlamps from low beam to high
beam, push the turn signal/multifunction lever toward
the instrument panel.
Headlamps on Reminder
If a door is open, a reminder chime sounds when the
headlamps or parking lamps are manually turned on
and the key is out of the ignition. To turn off the chime,
turn the headlamp switch to off or auto and then
back on, or close and re-open the door. In the auto
mode, the headlamps turn off once the ignition is
in LOCK/OFF or may remain on until the headlamp
delay ends, if enabled in the Driver Information
Center (DIC). See “Exit Lighting” underDIC Vehicle
Customization on page 3-58.
3-14
Page 133 of 402

Climate Controls
Climate Control System
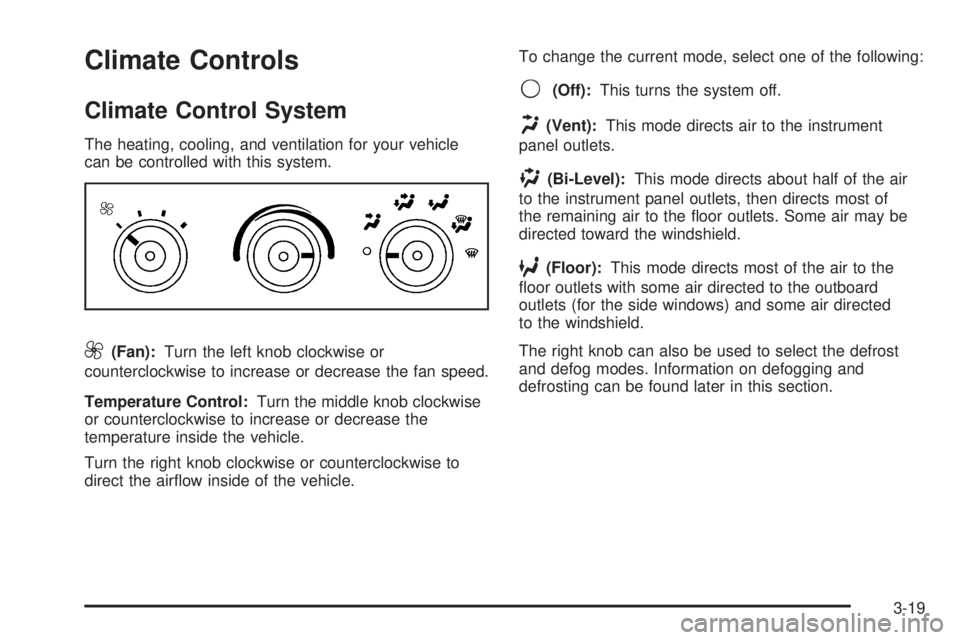
The heating, cooling, and ventilation for your vehicle
can be controlled with this system.
9(Fan):Turn the left knob clockwise or
counterclockwise to increase or decrease the fan speed.
Temperature Control:Turn the middle knob clockwise
or counterclockwise to increase or decrease the
temperature inside the vehicle.
Turn the right knob clockwise or counterclockwise to
direct the airflow inside of the vehicle.To change the current mode, select one of the following:
9(Off):This turns the system off.
H(Vent):This mode directs air to the instrument
panel outlets.
)(Bi-Level):This mode directs about half of the air
to the instrument panel outlets, then directs most of
the remaining air to the floor outlets. Some air may be
directed toward the windshield.
6(Floor):This mode directs most of the air to the
floor outlets with some air directed to the outboard
outlets (for the side windows) and some air directed
to the windshield.
The right knob can also be used to select the defrost
and defog modes. Information on defogging and
defrosting can be found later in this section.
3-19
Page 134 of 402

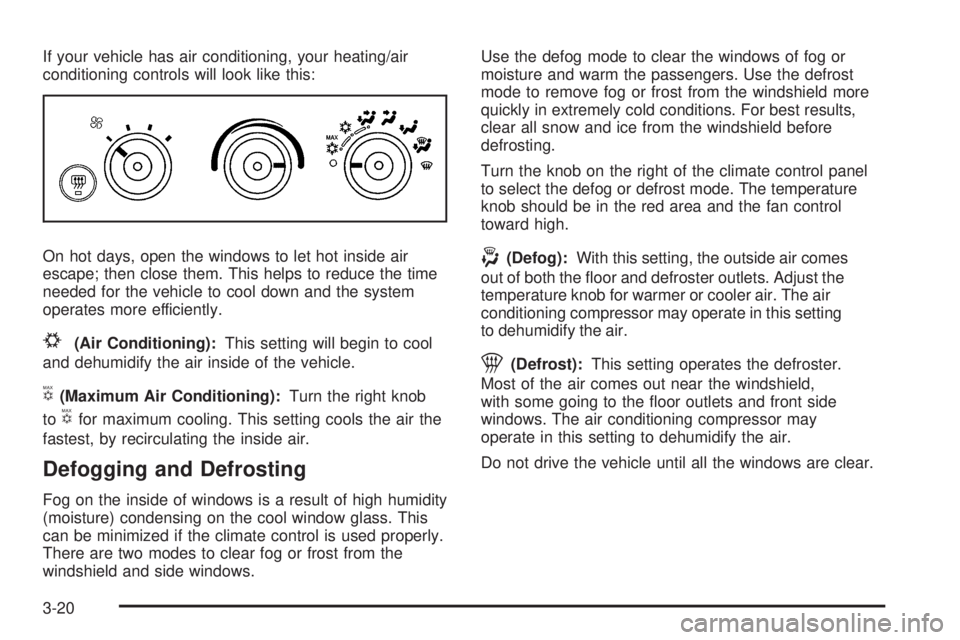
If your vehicle has air conditioning, your heating/air
conditioning controls will look like this:
On hot days, open the windows to let hot inside air
escape; then close them. This helps to reduce the time
needed for the vehicle to cool down and the system
operates more efficiently.
#(Air Conditioning):This setting will begin to cool
and dehumidify the air inside of the vehicle.
V(Maximum Air Conditioning):Turn the right knob
to
Vfor maximum cooling. This setting cools the air the
fastest, by recirculating the inside air.
Defogging and Defrosting
Fog on the inside of windows is a result of high humidity
(moisture) condensing on the cool window glass. This
can be minimized if the climate control is used properly.
There are two modes to clear fog or frost from the
windshield and side windows.Use the defog mode to clear the windows of fog or
moisture and warm the passengers. Use the defrost
mode to remove fog or frost from the windshield more
quickly in extremely cold conditions. For best results,
clear all snow and ice from the windshield before
defrosting.
Turn the knob on the right of the climate control panel
to select the defog or defrost mode. The temperature
knob should be in the red area and the fan control
toward high.
-(Defog):With this setting, the outside air comes
out of both the floor and defroster outlets. Adjust the
temperature knob for warmer or cooler air. The air
conditioning compressor may operate in this setting
to dehumidify the air.
1(Defrost):This setting operates the defroster.
Most of the air comes out near the windshield,
with some going to the floor outlets and front side
windows. The air conditioning compressor may
operate in this setting to dehumidify the air.
Do not drive the vehicle until all the windows are clear.
3-20
Page 147 of 402

You can only drive for a short time with the reading in
either warning zone. If you must drive, turn off all
unnecessary accessories.
Readings in either warning zone indicate a possible
problem in the electrical system. Have the vehicle
serviced as soon as possible.
Brake System Warning Light
Your vehicle’s hydraulic brake system is divided into
two parts. If one part is not working, the other part can
still work and stop you. For good braking, though,
you need both parts working well.
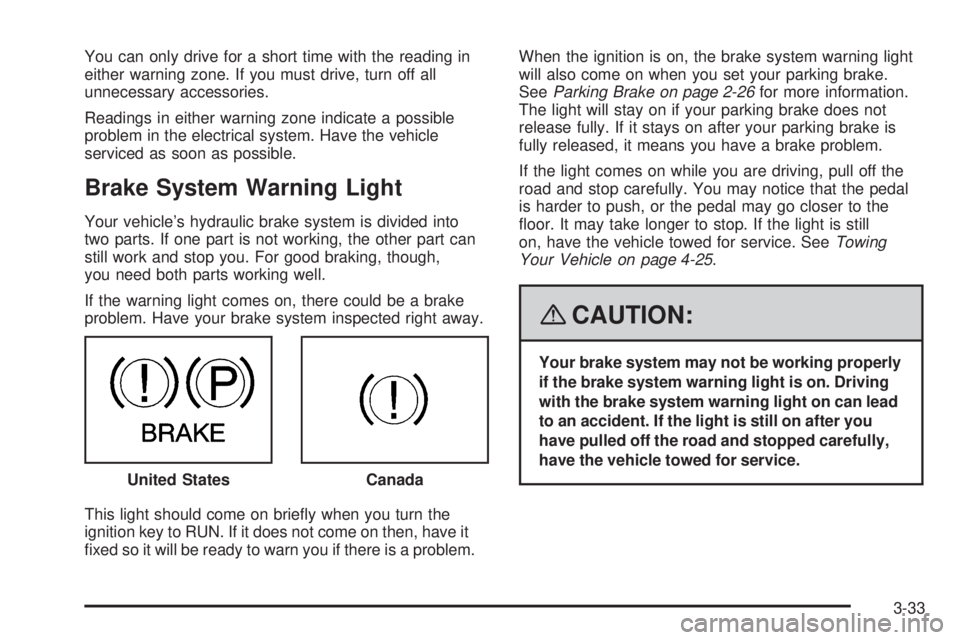
If the warning light comes on, there could be a brake
problem. Have your brake system inspected right away.
This light should come on briefly when you turn the
ignition key to RUN. If it does not come on then, have it
fixed so it will be ready to warn you if there is a problem.When the ignition is on, the brake system warning light
will also come on when you set your parking brake.
SeeParking Brake on page 2-26for more information.
The light will stay on if your parking brake does not
release fully. If it stays on after your parking brake is
fully released, it means you have a brake problem.
If the light comes on while you are driving, pull off the
road and stop carefully. You may notice that the pedal
is harder to push, or the pedal may go closer to the
floor. It may take longer to stop. If the light is still
on, have the vehicle towed for service. SeeTowing
Your Vehicle on page 4-25.
{CAUTION:
Your brake system may not be working properly
if the brake system warning light is on. Driving
with the brake system warning light on can lead
to an accident. If the light is still on after you
have pulled off the road and stopped carefully,
have the vehicle towed for service.
United States
Canada
3-33
Page 151 of 402

If the Light is Flashing
The following can prevent more serious damage to your
vehicle:
•Reduce vehicle speed.
•Avoid hard accelerations.
•Avoid steep uphill grades.
•If you are towing a trailer, reduce the amount of
cargo being hauled as soon as it is possible.
If the light stops flashing and remains on steady,
see “If the Light Is On Steady” following.
If the light continues to flash, when it is safe to do so,
stop the vehicle. Find a safe place to park the vehicle.
Turn the ignition off, wait at least 10 seconds, and restart
the engine. If the light remains on steady, see “If the
Light Is On Steady” following. If the light is still flashing,
follow the previous steps and see your dealer/retailer
for service as soon as possible.
If the Light Is On Steady
You might be able to correct the emission system
malfunction by considering the following:
Did you recently put fuel into your vehicle?
If so, reinstall the fuel cap, making sure to fully
install the cap. SeeFilling the Tank on page 5-10.
The diagnostic system can determine if the fuel cap hasbeen left off or improperly installed. A loose or missing
fuel cap allows fuel to evaporate into the atmosphere.
A few driving trips with the cap properly installed should
turn the light off.
Did you just drive through a deep puddle of water?
If so, your vehicle’s electrical system might be wet.
The condition is usually corrected when the electrical
system dries out. A few driving trips should turn the
light off.
Have you recently changed brands of fuel?
If so, be sure to fuel your vehicle with quality fuel. See
Gasoline Octane on page 5-6. Poor fuel quality causes
the engine not to run as efficiently as designed. You
might notice this as stalling after start-up, stalling when
you put the vehicle into gear, misfiring, hesitation on
acceleration, or stumbling on acceleration — these
conditions might go away once the engine is warmed up.
This will be detected by the system and cause the light to
turn on.
If you experience one or more of these conditions,
change the fuel brand you use. It will require at least
one full tank of the proper fuel to turn the light off.
If none of the above steps have made the light turn off,
your dealer/retailer can check the vehicle. Your dealer/
retailer has the proper test equipment and diagnostic
tools to fix any mechanical or electrical problems that
might have developed.
3-37
Page 154 of 402

Security Light
For information regarding
this light and the vehicle’s
security system, see
PASS-Key
®III+ Operation
on page 2-17.
Cruise Control Light
This light comes on
whenever you set the
cruise control.
The light goes out when the cruise control is turned off.
SeeCruise Control on page 3-10for more information.
Highbeam On Light
This light comes on when
the high-beam headlamps
are in use.
SeeHeadlamp High/Low-Beam Changer on page 3-9
for more information.
Tow/Haul Mode Light
This light comes on when
the Tow/Haul mode has
been activated.
For more information, seeTow/Haul Mode on page 2-25.
3-40
Page 199 of 402

Your Driving, the Road, and Your Vehicle..........4-2
Defensive Driving...........................................4-2
Drunk Driving.................................................4-2
Control of a Vehicle........................................4-3
Braking.........................................................4-3
Antilock Brake System (ABS)...........................4-4
Braking in Emergencies...................................4-5
Locking Rear Axle..........................................4-5
StabiliTrak
®System........................................4-5
All-Wheel Drive (AWD) System.........................4-7
Steering........................................................4-7
Off-Road Recovery.......................................4-10
Passing.......................................................4-10
Loss of Control.............................................4-10Driving at Night............................................4-12
Driving in Rain and on Wet Roads..................4-13
Before Leaving on a Long Trip.......................4-14
Highway Hypnosis........................................4-14
Hill and Mountain Roads................................4-15
Winter Driving..............................................4-16
If Your Vehicle is Stuck in Sand, Mud,
Ice, or Snow.............................................4-19
Rocking Your Vehicle to Get It Out.................4-20
Loading Your Vehicle....................................4-20
Towing..........................................................4-25
Towing Your Vehicle.....................................4-25
Recreational Vehicle Towing...........................4-26
Towing a Trailer...........................................4-28
Section 4 Driving Your Vehicle
4-1
Page 218 of 402

Rocking Your Vehicle to Get It Out
First, turn the steering wheel left and right to clear the
area around the front wheels. Turn off any traction or
stability system. SeeStabiliTrak
®System on page 4-5.
Then shift back and forth between REVERSE (R) and a
forward gear, spinning the wheels as little as possible.
To prevent transmission wear, wait until the wheels stop
spinning before shifting gears. Release the accelerator
pedal while you shift, and press lightly on the accelerator
pedal when the transmission is in gear. By slowly
spinning the wheels in the forward and reverse directions,
you will cause a rocking motion that could free your
vehicle. If that does not get your vehicle out after a few
tries, it might need to be towed out. If your vehicle does
need to be towed out, seeTowing Your Vehicle on
page 4-25.
Loading Your Vehicle
It is very important to know how much weight
your vehicle can carry. This weight is called the
vehicle capacity weight and includes the weight of
all occupants, cargo, and all nonfactory-installed
options. Two labels on your vehicle show how
much weight it was designed to carry, the Tire
and Loading Information label and the
Certification/Tire label.
{CAUTION:
Do not load your vehicle any heavier than
the Gross Vehicle Weight Rating (GVWR),
or either the maximum front or rear Gross
Axle Weight Rating (GAWR). If you do,
parts on your vehicle can break, and it
can change the way your vehicle handles.
These could cause you to lose control
and crash. Also, overloading can shorten
the life of your vehicle.
4-20