2008 FIAT SEDICI clock
[x] Cancel search: clockPage 113 of 266
112
GENERAL
1.Power on/ off knob – volume control
knob
2.Mute button
3.Audio control button
4.Up button
5.Down button
Power On/Off
Press the power on/ off knob (1) to switch
power on.
Press the power on/ off knob (1) again to
switch power off.
Volume Up/Down
Turn the volume control knob (1) clock-
wise to increase the volume.
Turn the volume control knob (1) counter
clockwise to decrease the volume.
Mute On/Off
Press the mute button (2) to temporari-
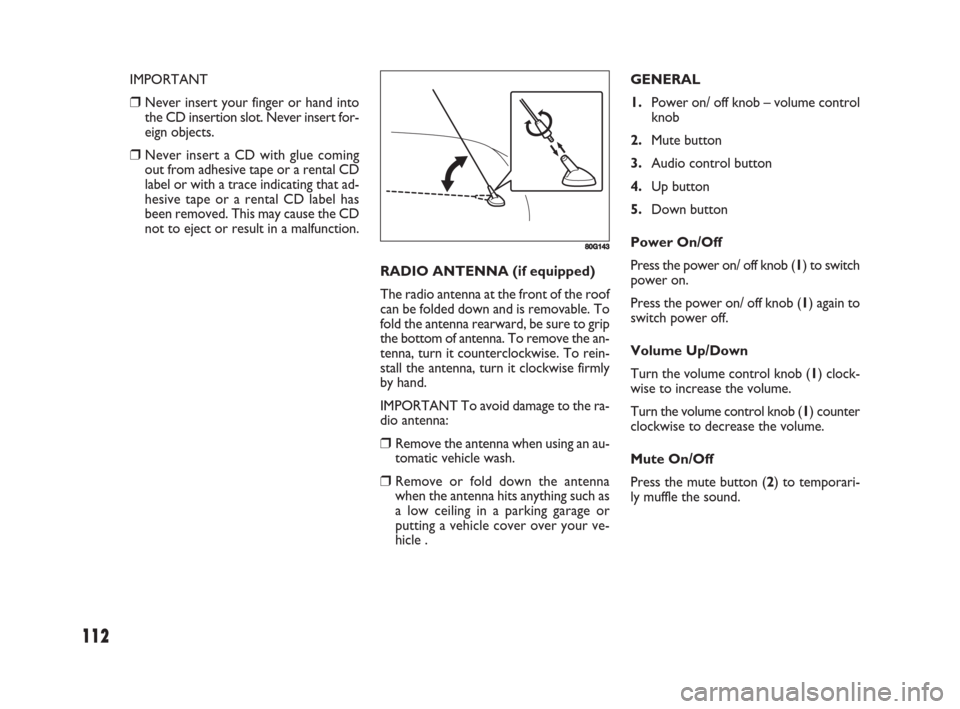
ly muffle the sound. RADIO ANTENNA (if equipped)
The radio antenna at the front of the roof
can be folded down and is removable. To
fold the antenna rearward, be sure to grip
the bottom of antenna. To remove the an-
tenna, turn it counterclockwise. To rein-
stall the antenna, turn it clockwise firmly
by hand.
IMPORTANT To avoid damage to the ra-
dio antenna:
❒Remove the antenna when using an au-
tomatic vehicle wash.
❒Remove or fold down the antenna
when the antenna hits anything such as
a low ceiling in a parking garage or
putting a vehicle cover over your ve-
hicle .
80G143
IMPORTANT
❒Never insert your finger or hand into
the CD insertion slot. Never insert for-
eign objects.
❒Never insert a CD with glue coming
out from adhesive tape or a rental CD
label or with a trace indicating that ad-
hesive tape or a rental CD label has
been removed. This may cause the CD
not to eject or result in a malfunction.
069-128 Fiat16 New GB 3-09-2008 8:20 Pagina 112
Page 117 of 266
116
PTY Search
Programs can be searched for by PTY.
❒Press the program type button (11) to
select PTY mode.
❒Turn the volume control knob (1) to
select a desired PTY.
Turning the volume knob (1) clockwise
changes the items in the following order.
(Turning it counter clockwise changes
them in the reverse order.)
NO PTY / NEWS / AFFAIRS / INFO /
SPORTS / EDUCATE / DRAMA / CUL-
TURE / SCIENCE / VARIED / POP /
ROCK / EASY M / LIGHT M / CLASSICS /
OTHER M / WEATHER / FINANCE /
CHILDREN / SOCIAL / RELIGION /
PHONE IN / TRAVEL / LEISURE / JAZZ /
COUNTRY / NATION M / OLDIES /
FOLK M / DOCUMENT / (NEWS)
❒Press the up button (4) or the down
button (5) while PTY is displayed.
Search begins.
NOTE If the specified PTY is not received,
the unit displays “NOTHING”, and then
PTY again. If the up button (4) or the
down button (5) is pressed, the same PTY
is searched for again.CD PLAYER
4.Up button
5.Down button
12.CD button
13.Eject button
14.Scan button
15.Repeat button
16.Random play button
CD Mode
CD mode is selected by pressing the CD
button (12) when power is off or in oth-
er modes
NOTE
❒CD mode is not selected if no CD is
in the unit.
❒If the mode has changed to CD chang-
er mode, press the CD button (12)
again. TA On/off
Press the traffic announcement button
(10) to turn TA on. Press the traffic an-
nouncement button (10) again to turn TA
off.
When TA is turned on, the “TA” indica-
tor lights.
The “TP” indicator remains lit while TP
data is being received.
NOTE
❒If the up button (4) or the down but-
ton (5) is pressed while TA is turned
on, the unit searches for a TP station
(TP SEEK).
❒If TP data is not received in about 20
seconds after TA is turned on, TP SEEK
automatically takes place only once.
❒If no TP station is received, the unit dis-
plays “NOTHING”.
TA Standby
If TP is received when TA is ON in CD or
CD changer mode, radio mode is auto-
matically selected. The unit returns to the
preceding mode after TP.
069-128 Fiat16 New GB 3-09-2008 8:20 Pagina 116
Page 134 of 266
133
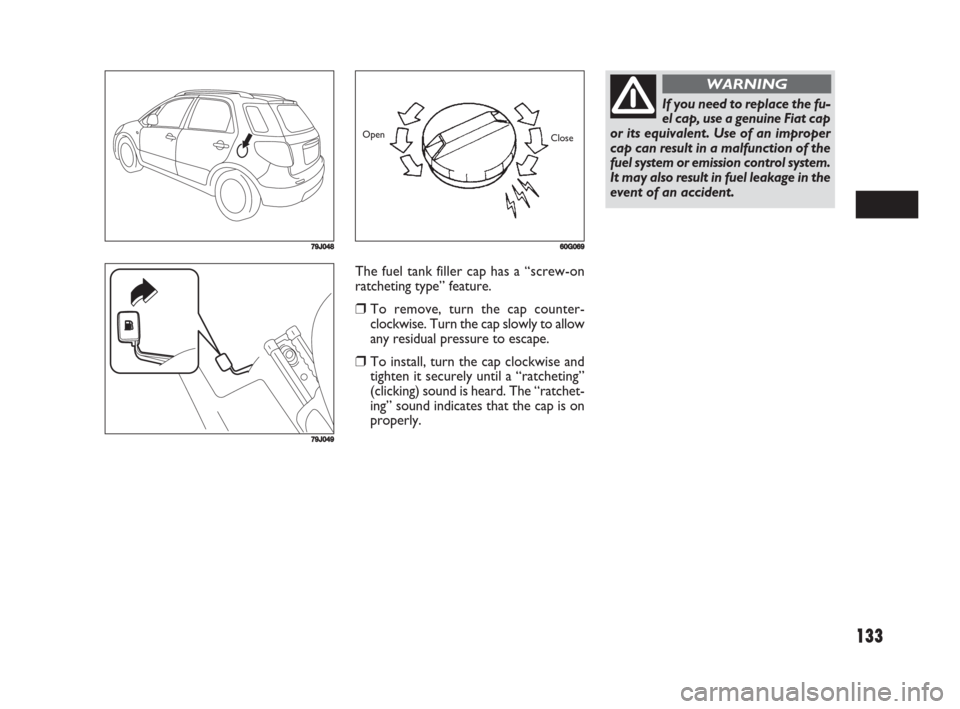
The fuel tank filler cap has a “screw-on
ratcheting type” feature.
❒To remove, turn the cap counter-
clockwise. Turn the cap slowly to allow
any residual pressure to escape.
❒To install, turn the cap clockwise and
tighten it securely until a “ratcheting”
(clicking) sound is heard. The “ratchet-
ing” sound indicates that the cap is on
properly.
79J048
79J049
60G069
Open
Close
If you need to replace the fu-
el cap, use a genuine Fiat cap
or its equivalent. Use of an improper
cap can result in a malfunction of the
fuel system or emission control system.
It may also result in fuel leakage in the
event of an accident.
WARNING
129-148 Fiat16 New GB 3-09-2008 8:16 Pagina 133
Page 145 of 266
144
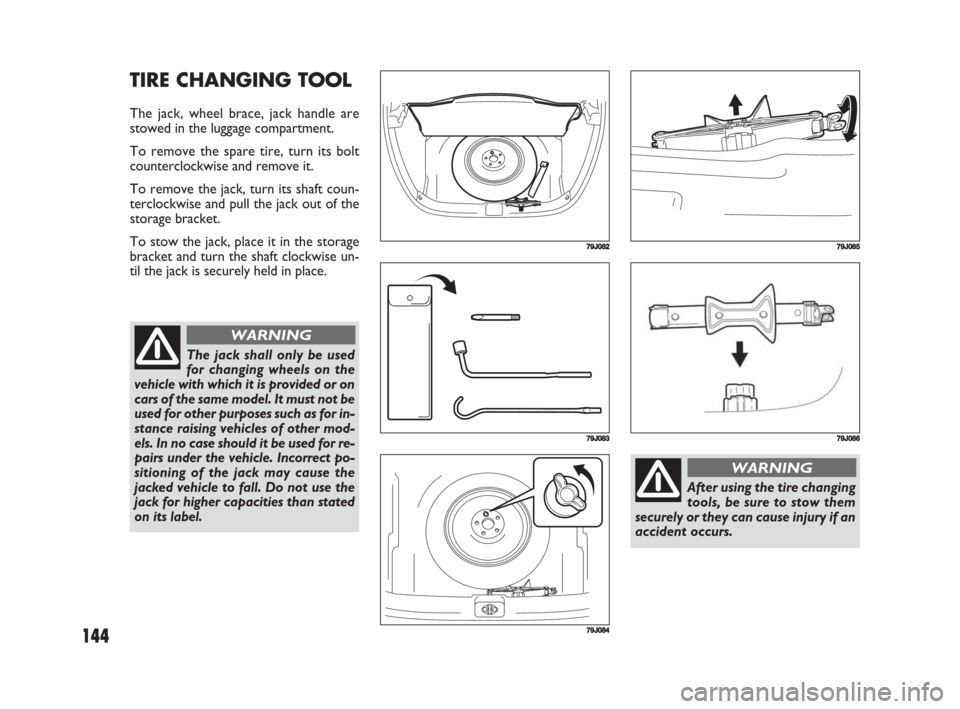
TIRE CHANGING TOOL
The jack, wheel brace, jack handle are
stowed in the luggage compartment.
To remove the spare tire, turn its bolt
counterclockwise and remove it.
To remove the jack, turn its shaft coun-
terclockwise and pull the jack out of the
storage bracket.
To stow the jack, place it in the storage
bracket and turn the shaft clockwise un-
til the jack is securely held in place.
79J082
79J083
79J084
79J085
The jack shall only be used
for changing wheels on the
vehicle with which it is provided or on
cars of the same model. It must not be
used for other purposes such as for in-
stance raising vehicles of other mod-
els. In no case should it be used for re-
pairs under the vehicle. Incorrect po-
sitioning of the jack may cause the
jacked vehicle to fall. Do not use the
jack for higher capacities than stated
on its label.
WARNING
After using the tire changing
tools, be sure to stow them
securely or they can cause injury if an
accident occurs.
WARNING
79J086
129-148 Fiat16 New GB 3-09-2008 8:16 Pagina 144
Page 148 of 266
147
IMPORTANT To avoid damage to the ra-
dio antenna:
❒Remove the antenna when using an au-
tomatic vehicle wash.
❒Remove or fold down the antenna
when the antenna hits anything such as
a low ceiling in a parking garage or
putting a vehicle cover over your ve-
hicle.
RADIO ANTENNA
(if equipped)
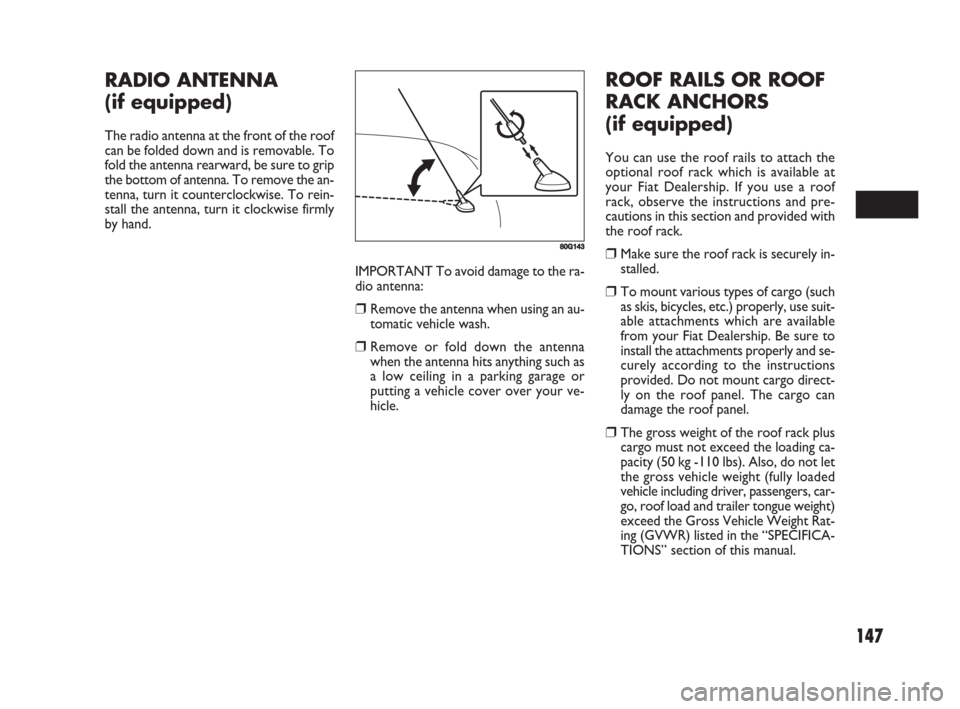
The radio antenna at the front of the roof
can be folded down and is removable. To
fold the antenna rearward, be sure to grip
the bottom of antenna. To remove the an-
tenna, turn it counterclockwise. To rein-
stall the antenna, turn it clockwise firmly
by hand.
80G143
ROOF RAILS OR ROOF
RACK ANCHORS
(if equipped)
You can use the roof rails to attach the
optional roof rack which is available at
your Fiat Dealership. If you use a roof
rack, observe the instructions and pre-
cautions in this section and provided with
the roof rack.
❒Make sure the roof rack is securely in-
stalled.
❒To mount various types of cargo (such
as skis, bicycles, etc.) properly, use suit-
able attachments which are available
from your Fiat Dealership. Be sure to
install the attachments properly and se-
curely according to the instructions
provided. Do not mount cargo direct-
ly on the roof panel. The cargo can
damage the roof panel.
❒The gross weight of the roof rack plus
cargo must not exceed the loading ca-
pacity (50 kg -110 lbs). Also, do not let
the gross vehicle weight (fully loaded
vehicle including driver, passengers, car-
go, roof load and trailer tongue weight)
exceed the Gross Vehicle Weight Rat-
ing (GVWR) listed in the “SPECIFICA-
TIONS” section of this manual.
129-148 Fiat16 New GB 3-09-2008 8:16 Pagina 147
Page 155 of 266
154
DIESEL PARTICULATE FILTER
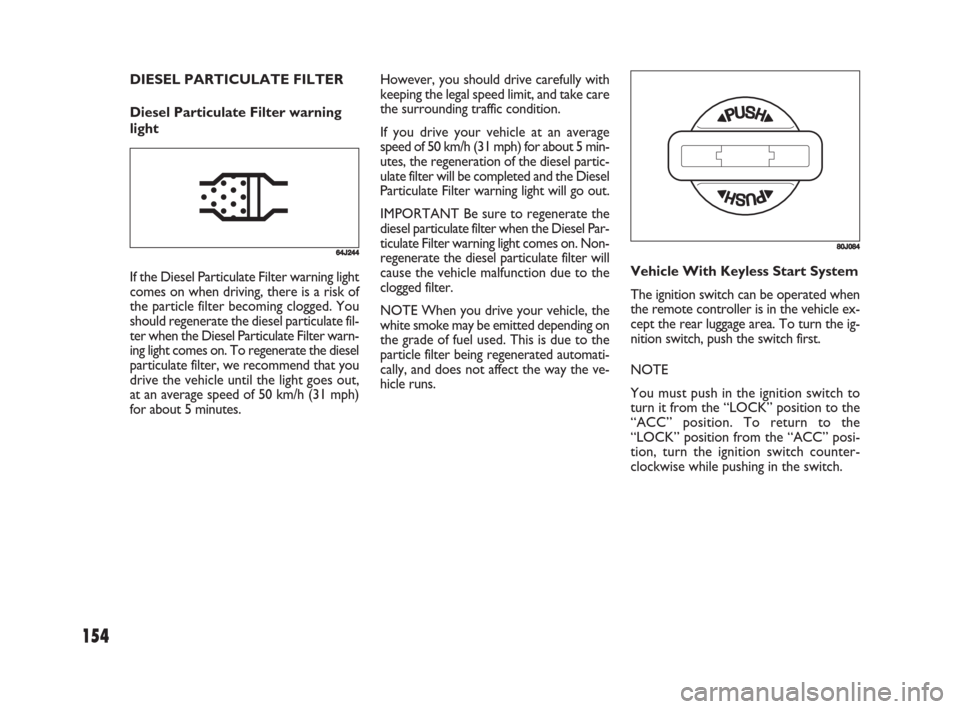
Diesel Particulate Filter warning
lightHowever, you should drive carefully with
keeping the legal speed limit, and take care
the surrounding traffic condition.
If you drive your vehicle at an average
speed of 50 km/h (31 mph) for about 5 min-
utes, the regeneration of the diesel partic-
ulate filter will be completed and the Diesel
Particulate Filter warning light will go out.
IMPORTANT Be sure to regenerate the
diesel particulate filter when the Diesel Par-
ticulate Filter warning light comes on. Non-
regenerate the diesel particulate filter will
cause the vehicle malfunction due to the
clogged filter.
NOTE When you drive your vehicle, the
white smoke may be emitted depending on
the grade of fuel used. This is due to the
particle filter being regenerated automati-
cally, and does not affect the way the ve-
hicle runs.
64J244
If the Diesel Particulate Filter warning light
comes on when driving, there is a risk of
the particle filter becoming clogged. You
should regenerate the diesel particulate fil-
ter when the Diesel Particulate Filter warn-
ing light comes on. To regenerate the diesel
particulate filter, we recommend that you
drive the vehicle until the light goes out,
at an average speed of 50 km/h (31 mph)
for about 5 minutes.Vehicle With Keyless Start System
The ignition switch can be operated when
the remote controller is in the vehicle ex-
cept the rear luggage area. To turn the ig-
nition switch, push the switch first.
NOTE
You must push in the ignition switch to
turn it from the “LOCK” position to the
“ACC” position. To return to the
“LOCK” position from the “ACC” posi-
tion, turn the ignition switch counter-
clockwise while pushing in the switch.
80J084
149-166 Fiat16 New GB 3-09-2008 8:15 Pagina 154
Page 193 of 266
192
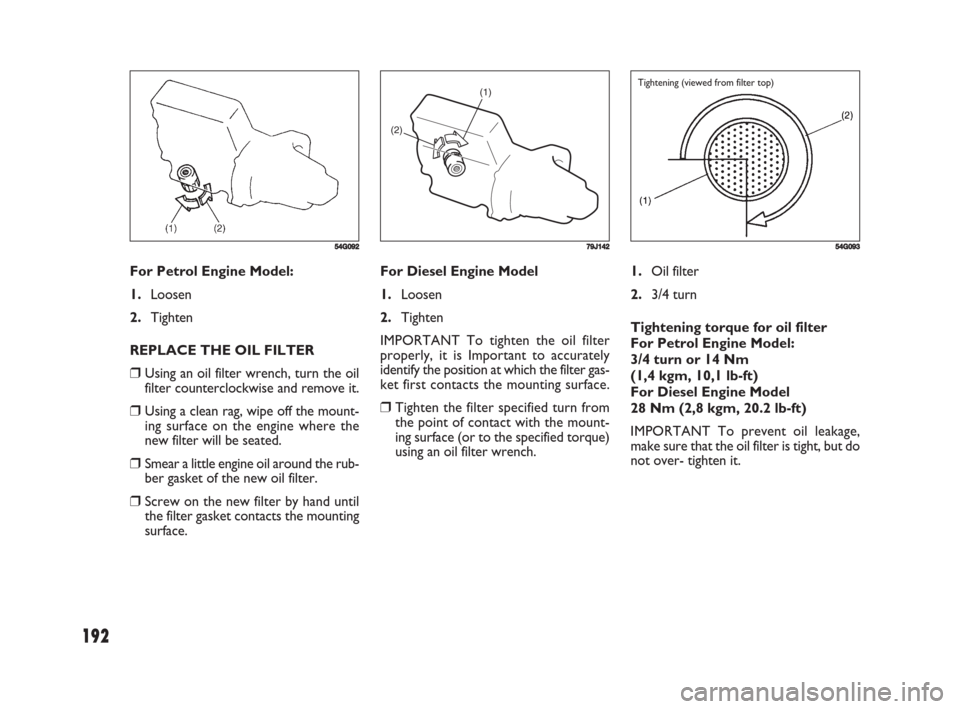
1.Oil filter
2.3/4 turn
Tightening torque for oil filter
For Petrol Engine Model:
3/4 turn or 14 Nm
(1,4 kgm, 10,1 lb-ft)
For Diesel Engine Model
28 Nm (2,8 kgm, 20.2 lb-ft)
IMPORTANT To prevent oil leakage,
make sure that the oil filter is tight, but do
not over- tighten it. For Petrol Engine Model:
1.Loosen
2.Tighten
REPLACE THE OIL FILTER
❒Using an oil filter wrench, turn the oil
filter counterclockwise and remove it.
❒Using a clean rag, wipe off the mount-
ing surface on the engine where the
new filter will be seated.
❒Smear a little engine oil around the rub-
ber gasket of the new oil filter.
❒Screw on the new filter by hand until
the filter gasket contacts the mounting
surface.
54G09254G093
Tightening (viewed from filter top)
For Diesel Engine Model
1.Loosen
2.Tighten
IMPORTANT To tighten the oil filter
properly, it is Important to accurately
identify the position at which the filter gas-
ket first contacts the mounting surface.
❒Tighten the filter specified turn from
the point of contact with the mount-
ing surface (or to the specified torque)
using an oil filter wrench.
(1)
(2)
79J142
181-224 Fiat16 New GB 3-09-2008 8:17 Pagina 192
Page 197 of 266
196
ADDING COOLANT
Engine coolant is harmful or
fatal if swallowed or inhaled.
Do not drink antifreeze or coolant so-
lution. If swallowed, do not induce
vomiting. Immediately contact a poi-
son control center or a physician.
Avoid inhaling mist or hot vapors; if
inhaled, remove to fresh air. If
coolant gets in eyes, flush eyes with
water and seek medical attention.
Wash thoroughly after handling. So-
lution can be poisonous to animals.
Keep out of the reach of children and
animals.
WARNINGIMPORTANT
❒The mixture you use should contain
50% concentration of antifreeze.
❒If the lowest ambient temperature in
your area is expected to be –35°C
(–31°F) or below, use higher concen-
trations up to 60% following the in-
structions on the antifreeze container.
❒When putting the cap on the reservoir
tank, line up the arrow on the cap and
the arrow on the tank. Failure to follow
this can result in coolant leakage.
If the coolant level is below the “LOW”
mark, more coolant should be added.
When the engine is cool, remove the de-
gassing tank cap by turning it anticlock-
wise slowly to release any pressure. And
add coolant until the degassing tank level
reaches the “FULL” mark. Never fill the
degassing tank above the “FULL” mark.
It is hazardous to remove the
degassing tank cap for Diesel
engine when the water temperature
is high, because scalding fluid and
steam may be blown out under pres-
sure. Wait until the coolant temper-
ature has lowered before removing
the cap.
WARNING
181-224 Fiat16 New GB 3-09-2008 8:18 Pagina 196