2008 FIAT DOBLO dashboard
[x] Cancel search: dashboardPage 16 of 222

15GETTING TO KNOW YOUR VEHICLE
TRANSPORTING CHILDREN SAFELYFor optimal protection in the event
of a crash, all passengers must be seat-
ed and wearing adequate restraint sys-
tems.
This is even more important for chil-
dren.
This prescription is compulsory in all
EC countries according to EC Direc-
tive 2003/20/EC.
Compared with adults, their head is
proportionally larger and heavier than
the rest of the body, while the mus-
cles and bone structure are not com-
pletely developed. Therefore, correct
restraint systems are necessary, oth-
er then adult seat belts. SERIOUS DANGER: Never place cradle child’s seats not
facing the running direction on the front seat of vehicles
with passenger’s airbag, which during inflation could cause
serious injury, even mortal. You are advised to carry children always on
the rear seat, as this is the most protected position in the case of a crash.
In any case, child’ seats must absolutely not be fitted on the front seats
of vehicles with passenger’s airbag, which during inflation could cause
serious injury, even mortal, regardless of the seriousness of the crash
that triggered it. Children may be placed on the front seat of vehicles
fitted with passenger’s airbag deactivation. In this case, it is absolutely
necessary to check the warning light
Fon the instrument panel to
make sure that deactivation has actually taken place (see paragraph
F
RONT AND SIDE AIRBAGS AT ITEMFRONT PASSENGER AIRBAG). The front pas-
senger’s seat shall be adjusted in the most backward position to pre-
vent any contact between child’s seat and dashboard.
001-105 Doblo GB 16-12-2008 14:22 Pagina 15
Page 22 of 222

21GETTING TO KNOW YOUR VEHICLE
DASHBOARD
The presence and the position of the instruments and warning lights may vary according to the versions.
1.Fixed side vent - 2.Adjustable side vent - 3.Horn - 4.Instrument panel - 5.Adjustable central vent - 6.Glove compart-
ment - 7.Adjustable central vent - 8.Central controls - 9.Glove compartment - 10.Adjustable side vent - 11.Fixed side
vent - 12.Front right-hand speaker housing -13.Glove compartment - 14.Heater/ventilation/climate control system con-
trols - 15.Recirculation slider - 16.Additional power socket - 17.Glove compartment - 18.Ashtray - 19.Cigar lighter -
20.Ignition switch - 21.Steering wheel adjustment lever - 22.Bonnet opening lever - 23.Front left-hand speaker housing.
143567891011
121314161517191820212223
2
fig. 27
F0A0701b
001-105 Doblo GB 16-12-2008 14:22 Pagina 21
Page 46 of 222

HEATED REAR
WINDOW (amber)
The warning light turns
on when switching the heated rear
window on.
45GETTING TO KNOW YOUR VEHICLE
The presence of water in
the fuel circuit may cause
serious damage to the en-
tire injection system and cause ir-
regular engine operation. If the
warning light
cor èturns on
(on certain versions together
with the message on the display)
contact Fiat Dealership as soon
as possible to have the system re-
lieved. If the above indications
come on immediately after refu-
elling, water has probably been
poured into the tank: turn the en-
gine off immediately and contact
Fiat Dealership.
¢Y(
EXTERNAL LIGHT
FAILURE (amber)
The warning light turns on
when one of the following
lights is failing:
– sidelights
– brake lights (third brake light ex-
cluded)
– rear fog guards
– direction indicators
– number plate lights.
W
VEHICLE
PROTECTION
SYSTEM
FAILURE -
FIAT CODE
(amber)
Turning the key to MARthe warn-
ing light shall flash only once and then
go off.
If with the ignition key at MAR, the
warning light stays on, this indicates a
possible failure (see “Fiat Code sys-
tem” in section “Dashboard and con-
trols”).
IMPORTANTThe turning on at
the same time of the warning lights
U
and Yindicates a failure of the Fiat
CODE system.
If with the engine running the warn-
ing light
Uflashes, this means that
the vehicle is not protected by the en-
gine inhibitor device (see “Fiat Code
system” in section “Dashboard and
controls”).
Contact Fiat Dealership to have all
the key memorised.
001-105 Doblo GB 16-12-2008 14:22 Pagina 45
Page 48 of 222

LEFT-HAND AND
RIGHT-HAND
DIRECTION
INDICATOR (green -
intermittent) (Natural
Power versions)
The warning light turns on when the
direction indicator control lever is
moved downwards or, together with
the right indicator, when the hazard
warning light button is pressed.
The warning light turns on when the
direction indicator control lever is
moved upwards or, together with the
left indicator, when the hazard warn-
ing light button is pressed.RIGHT-HAND
DIRECTION
INDICATOR (green -
intermittent)
The warning light turns on when the
direction indicator control lever is
moved upwards or, together with the
left indicator, when the hazard warn-
ing light button is pressed.
LEFT-HAND
DIRECTION
INDICATOR (green -
intermittent)
The warning light turns on when the
direction indicator control lever is
moved downwards or, together with
the right indicator, when the hazard
warning light button is pressed. SIDELIGHTS
AND LOW BEAMS
(green)
FOLLOW ME HOME (green)
Side/taillights and low beams
The warning light turns on when
side/taillights or low beams are turned
on.
47GETTING TO KNOW YOUR VEHICLE
FRONT FOG
LIGHTS (green)
The warning light turns
on when the front fog lights are turned
on.
3
5
Follow me home
The warning light will turn when this
device is active (see “Follow me
home” in section “Dashboard and
controls”).
The display will show the dedicated
message.
F
y
D
Diesel fuel filter sensor failure
The warning light comes on when
the diesel fuel filter sensor is faulty.
Contact Fiat Dealership as soon as
possible.
On certain versions the dedicated
message is displayed.
Water in diesel fuel filter
See what described for warning light
c.
001-105 Doblo GB 16-12-2008 14:22 Pagina 47
Page 59 of 222

58GETTING TO KNOW YOUR VEHICLE
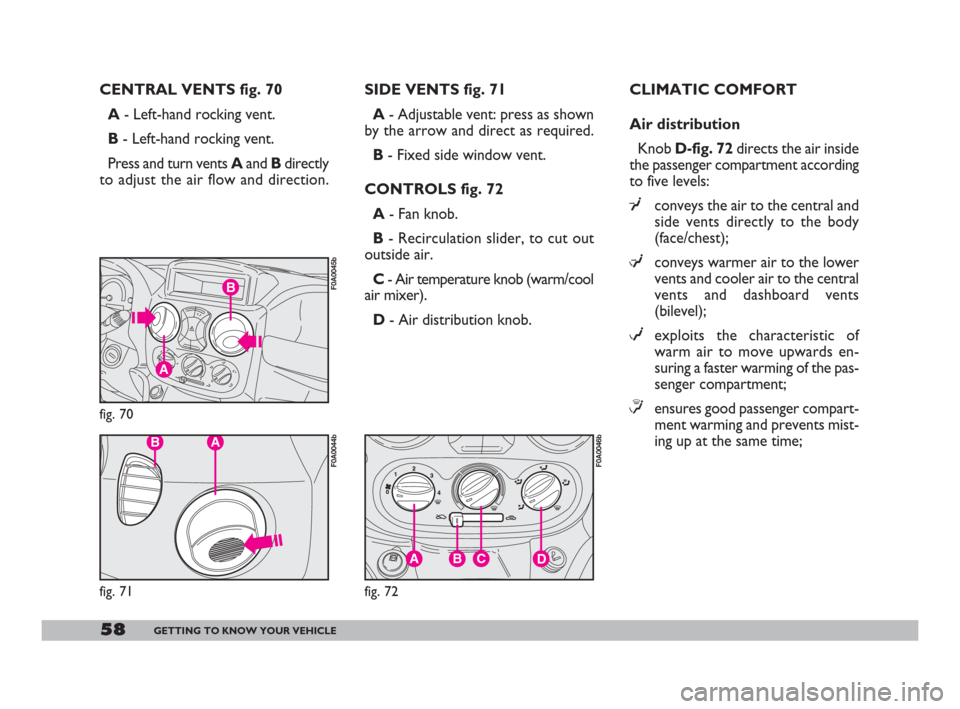
CENTRAL VENTS fig. 70
A- Left-hand rocking vent.
B- Left-hand rocking vent.
Press and turn vents Aand Bdirectly
to adjust the air flow and direction.SIDE VENTS fig. 71
A- Adjustable vent: press as shown
by the arrow and direct as required.
B- Fixed side window vent.
CONTROLS fig. 72
A- Fan knob.
B- Recirculation slider, to cut out
outside air.
C- Air temperature knob (warm/cool
air mixer).
D- Air distribution knob. CLIMATIC COMFORT
Air distribution
Knob D-fig. 72directs the air inside
the passenger compartment according
to five levels:
¥conveys the air to the central and
side vents directly to the body
(face/chest);
µconveys warmer air to the lower
vents and cooler air to the central
vents and dashboard vents
(bilevel);
wexploits the characteristic of
warm air to move upwards en-
suring a faster warming of the pas-
senger compartment;
≤ensures good passenger compart-
ment warming and prevents mist-
ing up at the same time;
B
A
fig. 70
F0A0045b
BA
fig. 71
F0A0044b
BCAD
fig. 72
F0A0046b
001-105 Doblo GB 16-12-2008 14:22 Pagina 58
Page 61 of 222

60GETTING TO KNOW YOUR VEHICLE
Heating
1)Air temperature knob C: point-
er in the red sector.
2)Fan knob A: pointer at the re-
quired speed.
3)Air distribution knob D: pointer
at
≤to warm the feet and demist the
windscreen at the same time;
µto convey air to the feet and cool-
er air to the central vents and
dashboard vents;
wfor fast heating.
Fast heating
1)Close the vents on the dashboard.
2)Air temperature knob A: point-
er at -in the red sector.
3)Fan knob Aat fourth speed,
pointer at 4-.
4)Air temperature knob D: point-
er at w.To prevent misting up:
IMPORTANTIf the outside air is
very damp, if it is raining and/or if there
is a considerable difference between
temperature inside and outside the ve-
hicle, prevent the windows from
misting up as follows:
– slider Bat Y;
– air temperature knob C: pointer at
-in the red sector;
– fan knob Aat second speed or
faster, pointer at 2;
– air distribution knob D: pointer at
-; switch to ≤if the windows start
misting up.
If the vehicle has a climate control
system, you are recommended to ad-
just the controls as described above
and press button A-fig. 78to speed
up the demisting process. Demisting and defrosting the
windscreen and the front side
windows
This function - called max-def- is
obtained by turning the control point-
ers to the orange symbols, specifical-
ly:
1)Air temperature knob A: point-
er at -in the red sector.
2)Fan knob B
: pointer at top speed
4-.
3)Air distribution knob D: pointer
at -.
4)Slider Bat Y.
After demisting and/or defrosting,
operate the controls to restore the
required comfort.
001-105 Doblo GB 16-12-2008 14:22 Pagina 60
Page 65 of 222

64GETTING TO KNOW YOUR VEHICLE
The direction indicators will auto-
matically be switched off when the ve-
hicle is straightened out.
If you wish to signal a lane change
where only a slight movement of the
steering wheel is required, move the
stalk up or down without pushing it far
enough to make it click. The stalk will
return to the neutral position as soon
as it is released.
RIGHT-HAND STALK
Windscreen wiper/washer
fig. 84
The device will only work when the
ignition key is at MAR.
fig. 84
F0A0053b
Main beam headlights fig. 81
Push the stalk from position 2to-
wards the dashboard to switch the
headlights on.
Warning light 1on the instrument
panel will turn on.
Pull the stalk towards the steering
wheel to switch the lights off.Flashing the headlights fig. 82
Pull the stalk towards the steering
wheel (unstable position).
Warning light 1on the instrument
panel will turn on.
Direction indicators fig. 83
Move the stalk as follows:
up - to switch on the right-hand di-
rection indicator
down - to switch on the left-hand di-
rection indicator.
Instrument panel warning light FD
or Rand Ewill come on flashing.
62
y1∆
fig. 81
F0A0050b
fig. 82
F0A0051b
fig. 83
F0A0052b
001-105 Doblo GB 16-12-2008 14:22 Pagina 64
Page 66 of 222

65GETTING TO KNOW YOUR VEHICLE
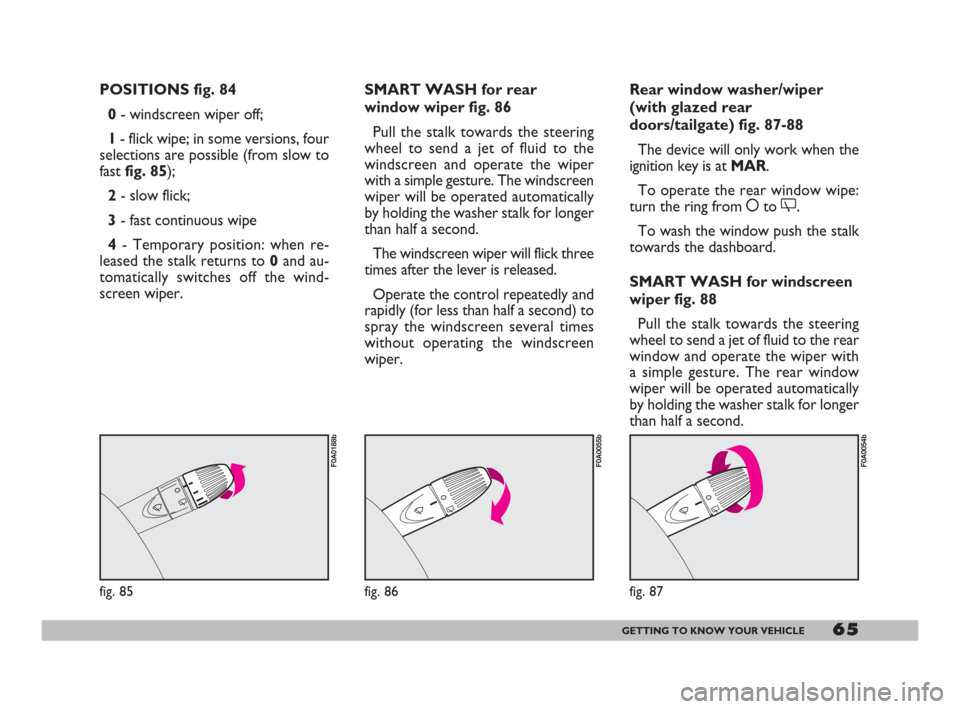
POSITIONS fig. 84
0- windscreen wiper off;
1- flick wipe; in some versions, four
selections are possible (from slow to
fast fig. 85);
2- slow flick;
3- fast continuous wipe
4- Temporary position: when re-
leased the stalk returns to 0and au-
tomatically switches off the wind-
screen wiper.SMART WASH for rear
window wiper fig. 86
Pull the stalk towards the steering
wheel to send a jet of fluid to the
windscreen and operate the wiper
with a simple gesture. The windscreen
wiper will be operated automatically
by holding the washer stalk for longer
than half a second.
The windscreen wiper will flick three
times after the lever is released.
Operate the control repeatedly and
rapidly (for less than half a second) to
spray the windscreen several times
without operating the windscreen
wiper.
fig. 85
F0A0188b
fig. 86
F0A0055b
Rear window washer/wiper
(with glazed rear
doors/tailgate) fig. 87-88
The device will only work when the
ignition key is at MAR.
To operate the rear window wipe:
turn the ring from åto '.
To wash the window push the stalk
towards the dashboard.
SMART WASH for windscreen
wiper fig. 88
Pull the stalk towards the steering
wheel to send a jet of fluid to the rear
window and operate the wiper with
a simple gesture. The rear window
wiper will be operated automatically
by holding the washer stalk for longer
than half a second.
fig. 87
F0A0054b
001-105 Doblo GB 16-12-2008 14:22 Pagina 65