2008 DODGE RAM 3500 DIESEL torque
[x] Cancel search: torquePage 6 of 527
INTRODUCTION
This Owner's Manual has been prepared with the assis-
tance of service and engineering specialists to acquaint
you with the operation and maintenance of your vehicle.
It is supplemented by a Warranty Information Booklet
and various customer-oriented documents. You are
urged to read these publications carefully. Following the
instructions and recommendations in this manual will
help assure safe and enjoyable operation of your vehicle.
NOTE: After you read the manual, it should be stored
in the vehicle for convenient reference and remain with
the vehicle when sold, so that the new owner will be
aware of all safety warnings.
When it comes to service, remember that your authorized
dealer knows your vehicle best, has the factory-trained
technicians and genuine Mopartparts, and is interested
in your satisfaction.
A MESSAGE FROM DAIMLERCHRYSLER
CORPORATION
DaimlerChrysler Corporation and Cumminstwelcome
you as a CumminstTurbo Diesel-powered truck owner.
Almost 100% of the heavy duty trucks in the United
States and Canada are diesel powered because of the fuel
economy, rugged durability, and high torque which per-
mits pulling heavy loads. Cumminst, engines power
well over half of these trucks. Now this same technology
and proven performance is yours in your truck equipped
with the Cumminst, turbocharged, charge air cooled,
diesel engine.
Your diesel truck will sound, feel, drive, and operate
differently from a gasoline-powered truck. It is important
that you read and understand this manual. You may find
that some of the starting, operating, and maintenance
procedures are different. However, they are simple to
4 INTRODUCTION
Page 200 of 527
CAUTION!
The TPMS has been optimized for the original
equipment tires and wheels. TPMS pressures and
warning have been established for the tire size
equipped on your vehicle. Undesirable system opera-
tion or sensor damage may result when using re-
placement equipment that is not of the same size,
type, and/or style. Aftermarket wheels can cause
sensor damage. Do not use tire sealant from a can, or
balance beads if your vehicle is equipped with a
TPMS, as damage to the sensors may result.
TPMS ªLight Loadº Reset Switch ± If Equipped
The TPMS ºLight Loadº reset switch allows you to
choose between Light Load vehicle conditions and Max
Load vehicle conditions tire pressures and related TPMS
warning levels. The switch is located in the instrumentpanel, below the climate control panel. For additional
information refer to ªTire Pressure Monitoring System
(TPMS) Ð If Equippedº in section 5 of this manual.
25. Transmission Oil Temperature Warning Light
(Automatic Transmissions Only)
This light indicates that there is excessive trans-
mission fluid temperature that might occur
with severe usage such as trailer towing. It may
also occur when operating the vehicle in a high
torque converter slip condition, such as 4-wheel drive
operation (e.g., snow plowing, off-road operation). If this
light comes on, stop the vehicle and run the engine at idle
or faster, with the transmission in NEUTRAL until the
light goes off.
26. Wait To Start Indicator
The Wait To Start indicator will illuminate when
the ignition is turned to the run position and the
intake manifold temperature is below 66ÉF (19ÉC).
198 UNDERSTANDING YOUR INSTRUMENT PANEL
Page 284 of 527
²Up Steep Hills Ð
select a lower transmission gear, but try and keep the
torque converter clutch engaged.
²Air Conditioning Ð
turn it off temporarily.
Do Not Operate The Engine With Low Oil
Pressure
When the engine is at normal operating temperature, the
minimum oil pressures required are:
Idle 700 to 800 RPM............... 10psi(69kPa)
Full speed and load.............. 30psi(207 kPa)
CAUTION!
If oil pressure falls to less than normal readings, shut
the engine off immediately. Failure to do so could
result in immediate and severe engine damage.
Do Not Operate The Engine With Failed Parts
Practically all failures give some warning before the parts
fail. Be on the alert for changes in performance, sounds,
and visual evidence that the engine requires service.
Some important clues are:
²engine misfiring or vibrating severely
²sudden loss of power
²unusual engine noises
²fuel, oil or coolant leaks
²sudden change, outside the normal operating range, in
the engine operating temperature
²excessive smoke
²oil pressure drop
282 STARTING AND OPERATING
Page 286 of 527
WARNING!
Do not use the Exhaust Brake feature when driving
in icy or slippery conditions as the increased engine
braking can cause the rear wheels to slide and the
vehicle to swing around with the possible loss of
vehicle control, which may cause an accident possi-
bly resulting in personal injury or death.
NOTE:For optimum braking power it is recommended
to use the Exhaust Brake while in Tow/Haul Mode.
The purpose of the exhaust brake (engine braking) fea-
ture is to supply negative (braking) torque to the engine.
Typically, the engine braking is used for, but not limited
to, vehicle towing applications where vehicle braking can
be achieved by the internal engine power, thereby spar-
ing the mechanical brakes of the vehicle.Benefits of the exhaust brake are:²vehicle driving control
²reduced brake fade
²longer brake life
²faster cab warm-up.
The exhaust brake feature can also be used to reduce the
engine warm up time. To use the exhaust brake as a
warm-up device, the vehicle must be moving less than 5
mph (8 km/h), the exhaust brake switch must be in the
ON position, and the coolant temperature must below
180ÉF (82ÉC) and ambient temperature below 60ÉF (16ÉC).
284 STARTING AND OPERATING
Page 289 of 527
Upshifts into both overdrive gears, 5th and 6th, will be
delayed when the transmission fluid temperature is
below 40É F (4.5É C) or above 240É F (115.5É C).
NOTE:Use caution when operating a heavily loaded
vehicle in 2nd or 1st gear in high ambients as torque
converter slip can impose significant additional heat load
on the cooling system.
WARNING!
Never use Park position on an automatic transmis-
sion as a substitute for the parking brake. Always
apply parking brake fully when parked to guard
against vehicle movement and possible injury or
damage.
Overdrive Operation
The overdrive automatic transmission contains an elec-
tronically controlled 5th and 6th (Overdrive). The trans-
mission will automatically shift from Drive to Overdrive
if the following conditions are present:
²the transmission selector is in DRIVE;
²the engine coolant has reached normal operating tem-
perature;
²vehicle speed is above approximately 30 mph (48
km/h);
²the ªTOW HAUL O/D OFFº switch has not been
activated;
²transmission has reached normal operating tempera-
ture.
STARTING AND OPERATING 287
5
Page 290 of 527
NOTE:If the vehicle is started in extremely cold tem-
peratures, the transmission may not shift into Overdrive
and will automatically select the most desirable gear for
operation at this temperature. Normal operation will
resume when the transmission fluid temperature has
risen to a suitable level. Refer also to the Note under
torque converter clutch, later in this section.
If the transmission temperature gets extremely hot, the
transmission will automatically select the most desirable
gear for operation at this temperature. If the transmission
temperature becomes hot enough the TRANS TEMP light
may illuminate and the transmission may downshift out
of Overdrive until the transmission cools down. After
cooldown, the transmission will resume normal opera-
tion.
The transmission will downshift from Overdrive to Drive
if the accelerator pedal is fully depressed at vehicle
speeds above approximately 35 mph (56 km/h).When To Use TOW HAUL
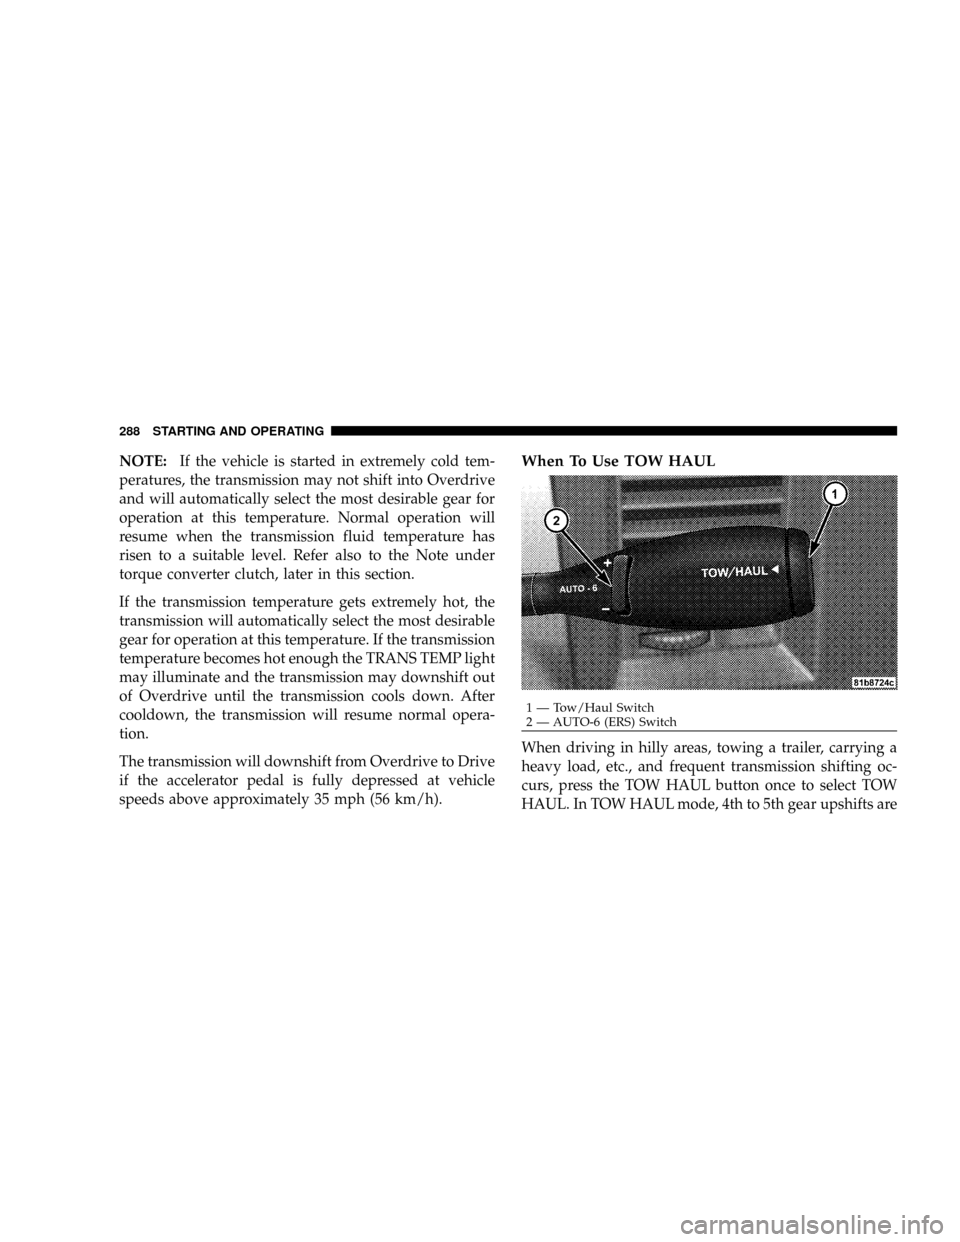
When driving in hilly areas, towing a trailer, carrying a
heavy load, etc., and frequent transmission shifting oc-
curs, press the TOW HAUL button once to select TOW
HAUL. In TOW HAUL mode, 4th to 5th gear upshifts are
1 Ð Tow/Haul Switch
2 Ð AUTO-6 (ERS) Switch 288 STARTING AND OPERATING
Page 292 of 527
NOTE:To select the proper gear position for maximum
deceleration (engine braking), simply press and hold the
switch down (-). The transmission will shift to the range
from which the vehicle can best be slowed down.
Torque Converter Clutch
A feature designed to improve fuel economy has been
included in the automatic transmission on your vehicle.
A clutch within the torque converter engages automati-
cally at calibrated speeds. This may result in a slightly
different feeling or response during normal operation in
the upper gears. When the vehicle speed drops or during
acceleration when the transmission downshifts to second
gear, the clutch automatically disengages.NOTE:The torque converter clutch will not engage
until the transmission fluid and engine coolant are warm
[usually after 1-3 miles (1.6 - 4.8 km) of driving]. Because
the engine speed is higher when the torque converter
clutch is not engaged, it may seem as if the transmission
is not shifting into Overdrive when cold. This is normal.
Pressing the TOW HAUL O/D OFF button, when the
transmission is sufficiently warm, will demonstrate that
the transmission is able to shift into and out of Overdrive.
NOTE:If the vehicle has not been driven in several
days, the first few seconds of operation after shifting the
transmission into gear may seem sluggish. This is due to
the fluid partially draining from the torque converter into
the transmission. This condition is normal and will not
cause damage to the transmission. The torque converter
will refill within five seconds of shifting from PARK into
any other gear position.
290 STARTING AND OPERATING
Page 394 of 527
6. Using the wheel wrench, finish tightening the nuts
using a crisscross pattern. Correct nut tightness is 135 ft.
lbs. (183 N´m) torque for 2500/3500 single rear wheel
(SRW) models and 145 ft. lbs. (197 N´m) for 3500 dual rear
wheel models. If in doubt about the correct tightness,
have them checked with a torque wrench by your dealer
or at a service station.
WARNING!
A loose tire or jack thrown forward in a collision or
hard stop could injure someone in the vehicle. Al-
ways stow the jack parts and the extra tire and wheel
in the places provided.
7. Install wheel center cap and remove wheel blocks. Do
not install chrome or aluminum wheel center caps on the
spare wheel. This may result in cap damage.8. Lower the jack to its fully closed position. If the jack
will not lower by turning the dial (thumbwheel) by hand,
it may be necessary to use the jack drive tube in order to
lower the jack. Stow the replaced tire, jack, and tools as
previously described.
9. Adjust the tire pressure when possible.
NOTE:Do not oil wheel studs. For chrome wheels, do
not substitute with chrome plated wheel nuts.Hub Caps/Wheel Covers
The hub caps must be removed before raising the vehicle
off the ground.
For 2500/3500 single rear wheel (SRW) models, use the
blade on the end of the lug wrench to pry the hub cap off.
Insert the blade end into the pryoff notch and carefully
pop off the hub cap with a back and forth motion.
392 WHAT TO DO IN EMERGENCIES