Page 313 of 527
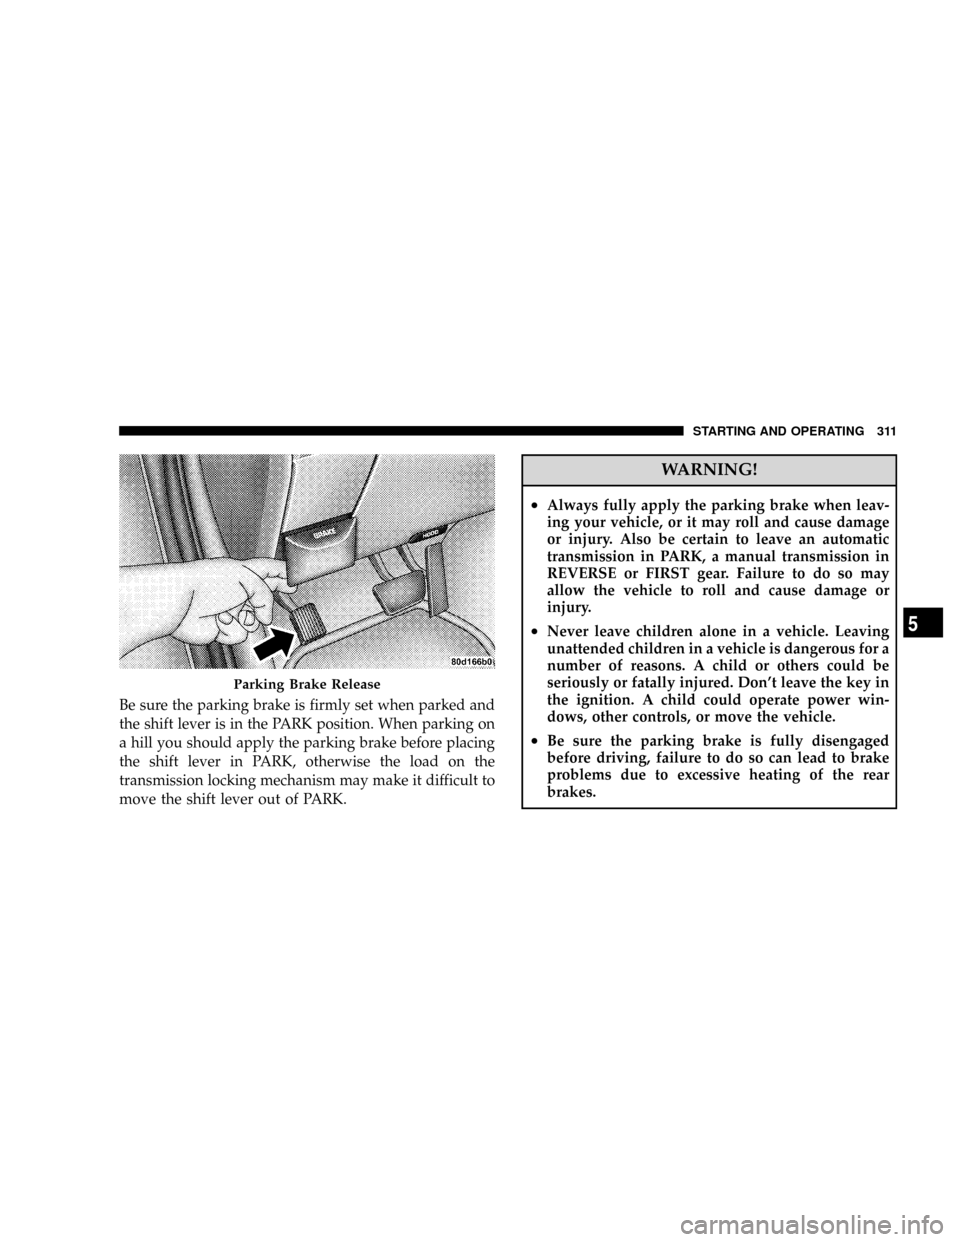
Be sure the parking brake is firmly set when parked and
the shift lever is in the PARK position. When parking on
a hill you should apply the parking brake before placing
the shift lever in PARK, otherwise the load on the
transmission locking mechanism may make it difficult to
move the shift lever out of PARK.
WARNING!
²Always fully apply the parking brake when leav-
ing your vehicle, or it may roll and cause damage
or injury. Also be certain to leave an automatic
transmission in PARK, a manual transmission in
REVERSE or FIRST gear. Failure to do so may
allow the vehicle to roll and cause damage or
injury.
²Never leave children alone in a vehicle. Leaving
unattended children in a vehicle is dangerous for a
number of reasons. A child or others could be
seriously or fatally injured. Don't leave the key in
the ignition. A child could operate power win-
dows, other controls, or move the vehicle.
²Be sure the parking brake is fully disengaged
before driving, failure to do so can lead to brake
problems due to excessive heating of the rear
brakes.
Parking Brake Release
STARTING AND OPERATING 311
5
Page 345 of 527
To switch from the max load inflation pressure (cold) low
pressure warning threshold to the light load inflation
pressure (cold) low pressure warning threshold, begin by
placing the ignition switch in the RUN position. Next,
lower all four road tire pressures to the Light Load
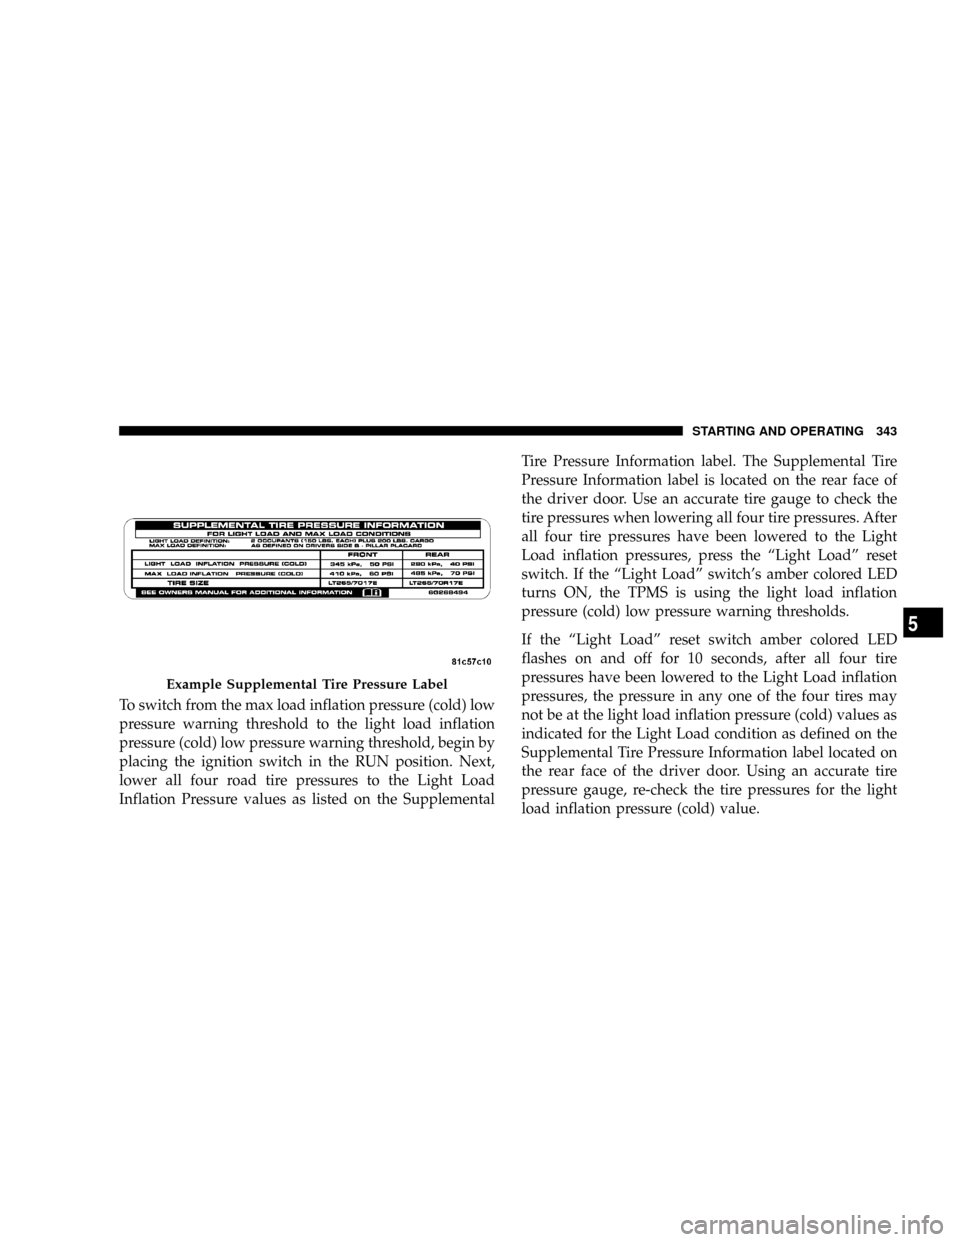
Inflation Pressure values as listed on the SupplementalTire Pressure Information label. The Supplemental Tire
Pressure Information label is located on the rear face of
the driver door. Use an accurate tire gauge to check the
tire pressures when lowering all four tire pressures. After
all four tire pressures have been lowered to the Light
Load inflation pressures, press the ªLight Loadº reset
switch. If the ªLight Loadº switch's amber colored LED
turns ON, the TPMS is using the light load inflation
pressure (cold) low pressure warning thresholds.
If the ªLight Loadº reset switch amber colored LED
flashes on and off for 10 seconds, after all four tire
pressures have been lowered to the Light Load inflation
pressures, the pressure in any one of the four tires may
not be at the light load inflation pressure (cold) values as
indicated for the Light Load condition as defined on the
Supplemental Tire Pressure Information label located on
the rear face of the driver door. Using an accurate tire
pressure gauge, re-check the tire pressures for the light
load inflation pressure (cold) value.
Example Supplemental Tire Pressure Label
STARTING AND OPERATING 343
5
Page 348 of 527
the ignition key is cycled, this sequence will repeat,
providing the system fault still exists. A system fault can
occur by any of the following scenarios:
1. Signal interference due to electronic devices or driving
next to facilities emitting the same Radio Frequencies as
the TPM sensors.
2. Installing aftermarket window tinting that affects ra-
dio wave signals.
3. Accumulation of snow or ice around the wheels or
wheel housings.
4. Using tire chains on the vehicle.
5. Using wheels/tires not equipped with TPM sensors.
6. Loss of communication with the trigger modules or
tire pressure monitoring sensors.
NOTE: Your vehicle is equipped with a non-matching
full size spare wheel and tire assembly.1. This spare tire does not have a tire pressure monitor-
ing sensor. Therefore, the TPMS will not monitor the tire
pressure in the spare tire.
2. If you install the full size spare tire in place of a road
tire that has a pressure below the low-pressure warning
limit, upon the next ignition key cycle, a chime will
sound and the TPM Telltale Light will still turn ON due
to the low tire.
3. However, after driving the vehicle for up to 10 min-
utes above 15 mph (25 km/h), the TPM Telltale Light will
flash on and off for 75 seconds and then remain on solid.
4. For each subsequent ignition key cycle, a chime will
sound and the TPM Telltale Light will flash on and off for
75 seconds and then remain on solid.
5. Once you repair or replace the original road tire, and
reinstall it on the vehicle in place of the full size spare tire,
the TPMS will update automatically and the TPM Telltale
346 STARTING AND OPERATING
Page 349 of 527
Light will turn OFF, as long as no tire pressure is below
the low-pressure warning limit in any of the four active
road tires. The vehicle may need to be driven for up to 10
minutes above 15 mph (25 km/h) in order for the TPMS
to receive this information.
General Information
This device complies with part 15 of the FCC rules and
RSS 210 of Industry Canada. Operation is subject to the
following conditions:
²This device may not cause harmful interference.
²This device must accept any interference received,
including interference that may cause undesired op-
eration.
The tire pressure sensors are covered under one of the
following licenses:
United States.....................KR5S120123
Canada........................2671-S120123
ENGINE RUNAWAY
WARNING!
In case of engine runaway due to flammable fumes
from gasoline spills or turbocharger oil leaks being
sucked into the engine, do the following to help
avoid personal injury and/or vehicle damage:
1. Shut off engine ignition switch.
2. Using a CO
2or dry chemical type fire extin-
guisher, direct the spray from the fire extinguisher
into the grille on the passenger side so that the spray
enters the engine air intake.
The inlet for the engine air intake is located behind
the passenger side headlamp and receives air
through the grille.
STARTING AND OPERATING 347
5
Page 378 of 527
Recreational Towing Procedure Ð Manual Shift
Transfer Case Ð If Equipped
Use the following procedure to prepare your vehicle for
recreational towing:
CAUTION!
It is necessary to follow these steps to be certain that
the transfer case is fully in NEUTRAL before recre-
ational towing to prevent damage to internal parts.
1. Bring the vehicle to a complete stop.
2. Shut OFF the engine.
3. Depress the brake pedal.
4. Shift automatic transmission to NEUTRAL, or depress
the clutch on manual transmissions.5. Shift transfer case lever into NEUTRAL.
6. Start the engine.
7. Shift automatic transmission into REVERSE.
8. Release brake pedal for five seconds and ensure that
there is no vehicle movement.
9. Repeat steps 7 and 8 with the transmission in DRIVE.
10. Shut OFF the engine and place the ignition key in the
unlocked OFF position.
11. Shift automatic transmission into PARK or 1st gear
on manual transmissions.
12. Apply the parking brake.
13. Attach vehicle to tow vehicle with tow bar.
14. Release the parking brake.
376 STARTING AND OPERATING
Page 380 of 527
CAUTION!
²Do not use a bumper-mounted clamp-on tow bar
on your vehicle. The bumper face bar will be
damaged.
²Do not disconnect the rear driveshaft because
fluid will leak from the transfer case and damage
the internal parts.
Recreational Towing Procedure Ð Electronic Shift
Transfer Case Ð If Equipped
Use the following procedure to prepare your vehicle for
recreational towing:
CAUTION!
It is necessary to follow these steps to be certain that
the transfer case is fully in NEUTRAL before recre-
ational towing, to prevent damage to internal parts.
1. Bring vehicle to a complete stop.
2. Shut OFF the engine.
3. Turn the ignition key to the ON position, but do not
start the engine.
4. Depress the brake pedal.
5. Shift automatic transmission to NEUTRAL or depress
clutch on manual transmission.
6. Using the point of a ballpoint pen or similar object,
depress the recessed transfer case NEUTRAL button for
four seconds.
378 STARTING AND OPERATING
Page 381 of 527
7. After shift is completed and the NEUTRAL light
comes on, release the NEUTRAL button.
8. Start engine.
9. Shift automatic transmission into REVERSE.
10. Release brake pedal for five seconds and ensure that
there is no vehicle movement.
11. Repeat steps 9 and 10 with the transmission in
DRIVE.
12. Shut engine OFF and place ignition key in the
unlocked OFF position.
13. Shift automatic transmission into PARK or 1st gear
on manual transmissions.
14. Apply parking brake.
15. Attach vehicle to tow vehicle with tow bar.
16. Release parking brake.NOTE:Steps 1 through 5 are requirements that must be
met prior to depressing the NEUTRAL selection button,
and must continue to be met until the four seconds
elapses and the shift has been completed. If any of these
requirements (with the exception of 3 - Key ON) are not
met prior to depressing the NEUTRAL button or are no
longer met during the four second timer, then the NEU-
TRAL indicator light will flash continuously until all
requirements are met or until the NEUTRAL button is
released.
NOTE:The ignition key must be ON for a shift to take
place and for the position indicator lights to be operable.
If the key in not ON, the shift will not take place and no
position indicator lights will be on or flashing.
NOTE:Flashing NEUTRAL position indicator light
indicates that shift requirements have not been met.
STARTING AND OPERATING 379
5
Page 382 of 527
CAUTION!
Damage to the transmission may occur if the trans-
mission is shifted into PARK with the transfer case in
NEUTRAL and the engine running. With the transfer
case in NEUTRAL ensure, that the engine is OFF
prior to shifting the transmission into PARK.
Returning to Normal Operation Ð Electronic Shift
Transfer Case
Use the following procedure to prepare your vehicle for
normal usage:
1. Bring vehicle to a complete stop.
2. Shut OFF the engine.
3. Turn the ignition key to the ON position, but do not
start the engine.4. Depress the brake pedal.
5. Shift automatic transmission to NEUTRAL or depress
clutch on manual transmission.
6. Using the point of a ballpoint pen or similar object,
depress the recessed transfer case Neutral (N) button for
one second.
7. After the Neutral indicator light turns off, release the
Neutral (N) button.
8. After the Neutral (N) button has been released, the
transfer case will shift to the position identified by the
selector switch.
9. Shift automatic transmission into PARK.
NOTE:The transfer case cannot be shifted into NEU-
TRAL from the 4AUTO (if equipped) position.
380 STARTING AND OPERATING