2008 DODGE RAM 3500 DIESEL change time
[x] Cancel search: change timePage 31 of 527
8. If a chime is not heard, the program mode was
canceled before the feature could be disabled. If neces-
sary, repeat the above procedure.
Auto Unlock On Exit Ð If Equipped
This feature unlocks all of the doors of the vehicle when
any door is opened. This will occur only after the vehicle
has been shifted into the PARK position after the vehicle
has been driven (shifted out of PARK and all doors
closed).
Auto Unlock On Exit Programming Ð If Equipped
Customer programming sequence to enable or disable
the Auto Unlock Feature:
²For vehicles equipped with the Electronic Vehicle
Information Center (EVIC), refer to ªPersonal Settings
(Customer Programmable Features)º under ªOver-
head Console with Electronic Vehicle Information
Center (EVIC) ± If Equippedº in Section 3.
²For vehicles not equipped with the EVIC, perform the
following procedure:
1. Enter your vehicle and close all doors.
2. Fasten your seat belt. (fastening the seat belt will
cancel any chimes that may be confusing during this
programming procedure.)
3. Insert the key into the ignition.
4. Within 15 seconds, cycle the key from the LOCK
position to the ON/RUN position a minimum of four
times, ending in the LOCK position(do not start the
engine).
5. Within 30 seconds, press the driver's door lock switch
in the UNLOCK direction.
6. A single chime will sound to indicate the feature has
been changed.
THINGS TO KNOW BEFORE STARTING YOUR VEHICLE 29
2
Page 78 of 527
Lock Your Vehicle
Always remove the key from the ignition and lock all
doors when leaving the vehicle unattended, even in your
own driveway or garage. Try to park your vehicle in a
well-lighted area and never invite theft by leaving ar-
ticles of value exposed.
Exhaust Gas
WARNING!
Exhaust gases contain carbon monoxide, a potentially
toxic gas that, by itself, is colorless and odorless. To
avoid inhaling these gases, the following precautions
should be observed:
²Do not run the engine in a closed garage or in confined
areas any longer than needed to move your vehicle in
or out of the area.
²If it is necessary to sit in a parked vehicle with the
engine running for more than a short period, adjust
your climate control system to force outside air into
the vehicle. Set the blower at high speed and the
controls in any position except OFF or MAX A/C.
²The best protection against carbon monoxide entry
into the vehicle body is a properly maintained engine
exhaust system.
Be aware of changes in the sound of the exhaust system,
exhaust fumes detected inside the vehicle, or damage to
the underside or rear of the vehicle. Have a competent
authorized mechanic inspect the complete exhaust sys-
tem and adjacent body areas for broken, damaged,
deteriorated or mispositioned parts. Open seams or loose
connections could permit exhaust fumes to seep into the
passenger compartment. In addition, inspect the exhaust
system each time the vehicle is raised for lubrication or
oil change. Replace or adjust as required.
76 THINGS TO KNOW BEFORE STARTING YOUR VEHICLE
Page 111 of 527
²In a convertible vehicle, system performance may be
compromised with the convertible top down.
Far End Audio Performance
²
Audio quality is maximized under:
²low-to-medium blower setting,
²low-to-medium vehicle speed,
²low road noise,
²smooth road surface,
²fully closed windows,
²dry weather conditions, and
²operation from the drivers seat.
²Performance, such as audio clarity, echo, and loudness
to a large degree rely on the phone and network, and
not the UConnecttsystem.
²Echo at the far end can sometimes be reduced by
lowering the in-vehicle audio volume.
²In a convertible vehicle, system performance may be
compromised with the convertible top down.
BluetoothtCommunication Link
Cellular phones have been found to lose connection to
the UConnecttsystem. When this happens, the connec-
tion can generally be re-established by switching the
phone off/on. Your cell phone is recommended to remain
in BluetoothtON mode.
Power-Up
After switching the ignition key from OFF to either ON
or ACC position, or after a language change, you must
wait at least five seconds prior to using the system.
UNDERSTANDING THE FEATURES OF YOUR VEHICLE 109
3
Page 128 of 527
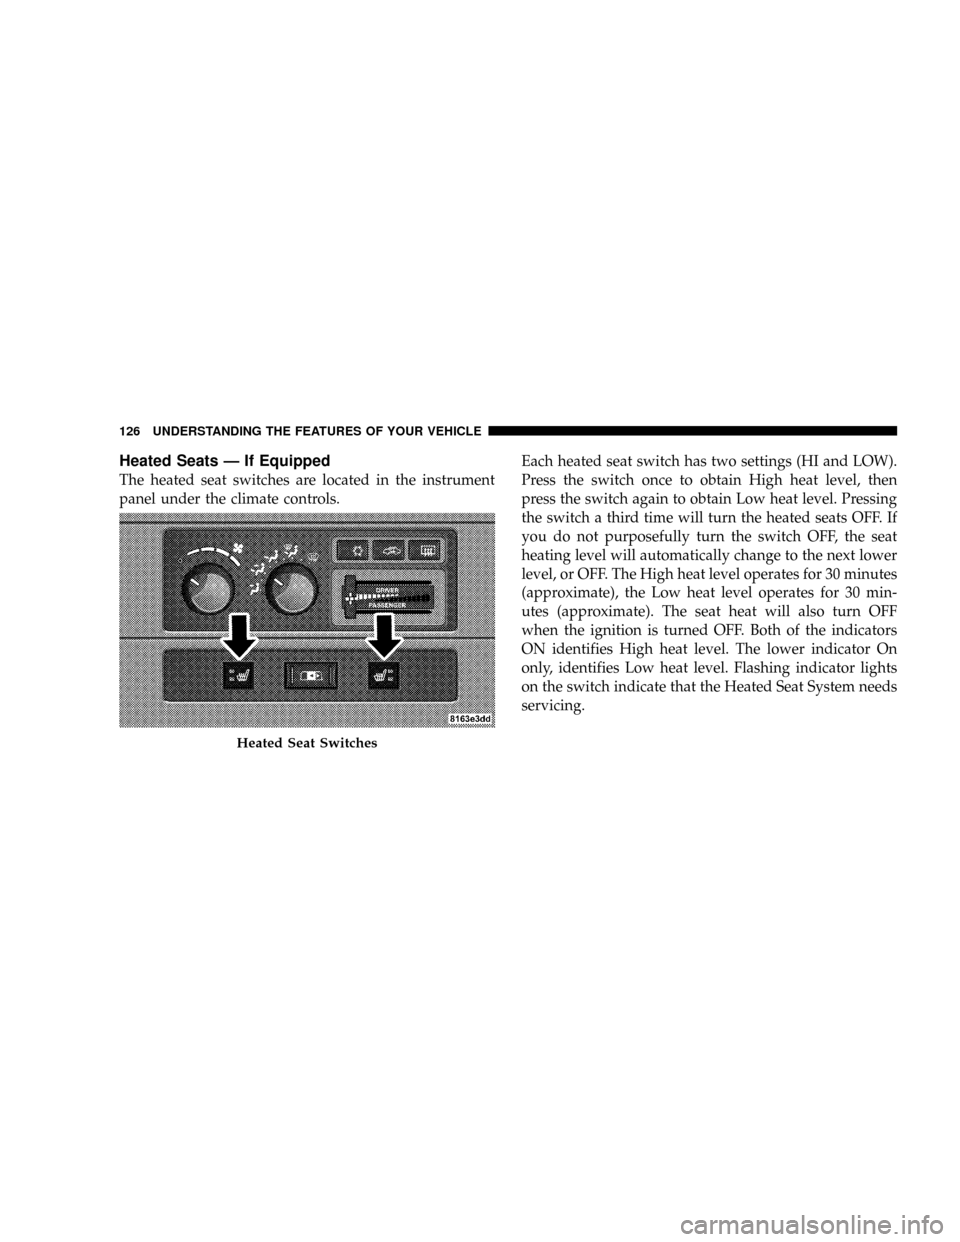
Heated Seats Ð If Equipped
The heated seat switches are located in the instrument
panel under the climate controls.Each heated seat switch has two settings (HI and LOW).
Press the switch once to obtain High heat level, then
press the switch again to obtain Low heat level. Pressing
the switch a third time will turn the heated seats OFF. If
you do not purposefully turn the switch OFF, the seat
heating level will automatically change to the next lower
level, or OFF. The High heat level operates for 30 minutes
(approximate), the Low heat level operates for 30 min-
utes (approximate). The seat heat will also turn OFF
when the ignition is turned OFF. Both of the indicators
ON identifies High heat level. The lower indicator On
only, identifies Low heat level. Flashing indicator lights
on the switch indicate that the Heated Seat System needs
servicing.
Heated Seat Switches
126 UNDERSTANDING THE FEATURES OF YOUR VEHICLE
Page 136 of 527
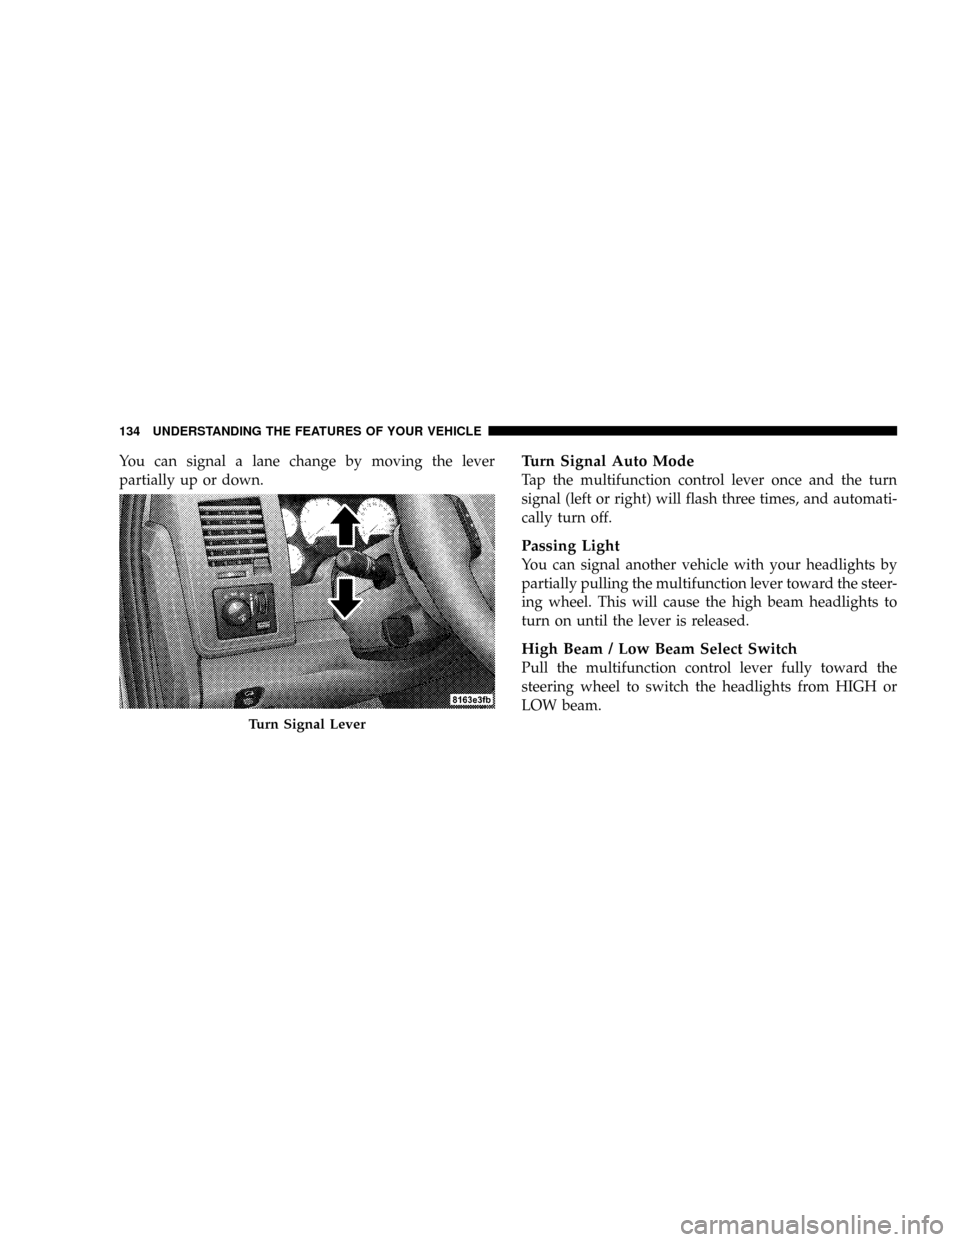
You can signal a lane change by moving the lever
partially up or down.Turn Signal Auto Mode
Tap the multifunction control lever once and the turn
signal (left or right) will flash three times, and automati-
cally turn off.
Passing Light
You can signal another vehicle with your headlights by
partially pulling the multifunction lever toward the steer-
ing wheel. This will cause the high beam headlights to
turn on until the lever is released.
High Beam / Low Beam Select Switch
Pull the multifunction control lever fully toward the
steering wheel to switch the headlights from HIGH or
LOW beam.
Turn Signal Lever
134 UNDERSTANDING THE FEATURES OF YOUR VEHICLE
Page 146 of 527
Trip Functions
Pressing the STEP button allows you to scroll through
one of the following Trip Function features:
²TRIP ± Shows the total distance traveled since the last
reset. To reset the TRIP function, press and hold the
RESET button.
²ELAPSED TIME ± Shows the total elapsed time of
travel since the last reset. Elapsed time will increment
when the ignition switch is in the ON/RUN or START
positions.
²UNIT IN US/METRIC ± Press the RESET button to
toggle between US and METRIC.
²AVG. MPG ± Shows the average fuel economy since
the last reset. When the fuel economy is reset, the
display will show dashes for two seconds. Then the
history information will be erased, and the averaging
will continue from the last fuel average reading beforethe reset. (Example: If your EVIC displays 18 AVG.
MPG and the RESET button is pressed, the previous
averaging history will be erased and the display will
return to the 18 AVG. MPG, not to 0 AVG. MPG.) The
display may take several miles/kilometers for the
value to change, dependent upon driving habits.
²MI TO EMPTY (Distance to Empty) ± Shows the
estimated distance that can be traveled with the fuel
remaining in the tank. This estimated distance is
determined by a weighted average of fuel economy,
according to the current fuel tank level. MI TO EMPTY
cannot be reset through the RESET button.
NOTE:Significant changes in driving style or vehicle
loading will greatly affect the actual drivable distance of
the vehicle, regardless of the DTE displayed value.
²When the DTE value is less than 30 mi (48 km)
estimated driving distance, the DTE display will
change to a text display of9LOW FUEL.9This display
144 UNDERSTANDING THE FEATURES OF YOUR VEHICLE
Page 148 of 527

indicator system is duty cycle based, which means the
engine oil change interval may fluctuate, dependent
upon your personal driving style.
Unless reset, this message will continue to display each
time you turn the ignition switch to the ON/RUN
position. To turn off the message temporarily, press and
release the Menu button. To reset the oil change indicator
system (after performing the scheduled maintenance) use
the following procedure.
1. Turn the ignition switch to the ON position(Do not
start the engine).
2. Fully depress the accelerator pedal slowly three times
within 10 seconds.
3. Turn the ignition switch to the OFF/LOCK position.
NOTE:If the indicator message illuminates when you
start the vehicle, the oil change indicator system did not
reset. If necessary, repeat this procedure.PERFORM SERVICE
Your vehicle will require emissions maintenance at a set
interval. To help remind you when this maintenance is
due, the Electronic Vehicle Information Center (EVIC)
will display ªPerform Serviceº. When the ªPerform Ser-
viceº message is displayed on the EVIC it is necessary to
have the emissions maintenance performed. Emissions
maintenance includes replacing the Closed Crankcase
Ventilation (CCV) filter element, cleaning of the EGR
Cooler, and cleaning of the EGR Valve. The procedure for
clearing and resetting the9Perform Service9indicator
message is located in the appropriate Service Informa-
tion.
Personal Settings (Customer Programmable
Features)
Personal Settings allows the driver to set and recall
features when the transmission is in PARK. If the trans-
mission is not in PARK, the EVIC will display NOT
AVAILABLE and VEHICLE NOT IN PARK.
146 UNDERSTANDING THE FEATURES OF YOUR VEHICLE
Page 158 of 527
Similar to this Canadian law, some U.S. gate operators are
designed to ªtime-outº in the same manner.
It may be helpful to unplug the device during the cycling
process to prevent possible overheating of the garage
door or gate motor.
If you are having difficulties programming a garage door
opener or a gate operator, replace ªProgramming
HomeLinkº Step 3 with the following:
3. Continue to press and hold the HomeLinktbutton
while you press and release - every two seconds
(ªcycleº) your hand-held transmitter until HomeLinkt
has successfully accepted the frequency signal. The
EVIC display will change from ªCHANNEL # TRAIN-
INGº to ªCHANNEL # TRAINED.º
If you unplugged the device for training, plug it back in
at this time.Then proceed with Step 4 under ªProgramming
HomeLinktº earlier in this section.
Using HomeLinkT
To operate, simply press and release the programmed
HomeLinktbutton. Activation will now occur for the
trained device (i.e., garage door opener, gate operator,
security system, entry door lock, home/office lighting,
etc.) The hand-held transmitter of the device may also be
used at any time.
Reprogramming A Single HomeLinkTButton
To reprogram a channel that has been previously trained,
follow these steps:
1. Turn the ignition switch to the ON/RUN position.
2. Press and hold the desired HomeLinktbutton for 20
seconds until the EVIC display states ªCHANNEL #
TRAINING.ºDo not release the button.
156 UNDERSTANDING THE FEATURES OF YOUR VEHICLE