Page 242 of 467
² The LCD screen swings up from the rear of the armrest
to allow the rear seat passenger(s) to view the display.
NOTE: Close the armrest after the LCD screen has been
raised to its viewing position. ² The touch screen radio and DVD player controls allow
front seat operation for easy setup in the case of
younger rear seat passengers.
² A battery-powered infrared remote control snaps into
a molded compartment in the center console armrest
upper storage bin.
VES t Video Screen
VES t Remote Control240 UNDERSTANDING YOUR INSTRUMENT PANEL
Page 243 of 467

² Two wireless infrared headsets allow rear seat passen-
gers to listen to the same or individual audio sources.
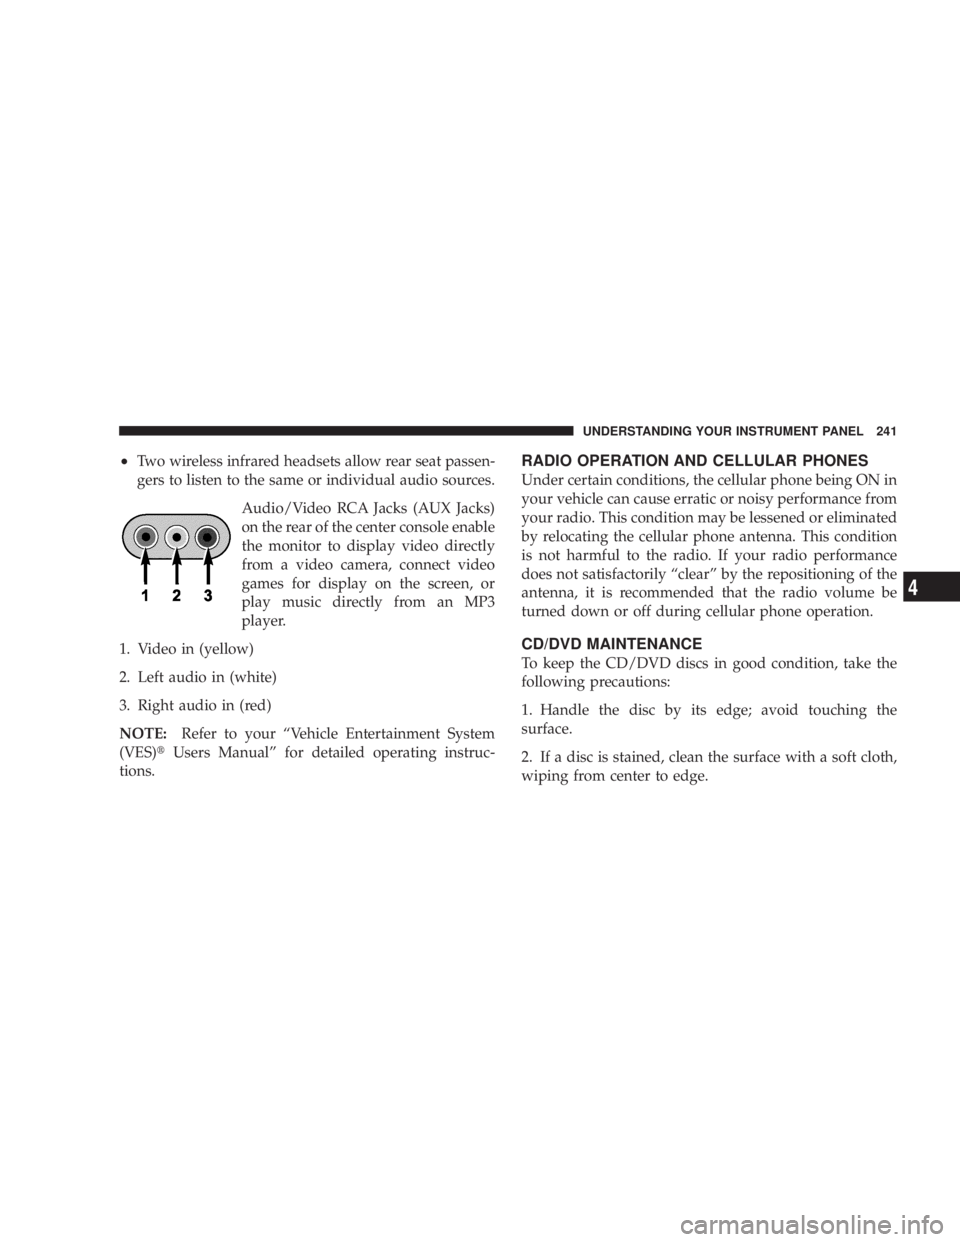
Audio/Video RCA Jacks (AUX Jacks)
on the rear of the center console enable
the monitor to display video directly
from a video camera, connect video
games for display on the screen, or
play music directly from an MP3
player.
1. Video in (yellow)
2. Left audio in (white)
3. Right audio in (red)
NOTE: Refer to your ªVehicle Entertainment System
(VES) t Users Manualº for detailed operating instruc-
tions. RADIO OPERATION AND CELLULAR PHONES
Under certain conditions, the cellular phone being ON in
your vehicle can cause erratic or noisy performance from
your radio. This condition may be lessened or eliminated
by relocating the cellular phone antenna. This condition
is not harmful to the radio. If your radio performance
does not satisfactorily ªclearº by the repositioning of the
antenna, it is recommended that the radio volume be
turned down or off during cellular phone operation.
CD/DVD MAINTENANCE
To keep the CD/DVD discs in good condition, take the
following precautions:
1. Handle the disc by its edge; avoid touching the
surface.
2. If a disc is stained, clean the surface with a soft cloth,
wiping from center to edge. UNDERSTANDING YOUR INSTRUMENT PANEL 241
4
Page 368 of 467

N A/C Air Filter Ð If Equipped ............383
N Power Steering .......................385
N Front Suspension .....................385
N Steering Linkage ......................386
N Body Lubrication .....................386
N Windshield Wiper Blades ................386
N Windshield Washers ...................387
N Exhaust System ......................387
N Cooling System .......................388
N Hoses And Vacuum/Vapor Harnesses .......394
N Fuel System .........................394
N Brake System ........................394
N Automatic Transaxle ...................397 N Front And Rear Wheel Bearings ...........400
N Appearance Care And Protection From
Corrosion ...........................400
N Cleaning Center Console Cupholders .......405
m Fuses Ð Totally Integrated Power Module
(TIPM) ..............................406
m Vehicle Storage ........................411
m Replacement Bulbs ......................411
m Bulb Replacement ......................412
N Headlight Bulb Replacement .............412
N Fog Lights ..........................415
N Taillights, Rear Turn Signals And Backup Lights Ð
Replacement .........................416
N License Plate Light Ð Rear ..............418366 MAINTAINING YOUR VEHICLE
Page 407 of 467

Cleaning Plastic Instrument Cluster Lenses
The lenses in front of the instruments in this vehicle are
molded in clear plastic. When cleaning the lenses, care
must be taken to avoid scratching the plastic.
1.
Clean with a wet, soft rag. A mild soap solution may be
used, but do not use high alcohol content or abrasive
cleaners. If soap is used, wipe clean with a clean damp rag.
2. Dry with a soft tissue.
Seat Belt Maintenance
Do not bleach, dye, or clean the belts with chemical
solvents or abrasive cleaners. This will weaken the fabric.
Sun damage can also weaken the fabric.
If the belts need cleaning, use a mild soap solution or
lukewarm water. Do not remove the belts from the car to
wash them.
Replace the belts if they appear frayed or worn or if the
buckles do not work properly. Dry with a soft tissue.
CLEANING CENTER CONSOLE CUPHOLDERS
Removal
Grab the rubber portion of the cupholder and lift up-
ward.
Cleaning
Soak the rubber cupholder liner in a mixture of medium
hot tap water and one teaspoon of mild liquid dish soap.
Let soak for approximately one hour. After one hour pull
the liner from the water and dip it back into the water
about six times. This will loosen any remaining debris.
Rinse the liner thoroughly under warm running water.
Shake the excess water from the liner and dry the outer
surfaces with a clean soft cloth.
Installation
Align the liner in the cupholder and press down firmly. MAINTAINING YOUR VEHICLE 405
7