Page 148 of 494

WARNING!
Vehicle exhaust contains carbon monoxide, a danger-
ous gas. Do not run your vehicle in the garage while
training the transceiver. Exhaust gas can cause seri-
ous injury or death.
Programming HomeLink�
Before You Begin
If you have not trained any of the HomeLink�buttons,
erase all channels before you begin training.
To do this, press and hold the two outside buttons for 20
seconds until the red indicator flashes.
It is recommended that a new battery be placed in the
hand-held transmitter of the device being programmed
to HomeLink�for more efficient training and accurate
transmission of the radio-frequency signal.Your vehicle should be parked outside of the garage
when programming.
1. Turn the ignition switch to the ON/RUN position.
2. Hold the battery side of the hand-held transmitter
away from the HomeLink�button you wish to program.
Place the hand-held transmitter 1–3 in (3-8 cm) away
from the HomeLink�button you wish to program while
keeping the indicator light in view.
3. Simultaneously press and hold both the chosen
HomeLink�button and the hand-held transmitter button
until the HomeLink�indicator changes from a slow to a
rapidly blinking light, then release both the HomeLink�
and hand-held transmitter buttons.
Watch for the HomeLink�indicator to change flash rates.
When it changes, it is programmed. It may take up to 30
seconds, or longer in rare cases. The garage door may
open and close while you train.
146 UNDERSTANDING THE FEATURES OF YOUR VEHICLE
Page 150 of 494

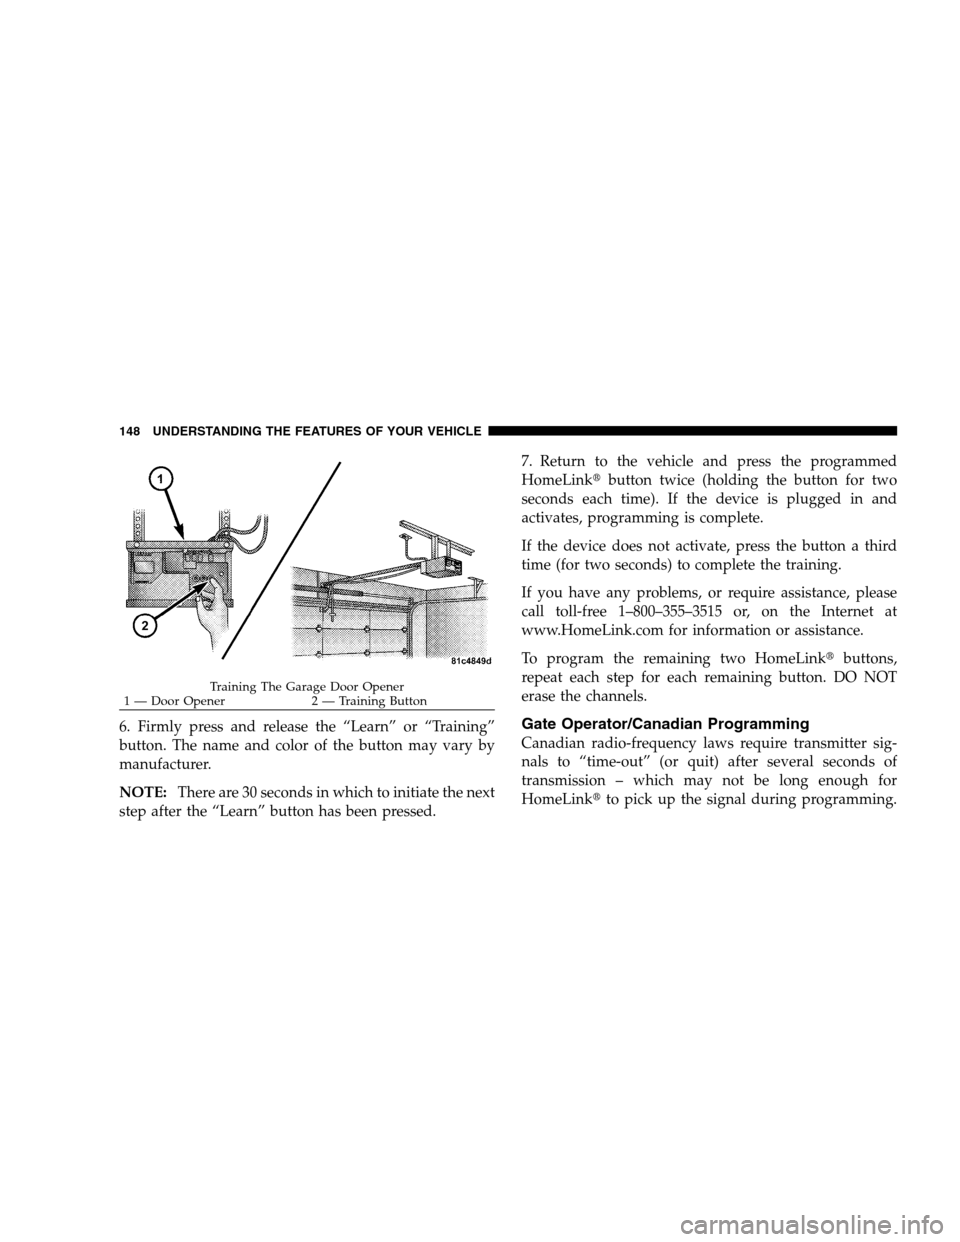
6. Firmly press and release the “Learn” or “Training”
button. The name and color of the button may vary by
manufacturer.
NOTE:There are 30 seconds in which to initiate the next
step after the “Learn” button has been pressed.7. Return to the vehicle and press the programmed
HomeLink�button twice (holding the button for two
seconds each time). If the device is plugged in and
activates, programming is complete.
If the device does not activate, press the button a third
time (for two seconds) to complete the training.
If you have any problems, or require assistance, please
call toll-free 1–800–355–3515 or, on the Internet at
www.HomeLink.com for information or assistance.
To program the remaining two HomeLink�buttons,
repeat each step for each remaining button. DO NOT
erase the channels.Gate Operator/Canadian Programming
Canadian radio-frequency laws require transmitter sig-
nals to “time-out” (or quit) after several seconds of
transmission – which may not be long enough for
HomeLink�to pick up the signal during programming.
Training The Garage Door Opener
1 — Door Opener 2 — Training Button 148 UNDERSTANDING THE FEATURES OF YOUR VEHICLE
Page 167 of 494
UNDERSTANDING YOUR INSTRUMENT PANEL
CONTENTS
�Instrument Panel Features.................169
�Base Instrument Cluster..................170
�Premium Instrument Cluster...............171
�Instrument Cluster Descriptions............172
�Electronic Vehicle Information Center (EVIC) –
If Equipped...........................183
▫Electronic Vehicle Information Center (EVIC)
Displays............................184
▫Oil Change Required...................185
▫Trip Functions.......................186▫Compass Display.....................187
▫Personal Settings (Customer Programmable
Features)...........................190
�Setting The Analog Clock.................193
�Radio General Information................193
▫Radio Broadcast Signals.................193
▫Two Types Of Signals..................193
▫Electrical Disturbances..................193
▫AM Reception.......................1944
Page 168 of 494

▫FM Reception........................194
�Sales Code RES — AM/FM Stereo Radio With
CD Player (MP3 AUX Jack)................194
▫Operating Instructions - Radio Mode.......195
▫Operation Instructions - CD Mode For CD
And MP3 Audio Play..................200
▫Notes On Playing MP3 Files.............203
▫List Button (CD Mode For MP3 Play).......205
▫Info Button (CD Mode For MP3 Play).......205
�Sales Code REQ — AM/FM Stereo Radio And
6–Disc CD/DVD Changer
(MP3/WMA AUX Jack)..................207
▫Operating Instructions - Radio Mode.......207
▫Operation Instructions - (Disc Mode For CD
And MP3/WMA Audio Play, DVD-Video)....215▫NotesOnPlayingMP3/WMAFiles ........217
▫List Button
(Disc Mode For MP3/WMA Play)..........220
▫Info Button
(Disc Mode For MP3/WMA Play)..........220
�Sales Code REN — Multimedia System —
If Equipped...........................222
▫Operating Instructions — Satellite Radio
(If Equipped)........................223
▫Operating Instructions — Voice Recognition
System (VR) (If Equipped)...............223
▫Operating Instructions — Hands-Free
Communication (UConnect�) (If Equipped) . . . 224
▫Clock Setting Procedure.................224
166 UNDERSTANDING YOUR INSTRUMENT PANEL
Page 169 of 494

�Sales Code RER — Multimedia System —
If Equipped...........................225
▫Operating Instructions — Satellite Radio.....227
▫Operating Instructions — Hands-Free
Communication (UConnect�) (If Equipped) . . . 227
▫Clock Setting Procedure.................227
�Universal Consumer Interface (UCI) —
If Equipped...........................229
▫Connecting The iPod�Device............230
▫Controlling The iPod�Using Radio Buttons . . . 230
▫Play Mode..........................230
▫List Or Browse Mode..................232
�Satellite Radio — If Equipped
(REN/REQ/RER/RES Radios Only).........234▫System Activation.....................234
▫Electronic Serial Number/Sirius Identification
Number (ESN/SID)....................234
▫Selecting Satellite Mode.................235
▫Satellite Antenna......................235
▫Reception Quality.....................235
▫Operating Instructions - Satellite Mode......236
▫Operating Instructions - Hands-Free Phone
(If Equipped)........................238
▫Operating Instructions - Video Entertainment
System (VES�) (If Equipped).............238
�Remote Sound System Controls — If Equipped . . 238
▫Radio Operation......................239
▫CD Player..........................239
UNDERSTANDING YOUR INSTRUMENT PANEL 167
4
Page 170 of 494
�Video Entertainment System (VES)�—
If Equipped...........................240
�Radio Operation And Cellular Phones........242
�CD/DVD Disc Maintenance...............242
�Climate Controls.......................243
▫Manual Air Conditioning And Heating
System.............................243▫Automatic Temperature Control (ATC) —
If Equipped.........................248
▫Operating Tips.......................254
�Rear Window Features...................258
▫Electric Rear Window Defroster —
If Equipped.........................258
168 UNDERSTANDING YOUR INSTRUMENT PANEL
Page 171 of 494
INSTRUMENT PANEL FEATURES
1 — Air Outlet 6 — Radio 11 — Storage Compartment
2 — Side Window Demister Outlet 7 — Passenger Airbag 12 — Climate Control
3 — Instrument Cluster 8 — Glove Box 13 — Trunk Release Switch
4 — Ignition Switch 9 — Heated Seat Switch*
5 — Analog Clock 10 — Hazard Switch * If Equipped
UNDERSTANDING YOUR INSTRUMENT PANEL 169
4
Page 185 of 494
ELECTRONIC VEHICLE INFORMATION CENTER
(EVIC) – IF EQUIPPEDThe Electronic Vehicle Information Center (EVIC) fea-
tures a driver-interactive display. It is located in the lower
left part of the cluster below the fuel and engine tem-
perature gauges. The EVIC consists of the following:
•System status
•Vehicle information warning message displays
•Personal settings (customer programmable features)
•Compass heading display (N, S, E, W, NE, NW, SE,
SW)
•Outside temperature display (°F or °C)
•Trip computer functions
•Audio mode displays – 12 preset Radio Stations or CD
Title and Track number when playing
•Tire Pressure Monitor System (TPMS) displays (if
equipped)
EVIC Display Location
UNDERSTANDING YOUR INSTRUMENT PANEL 183
4