2008 CHEVROLET SILVERADO warning light
[x] Cancel search: warning lightPage 1 of 596

Seats and Restraint Systems........................... 1-1
Front Seats
............................................... 1-2
Rear Seats
..............................................1-12
Safety Belts
.............................................1-14
Child Restraints
.......................................1-35
Airbag System
.........................................1-69
Restraint System Check
............................1-88
Features and Controls..................................... 2-1
Keys
........................................................ 2-3
Doors and Locks
......................................2-10
Windows
.................................................2-15
Theft-Deterrent Systems
............................2-18
Starting and Operating Your Vehicle
...........2-22
Mirrors
....................................................2-56
Object Detection Systems
..........................2-64
OnStar
®System
......................................2-67
Universal Home Remote System
................2-71
Storage Areas
.........................................2-78
Sunroof
..................................................2-82
Instrument Panel............................................. 3-1
Instrument Panel Overview
.......................... 3-4
Climate Controls
......................................3-25
Warning Lights, Gages, and Indicators
........3-36
Driver Information Center (DIC)
..................3-56
Audio System(s)
.......................................3-84Driving Your Vehicle....................................... 4-1
Your Driving, the Road, and Your Vehicle
..... 4-2
Towing
...................................................4-50
Service and Appearance Care.......................... 5-1
Service
..................................................... 5-4
Fuel
......................................................... 5-6
Checking Things Under the Hood
...............5-12
Rear Axle
...............................................5-52
Four-Wheel Drive
.....................................5-54
Front Axle
...............................................5-56
Noise Control System
...............................5-57
Headlamp Aiming
.....................................5-58
Bulb Replacement
....................................5-61
Windshield Wiper Blade Replacement
.........5-67
Tires
......................................................5-68
Appearance Care
...................................5-114
Vehicle Identi�cation
...............................5-124
Electrical System
....................................5-125
Capacities and Speci�cations
...................5-133
Maintenance Schedule..................................... 6-1
Maintenance Schedule
................................ 6-2
Customer Assistance Information.................... 7-1
Customer Assistance and Information
........... 7-2
Reporting Safety Defects
...........................7-14
Vehicle Data Recording and Privacy
...........7-16
Index................................................................ 1
2008 Chevrolet Silverado Owner ManualM
Page 100 of 596
"(Unlock):Press to unlock the driver’s door. If"is
pressed again within three seconds, all remaining doors
will unlock.
If it is dark enough outside, your interior lamps will
come on and stay on for 20 seconds or until the ignition
is turned on. If enabled through the DIC, the turn signal
lamps will �ash twice to indicate unlocking has occurred.
SeeDIC Vehicle Customization (With DIC Buttons)
on page 3-76. If enabled through the DIC, the exterior
lights will turn on brie�y if it is dark enough outside.
See “APPROACH LIGHTING” underDIC Vehicle
Customization (With DIC Buttons) on page 3-76.
Pressing
"on the RKE transmitter will disarm the content
theft-deterrent system. SeeContent Theft-Deterrent on
page 2-18.
L(Vehicle Locator/Panic Alarm):Press and release
to locate your vehicle. The turn signal lamps will �ash
and the horn will sound three times.
Press and hold
Lfor more than two seconds to
activate the panic alarm. The turn signal lamps will �ash
and the horn will sound repeatedly for 30 seconds.
The alarm will turn off when the ignition is moved
to ON/RUN or
Lis pressed again. The ignition
must be in LOCK/OFF for the panic alarm to work.
Matching Transmitter(s) to Your
Vehicle
Each RKE transmitter is coded to prevent another
transmitter from unlocking your vehicle. If a transmitter is
lost or stolen, a replacement can be purchased through
your dealer/retailer. All transmitters need to be re-coded
to match the new transmitter. The lost transmitter will no
longer work after the new transmitters are re-coded.
The vehicle can have a maximum of eight transmitters
matched to it. See “Relearn Remote Key” underDIC
Operation and Displays (With DIC Buttons) on page 3-57
orDIC Operation and Displays (Without DIC Buttons)
on page 3-63for instructions on how to match RKE
transmitters to your vehicle.
Battery Replacement
Replace the battery if the REPLACE BATTERY
IN REMOTE KEY message displays in the DIC.
See “REPLACE BATTERY IN REMOTE KEY” under
DIC Warnings and Messages on page 3-66for additional
information.
Notice:When replacing the battery, do not to touch
any of the circuitry on the transmitter. Static from
your body could damage the transmitter.
2-6
Page 102 of 596
Do not use the remote start feature if your vehicle is low
on fuel. Your vehicle may run out of fuel.
If your vehicle has the remote start feature, the RKE
transmitter functions will have an increased range
of operation. However, the range may be less while
the vehicle is running.
There are other conditions which can affect the
performance of the transmitter, seeRemote Keyless
Entry (RKE) System on page 2-4for additional
information.
/(Remote Start):This button will be on the RKE
transmitter if you have remote start.
To start the vehicle using the remote start feature:
1. Aim the transmitter at the vehicle.
2. Press and release the transmitter’s lock button.
The vehicle’s doors will lock. Immediately press and
hold the transmitter’s remote start button until the
turn signal lights �ash. If you cannot see the vehicle’s
lights, press and hold the remote start button for
two to four seconds. Pressing the remote start
button again after the vehicle has started will
turn the engine off.
When the vehicle starts, the parking lamps will turn
on and remain on while the vehicle is running.If the vehicle is left running it will automatically shut
off after 10 minutes unless a time extension has
been done.
3. If it is the �rst remote start since the vehicle has
been driven, repeat these steps, while the engine
is still running, to extend the engine running time
by 10 minutes. Remote start can be extended
one time.
After entering the vehicle during a remote start, insert
and turn the key to RUN to drive the vehicle.
To manually shut off a remote start, do any of the
following:
Aim the RKE transmitter at the vehicle and press
the remote start button until the parking lamps
turn off.
Turn on the hazard warning �ashers.
Turn the ignition switch on and then off.
The vehicle can be remote started two separate times
between driving sequences. The engine will run for
10 minutes after each remote start.
Or, you can extend the engine run time by another
10 minutes within the �rst 10 minute remote start time
frame, and before the engine stops.
2-8
Page 140 of 596
for driving in most street and highway situations. The
front axle is not engaged in Two-Wheel Drive.
This setting also provides the best fuel economy.
AUTO (Automatic Four-Wheel Drive):This setting is
ideal for use when road surface traction conditions are
variable. When driving your vehicle in AUTO, the front
axle is engaged, but the vehicle’s power is sent only to
the front and rear wheels automatically based on driving
conditions. Driving in this mode results in slightly lower
fuel economy than Two-Wheel-Drive High.
4
m(Four-Wheel-Drive High):Use the
Four-Wheel-Drive High position when extra traction is
needed, such as on snowy or icy roads or in most off-road
situations. This setting also engages the front axle to help
drive your vehicle. This is the best setting to use when
plowing snow.
4
n(Four-Wheel-Drive Low):This setting also
engages the front axle and delivers extra torque.
You may never need this setting. It sends maximum
power to all four wheels. You might choose
Four-Wheel-Drive Low if you are driving off-road in
deep sand, deep mud, deep snow, and while climbing
or descending steep hills. StabiliTrak
®will not engage
in this mode. SeeStabiliTrak®System on page 4-6for
more information.
{CAUTION:
Shifting the transfer case to NEUTRAL
can cause your vehicle to roll even if the
transmission is in PARK (P). You or someone
else could be seriously injured. Be sure to set
the parking brake before placing the transfer
case in NEUTRAL. SeeParking Brake on
page 2-50.
N (NEUTRAL):Shift the vehicle’s transfer case
to NEUTRAL only when towing your vehicle. See
Recreational Vehicle Towing on page 4-50orTowing
Your Vehicle on page 4-50for more information.
If the SERVICE 4–Wheel Drive message stays on, you
should take your vehicle to your dealer for service.
See “Service 4–Wheel Drive message” underDIC
Warnings and Messages on page 3-66.
2-46
Page 144 of 596
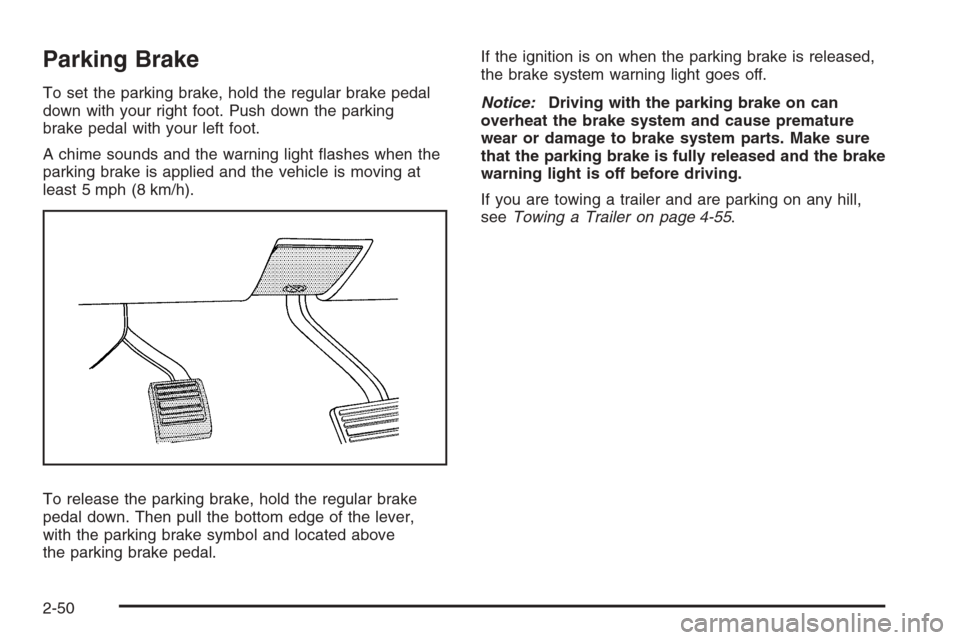
Parking Brake
To set the parking brake, hold the regular brake pedal
down with your right foot. Push down the parking
brake pedal with your left foot.
A chime sounds and the warning light �ashes when the
parking brake is applied and the vehicle is moving at
least 5 mph (8 km/h).
To release the parking brake, hold the regular brake
pedal down. Then pull the bottom edge of the lever,
with the parking brake symbol and located above
the parking brake pedal.If the ignition is on when the parking brake is released,
the brake system warning light goes off.
Notice:Driving with the parking brake on can
overheat the brake system and cause premature
wear or damage to brake system parts. Make sure
that the parking brake is fully released and the brake
warning light is off before driving.
If you are towing a trailer and are parking on any hill,
seeTowing a Trailer on page 4-55.
2-50
Page 160 of 596
To be detected, objects must be at least 10 inches
(25.4 cm) off the ground and below tailgate level.
Objects must also be within 8 feet (2.5 m) from the
rear bumper. This distance may be less during warmer
or humid weather.
A single beep will sound the �rst time an object is
detected between 20 inches (0.5 m) and 8 feet (2.5 m)
away. Beeping will occur for a short time when the
vehicle is closer than 1 foot (0.3 m) from the object.
The following describes what will occur with the URPA
display as the vehicle gets closer to a detected object:
Description English Metric
amber light 8 ft 2.5 m
amber/amber lights 40 in 1.0 m
amber/amber/red lights 23 in 0.6 m
amber/amber/red lights
�ashing and beep for
three seconds1 ft 0.3 mThe system can be
disabled by pressing the
rear park aid disable button
located next to the radio.
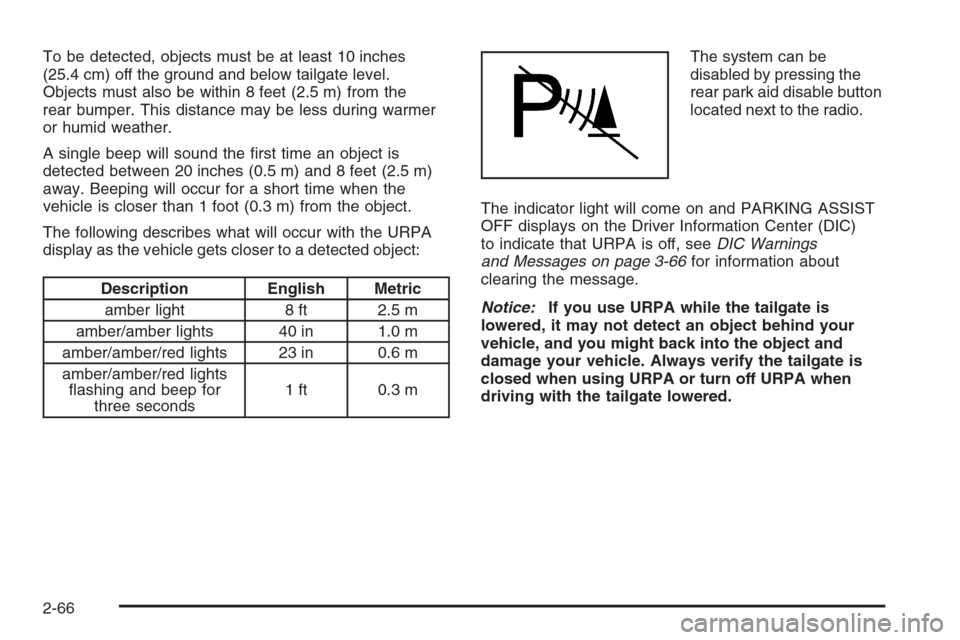
The indicator light will come on and PARKING ASSIST
OFF displays on the Driver Information Center (DIC)
to indicate that URPA is off, seeDIC Warnings
and Messages on page 3-66for information about
clearing the message.
Notice:If you use URPA while the tailgate is
lowered, it may not detect an object behind your
vehicle, and you might back into the object and
damage your vehicle. Always verify the tailgate is
closed when using URPA or turn off URPA when
driving with the tailgate lowered.
2-66
Page 179 of 596
Instrument Panel Overview...............................3-4
Instrument Panel Overview
(Base/Uplevel version).................................3-4
Instrument Panel Overview (Premium version). . . .3-6
Hazard Warning Flashers................................3-8
Other Warning Devices...................................3-8
Horn .............................................................3-8
Tilt Wheel.....................................................3-8
Turn Signal/Multifunction Lever.........................3-9
Turn and Lane-Change Signals.......................3-10
Headlamp High/Low-Beam Changer.................3-10
Flash-to-Pass...............................................3-11
Windshield Wipers........................................3-11
Rainsense™ II Wipers...................................3-12
Windshield Washer.......................................3-12
Cruise Control..............................................3-13
Exterior Lamps.............................................3-17
Headlamps on Reminder................................3-18
Daytime Running Lamps (DRL).......................3-18
Automatic Headlamp System..........................3-19
Puddle Lamps..............................................3-20
Fog Lamps ..................................................3-20
Auxiliary Roof Mounted Lamp.........................3-20
Instrument Panel Brightness...........................3-21
Dome Lamps ...............................................3-21
Dome Lamp Override....................................3-21
Entry Lighting...............................................3-21Exit Lighting.................................................3-21
Reading Lamps............................................3-22
Cargo Lamp.................................................3-22
Electric Power Management...........................3-22
Battery Run-Down Protection..........................3-23
Accessory Power Outlet(s).............................3-23
Ashtray(s) and Cigarette Lighter......................3-24
Climate Controls............................................3-25
Climate Control System
(With Air Conditioning )..............................3-25
Climate Control System (Heater Only)..............3-28
Dual Automatic Climate Control System...........3-29
Outlet Adjustment.........................................3-35
Warning Lights, Gages, and Indicators............3-36
Instrument Panel Cluster................................3-37
Speedometer and Odometer...........................3-38
Trip Odometer..............................................3-38
Tachometer.................................................3-38
Safety Belt Reminders...................................3-39
Airbag Readiness Light..................................3-40
Airbag Off Light............................................3-41
Passenger Airbag Status Indicator...................3-43
Charging System Light..................................3-45
Voltmeter Gage............................................3-45
Brake System Warning Light..........................3-46
Anti-lock Brake System (ABS) Warning Light. . . .3-47
Section 3 Instrument Panel
3-1
Page 180 of 596

StabiliTrak®Indicator Light.............................3-48
Engine Coolant Temperature Gage..................3-48
Tire Pressure Light.......................................3-49
Malfunction Indicator Lamp.............................3-49
Oil Pressure Gage........................................3-52
Oil Pressure Light.........................................3-53
Security Light...............................................3-53
Fog Lamp Light............................................3-53
Cruise Control Light......................................3-54
Highbeam On Light.......................................3-54
Four-Wheel-Drive Light..................................3-54
Tow/Haul Mode Light....................................3-54
Fuel Gage...................................................3-55
Low Fuel Warning Light.................................3-56
Driver Information Center (DIC).......................3-56
DIC Operation and Displays
(With DIC Buttons)....................................3-57
DIC Operation and Displays
(Without DIC Buttons)................................3-63DIC Warnings and Messages.........................3-66
DIC Vehicle Customization (With DIC Buttons) . . .3-76
Audio System(s).............................................3-84
Setting the Clock..........................................3-86
Radio(s)......................................................3-88
Using an MP3 (Radio with CD or
Six-Disc CD Player).................................3-108
Using an MP3 (Radio with CD and
DVD Player)...........................................3-114
XM Radio Messages...................................3-119
Navigation/Radio System..............................3-120
Rear Seat Entertainment (RSE) System.........3-121
Rear Seat Audio (RSA)................................3-130
Theft-Deterrent Feature................................3-132
Audio Steering Wheel Controls......................3-132
Radio Reception.........................................3-133
Fixed Mast Antenna....................................3-134
XM™ Satellite Radio Antenna System............3-134
Section 3 Instrument Panel
3-2