2008 CHEVROLET SILVERADO radio
[x] Cancel search: radioPage 294 of 596

File System and Naming
The song name that is displayed is the song name that is
contained in the ID3 tag. If the song name is not present
in the ID3 tag, then the radio displays the �le name
without the extension (such as .mp3) as the track name.
Track names longer than 32 characters or four pages
are shortened. Parts of words on the last page of
text and the extension of the �lename displays.
Preprogrammed Playlists
Preprogrammed playlists that were created using
WinAmp™, MusicMatch™, or Real Jukebox™ software
can be accessed, however, they cannot be edited
using the radio. These playlists are treated as special
folders containing compressed audio song �les.
Playing an MP3/WMA
(In Either the DVD or CD Slot)
Insert a CD-R or CD-RW partway into either the top or
bottom slot, label side up. The player pulls it in, and
the CD-R or CD-RW should begin playing.
Depending on the format of the disc, a softkey menu
appears and allows navigation of the disc. The menu
reads left to right as RDM (Randomize song play order),a Folder icon with left and right arrows (to move up or
down through available folders), a PL tag if the disc has
a Playlist available, and a Music Navigator tag. If a
Playlist tag is shown, toggling this key brings up a Folder
softkey only or the menu as previously described.
If the ignition or radio is turned off with a CD-R or
CD-RW in the player it stays in the player. When the
ignition or radio is turned back on, the CD-R starts
to play where it stopped, if it was the last selected
audio source.
As each new track starts to play, the track number and
song title displays.
ZCD (Eject):Press and release this button to eject
the CD-R or CD-RW that is currently playing in the
bottom slot. A beep sounds and Ejecting Disc displays.
Once the disc is ejected, Remove Disc displays.
The CD-R or CD-RW can be removed. If the CD-R or
CD-RW is not removed, after several seconds, the CD-R
or CD-RW automatically pulls back into the player.
If loading and reading of a CD cannot be completed,
such as unknown format, etc., and the disc fails to eject,
press and hold this button for more than �ve seconds
to force the disc to eject.
3-116
Page 296 of 596
h(Music Navigator):Use the music navigator
feature to play MP3/WMA �les on the CD-R or CD-RW
in order by artist or album. Press the pushbutton
located below the music navigator label. The player
scans the disc to sort the �les by artist and album ID3
tag information. It could take several minutes to scan the
disc depending on the number of MP3/WMA �les
recorded to the CD-R or CD-RW.
To cancel music navigator while the player is scanning,
press the pushbutton located below the music
navigator label or eject the disc.
The radio can begin playing while it is scanning the disc
in the background. When the scan is �nished, the
CD-R or CD-RW begins playing again.
Once the disc has been scanned, the player defaults to
playing MP3/WMA �les in order by artist. The current
artist playing is shown on the second line of the display
between the arrows. To listen to MP3/WMA �les by
another artist, press the pushbutton located below either
arrow button. The disc goes to the next or previous
artist in alphabetical order. Continue pressing either
button until the desired artist is displayed.To change from playback by artist to playback by
album, press the pushbutton located below the Sort By
label. From the sort screen, push one of the buttons
below the album button. Press the pushbutton below
the back label to return to the main music navigator
screen. Now the album name displays on the second
line between the arrows and songs from the current
album begin to play. Once all songs from that album
are played, the player moves to the next album in
alphabetical order on the CD-R or CD-RW and begins
playing MP3/WMA �les from that album.
To exit music navigator mode, press the pushbutton
below the Back label to return to normal MP3/WMA
playback.
BAND:Press this button to listen to the radio when a
CD or a DVD is playing. The CD or DVD remains inside
the radio for future listening or viewing entertainment.
3-118
Page 297 of 596
DVD/CD AUX (Auxiliary):Press this button to cycle
through DVD, CD, or Auxiliary when listening to
the radio. The DVD/CD text label and a message
showing track or chapter number displays when a disc
is in either slot. Press this button again and the
system automatically searches for an auxiliary input
device, such as a portable audio player. If a portable
audio player is not connected, “No Aux Input Device”
displays. If a disc is in both the DVD slot and the
CD slot the DVD/CD AUX button cycles between the
two sources and not indicate “No Aux Input Device”. If a
front auxiliary device is connected, the DVD/CD AUX
button cycles through all available options, such
as: DVD slot, CD slot, Front Auxiliary, and Rear Auxiliary
(if available). See “Using the Auxiliary Input Jack(s)”
later in this section, or “Audio/Video (A/V) Jacks” under,
Rear Seat Entertainment (RSE) System on page 3-121
for more information.
If a MP3/WMA is inserted into top DVD slot, the rear
seat operator can turn on the video screen and use the
remote control to navigate the CD (tracks only)
through the remote control.XM Radio Messages
XL (Explicit Language Channels):These channels, or
any others, can be blocked at a customer’s request,
by calling 1-800-852-XMXM (9696).
XM Updating:The encryption code in the receiver is
being updated, and no action is required. This process
should take no longer than 30 seconds.
No XM Signal:The system is functioning correctly, but
the vehicle is in a location that is blocking the XM™
signal. When you move into an open area, the signal
should return.
Loading XM:The audio system is acquiring and
processing audio and text data. No action is needed.
This message should disappear shortly.
Channel Off Air:This channel is not currently in
service. Tune to another channel.
Channel Unavail:This previously assigned channel is
no longer assigned. Tune to another station. If this
station was one of the presets, choose another station
for that preset button.
3-119
Page 298 of 596

No Artist Info:No artist information is available at this
time on this channel. The system is working properly.
No Title Info:No song title information is available
at this time on this channel. The system is working
properly.
No CAT Info:No category information is available at
this time on this channel. The system is working
properly.
No Information:No text or informational messages are
available at this time on this channel. The system is
working properly.
CAT Not Found:There are no channels available for
the selected category. The system is working properly.
XM TheftLocked:The XM receiver in the vehicle
could have previously been in another vehicle. For
security purposes, XM receivers cannot be swapped
between vehicles. If this message appears after having
your vehicle serviced, check with your dealer/retailer.
XM Radio ID:If tuned to channel 0, this message
alternates with the XM Radio eight digit radio ID label.
This label is needed to activate the service.Unknown:If this message is received when tuned to
channel 0, there could be a receiver fault. Consult
with your dealer/retailer.
Check XM Receivr:If this message does not clear
within a short period of time, the receiver could have a
fault. Consult with your dealer/retailer.
XM Not Available:If this message does not clear
within a short period of time, the receiver could have a
fault. Consult with your dealer/retailer.
Navigation/Radio System
Your vehicle may have a navigation radio system.
The navigation system has built-in features intended to
minimize driver distraction. Technology alone, no
matter how advanced, can never replace your own
judgment. See the Navigation System manual for some
tips to help you reduce distractions while driving.
3-120
Page 299 of 596
Rear Seat Entertainment (RSE)
System
The vehicle may have a DVD Rear Seat Entertainment
(RSE) system. The RSE system works with the
vehicle’s audio system. The DVD player is part of the
front radio. The RSE system includes a radio with a
DVD player, a video display screen, audio/video jacks,
two wireless headphones, and a remote control.
SeeRadio(s) on page 3-88for more information on
the vehicle’s audio/DVD system.
Before Driving
The RSE is designed for rear seat passengers only.
The driver cannot safely view the video screen
while driving and should not try to do so.
In severe or extreme weather conditions the RSE
system might not work until the temperature is within
the operating range. The operating range for the
RSE system is above−4°F (−20°C) or below
140°F (60°C). If the temperature of the vehicle is
outside of this range, heat or cool the vehicle until the
temperature is within the operating range of the
RSE system.
Parental Control
The RSE system may have a Parental Control feature,
depending on which radio the vehicle has. To start
Parental Control, press and hold the radio power button
for more than two seconds to stop all system features
such as: radio, video screen, RSA, DVD and/or CD.
While Parental Control is on, a padlock icon displays.
The radio can be turned back on with a single press of
the power button, but the RSE system will remain
under Parental Control.
To turn Parental Control off, press and hold the radio
power button for more than two seconds. The RSE
returns from where it was previously left and the padlock
icon disappears from the radio display.
Parental Control can also be turned off by inserting or
ejecting any disc, pressing the play icon on the radio
DVD display menu, or changing an ignition position.
3-121
Page 300 of 596
Headphones
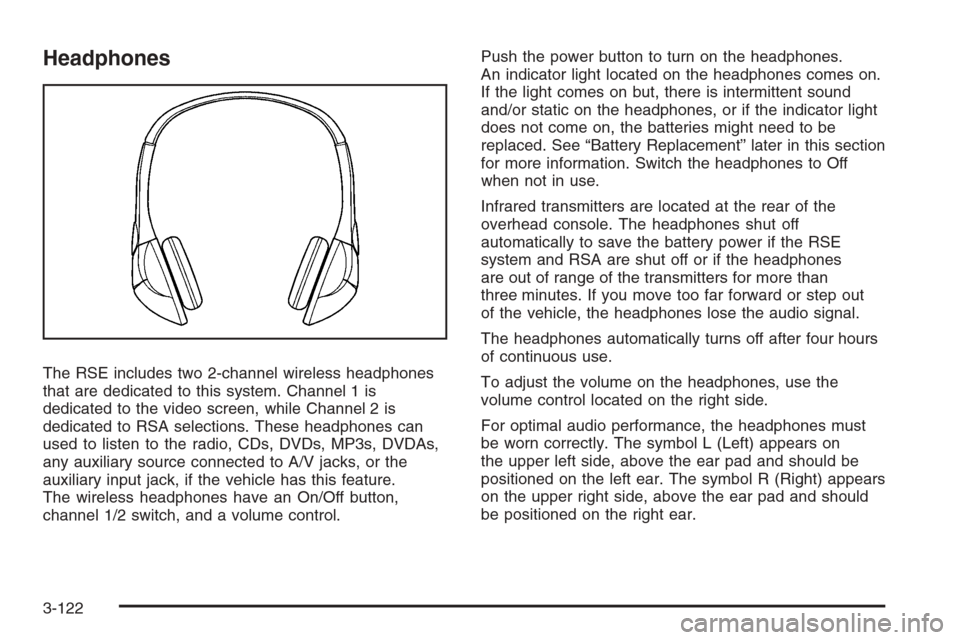
The RSE includes two 2-channel wireless headphones
that are dedicated to this system. Channel 1 is
dedicated to the video screen, while Channel 2 is
dedicated to RSA selections. These headphones can
used to listen to the radio, CDs, DVDs, MP3s, DVDAs,
any auxiliary source connected to A/V jacks, or the
auxiliary input jack, if the vehicle has this feature.
The wireless headphones have an On/Off button,
channel 1/2 switch, and a volume control.Push the power button to turn on the headphones.
An indicator light located on the headphones comes on.
If the light comes on but, there is intermittent sound
and/or static on the headphones, or if the indicator light
does not come on, the batteries might need to be
replaced. See “Battery Replacement” later in this section
for more information. Switch the headphones to Off
when not in use.
Infrared transmitters are located at the rear of the
overhead console. The headphones shut off
automatically to save the battery power if the RSE
system and RSA are shut off or if the headphones
are out of range of the transmitters for more than
three minutes. If you move too far forward or step out
of the vehicle, the headphones lose the audio signal.
The headphones automatically turns off after four hours
of continuous use.
To adjust the volume on the headphones, use the
volume control located on the right side.
For optimal audio performance, the headphones must
be worn correctly. The symbol L (Left) appears on
the upper left side, above the ear pad and should be
positioned on the left ear. The symbol R (Right) appears
on the upper right side, above the ear pad and should
be positioned on the right ear.
3-122
Page 301 of 596
Notice:Do not store the headphones in heat or
direct sunlight. This could damage the headphones
and repairs will not be covered by your warranty.
Storage in extreme cold can weaken the batteries.
Keep the headphones stored in a cool, dry place.
If the foam ear pads attached to the headphones
become worn or damaged, the pads can be replaced
separately from the headphone set. Refer to your
dealer/retailer for more information.
Battery Replacement
To change the batteries on the headphones, do the
following:
1. Turn the screw to loosen the battery door located
on the left side of the headphones. Slide the
battery door open.
2. Replace the two batteries in the compartment.
Make sure that they are installed correctly, using
the diagram on the inside of the battery
compartment.
3. Replace the battery door and tighten the door screw.
If the headphones are to be stored for a long period of
time, remove the batteries and keep them in a cool, dry
place.
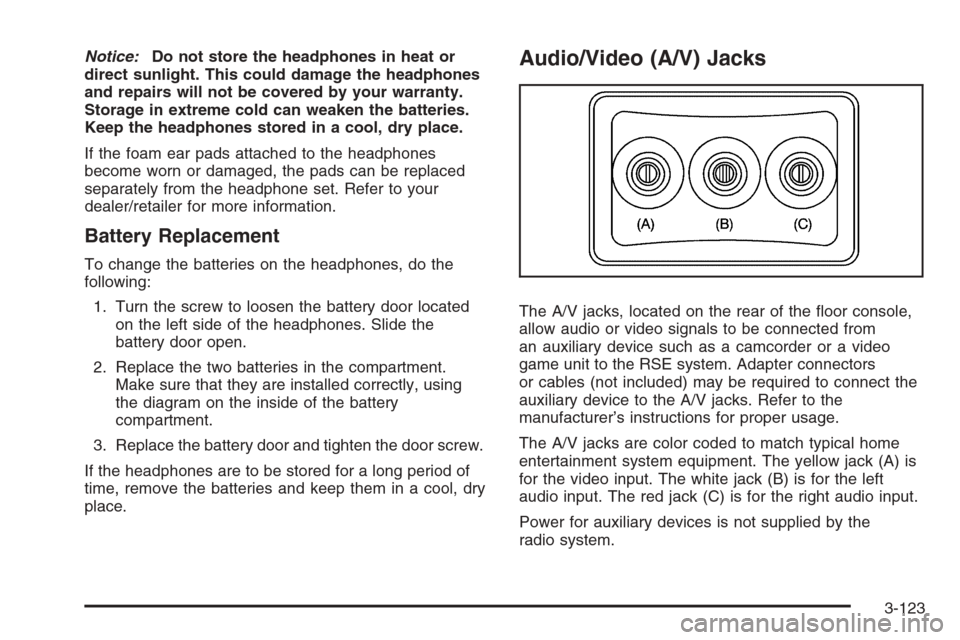
Audio/Video (A/V) Jacks
The A/V jacks, located on the rear of the �oor console,
allow audio or video signals to be connected from
an auxiliary device such as a camcorder or a video
game unit to the RSE system. Adapter connectors
or cables (not included) may be required to connect the
auxiliary device to the A/V jacks. Refer to the
manufacturer’s instructions for proper usage.
The A/V jacks are color coded to match typical home
entertainment system equipment. The yellow jack (A) is
for the video input. The white jack (B) is for the left
audio input. The red jack (C) is for the right audio input.
Power for auxiliary devices is not supplied by the
radio system.
3-123
Page 302 of 596

To use the auxiliary inputs of the RSE system, connect
an external auxiliary device to the color-coded A/V
jacks and turn both the auxiliary device and the video
screen power on. If the video screen is in the DVD
player mode, pressing the AUX (auxiliary) button on the
remote control switches the video screen from the
DVD player mode to the auxiliary device. The radio can
listen to the audio of the connected auxiliary device
by sourcing to auxiliary. SeeRadio(s) on page 3-88for
more information.
How to Change the RSE Video Screen
Settings
The screen display mode (normal, full, and zoom),
screen brightness, and setup menu language can be
changed from the on screen setup menu. To change any
feature, do the following:
1. Press the
z(display) menu button on the remote
control.
2. Use the remote control menu
n,q,p,o
(navigation) arrows and ther(enter) button
to use the setup menu.
3. Press the
zbutton again to remove the setup
menu from the screen.
Audio Output
Audio from the DVD player or auxiliary inputs can
be heard through the following possible sources:
Wireless Headphones
Vehicle Speakers
Vehicle wired headphone jacks on the rear seat
audio system, if the vehicle has this feature.
The RSE system always transmits the audio signal to
the wireless headphones, if there is audio available.
See “Headphones” earlier in this section for more
information.
The DVD player is capable of outputting audio to the
wired headphone jacks on the RSA system, if the
vehicle has this feature. The DVD player can be
selected as an audio source on the RSA system.
SeeRear Seat Audio (RSA) on page 3-130for more
information.
When a device is connected to the A/V jacks, or the
radio’s auxiliary input jack, if the vehicle has this feature,
the rear seat passengers are able to hear audio from
the auxiliary device through the wireless or wired
headphones. The front seat passengers are able to
listen to playback from this device through the vehicle
speakers by selecting AUX as the source on the radio.
3-124