2008 CHEVROLET SILVERADO rear entertainment
[x] Cancel search: rear entertainmentPage 283 of 596

c(Stop):Press to stop playing, rewinding, or fast
forwarding a DVD.
r(Enter):Press to select the choices that are
highlighted in any menu.
y(Menu):Press to access the DVD menu. The DVD
menu is different on every DVD. Use the pushbuttons
located under the navigation arrows to navigate
the cursor through the DVD menu. After making a
selection press this button. This button only operates
when using a DVD.
Nav (Navigate):Press to display directional arrows for
navigating through the menus.
q(Return):Press to exit the current active menu
and return to the previous menu. This button operates
only when a DVD is playing and a menu is active.
DVD-A (Audio) Display Buttons
Once a DVD-A is inserted, radio display menu shows
several tag options for DVD playing. Press the
pushbuttons located under any desired tag option
during DVD playback. See the tag options listed after,
for more information.The rear seat operator can navigate the DVD-A menus
and controls through the remote control. See “Remote
Control”, underRear Seat Entertainment (RSE) System
on page 3-121for more information. The Video
Screen does not automatically power on when the
DVD-A is inserted into the DVD slot. It must be manually
turned on by the rear seat occupant through the
remote control power button.
r/j(Play/Pause):Press either the play or pause
icon displayed on the radio system, to toggle between
pausing or restarting playback of a DVD. If the
forward arrow is showing on the display, the system is
in pause mode. If the pause icon is showing on the
display, the system is in playback mode.
qGroupr:Press to cycle through musical groupings
on the DVD-A disc.
Nav (Navigate):Press to display directional arrows for
navigating through the menus.
e(Audio Stream):Press to cycle through audio
stream formats located on the DVD-A disc. The video
screen shows the audio stream changing.
3-105
Page 286 of 596
CD/AUX (CD/Auxiliary):Press to play a CD when a
portable audio device is playing. Press again and
the system begins playing audio from the connected
portable audio player. If a portable audio player is
not connected, “No Input Device Found” displays.
DVD/CD AUX (CD/Auxiliary):Press to cycle through
DVD, CD, or Auxiliary when listening to the radio.
The DVD/CD text label and a message showing track or
chapter number displays when a disc is in either slot.
Press again and the system automatically searches
for an auxiliary input device, such as a portable audio
player. If a portable audio player is not connected,
“No Aux Input Device” displays. If a disc is in both the
DVD slot and the CD slot the DVD/CD AUX button
cycles between the two sources and not indicate
“No Aux Input Device”. If a front auxiliary device is
connected, the DVD/CD AUX button cycles through
all available options, such as: DVD slot, CD slot,
Front Auxiliary, and Rear Auxiliary (if available).
See “Using the Auxiliary Input Jack(s)” later in this
section, or “Audio/Video (A/V) Jacks” under,Rear
Seat Entertainment (RSE) System on page 3-121
for more information.Using an MP3 (Radio with CD or
Six-Disc CD Player)
MP3 CD-R or CD-RW Disc
The radio plays MP3 �les that were recorded on a
CD-R or CD-RW disc. The �les can be recorded with
the following �xed bit rates: 32 kbps, 40 kbps, 56 kbps,
64 kbps, 80 kbps, 96 kbps, 112 kbps, 128 kbps,
160 kbps, 192 kbps, 224 kbps, 256 kbps, and 320 kbps
or a variable bit rate. Song title, artist name, and
album are available for display by the radio when
recorded using ID3 tags version 1 and 2.
Compressed Audio
The radio also plays discs that contain both
uncompressed CD audio (.CDA �les) and MP3 �les.
By default the radio shows the MP3 label on the
left side of the screen but plays both �le formats in
the order in which they were recorded to the disc.
3-108
Page 297 of 596
DVD/CD AUX (Auxiliary):Press this button to cycle
through DVD, CD, or Auxiliary when listening to
the radio. The DVD/CD text label and a message
showing track or chapter number displays when a disc
is in either slot. Press this button again and the
system automatically searches for an auxiliary input
device, such as a portable audio player. If a portable
audio player is not connected, “No Aux Input Device”
displays. If a disc is in both the DVD slot and the
CD slot the DVD/CD AUX button cycles between the
two sources and not indicate “No Aux Input Device”. If a
front auxiliary device is connected, the DVD/CD AUX
button cycles through all available options, such
as: DVD slot, CD slot, Front Auxiliary, and Rear Auxiliary
(if available). See “Using the Auxiliary Input Jack(s)”
later in this section, or “Audio/Video (A/V) Jacks” under,
Rear Seat Entertainment (RSE) System on page 3-121
for more information.
If a MP3/WMA is inserted into top DVD slot, the rear
seat operator can turn on the video screen and use the
remote control to navigate the CD (tracks only)
through the remote control.XM Radio Messages
XL (Explicit Language Channels):These channels, or
any others, can be blocked at a customer’s request,
by calling 1-800-852-XMXM (9696).
XM Updating:The encryption code in the receiver is
being updated, and no action is required. This process
should take no longer than 30 seconds.
No XM Signal:The system is functioning correctly, but
the vehicle is in a location that is blocking the XM™
signal. When you move into an open area, the signal
should return.
Loading XM:The audio system is acquiring and
processing audio and text data. No action is needed.
This message should disappear shortly.
Channel Off Air:This channel is not currently in
service. Tune to another channel.
Channel Unavail:This previously assigned channel is
no longer assigned. Tune to another station. If this
station was one of the presets, choose another station
for that preset button.
3-119
Page 299 of 596
Rear Seat Entertainment (RSE)
System
The vehicle may have a DVD Rear Seat Entertainment
(RSE) system. The RSE system works with the
vehicle’s audio system. The DVD player is part of the
front radio. The RSE system includes a radio with a
DVD player, a video display screen, audio/video jacks,
two wireless headphones, and a remote control.
SeeRadio(s) on page 3-88for more information on
the vehicle’s audio/DVD system.
Before Driving
The RSE is designed for rear seat passengers only.
The driver cannot safely view the video screen
while driving and should not try to do so.
In severe or extreme weather conditions the RSE
system might not work until the temperature is within
the operating range. The operating range for the
RSE system is above−4°F (−20°C) or below
140°F (60°C). If the temperature of the vehicle is
outside of this range, heat or cool the vehicle until the
temperature is within the operating range of the
RSE system.
Parental Control
The RSE system may have a Parental Control feature,
depending on which radio the vehicle has. To start
Parental Control, press and hold the radio power button
for more than two seconds to stop all system features
such as: radio, video screen, RSA, DVD and/or CD.
While Parental Control is on, a padlock icon displays.
The radio can be turned back on with a single press of
the power button, but the RSE system will remain
under Parental Control.
To turn Parental Control off, press and hold the radio
power button for more than two seconds. The RSE
returns from where it was previously left and the padlock
icon disappears from the radio display.
Parental Control can also be turned off by inserting or
ejecting any disc, pressing the play icon on the radio
DVD display menu, or changing an ignition position.
3-121
Page 301 of 596
Notice:Do not store the headphones in heat or
direct sunlight. This could damage the headphones
and repairs will not be covered by your warranty.
Storage in extreme cold can weaken the batteries.
Keep the headphones stored in a cool, dry place.
If the foam ear pads attached to the headphones
become worn or damaged, the pads can be replaced
separately from the headphone set. Refer to your
dealer/retailer for more information.
Battery Replacement
To change the batteries on the headphones, do the
following:
1. Turn the screw to loosen the battery door located
on the left side of the headphones. Slide the
battery door open.
2. Replace the two batteries in the compartment.
Make sure that they are installed correctly, using
the diagram on the inside of the battery
compartment.
3. Replace the battery door and tighten the door screw.
If the headphones are to be stored for a long period of
time, remove the batteries and keep them in a cool, dry
place.
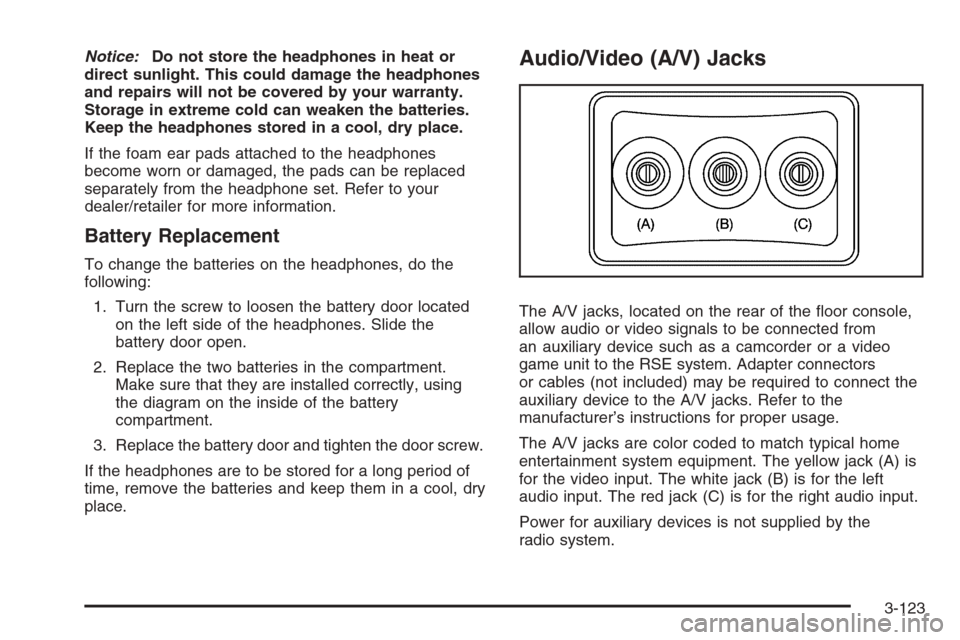
Audio/Video (A/V) Jacks
The A/V jacks, located on the rear of the �oor console,
allow audio or video signals to be connected from
an auxiliary device such as a camcorder or a video
game unit to the RSE system. Adapter connectors
or cables (not included) may be required to connect the
auxiliary device to the A/V jacks. Refer to the
manufacturer’s instructions for proper usage.
The A/V jacks are color coded to match typical home
entertainment system equipment. The yellow jack (A) is
for the video input. The white jack (B) is for the left
audio input. The red jack (C) is for the right audio input.
Power for auxiliary devices is not supplied by the
radio system.
3-123
Page 533 of 596
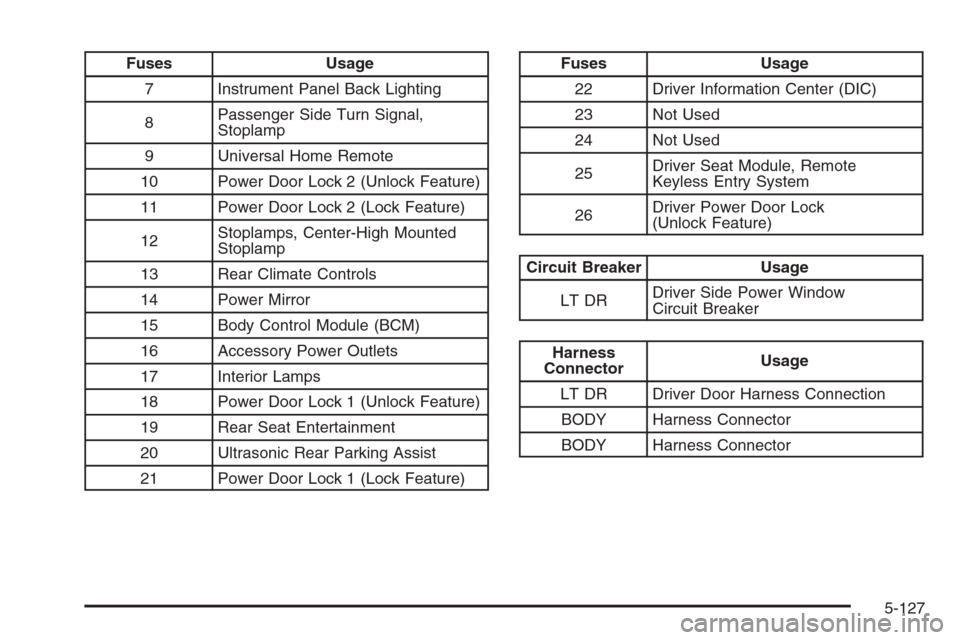
Fuses Usage
7 Instrument Panel Back Lighting
8Passenger Side Turn Signal,
Stoplamp
9 Universal Home Remote
10 Power Door Lock 2 (Unlock Feature)
11 Power Door Lock 2 (Lock Feature)
12Stoplamps, Center-High Mounted
Stoplamp
13 Rear Climate Controls
14 Power Mirror
15 Body Control Module (BCM)
16 Accessory Power Outlets
17 Interior Lamps
18 Power Door Lock 1 (Unlock Feature)
19 Rear Seat Entertainment
20 Ultrasonic Rear Parking Assist
21 Power Door Lock 1 (Lock Feature)Fuses Usage
22 Driver Information Center (DIC)
23 Not Used
24 Not Used
25Driver Seat Module, Remote
Keyless Entry System
26Driver Power Door Lock
(Unlock Feature)
Circuit Breaker Usage
LT DRDriver Side Power Window
Circuit Breaker
Harness
ConnectorUsage
LT DR Driver Door Harness Connection
BODY Harness Connector
BODY Harness Connector
5-127
Page 584 of 596
Customer Assistance Information
Courtesy Transportation.................................. 7-9
Customer Assistance for Text Telephone (TTY)
Users....................................................... 7-5
Customer Assistance Offices........................... 7-5
Customer Satisfaction Procedure..................... 7-2
GM Mobility Reimbursement Program............... 7-6
Reporting Safety Defects to General Motors....7-15
Reporting Safety Defects to the
Canadian Government..............................7-14
Reporting Safety Defects to the
United States Government.........................7-14
Roadside Assistance Program......................... 7-7
Service Publications Ordering Information........7-15
D
Daytime Running Lamps..................................3-18
Defensive Driving............................................. 4-2
Delayed Locking.............................................2-11
Diesel
Running Out of Fuel....................................2-54
Disc, MP3..........................................3-108, 3-114
Doing Your Own Service Work........................... 5-5
Dome Lamp Override......................................3-21
Dome Lamps .................................................3-21Door
Delayed Locking..........................................2-11
Locks........................................................2-10
Power Door Locks.......................................2-10
Programmable Automatic Door Locks.............2-11
Rear Door Security Locks.............................2-11
Rear Doors.................................................2-12
Driver Information Center (DIC).........................3-56
DIC Operation and Displays..................3-57, 3-63
DIC Vehicle Customization............................3-76
DIC Warnings and Messages........................3-66
Driving
At Night.....................................................4-27
Before a Long Trip......................................4-29
Defensive..................................................... 4-2
Drunken....................................................... 4-2
Highway Hypnosis.......................................4-29
Hill and Mountain Roads..............................4-30
In Rain and on Wet Roads...........................4-28
Off-Road ....................................................4-12
Recovery Hooks..........................................4-35
Rocking Your Vehicle to Get it Out.................4-34
Winter........................................................4-31
Dual Automatic Climate Control System.............3-29
Dual Tire Operation.........................................5-77
DVD
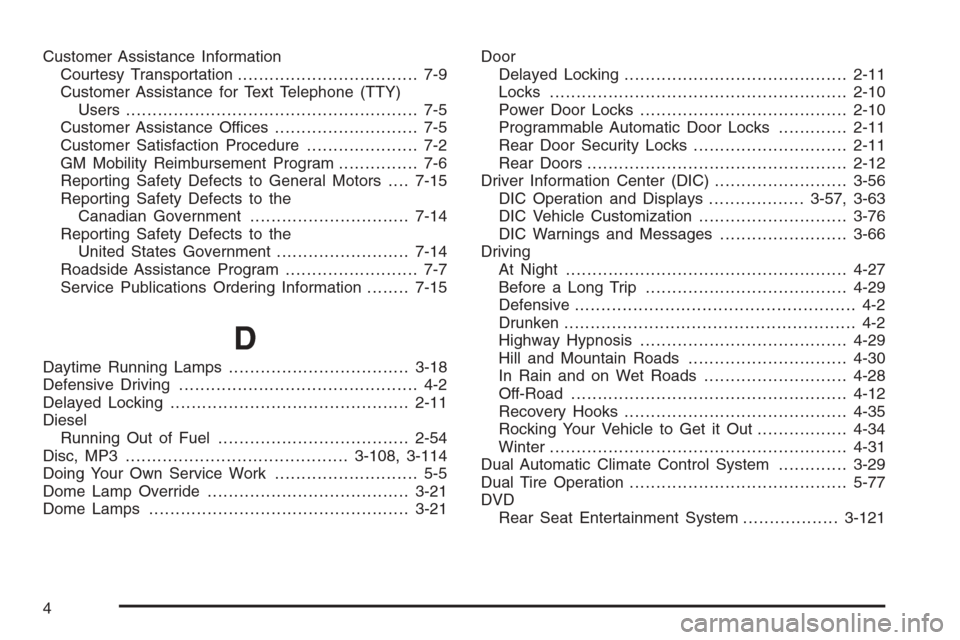
Rear Seat Entertainment System..................3-121
4
Page 591 of 596
Privacy..........................................................7-16
Event Data Recorders..................................7-17
Navigation System.......................................7-18
OnStar.......................................................7-18
Radio Frequency Identi�cation.......................7-18
Programmable Automatic Door Locks.................2-11
Puddle Lamps................................................3-20
R
Radio Frequency Identi�cation (RFID), Privacy....7-18
Radio(s)........................................................3-88
Radios
Navigation/Radio System,
see Navigation Manual............................3-120
Rear Seat Audio........................................3-130
Reception.................................................3-133
Setting the Clock.........................................3-86
Theft-Deterrent..........................................3-132
Rainsense™ II Wipers.....................................3-12
Reading Lamps..............................................3-22
Rear Axle......................................................5-52
Locking........................................................ 4-5
Rear Door Security Locks................................2-11
Rear Doors....................................................2-12
Rear Seat Armrest..........................................2-80Rear Seat Audio (RSA)..................................3-130
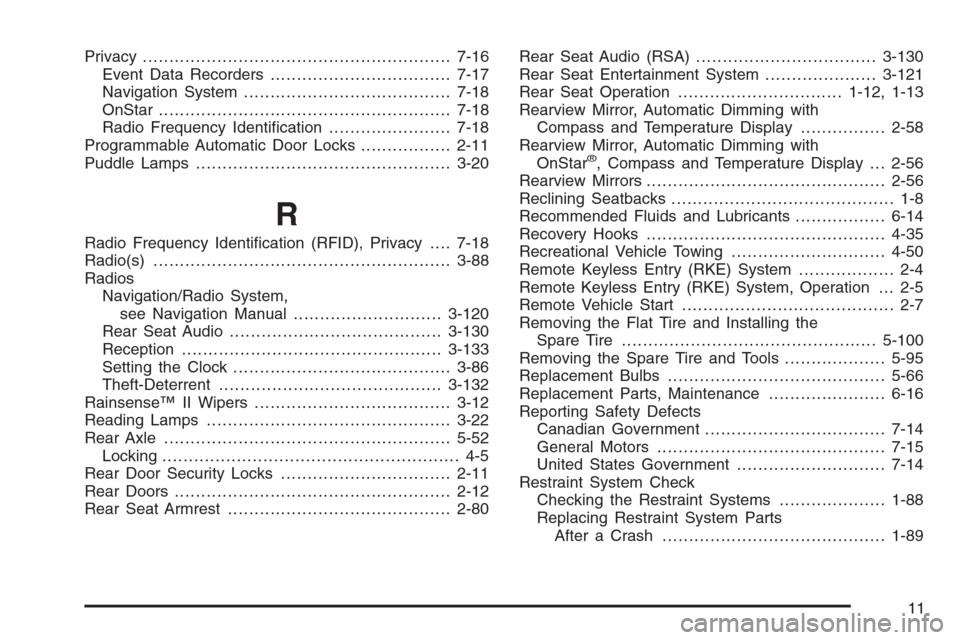
Rear Seat Entertainment System.....................3-121
Rear Seat Operation...............................1-12, 1-13
Rearview Mirror, Automatic Dimming with
Compass and Temperature Display................2-58
Rearview Mirror, Automatic Dimming with
OnStar
®, Compass and Temperature Display . . . 2-56
Rearview Mirrors.............................................2-56
Reclining Seatbacks.......................................... 1-8
Recommended Fluids and Lubricants.................6-14
Recovery Hooks.............................................4-35
Recreational Vehicle Towing.............................4-50
Remote Keyless Entry (RKE) System.................. 2-4
Remote Keyless Entry (RKE) System, Operation . . . 2-5
Remote Vehicle Start........................................ 2-7
Removing the Flat Tire and Installing the
Spare Tire................................................5-100
Removing the Spare Tire and Tools...................5-95
Replacement Bulbs.........................................5-66
Replacement Parts, Maintenance......................6-16
Reporting Safety Defects
Canadian Government..................................7-14
General Motors...........................................7-15
United States Government............................7-14
Restraint System Check
Checking the Restraint Systems....................1-88
Replacing Restraint System Parts
After a Crash..........................................1-89
11