2008 CHEVROLET MALIBU lights
[x] Cancel search: lightsPage 1 of 412
Seats and Restraint Systems........................... 1-1
Front Seats
............................................... 1-2
Rear Seats
............................................... 1-9
Safety Belts
.............................................1-11
Child Restraints
.......................................1-31
Airbag System
.........................................1-56
Restraint System Check
............................1-72
Features and Controls..................................... 2-1
Keys
........................................................ 2-3
Doors and Locks
......................................2-10
Windows
.................................................2-15
Theft-Deterrent Systems
............................2-18
Starting and Operating Your Vehicle
...........2-22
Mirrors
....................................................2-39
OnStar
®System
......................................2-42
Universal Home Remote System
................2-45
Storage Areas
.........................................2-52
Sunroof
..................................................2-53
Instrument Panel............................................. 3-1
Instrument Panel Overview
.......................... 3-4
Climate Controls
......................................3-21
Warning Lights, Gages, and Indicators
........3-30
Driver Information Center (DIC)
..................3-46
Audio System(s)
.......................................3-59Driving Your Vehicle....................................... 4-1
Your Driving, the Road, and the Vehicle
....... 4-2
Towing
...................................................4-26
Service and Appearance Care.......................... 5-1
Service
..................................................... 5-3
Fuel
......................................................... 5-5
Checking Things Under the Hood
...............5-12
Headlamp Aiming
.....................................5-48
Bulb Replacement
....................................5-48
Windshield Wiper Blade Replacement
.........5-51
Tires
......................................................5-52
Appearance Care
.....................................5-89
Vehicle Identi�cation
.................................5-97
Electrical System
......................................5-98
Capacities and Speci�cations
...................5-108
Maintenance Schedule..................................... 6-1
Maintenance Schedule
................................ 6-2
Customer Assistance Information.................... 7-1
Customer Assistance and Information
........... 7-2
Reporting Safety Defects
...........................7-15
Vehicle Data Recording and Privacy
...........7-18
Index................................................................ 1
2008 Chevrolet Malibu Owner ManualM
Page 84 of 412
If enabled through the DIC, and it is dark enough
outside, the vehicle’s high-beam headlamps, parking
lamps, and back-up lamps turn on each time
Kon the
transmitter is pressed. These exterior lamps stay on
for 20 seconds, or until a door is opened. See
“EXT (Exterior) LIGHTS” underDIC Vehicle
Personalization on page 3-53for additional information.
Pressing
Kon the RKE transmitter disarms the
content theft-deterrent system. SeeContent
Theft-Deterrent on page 2-18.
V(Remote Trunk Release):Press and hold for
about one second to open the trunk. The trunk can be
opened with the transmitter when the vehicle speed
is less than 2 mph (3 km/h) or when the ignition is off.
L(Vehicle Locator/Panic Alarm):Press and release
to locate your vehicle. The horn sounds three times
and the headlamps and turn signals �ash three times.
Press and hold
Lfor about three seconds to initiate the
panic alarm. The horn sounds and the headlamps
and turn signals �ash for 30 seconds. Press
Lagain
to cancel the panic alarm.
Matching Transmitter(s) to Your
Vehicle
Each RKE transmitter is coded to prevent another
transmitter from unlocking your vehicle. If a transmitter
is lost or stolen, a replacement can be purchased
through your dealer/retailer. All transmitters need to be
re-coded to match the new transmitter. The lost
transmitter will no longer work after the new transmitters
are re-coded. Each vehicle can have a maximum of
four transmitters matched to it.
Battery Replacement
Replace the battery if the KEY FOB BATT (Battery)
LOW message displays in the DIC. See “KEY FOB
BATT (Battery) LOW” underDIC Warnings and
Messages on page 3-48for additional information.
Notice:When replacing the battery, do not touch
any of the circuitry on the transmitter. Static
from your body could damage the transmitter.
2-6
Page 96 of 412
Sun Visors
To block out glare, you can swing down the visors.
You can also remove them from the center mount
and swing them to the side, to block out glare from
the side.
Your vehicle may have lighted visor vanity mirrors
located on the passenger and driver’s side visor.
When you lift the cover, the light will turn on.
Theft-Deterrent Systems
Vehicle theft is big business, especially in some cities.
This vehicle has theft-deterrent features, however,
they do not make it impossible to steal.
Content Theft-Deterrent
Your vehicle may have a
content theft-deterrent
alarm system.
Arming the System
With the ignition off, press the Remote Keyless Entry
(RKE) transmitter lock button to arm the system.
The system will arm 30 seconds after all the doors are
closed, or 60 seconds any door open.
If you press the lock button on the transmitter a second
time while all the doors are closed, the system will
arm immediately. The system will still arm in 60 seconds
if a door is open. When the open door is closed, the
system will arm.
The security light, located on the instrument panel
cluster, comes on to indicate that arming has been
initiated. Once the system is armed, the security light
�ashes once every three seconds.
If the security light is �ashing twice per second, this
means that a door is open.
If the system is armed and the key is used to unlock the
vehicle, the alarm will be activated.
If you do not want to arm the content theft system, lock
the vehicle with the manual lock knob on the doors
or with the inside power door lock switches.
The alarm will sound and the exterior lights will �ash if
any door is opened while armed.
2-18
Page 97 of 412
Disarming the System
To disarm the system, do one of the following:
Press the RKE transmitter unlock button.
Turn the ignition to ON/RUN.
Once the system is disarmed, the security light will
stop �ashing.
How the System Alarm is Activated
To activate the system if it is armed:
Open the driver’s door or trunk. A ten second
pre-alarm chirp will sound followed by a
thirty second full alarm of horn and lights.
Open any other door. A full alarm of horn and
lights will immediately sound for thirty seconds.
Open the hood. If the vehicle has the remote
start feature, it will activate the full alarm.
When an alarm event has �nished, the system
will re-arm itself automatically.
How to Turn Off the System Alarm
To turn off the system alarm:
Press the lock button on the RKE transmitter.
The system will then re-arm itself.
Press the unlock button on the RKE transmitter.
This will also disarm the system.
Insert the key in the ignition and turn it on.
This will also disarm the system.
How to Detect a Tamper Condition
If three chirps are heard when the unlock or lock button
is pressed on the RKE transmitter, it means that the
content theft security system alarm was previously
triggered.
2-19
Page 101 of 412
9(LOCK/OFF):This is the only position from which
the key can be removed. It also locks the ignition
and transmission. A warning chime sounds if the driver’s
door is opened while the ignition is off and the key is
left in the ignition.
ACC (ACC/ACCESSORY):This position lets you use
things like the radio and windshield wipers while
the engine is not running.
R(ON/RUN):This position unlocks the ignition. It is also
the position to where the key returns after you release
the switch and the engine starts. The switch will
stay in this position while the engine is running. But
even while the engine is not running, you can use
ON/RUN to operate the electrical accessories, and to
display some instrument panel warning lights.
The battery could be drained if you leave the key in the
ACC/ACCESSORY or ON/RUN position with the
engine off. You might not be able to start your vehicle if
the battery is allowed to drain for an extended period
of time.
/(START):This position starts the engine. When the
engine starts, release the key. The ignition switch will
return to the ON/RUN position for normal driving.
Key In the Ignition
Never leave your vehicle with the keys inside, as it is an
easy target for joy riders or thieves. If you leave the
key in the ignition and park your vehicle, a chime
sounds, when the driver’s door is opened. Always
remember to remove the key from the ignition and take
it with you. This locks your ignition and transmission.
Also, always remember to lock the doors.
The battery could be drained if the key is left in the
ignition while your vehicle is parked. You might not be
able to start your vehicle after it has been parked for an
extended period of time.
2-23
Page 124 of 412
Universal Home Remote System
Operation (With Three Round LED)
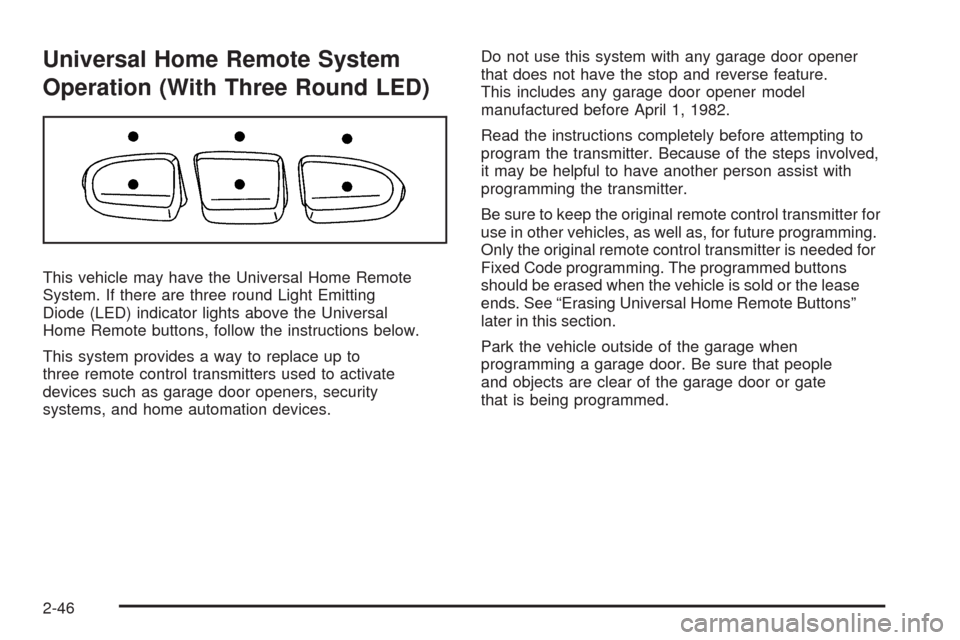
This vehicle may have the Universal Home Remote
System. If there are three round Light Emitting
Diode (LED) indicator lights above the Universal
Home Remote buttons, follow the instructions below.
This system provides a way to replace up to
three remote control transmitters used to activate
devices such as garage door openers, security
systems, and home automation devices.Do not use this system with any garage door opener
that does not have the stop and reverse feature.
This includes any garage door opener model
manufactured before April 1, 1982.
Read the instructions completely before attempting to
program the transmitter. Because of the steps involved,
it may be helpful to have another person assist with
programming the transmitter.
Be sure to keep the original remote control transmitter for
use in other vehicles, as well as, for future programming.
Only the original remote control transmitter is needed for
Fixed Code programming. The programmed buttons
should be erased when the vehicle is sold or the lease
ends. See “Erasing Universal Home Remote Buttons”
later in this section.
Park the vehicle outside of the garage when
programming a garage door. Be sure that people
and objects are clear of the garage door or gate
that is being programmed.
2-46
Page 128 of 412
2. Write down the eight to 12 switch settings from left
to right as follows:
When a switch is in the up position, write “Left.”
When a switch is in the down position,
write “Right.”
If a switch is set between the up and down
position, write “Middle.”
The switch settings written down in Step 2 now
become the button strokes to be entered into the
Universal Home Remote in Step 4. Be sure to
enter the switch settings written down in Step 2,
in order from left to right, into the Universal Home
Remote, when completing Step 4.
3. From inside your vehicle, �rst �rmly press all three
buttons at the same time for about three seconds.
Release the buttons to put the Universal Home
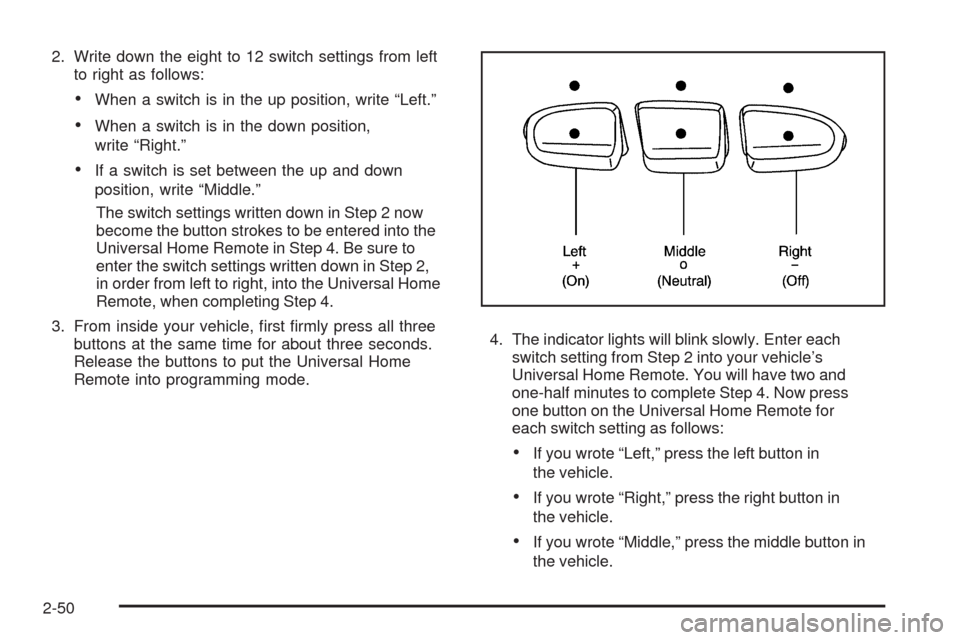
Remote into programming mode.4. The indicator lights will blink slowly. Enter each
switch setting from Step 2 into your vehicle’s
Universal Home Remote. You will have two and
one-half minutes to complete Step 4. Now press
one button on the Universal Home Remote for
each switch setting as follows:
If you wrote “Left,” press the left button in
the vehicle.
If you wrote “Right,” press the right button in
the vehicle.
If you wrote “Middle,” press the middle button in
the vehicle.
2-50
Page 129 of 412
5. After entering all of the switch positions, again,
�rmly press and release all three buttons at the
same time. The indicator lights will turn on.
6. Press and hold the button that will be used to
control the garage door until the garage door
moves. The indicator light above the selected button
should slowly blink. This button may need to be
held for up to 55 seconds.
7. Immediately release the button when the garage
door moves. The indicator light will blink rapidly
until programming is complete.
8. Press and release the same button again. The
garage door should move, con�rming that
programming is successful and complete.
To program another Fixed Code device such as an
additional garage door opener, a security device,
or home automation device, repeat Steps 1-8, choosing
a different button in Step 6 than what was used for
the garage door opener.
Using Universal Home Remote
Press and hold the appropriate button for at least half of
a second. The indicator light will come on while the
signal is being transmitted.
Reprogramming Universal Home
Remote Buttons
Any of the three buttons can be reprogrammed by
repeating the instructions.
Erasing Universal Home Remote
Buttons
The programmed buttons should be erased when the
vehicle is sold or the lease ends.
To erase either Rolling Code or Fixed Code on the
Universal Home Remote device:
1. Press and hold the two outside buttons at the same
time for approximately 20 seconds, until the
indicator lights, located directly above the buttons,
begin to blink rapidly.
2. Once the indicator lights begin to blink, release both
buttons. The codes from all buttons will be erased.
For help or information on the Universal Home Remote
System, call the customer assistance phone number
underCustomer Assistance Offices on page 7-6.
2-51