2008 CHEVROLET MALIBU brake light
[x] Cancel search: brake lightPage 108 of 412
INTERMEDIATE (I):This position is also used for
normal driving. However, it reduces vehicle speed without
using your brakes for slight downgrades where the
vehicle would otherwise accelerate due to steepness
of grade. If constant upshifting or downshifting occurs
while driving up steep hills, this position can be used to
prevent repetitive types of shifts. You might choose
INTERMEDIATE (I) instead of DRIVE (D) when driving on
hilly, winding roads and when towing a trailer, so that
there is less shifting between gears.
LOW (L):This position gives you access to FOURTH,
THIRD, SECOND and FIRST gear ranges. This
provides more engine braking but lower fuel economy
than DRIVE (D). You can use it on very steep hills, or in
deep snow or mud. If the electronic range select is
put in LOW (L), the transmission will not shift into lower
gears until the vehicle is going slow enough.Automatic Transmission Operation
(Six Speed Transmission)
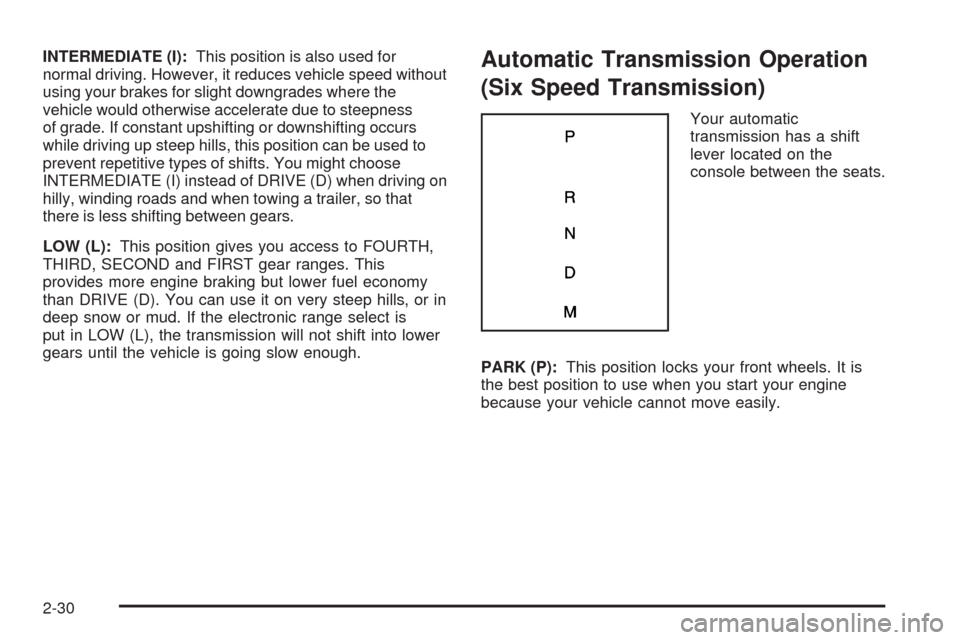
Your automatic
transmission has a shift
lever located on the
console between the seats.
PARK (P):This position locks your front wheels. It is
the best position to use when you start your engine
because your vehicle cannot move easily.
2-30
Page 112 of 412
Second or Third Gear Start Feature
When accelerating your vehicle from a stop in snowy
and icy conditions, you may want to shift the gear select
tap switch into Second or Third gear. A higher gear
allows you to gain more traction on slippery surfaces.
With the DSC feature, the vehicle can be set to pull
away in Second or Third gear.
1. Move the shift lever from DRIVE (D) into the
MANUAL MODE (M).
2. With the vehicle stopped, press (+) end of the button
to select Second or Third gear. The vehicle will start
from a stop position in Second or Third gear.
3. Once moving select the desired drive gear.
Parking Brake
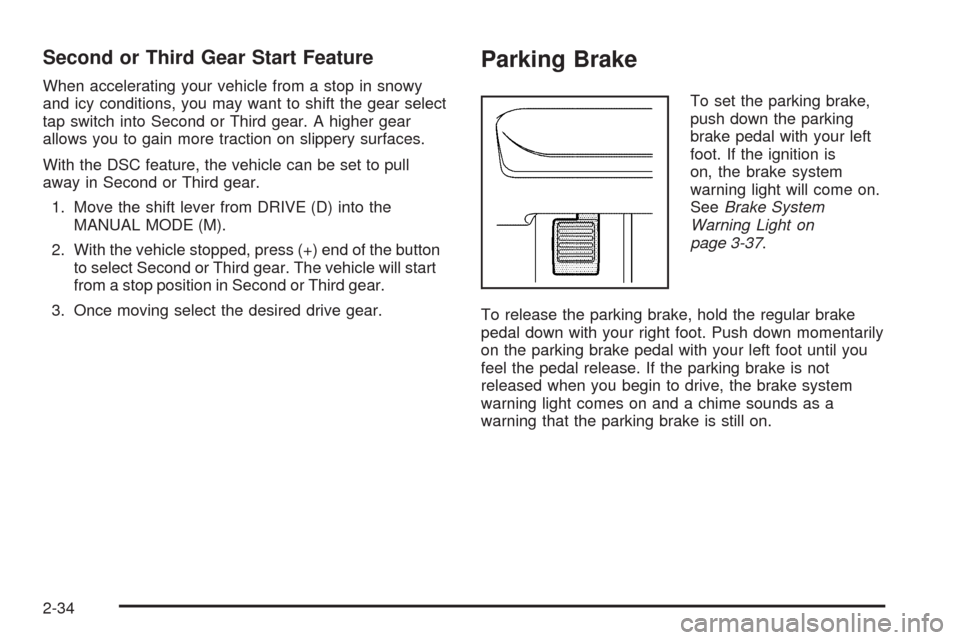
To set the parking brake,
push down the parking
brake pedal with your left
foot. If the ignition is
on, the brake system
warning light will come on.
SeeBrake System
Warning Light on
page 3-37.
To release the parking brake, hold the regular brake
pedal down with your right foot. Push down momentarily
on the parking brake pedal with your left foot until you
feel the pedal release. If the parking brake is not
released when you begin to drive, the brake system
warning light comes on and a chime sounds as a
warning that the parking brake is still on.
2-34
Page 113 of 412
The PUSH PARK PEDAL message will also display in
the Driver Information Center (DIC) as a reminder
to release the parking brake. SeeDIC Warnings and
Messages on page 3-48.
Notice:Driving with the parking brake on can
overheat the brake system and cause premature
wear or damage to brake system parts. Make sure
that the parking brake is fully released and the brake
warning light is off before driving.
If you are towing a trailer and are parking on a hill, see
Towing a Trailer on page 4-30.
Shifting Into Park
{CAUTION:
It can be dangerous to get out of the vehicle if
the shift lever is not fully in P (Park) with the
parking brake �rmly set. The vehicle can roll. If
you have left the engine running, the vehicle
CAUTION: (Continued)
CAUTION: (Continued)
can move suddenly. You or others could be
injured. To be sure the vehicle will not
move,even when you are on fairly level
ground, use the steps that follow. If you are
pulling a trailer, seeTowing a Trailer on
page 4-30.
1. Hold the brake pedal down with your right foot and
set the parking brake. SeeParking Brake on
page 2-34for more information.
2. Move the shift lever into PARK (P) by holding in the
button on the shift lever and pushing the shift lever
all the way toward the front of the vehicle.
3. Turn the ignition key to LOCK/OFF.
4. Remove the key and take it with you. If you can
leave your vehicle with the ignition key in your
hand, your vehicle is in PARK (P).
2-35
Page 133 of 412
Instrument Panel Overview...............................3-4
Hazard Warning Flashers................................3-6
Other Warning Devices...................................3-6
Horn .............................................................3-6
Tilt and Telescopic Steering Wheel...................3-7
Turn Signal/Multifunction Lever.........................3-7
Turn and Lane-Change Signals........................3-8
Headlamp High/Low-Beam Changer..................3-8
Flash-to-Pass.................................................3-8
Windshield Wipers..........................................3-9
Windshield Washer.......................................3-10
Cruise Control..............................................3-10
Headlamps..................................................3-13
Headlamps on Reminder................................3-14
Headlamps Off in Park..................................3-14
Delayed Headlamps......................................3-14
Daytime Running Lamps (DRL).......................3-14
Automatic Headlamp System..........................3-15
Fog Lamps ..................................................3-16
Instrument Panel Brightness...........................3-16
Dome Lamp .................................................3-17
Entry/Exit Lighting.........................................3-17
Parade Dimming...........................................3-17
Front Reading Lamps....................................3-17
Overhead Console Reading Lamps.................3-17
Rear Reading Lamps....................................3-18
Trunk Lamp.................................................3-18Battery Run-Down Protection..........................3-18
Accessory Power Outlet(s).............................3-19
Power Outlet 115 Volt Alternating Current........3-20
Climate Controls............................................3-21
Climate Control System.................................3-21
Automatic Climate Control System...................3-24
Outlet Adjustment.........................................3-29
Warning Lights, Gages, and Indicators...........
.3-30
Instrument Panel Cluster................................3-31
Speedometer and Odometer...........................3-32
Trip Odometer..............................................3-32
Tachometer.................................................3-32
Safety Belt Reminders...................................3-33
Airbag Readiness Light..................................3-34
Passenger Airbag Status Indicator...................3-35
Charging System Light..................................3-37
Brake System Warning Light..........................3-37
Antilock Brake System (ABS) Warning Light.....3-38
Electronic Stability Control (ESC)/Traction
Control System (TCS) Indicator/
Warning Light............................................3-39
Engine Coolant Temperature Warning Light......3-40
Engine Coolant Temperature Gage..................3-40
Tire Pressure Light.......................................3-41
Malfunction Indicator Lamp.............................3-41
Oil Pressure Light.........................................3-44
Section 3 Instrument Panel
3-1
Page 143 of 412
Setting Cruise Control
{CAUTION:
If you leave your cruise control on when you
are not using cruise, you might hit a button
and go into cruise when you do not want to.
You could be startled and even lose control.
Keep the cruise control switch off until you
want to use cruise control.
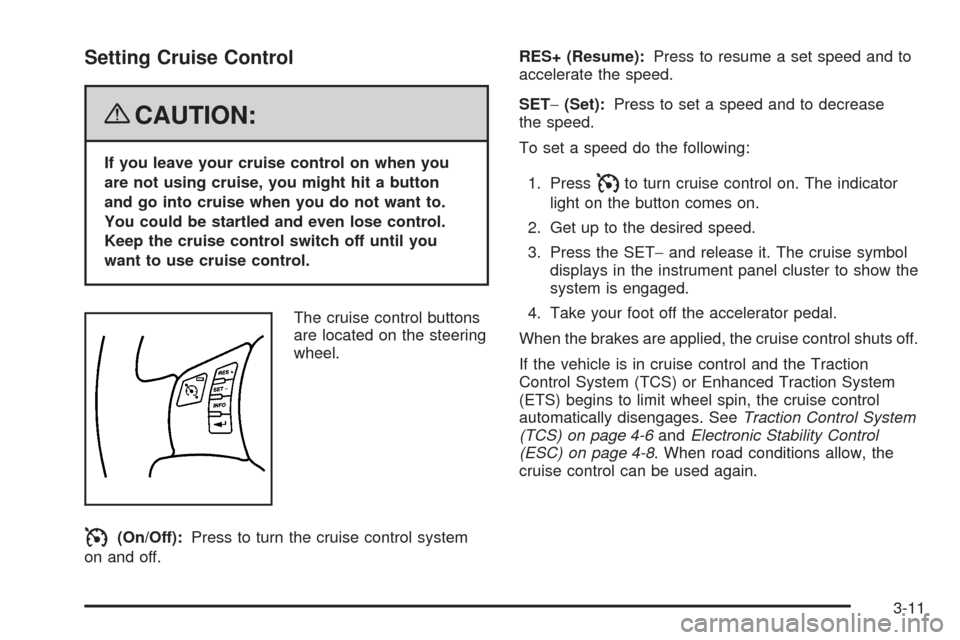
The cruise control buttons
are located on the steering
wheel.
I(On/Off):Press to turn the cruise control system
on and off.RES+ (Resume):Press to resume a set speed and to
accelerate the speed.
SET−(Set):Press to set a speed and to decrease
the speed.
To set a speed do the following:
1. Press
Ito turn cruise control on. The indicator
light on the button comes on.
2. Get up to the desired speed.
3. Press the SET−and release it. The cruise symbol
displays in the instrument panel cluster to show the
system is engaged.
4. Take your foot off the accelerator pedal.
When the brakes are applied, the cruise control shuts off.
If the vehicle is in cruise control and the Traction
Control System (TCS) or Enhanced Traction System
(ETS) begins to limit wheel spin, the cruise control
automatically disengages. SeeTraction Control System
(TCS) on page 4-6andElectronic Stability Control
(ESC) on page 4-8. When road conditions allow, the
cruise control can be used again.
3-11
Page 145 of 412
Ending Cruise Control
There are two ways to disengage the cruise control:
Step lightly on the brake pedal to disengage
the cruise control.
Press the on/off button, to turn off the cruise
control.
Erasing Speed Memory
The cruise control set speed memory is erased when
the cruise control or the ignition are turned off.
Headlamps
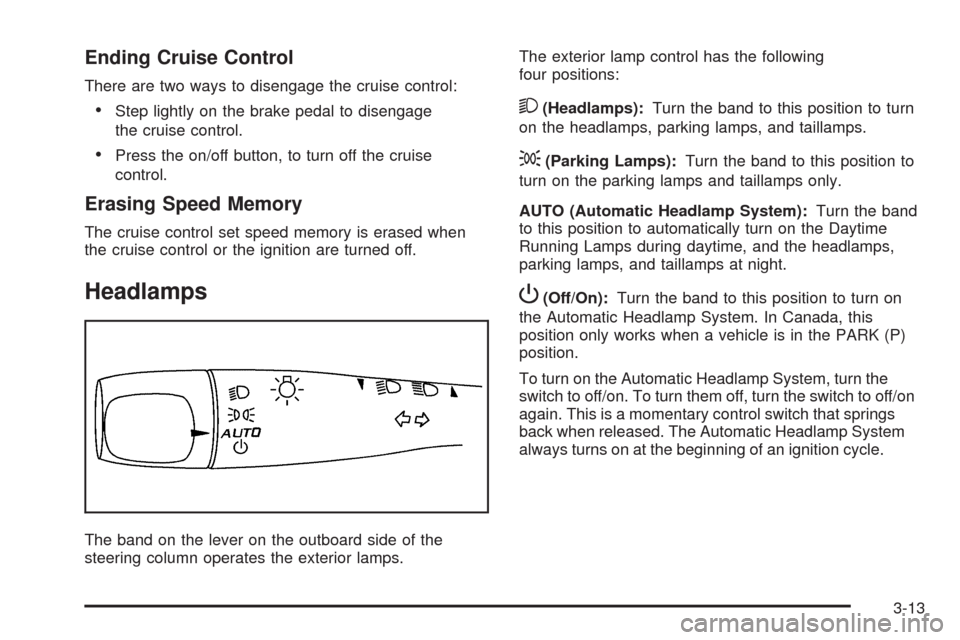
The band on the lever on the outboard side of the
steering column operates the exterior lamps.The exterior lamp control has the following
four positions:
2(Headlamps):Turn the band to this position to turn
on the headlamps, parking lamps, and taillamps.
;(Parking Lamps):Turn the band to this position to
turn on the parking lamps and taillamps only.
AUTO (Automatic Headlamp System):Turn the band
to this position to automatically turn on the Daytime
Running Lamps during daytime, and the headlamps,
parking lamps, and taillamps at night.
P(Off/On):Turn the band to this position to turn on
the Automatic Headlamp System. In Canada, this
position only works when a vehicle is in the PARK (P)
position.
To turn on the Automatic Headlamp System, turn the
switch to off/on. To turn them off, turn the switch to off/on
again. This is a momentary control switch that springs
back when released. The Automatic Headlamp System
always turns on at the beginning of an ignition cycle.
3-13
Page 146 of 412
Headlamps on Reminder
If you open the driver’s door and turn off the
ignition while leaving the lamps on, you will hear a
warning chime.
Headlamps Off in Park
This feature works when the ignition is in the ON/RUN
position and it is dark outside. To turn the headlamps
off when it is dark outside but keep other exterior lights
on, turn the exterior lamp control to the parking lamp
position.
To turn on the headlamps along with the other lamps
when it is dark outside, turn the exterior lamp control to
the AUTO or headlamp position.
This function does not work for vehicles �rst sold in
Canada.
Delayed Headlamps
The delayed headlamps feature keeps the headlamps
on for 20 seconds after the key is turned to LOCK/OFF,
then the headlamps automatically turn off.
To override the 20 second delayed headlamp feature
while it is active turn the turn signal/multifunction
lever up one position and then back to AUTO.
Daytime Running Lamps (DRL)
Daytime Running Lamps (DRL) can make it easier for
others to see the front of your vehicle during the
day. DRL are helpful in many different driving conditions,
but they can be especially helpful in the short periods
after dawn and before sunset. Fully functional DRL
are required on all vehicles �rst sold in Canada. The
vehicle has a light sensor on top of the instrument panel
that controls the DRL. Make sure it is not covered, or
the head lamps will be on when they are not needed.
The DRL system makes the low-beam headlamps come
on at a reduced brightness when the following conditions
are met:
The ignition is on.
The exterior lamps control is in AUTO.
The exterior lamps control is in the parking lamps
only position (This applies only to vehicles that are
�rst sold in Canada).
The light sensor detects daytime light.
The parking brake is released or the vehicle is
not in PARK.
When the DRL system is on, the taillamps, sidemarker
lamps, parking lamps, and instrument panel lights
are not on unless you turn the exterior lamps control to
the parking lamp position.
As with any vehicle, you should turn on the regular
headlamp system when they are needed.
3-14
Page 169 of 412
Charging System Light
This light comes on brie�y
when the ignition key is
turned, but the engine has
not started to run, as a
check to show you it
is working.
It should go out once the engine starts. If it stays on, or
comes on while driving, there could be a problem
with the charging system. A charging system message
in the Driver Information Center (DIC) may also
appear. SeeDIC Warnings and Messages on page 3-48
for more information. This light could indicate that
there are problems with a generator drive belt, or that
there is an electrical problem. Have it checked right
away. If you must drive a short distance with the light on,
be certain to turn off all the accessories, such as the
radio and air conditioner.
Brake System Warning Light
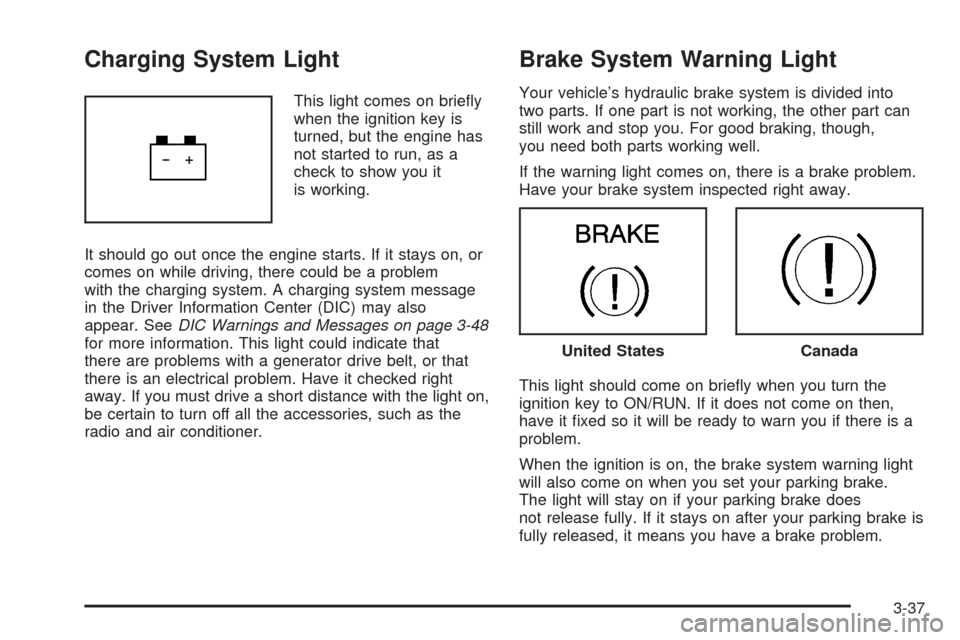
Your vehicle’s hydraulic brake system is divided into
two parts. If one part is not working, the other part can
still work and stop you. For good braking, though,
you need both parts working well.
If the warning light comes on, there is a brake problem.
Have your brake system inspected right away.
This light should come on brie�y when you turn the
ignition key to ON/RUN. If it does not come on then,
have it �xed so it will be ready to warn you if there is a
problem.
When the ignition is on, the brake system warning light
will also come on when you set your parking brake.
The light will stay on if your parking brake does
not release fully. If it stays on after your parking brake is
fully released, it means you have a brake problem.
United StatesCanada
3-37