2008 CHEVROLET EQUINOX power steering
[x] Cancel search: power steeringPage 130 of 436
Reduced Engine Power Light.........................3-39
Highbeam On Light.......................................3-39
Service All-Wheel Drive Light.........................3-39
All-Wheel Drive Disabled Light........................3-40
Gate Ajar Light.............................................3-40
Door Ajar Light.............................................3-40
Service Vehicle Soon Light............................3-41
Fuel Gage...................................................3-41
Low Fuel Warning Light.................................3-42
Driver Information Center (DIC).......................3-42
DIC Operation and Displays...........................3-43
DIC Compass..............................................3-46
DIC Warnings and Messages.........................3-49
DIC Vehicle Personalization............................3-58Audio System(s).............................................3-64
Setting the Time...........................................3-65
Radio(s)......................................................3-68
Using an MP3 (Radio with CD
or Six-Disc CD Player)...............................3-87
Using an MP3 (Radio with CD
and DVD Player).......................................3-92
XM Radio Messages.....................................3-97
Navigation/Radio System...............................3-98
Rear Seat Entertainment (RSE) System...........3-99
Theft-Deterrent Feature................................3-108
Audio Steering Wheel Controls......................3-108
Radio Reception.........................................3-110
Multi-Band Antenna.....................................3-110
Section 3 Instrument Panel
3-2
Page 133 of 436
The main components of your instrument panel are the following:
A. Air Outlets. SeeOutlet Adjustment on page 3-22.
B. Turn Signal/Multifunction Lever. SeeTurn
Signal/Multifunction Lever on page 3-7.
C. Instrument Panel Cluster. SeeInstrument Panel
Cluster on page 3-25.
D. Windshield Wiper/Washer Lever. SeeWindshield
Wipers on page 3-9.
E. Driver Information Center Controls. SeeDIC
Operation and Displays on page 3-43.
F. Hazard Warning Flashers. SeeHazard Warning
Flashers on page 3-6.
G. Passenger Airbag Status Indicator. SeePassenger
Airbag Status Indicator on page 3-28.
H. Rear Window Wiper/Washer Buttons. SeeRear
Window Wiper/Washer on page 3-10. Fog Lamps
Button. SeeFog Lamps on page 3-15.
I. Power Mirror Control. SeeOutside Power Mirrors
on page 2-38.
J. Instrument Panel Brightness Control. See
Instrument Panel Brightness on page 3-15.K. Cruise Controls. SeeCruise Control on page 3-10.
L. Tilt Wheel. SeeTilt Wheel on page 3-6.
M. Horn. SeeHorn on page 3-6.
N. Audio Steering Wheel Controls. SeeAudio
Steering Wheel Controls on page 3-108.
O. Audio System. SeeAudio System(s) on page 3-64.
P. Shift Lever. SeeShifting Into PARK (P)
on page 2-32.
Q. Traction Control System (TCS) Button. See
Traction Control System (TCS) on page 4-6.
R. Power Window Switches. SeePower Windows
on page 2-16.
S. Climate Control System. SeeClimate Control
System on page 3-19. Heated Seat Buttons
(If Equipped). SeeHeated Seats on page 1-4.
T. Glove Box. SeeGlove Box on page 2-42.
3-5
Page 182 of 436
SERVICE ALL WHEEL DRIVE
If your vehicle has the All-Wheel Drive (AWD) system,
this message displays along with the service all-wheel
drive light if a problem occurs with this system. See
Service All-Wheel Drive Light on page 3-39. If this
message appears, stop as soon as possible and turn
off the vehicle. Restart the vehicle and check for
the message on the DIC display. If the message is still
displayed or appears again when you begin driving,
the AWD system needs service. See your dealer/retailer.
SERVICE BATTERY CHARGING
SYSTEM
This message displays when there is a problem with the
generator and battery charging systems. Driving with
this problem could drain the vehicle’s battery. Turn off all
unnecessary accessories. Stop and turn off the vehicle
as soon as it is safe to do so. Have the electrical
system checked by your dealer/retailer immediately.Connecting a battery charger to your vehicle while the
ignition is in any position other than LOCK/OFF may
cause this message to appear. If you need to charge
your vehicle, make sure that the key is in LOCK/OFF or
out of the ignition during charging.
SERVICE BRAKE SYSTEM
This message displays and a chime sounds when the
brake �uid level is low. The brake system warning
light also appears on the instrument panel cluster when
this message appears on the DIC. SeeBrake System
Warning Light on page 3-31. Have the brake system
serviced by your dealer/retailer as soon as possible.
SERVICE POWER STEERING
On some vehicles, this message displays when a
problem is detected with the power steering system.
When this message is displayed, you may notice
that the effort required to steer the vehicle increases
or feels heavier, but you will still be able to steer
the vehicle. Have your vehicle serviced by your
dealer/retailer immediately.
3-54
Page 193 of 436
While your vehicle is parked:
Familiarize yourself with all of its controls.
Familiarize yourself with its operation.
Set up your audio system by presetting your
favorite radio stations, setting the tone, and
adjusting the speakers. Then, when driving
conditions permit, you can tune to your favorite
radio stations using the presets and steering
wheel controls if the vehicle has them.
Notice:Before adding any sound equipment to
your vehicle, such as an audio system, CD player,
CB radio, mobile telephone, or two-way radio, make
sure that it can be added by checking with your
dealer/retailer. Also, check federal rules covering
mobile radio and telephone units. If sound equipment
can be added, it is very important to do it properly.
Added sound equipment may interfere with the
operation of your vehicle’s engine, radio, or other
systems, and even damage them. Your vehicle’s
systems may interfere with the operation of sound
equipment that has been added.
Your vehicle has a feature called Retained Accessory
Power (RAP). With RAP, the audio system can
be played even after the ignition is turned off.
SeeRetained Accessory Power (RAP) on page 2-21
for more information.
Setting the Time
Without Date Display
AM/FM Base Radio with a Single CD Player
This type of radio has aH(clock) button for setting
the time. Set the time by following these steps:
1. Turn the radio on.
2. Press the
Hbutton until the hour begins �ashing
on the display. Press the
Hbutton a second time
and the minutes begin �ashing on the display.
3. While either the hour or the minutes are �ashing,
turn the
f(tune) knob, located on the upper right
side of the radio, clockwise or counterclockwise
to increase or decrease the time. Instead of
using the
fknob, you can also press the SEEK
arrows,
\FWD (forward), orsREV (reverse)
buttons to adjust the time.
4. Press the
Hbutton again until the clock display
stops �ashing to set the currently displayed time;
otherwise, the �ashing stops after �ve seconds and
the current time displayed is automatically set.
3-65
Page 236 of 436
Cleaning the RSE Overhead Console
When cleaning the RSE overhead console surface,
use only a clean cloth dampened with clean water.
Cleaning the Video Screen
When cleaning the video screen, use only a clean cloth
dampened with clean water. Use care when directly
touching or cleaning the screen, as damage can result.
Theft-Deterrent Feature
THEFTLOCK®is designed to discourage theft of your
vehicle’s radio. It works by using a secret code to
disable all radio functions when battery power is
removed and the radio is placed in a different vehicle.
This feature requires no user input to be activated.
The radio is automatically armed when it is put into
the vehicle for the �rst time.
If THEFTLOCK is activated, the radio does not operate
if stolen. The radio displays LOCKED. If this occurs,
the radio needs to be returned to your dealer/retailer.
Audio Steering Wheel Controls
Vehicles with audio
steering wheel controls
may be different depending
on your vehicle’s options.
Some audio controls
can be adjusted at the
steering wheel. They
include the following:
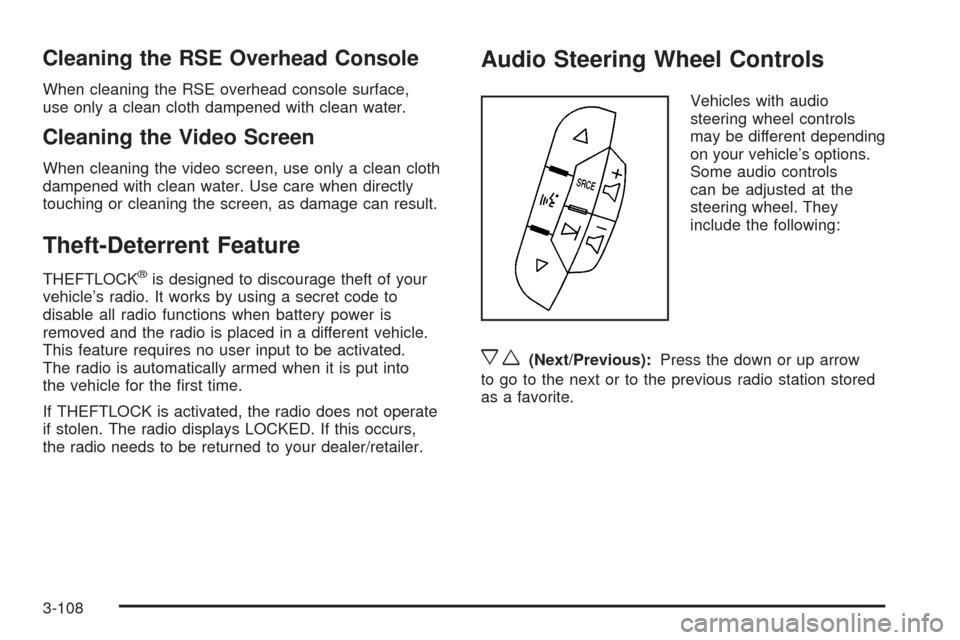
xw(Next/Previous):Press the down or up arrow
to go to the next or to the previous radio station stored
as a favorite.
3-108
Page 244 of 436
Using ABS
Do not pump the brakes. Just hold the brake pedal
down �rmly and let antilock work for you. You might hear
the antilock pump or motor operate, and feel the brake
pedal pulsate, but this is normal.
Braking in Emergencies
With ABS, you can steer and brake at the same time.
In many emergencies, steering can help you more than
even the very best braking.
Panic Brake Assist
Your vehicle has a Panic Brake Assist feature designed
to assist the driver in stopping or decreasing vehicle
speed in emergency driving conditions. This feature
uses the Electronic Stability Control (ESC) hydraulic
brake control module to supplement the power brake
system under conditions where the driver has quickly and
forcefully applied the brake pedal in an attempt to quickly
stop or slow down the vehicle. The ESC hydraulic brake
control module increases brake pressure at each corner
of the vehicle until the Antilock Brake System (ABS)
activates. Minor brake pedal pulsations or pedal
movement during this time is normal and the driver
should continue to apply the brake pedal as the driving
situation dictates. The Panic Brake Assist feature will
automatically disengage when the brake pedal is
released or brake pedal pressure is quickly decreased.
Traction Control System (TCS)
Your vehicle has a traction control system that limits
wheel spin. This is especially useful in slippery road
conditions. The system operates only if it senses that one
or more of the wheels are spinning or beginning to lose
traction. When this happens, the system works the
brakes and reduces engine power to limit wheel spin.
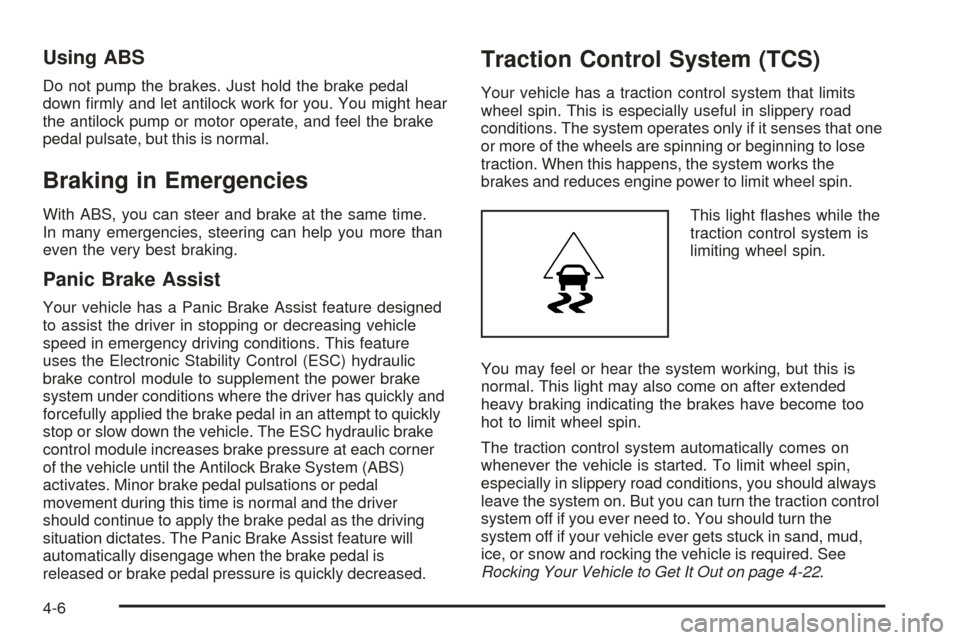
This light �ashes while the
traction control system is
limiting wheel spin.
You may feel or hear the system working, but this is
normal. This light may also come on after extended
heavy braking indicating the brakes have become too
hot to limit wheel spin.
The traction control system automatically comes on
whenever the vehicle is started. To limit wheel spin,
especially in slippery road conditions, you should always
leave the system on. But you can turn the traction control
system off if you ever need to. You should turn the
system off if your vehicle ever gets stuck in sand, mud,
ice, or snow and rocking the vehicle is required. See
Rocking Your Vehicle to Get It Out on page 4-22.
4-6
Page 247 of 436
SeeService All-Wheel Drive Light on page 3-39and
DIC Warnings and Messages on page 3-49for more
information.
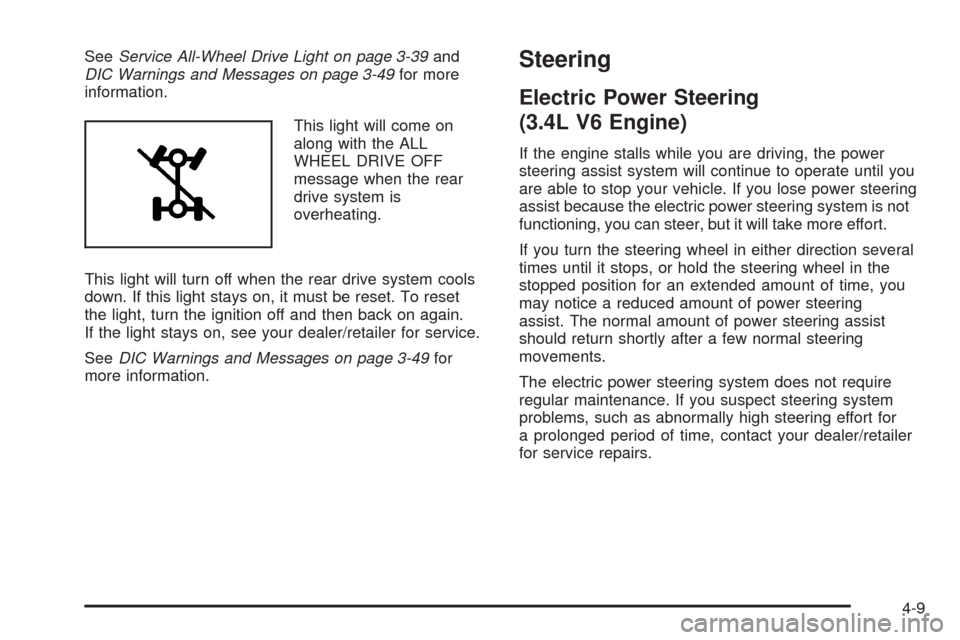
This light will come on
along with the ALL
WHEEL DRIVE OFF
message when the rear
drive system is
overheating.
This light will turn off when the rear drive system cools
down. If this light stays on, it must be reset. To reset
the light, turn the ignition off and then back on again.
If the light stays on, see your dealer/retailer for service.
SeeDIC Warnings and Messages on page 3-49for
more information.Steering
Electric Power Steering
(3.4L V6 Engine)
If the engine stalls while you are driving, the power
steering assist system will continue to operate until you
are able to stop your vehicle. If you lose power steering
assist because the electric power steering system is not
functioning, you can steer, but it will take more effort.
If you turn the steering wheel in either direction several
times until it stops, or hold the steering wheel in the
stopped position for an extended amount of time, you
may notice a reduced amount of power steering
assist. The normal amount of power steering assist
should return shortly after a few normal steering
movements.
The electric power steering system does not require
regular maintenance. If you suspect steering system
problems, such as abnormally high steering effort for
a prolonged period of time, contact your dealer/retailer
for service repairs.
4-9
Page 248 of 436
Hydraulic Power Steering
(3.6L V6 Engine)
If you lose power steering assist because the engine
stops or the power steering system is not functioning,
you can steer, but it will take much more effort.
Steering Tips
It is important to take curves at a reasonable speed.
A lot of the “driver lost control” accidents mentioned on
the news happen on curves. Here is why:
Experienced driver or beginner, each of us is subject to
the same laws of physics when driving on curves.
The traction of the tires against the road surface makes
it possible for the vehicle to change its path when you
turn the front wheels. If there is no traction, inertia will
keep the vehicle going in the same direction. If you have
ever tried to steer a vehicle on wet ice, you will
understand this.
The traction you can get in a curve depends on the
condition of the tires and the road surface, the angle at
which the curve is banked, and your speed. While you
are in a curve, speed is the one factor you can control.Suppose you are steering through a sharp curve.
Then you suddenly accelerate. Both control
systems — steering and acceleration — have to do their
work where the tires meet the road. Adding the
sudden acceleration can demand too much of those
places. You can lose control. SeeTraction Control
System (TCS) on page 4-6andStabiliTrak
®System
on page 4-7.
What should you do if this ever happens? Ease up on
the brake or accelerator pedal, steer the vehicle the way
you want it to go, and slow down.
Speed limit signs near curves warn that you should
adjust your speed. Of course, the posted speeds are
based on good weather and road conditions. Under less
favorable conditions you will want to go slower.
If you need to reduce your speed as you approach a
curve, do it before you enter the curve, while the
front wheels are straight ahead.
Try to adjust your speed so you can drive through the
curve. Maintain a reasonable, steady speed. Wait
to accelerate until you are out of the curve, and then
accelerate gently into the straightaway.
Adding non-dealer/non-retailer accessories can affect
your vehicle’s performance. SeeAccessories and
Modifications on page 5-3.
4-10