2008 CHEVROLET EQUINOX wheel
[x] Cancel search: wheelPage 177 of 436
DIC Warnings and Messages
Messages are displayed on the DIC to notify the driver
that the status of the vehicle has changed and that
some action may be needed by the driver to correct
the condition. Multiple messages may appear one
after another.
Some messages may not require immediate action,
but you can press the set/reset button to acknowledge
that you received the messages and to clear them
from the display. Pressing any of the DIC buttons
also acknowledge and clear any messages.
Some messages cannot be cleared from the DIC
display because they are more urgent. These messages
require action before they can be cleared. You should
take any messages that appear on the display seriously
and remember that clearing the messages will only
make the messages disappear, not correct the problem.
The following are the possible messages that can
be displayed and some information about them.
ALL WHEEL DRIVE OFF
If your vehicle has the All-Wheel Drive (AWD) system,
this message displays along with the All-Wheel
Drive Disabled light when the rear drive system is
overheating. This message turns off when the rear
drive system cools down. If the warning message stays
on for a while, you need to reset the warning message.
To reset the warning message, turn the ignition off
and then back on again. If the message stays on, see
your dealer/retailer right away. SeeAll-Wheel Drive
(AWD) System on page 4-8andAll-Wheel Drive
Disabled Light on page 3-40for more information.
BATTERY SAVER ACTIVE
This message displays when the charging system
detects that the battery is being drained. You may
notice that the vehicle attempts to reduce the drain for
you by turning off accessories, such as interior fans, rear
defogger, and heated seats. Turn off all accessories.
If the vehicle is not running, start and run the engine
for at least 10 minutes to allow the battery to recharge.
If the engine is running and the condition persists,
see your dealer/retailer. SeeElectric Power
Management on page 3-17for more information.
3-49
Page 182 of 436
SERVICE ALL WHEEL DRIVE
If your vehicle has the All-Wheel Drive (AWD) system,
this message displays along with the service all-wheel
drive light if a problem occurs with this system. See
Service All-Wheel Drive Light on page 3-39. If this
message appears, stop as soon as possible and turn
off the vehicle. Restart the vehicle and check for
the message on the DIC display. If the message is still
displayed or appears again when you begin driving,
the AWD system needs service. See your dealer/retailer.
SERVICE BATTERY CHARGING
SYSTEM
This message displays when there is a problem with the
generator and battery charging systems. Driving with
this problem could drain the vehicle’s battery. Turn off all
unnecessary accessories. Stop and turn off the vehicle
as soon as it is safe to do so. Have the electrical
system checked by your dealer/retailer immediately.Connecting a battery charger to your vehicle while the
ignition is in any position other than LOCK/OFF may
cause this message to appear. If you need to charge
your vehicle, make sure that the key is in LOCK/OFF or
out of the ignition during charging.
SERVICE BRAKE SYSTEM
This message displays and a chime sounds when the
brake �uid level is low. The brake system warning
light also appears on the instrument panel cluster when
this message appears on the DIC. SeeBrake System
Warning Light on page 3-31. Have the brake system
serviced by your dealer/retailer as soon as possible.
SERVICE POWER STEERING
On some vehicles, this message displays when a
problem is detected with the power steering system.
When this message is displayed, you may notice
that the effort required to steer the vehicle increases
or feels heavier, but you will still be able to steer
the vehicle. Have your vehicle serviced by your
dealer/retailer immediately.
3-54
Page 193 of 436
While your vehicle is parked:
Familiarize yourself with all of its controls.
Familiarize yourself with its operation.
Set up your audio system by presetting your
favorite radio stations, setting the tone, and
adjusting the speakers. Then, when driving
conditions permit, you can tune to your favorite
radio stations using the presets and steering
wheel controls if the vehicle has them.
Notice:Before adding any sound equipment to
your vehicle, such as an audio system, CD player,
CB radio, mobile telephone, or two-way radio, make
sure that it can be added by checking with your
dealer/retailer. Also, check federal rules covering
mobile radio and telephone units. If sound equipment
can be added, it is very important to do it properly.
Added sound equipment may interfere with the
operation of your vehicle’s engine, radio, or other
systems, and even damage them. Your vehicle’s
systems may interfere with the operation of sound
equipment that has been added.
Your vehicle has a feature called Retained Accessory
Power (RAP). With RAP, the audio system can
be played even after the ignition is turned off.
SeeRetained Accessory Power (RAP) on page 2-21
for more information.
Setting the Time
Without Date Display
AM/FM Base Radio with a Single CD Player
This type of radio has aH(clock) button for setting
the time. Set the time by following these steps:
1. Turn the radio on.
2. Press the
Hbutton until the hour begins �ashing
on the display. Press the
Hbutton a second time
and the minutes begin �ashing on the display.
3. While either the hour or the minutes are �ashing,
turn the
f(tune) knob, located on the upper right
side of the radio, clockwise or counterclockwise
to increase or decrease the time. Instead of
using the
fknob, you can also press the SEEK
arrows,
\FWD (forward), orsREV (reverse)
buttons to adjust the time.
4. Press the
Hbutton again until the clock display
stops �ashing to set the currently displayed time;
otherwise, the �ashing stops after �ve seconds and
the current time displayed is automatically set.
3-65
Page 199 of 436
Storing a Radio Station as a Favorite
Drivers are encouraged to set up their radio station
favorites while the vehicle is parked. Tune to your
favorite stations using the presets, favorites button,
and steering wheel controls, if your vehicle has them.
SeeDefensive Driving on page 4-2.
If your radio has XM, a maximum of 36 stations can be
programmed as favorites using the six pushbuttons
positioned below the radio station frequency labels and
by using the radio favorites page button (FAV button).
FAV (Favorites):Press the FAV button to go through
up to six pages of favorites, each having six favorite
stations available per page. Each page of favorites
can contain any combination of AM, FM, or XM
(if equipped) stations. To store a station as a
favorite, perform the following steps:
1. Tune to the desired radio station.
2. Press the FAV button to display the page where
the station is to be stored.
3. Press and hold one of the six pushbuttons until a
beep sounds. When that pushbutton is pressed
and released, the station that was set, returns.
4. Repeat the steps for each pushbutton radio station
to be stored as a favorite.The number of favorites pages can be setup using
the MENU button. To setup the number of favorites
pages, perform the following steps:
1. Press the MENU button to display the radio
setup menu.
2. Press the pushbutton located below the
FAV 1-6 label.
3. Select the desired number of favorites pages
by pressing the pushbutton located below the
displayed page numbers.
4. Press the FAV button, or let the menu time out,
to return to the original main radio screen showing
the radio station frequency labels and to begin
the process of programming your favorites for
the chosen amount of numbered pages.
Setting the Tone (Bass/Treble)
(Base Radio with CD)
EQ (Equalization):To adjust the bass or treble,
press the
fknob or EQ button until the desired tone
control label displays. Turn the
fknob clockwise
or counterclockwise to increase or decrease the setting.
The display shows the current bass or treble level.
If a station’s frequency is weak, or if there is static,
decrease the treble.
3-71
Page 236 of 436
Cleaning the RSE Overhead Console
When cleaning the RSE overhead console surface,
use only a clean cloth dampened with clean water.
Cleaning the Video Screen
When cleaning the video screen, use only a clean cloth
dampened with clean water. Use care when directly
touching or cleaning the screen, as damage can result.
Theft-Deterrent Feature
THEFTLOCK®is designed to discourage theft of your
vehicle’s radio. It works by using a secret code to
disable all radio functions when battery power is
removed and the radio is placed in a different vehicle.
This feature requires no user input to be activated.
The radio is automatically armed when it is put into
the vehicle for the �rst time.
If THEFTLOCK is activated, the radio does not operate
if stolen. The radio displays LOCKED. If this occurs,
the radio needs to be returned to your dealer/retailer.
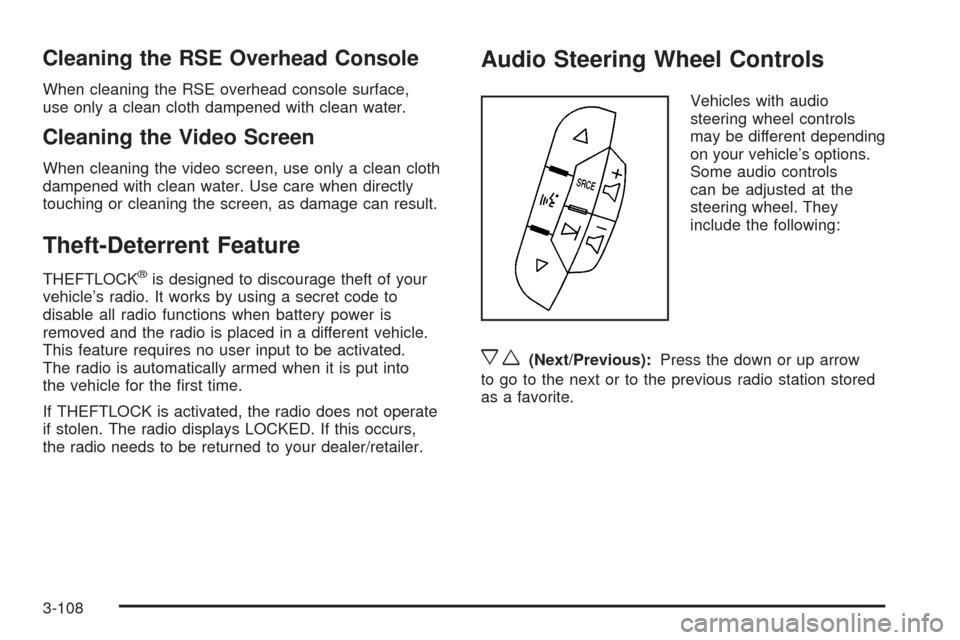
Audio Steering Wheel Controls
Vehicles with audio
steering wheel controls
may be different depending
on your vehicle’s options.
Some audio controls
can be adjusted at the
steering wheel. They
include the following:
xw(Next/Previous):Press the down or up arrow
to go to the next or to the previous radio station stored
as a favorite.
3-108
Page 237 of 436
When a CD is playing, press the down or up arrow to
go to the next or to the previous track.
If your vehicle has OnStar
®, press the down arrow
button to end an OnStar Hands-Free Call or the
Advisor Playback. It also cancels or hangs-up an
incoming Hands-Free Call.
g(Mute/Voice Recognition):Press and release
this button to silence the system. Press and release
this button again, to turn the sound on.
If your vehicle has the navigation system, press and
hold this button for longer than one second to initiate
voice recognition. See “Voice Recognition” in the
Navigation System manual for more information.
If your vehicle has OnStar, press and hold this
button for longer than one second to interact with
the OnStar system. If your vehicle also has theNavigation System, press this button to initiate voice
recognition and say “OnStar” to enter OnStar mode.
See theOnStar
®System on page 2-39in this manual
for more information.
SRCE (Source):Press this button to switch between
AM, FM, XM™ (if equipped), CD, and auxiliary
input jack.
+
e−e(Volume):Press the plus or minus volume
button to increase or to decrease the radio volume.
¨(Seek):Press the seek arrow to go to the next
radio station and stay there.
If you have the navigation system, some of the audio
steering wheel controls work when a CD is playing
in the navigation radio. See the Navigation System
manual for more information.
3-109
Page 239 of 436
Your Driving, the Road, and Your Vehicle..........4-2
Defensive Driving...........................................4-2
Drunk Driving.................................................4-2
Control of a Vehicle........................................4-3
Braking.........................................................4-4
Antilock Brake System (ABS)...........................4-5
Braking in Emergencies...................................4-6
Traction Control System (TCS).........................4-6
StabiliTrak
®System........................................4-7
All-Wheel Drive (AWD) System.........................4-8
Steering........................................................4-9
Off-Road Recovery.......................................4-12
Passing.......................................................4-12
Loss of Control.............................................4-13Driving at Night............................................4-14
Driving in Rain and on Wet Roads..................4-14
Before Leaving on a Long Trip.......................4-16
Highway Hypnosis........................................4-16
Hill and Mountain Roads................................4-16
Winter Driving..............................................4-17
If Your Vehicle is Stuck in Sand, Mud, Ice,
or Snow...................................................4-21
Rocking Your Vehicle to Get It Out.................4-22
Loading Your Vehicle....................................4-22
Towing..........................................................4-28
Towing Your Vehicle.....................................4-28
Recreational Vehicle Towing...........................4-28
Towing a Trailer...........................................4-33
Section 4 Driving Your Vehicle
4-1
Page 243 of 436
Antilock Brake System (ABS)
Your vehicle has the Antilock Brake System (ABS), an
advanced electronic braking system that will help
prevent a braking skid.
When you start the engine and begin to drive away,
ABS will check itself. You might hear a momentary
motor or clicking noise while this test is going on, and
you might even notice that the brake pedal moves
a little. This is normal.
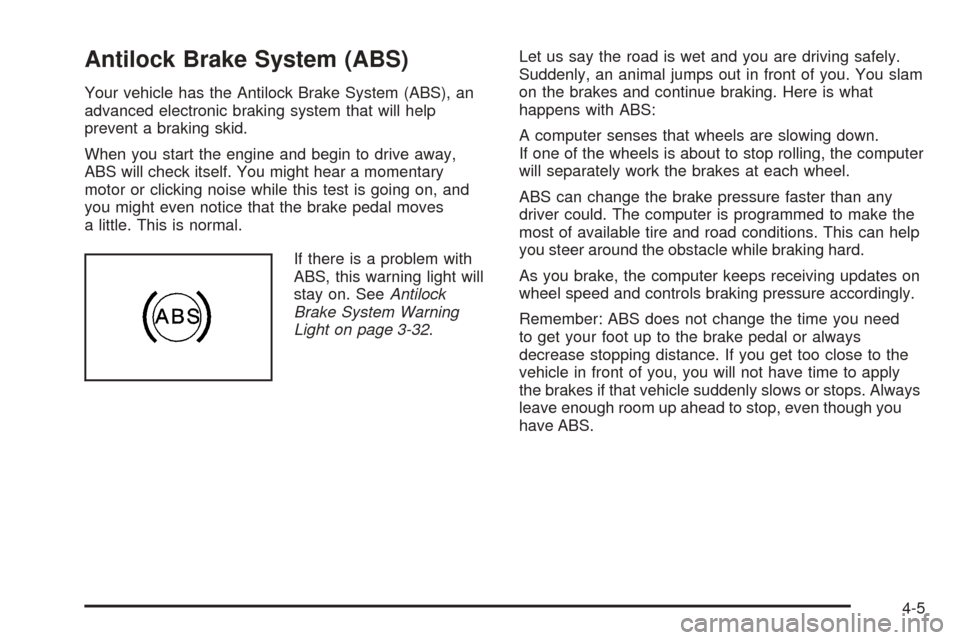
If there is a problem with
ABS, this warning light will
stay on. SeeAntilock
Brake System Warning
Light on page 3-32.Let us say the road is wet and you are driving safely.
Suddenly, an animal jumps out in front of you. You slam
on the brakes and continue braking. Here is what
happens with ABS:
A computer senses that wheels are slowing down.
If one of the wheels is about to stop rolling, the computer
will separately work the brakes at each wheel.
ABS can change the brake pressure faster than any
driver could. The computer is programmed to make the
most of available tire and road conditions. This can help
you steer around the obstacle while braking hard.
As you brake, the computer keeps receiving updates on
wheel speed and controls braking pressure accordingly.
Remember: ABS does not change the time you need
to get your foot up to the brake pedal or always
decrease stopping distance. If you get too close to the
vehicle in front of you, you will not have time to apply
the brakes if that vehicle suddenly slows or stops. Always
leave enough room up ahead to stop, even though you
have ABS.
4-5